TensorFlow 图像数据预处理及可视化
注:文章转自《慢慢学TensorFlow》微信公众号
图像是人们喜闻乐见的一种信息形式,“百闻不如一见”,有时一张图能胜千言万语。图像处理是利用计算机将数值化的图像进行一定(线性或非线性)变换获得更好效果的方法。Photoshop,美颜相机就是利用图像处理技术的应用程序。深度学习最重要的应用领域就是计算机视觉(CV, Computer Vision),历史上,MNIST 手写体数字识别和 ImageNet 大规模图像识别均得益于深度学习模型,取得了相比传统方法更高的准确率。从 2012 年的 AlexNet 模型开始,随后的 VGG, GoogLeNet, ResNet 等模型不断刷新 ImageNet 图像识别准确率纪录,甚至超过了人类水平。为了获得良好的识别效果,除了使用更好的模型,数据集的预处理也是十分重要的一项内容,最常用的方法有尺度缩放、随机切片、随机翻转、颜色变换等。
本文介绍如何使用 TensorFlow 完成图像数据的预处理,以及如何使用 tensorboard 工具将图像数据进行可视化。在使用 TensorFlow 实现图像识别、目标检测时会经常用到本文介绍的内容。
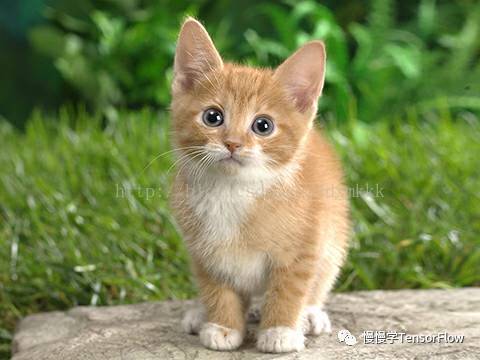
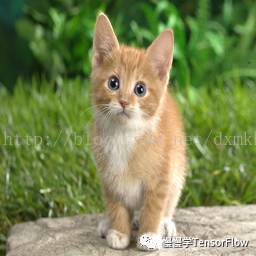
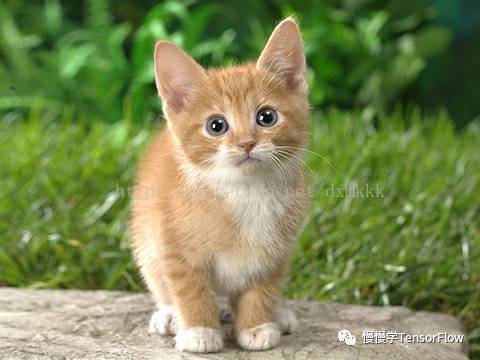
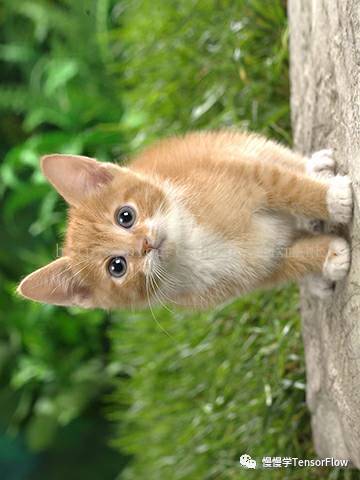
首先看下输入图像,是一只猫:
TensorFlow 读取图片数据代码:
reader = tf.WholeFileReader()
key, value = reader.read(tf.train.string_input_producer(['cat.jpg']))

image0 = tf.image.decode_jpeg(value)
用过 Caffe 的读者可能会非常熟悉上面的图片(位于 caffe/examples/images/cat.jpg)。原图尺寸为 360 x 480。
图像缩放
代码:
resized_image = tf.image.resize_images(image0, [256, 256], \
method=tf.image.ResizeMethod.AREA)
其中 method 有四种选择:
ResizeMethod.BILINEAR :双线性插值
ResizeMethod.NEAREST_NEIGHBOR : 最近邻插值
ResizeMethod.BICUBIC : 双三次插值
ResizeMethod.AREA :面积插值
读者可以分别试试,看看缩放效果。
图像裁剪
代码:
cropped_image = tf.image.crop_to_bounding_box(image0, 20, 20, 256, 256)
图像水平翻转
代码:
flipped_image = tf.image.flip_left_right(image0)
除此之外还可以上下翻转:
flipped_image = tf.image.flip_up_down(image0)
图像旋转
代码:
rotated_image = tf.image.rot90(image0, k=1)
其中 k 值表示旋转 90 度的次数,读者可以尝试对原图旋转 180 度、270 度。
图像灰度变换
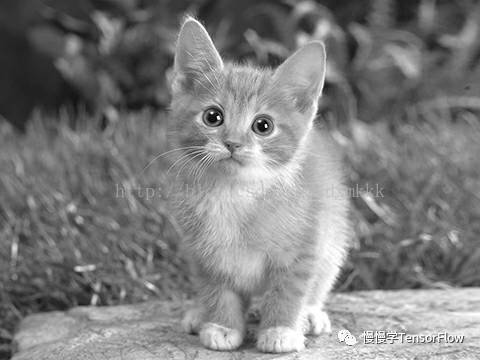
代码:
grayed_image = tf.image.rgb_to_grayscale(image0)
从上面看到,用 TensorFlow 实现上述图像预处理是非常简单的。TensorFlow 也提供了针对目标检测中用到的 bounding box 处理的 api,有兴趣的读者可以翻阅 api 文档(https://www.tensorflow.org/versions/r1.0/api_docs/python/image/working_with_bounding_boxes)学习。
为了方便查看图像预处理的效果,可以利用 TensorFlow 提供的 tensorboard 工具进行可视化。
使用方法也比较简单,直接用 tf.summary.image 将图像写入 summary,对应代码如下:
img_resize_summary = tf.summary.image('image resized', tf.expand_dims(resized_image, 0))
cropped_image_summary = tf.summary.image('image cropped', tf.expand_dims(cropped_image, 0))
flipped_image_summary = tf.summary.image('image flipped', tf.expand_dims(flipped_image, 0))
rotated_image_summary = tf.summary.image('image rotated', tf.expand_dims(rotated_image, 0))
grayed_image_summary = tf.summary.image('image grayed', tf.expand_dims(grayed_image, 0))
merged = tf.summary.merge_all()
with tf.Session() as sess:
summary_writer = tf.summary.FileWriter('/tmp/tensorboard', sess.graph)
summary_all = sess.run(merged)
summary_writer.add_summary(summary_all, 0)
summary_writer.close()
运行该程序,会在 /tmp/tensorboard 目录下生成 summary,接着在命令行启动 tensorboard 服务:
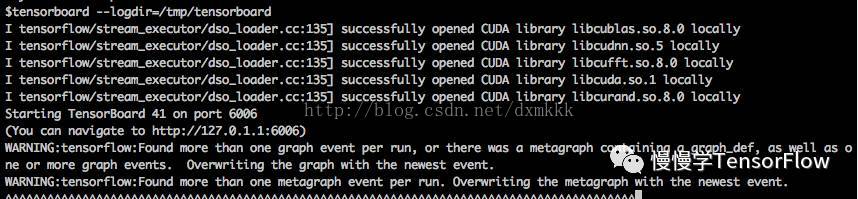
打开浏览器,输入 127.0.0.1:6006 就可以查看 tensorboard 页面了(Ubuntu 自带的 firefox 打开 tensorboard 时不显示图像,可以更换为 Chrome 浏览器)。
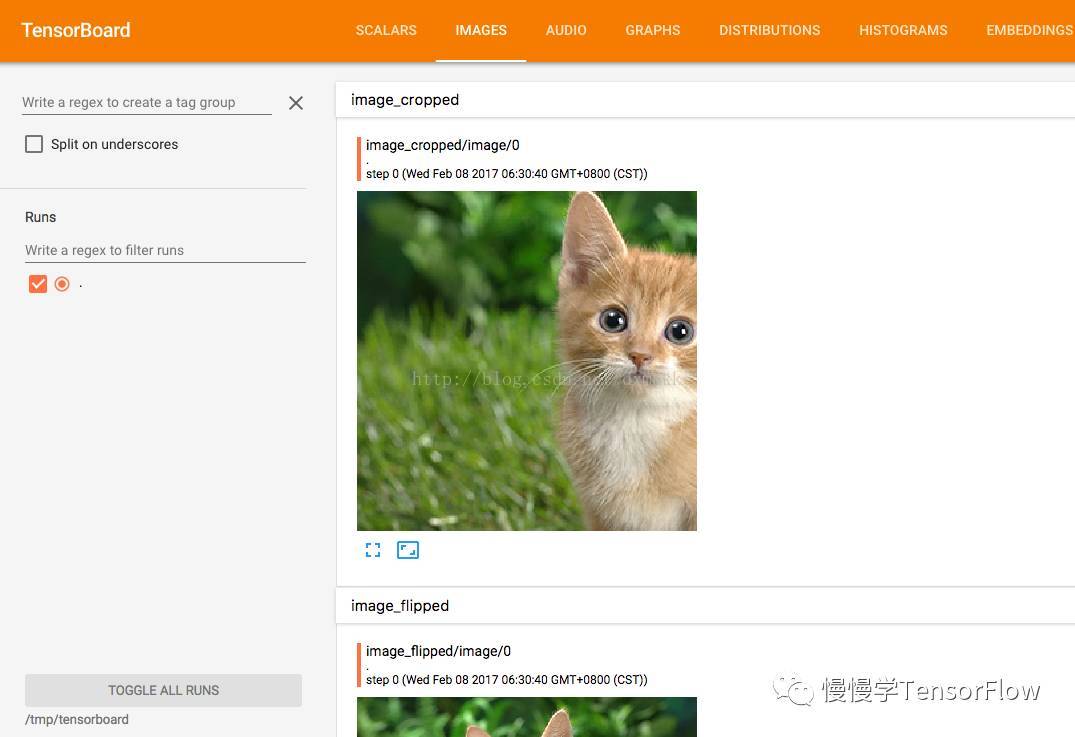
TensorBoard 图像可视化效果
利用 tensorboard 还可以查看图像直方图
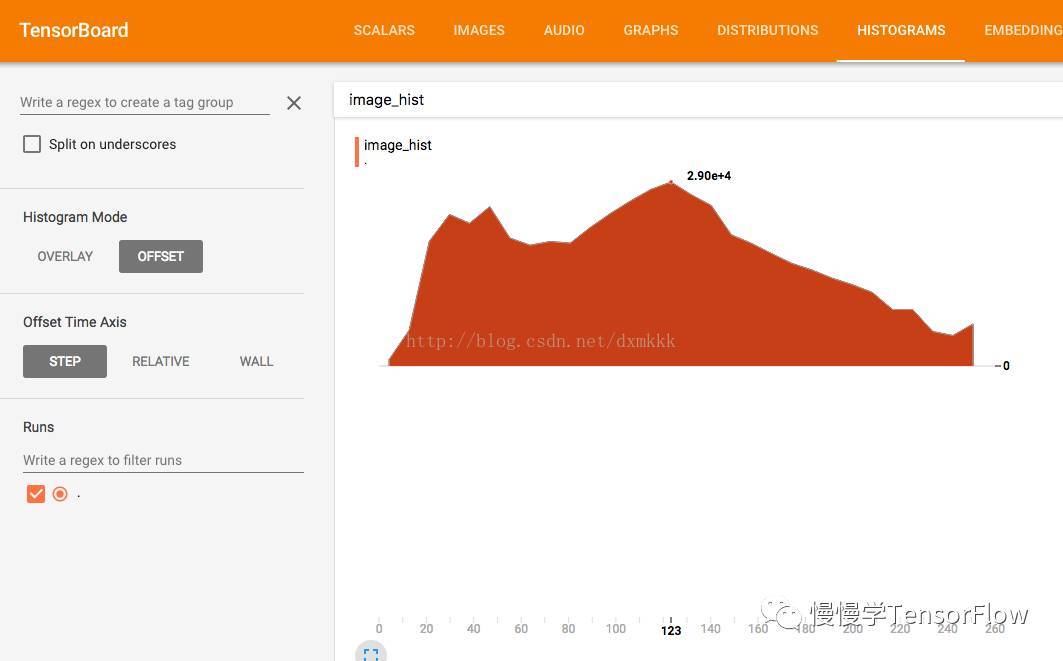
为了显示直方图,需要在代码中增加一行 summary :
histogram_summary = tf.summary.histogram('image hist', image0)
完整代码如下:

如果您觉得本文对您有帮助,请关注微信公众号,将来会有更多更好的文章推送!

结合实战Google深度学习框架和博客添加了自己总结的注释、笔记。
- 图像读取
- tf.gfile.FastGFile(“/path/to/picture”, ‘r’).read()
- 图像格式的编码解码 :图像不直接记录图像上的不同位置,不同颜色的亮度。而是记录压缩编码之后的结果。所以要还原成三维矩阵,需要解码。以下为对jpeg格式图像编码/解码函数:
- tf.image.decode_jpeg() #解码
- tf.image.encode_jpeg() #编码
- print (img_data.eval()) #输出解码之后的三维矩阵
- encoded_image = tf.image.encode_jpeg(img_data)
with tf.gfile.GFile(“pictures/output.jpeg”,”wb”) as f:
f.write(encoded_image.eval()) #编码之后保存 - tf.image.convert_image_dtype(img_data, dtype = tf.float.32) #数据类型转化成实数
- 图像大小调整
- tf.image.resize_images(image,height,width,method)
- method: 0-双线性插值 1-最近邻居法 2-双三次插值法 3-面积差值法
- tf.image.resize_image_with_crop_pad 自动裁剪或者填充(都是操作图片中间部分)
- tf.image.central_crop(img_data, 0.5) #按比例调整图像大小,第二个参数为(0,1]的实数。
- tf.image.crop_to_bounding_box() #裁剪给定区域
- tf.image.pad_to_bounding_box() #填充给定区域
- print(img_data.get_shape()) #打印img_data的维度大小
- 图像翻转
- tf.image.flip_up_down() #上下翻转
- tf.image.filp_left_right() #左右翻转
- tf.image.transpose_image() #对角线翻转
- tf.image.random_flip_up_down() #以一定概率上下翻转
- tf.image.random_flip_left_right() #以一定概率左右翻转
- 图像色彩调整
- 亮度调整 tf.image.adjust_brightness(image,0.5)
- 随机亮度调整 tf.image.random_brightness(image,max_delta) #在[-max_delta,max_delta]范围内
- 对比度调整 tf.image.adjust_contrast()
- 色相调整 tf.image.adjust_hue()
- 饱和度调整 tf.image.adjust_saturation()
- 随机调整图的饱和度 tf.image.random_satration(image, lower,upper)
- 图像标准化 tf.image.per_image_whitening(image) 图像上的亮度均值为0,方差变为1
- 标注框
- tf.image.draw_bounding_boxes(batch,boxes) 这个函数要求图像矩阵的数字为实数,而且输入的是一个batch的数据,即多张图像组成的四维矩阵,所以将编码后的图像矩阵加一维。
- tf.expand_dims(input, axis=None, name=None, dim=None)
#Given a tensorinput, this operation inserts a dimension of 1 at the
#dimension indexaxisofinput’s shape. The dimension indexaxisstarts
#at zero; if you specify a negative number foraxisit is counted backward
#from the end.
#给input插入一个维度,维度索引从0开始为插在最前面的维度,这里是batch,所以为0,最前面。 - boxes = tf.constant([[[0.05,0.05,0.9,0.7],[0.35,0.47,0.5,0.56]]]) #boxes.get_shape()->[1,2,4]
- begin,size,bboxes = tf.image.sample_distorted_bounding_box(tf.shape(image),bounding_boxes=boxes) #此函数为图像生成单个随机变形的边界框
#前2个张量用于 tf.slice 剪裁图像。最后一个参数可以用于 tf.image.draw_bounding_boxes 函数来画出边界框。
#返回值begin 和 size 可用在 tf.slice(inputs,begin,size,name=”) #裁剪图像
#inputs:可以是list,array,tensor
#begin:n维列表,begin[i] 表示从inputs中第i维抽取数据时,相对0的起始偏移量,也就是从第i维的begin[i]开始抽取数据
#size:n维列表,size[i]表示要抽取的第i维元素的数目。例子参考
#image_with_box = tf.image.draw_bounding_boxes(img_data, bboxes) #画出边界框
#bounding_boxes:是一个 shape 为 [batch, N, 4] 的三维数组,数据类型为float32,第一个batch是因为函数是处理一组 图片的,N表示描述与图像相关联的N个边界框的形状,而标注框由4个数字 [y_min, x_min, y_max, x_max] 表示出来。例如:tf.constant([[[0.05, 0.05, 0.9, 0.7], [0.35, 0.47, 0.5, 0.56]]]) 的 shape 为 [1,2,4] 表示一张图片中的两个标注框;tf.constant([[[ 0. 0. 1. 1.]]]) 的 shape 为 [1,1,4]表示一张图片中的一个标注框
随机翻转图像,随机调整颜色,随机截图图像中的有信息含量的部分,这些事提高模型健壮性的一种方式。这样可以使是训练得到的模型不受被识别物体大小的影响。
完整代码:
import tensorflow as tf

import numpy as np
import matplotlib.pyplot as plt

def distort_color(image,color_ordering=0):
    if color_ordering == 0:
        image = tf.image.random_brightness(image,max_delta=32./255.)#亮度
        image = tf.image.random_saturation(image,lower=0.5,upper=1.5)#饱和度
        image = tf.image.random_hue(image,max_delta=0.2)#色相
        image = tf.image.random_contrast(image,lower=0.5,upper=1.5)#对比度
    elif color_ordering == 1:
        image = tf.image.random_brightness(image, max_delta=32. / 255.)  # 亮度
        image = tf.image.random_hue(image, max_delta=0.2)  # 色相
        image = tf.image.random_saturation(image, lower=0.5, upper=1.5)  # 饱和度
        image = tf.image.random_contrast(image, lower=0.5, upper=1.5)  # 对比度
    return tf.clip_by_value(image,0.0,1.0) #将张量值剪切到指定的最小值和最大值

def preprocess_for_train(image,height,width,bbox):
    #如果没有提供标注框,则认为整个图像就是需要关注的部分
    if bbox is None:
        bbox = tf.constant([0.0,0.0,1.0,1.0],dtype=tf.float32,shape=[1,1,4])

    #转换图像张量的类型
    if image.dtype != tf.float32:
        image = tf.image.convert_image_dtype(image,dtype=tf.float32)

    #随机截取图像,减少需要关注的物体大小对图像识别的影响
    bbox_begin,bbox_size,_ = tf.image.sample_distorted_bounding_box(tf.shape(image),
                                                                    bounding_boxes=bbox)
    distort_image = tf.slice(image,bbox_begin,bbox_size)

    #将随机截图的图像调整为神经网络输入层的大小。大小调整的算法是随机的
    distort_image = tf.image.resize_images(
        distort_image,[height,width],method=np.random.randint(4)
    )
    #随机左右翻转图像
    distort_image = tf.image.random_flip_left_right(distort_image)
    #使用一种随机的顺序调整图像色彩
    distort_image = distort_color(distort_image,np.random.randint(1))
    return distort_image

image_raw_data = tf.gfile.FastGFile("pictures/Koala.jpg",'r').read()

with tf.Session() as Sess:
    ima_data = tf.image.decode_jpeg(image_raw_data)
    boxes = tf.constant([[[0.05,0.05,0.9,0.7],[0.35,0.47,0.5,0.56]]])

    #运行6次获得6中不同的图像,在图中显示效果
    for i in range(6):
        #将图像的尺寸调整为299*299
        result = preprocess_for_train(ima_data,299,299,boxes)

        plt.imshow(result.eval())
        plt.show()
- 1
- 2
- 3
- 4
- 5
- 6
- 7
- 8
- 9
- 10
- 11
- 12
- 13
- 14
- 15
- 16
- 17
- 18
- 19
- 20
- 21
- 22
- 23
- 24
- 25
- 26
- 27
- 28
- 29
- 30
- 31
- 32
- 33
- 34
- 35
- 36
- 37
- 38
- 39
- 40
- 41
- 42
- 43
- 44
- 45
- 46
- 47
- 48
- 49
- 50
- 51
- 52
- 53
- 54
- 55
					<link href="https://csdnimg.cn/release/phoenix/mdeditor/markdown_views-2011a91181.css" rel="stylesheet">
            </div>