tfrecord数据文件是一种将图像数据和标签统一存储的二进制文件,能更好的利用内存,在tensorflow中快速的复制,移动,读取,存储等。
关于tensorflow读取数据,官网给出了三种方法:
1、供给数据:在tensorflow程序运行的每一步,让python代码来供给数据
2、从文件读取数据:建立输入管线从文件中读取数据
3、预加载数据:如果数据量不太大,可以在程序中定义常量或者变量来保存所有的数据。
这里主要介绍一种比较通用、高效的数据读取方法,就是tensorflow官方推荐的标准格式:tfrecord。
一. 准备原始数据
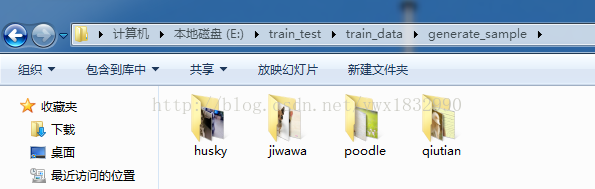
首先,我们需要准备训练的原始数据,本次训练为图像分类识别,因而一开始,笔者从网上随机的下载了Dog的四种类别:husky,jiwawa,poodle,qiutian。每种类别30种,一共120张图片。在训练之前,需要做的就是进行图像的预处理,即将这些大小不一的原始图片转换成我们训练需要的shape。
下载的原始图片分别放到同一文件的不同文件夹下,如:
二. 编程实现
该部分包括:制作Tfrecords,读取Tfrecords数据获得iamge和label,打印验证并保存生成的图片。
#将原始图片转换成需要的大小,并将其保存
#========================================================================================
import os
import tensorflow as tf
from PIL import Image

#原始图片的存储位置
orig_picture = 'E:/train_test/train_data/generate_sample/'

#生成图片的存储位置
gen_picture = 'E:/Re_train/image_data/inputdata/'

#需要的识别类型
classes = {'husky','jiwawa','poodle','qiutian'}

#样本总数
num_samples = 120

#制作TFRecords数据
def create_record():
    writer = tf.python_io.TFRecordWriter("dog_train.tfrecords")
    for index, name in enumerate(classes):
        class_path = orig_picture +"/"+ name+"/"
        for img_name in os.listdir(class_path):
            img_path = class_path + img_name
            img = Image.open(img_path)
            img = img.resize((64, 64))    #设置需要转换的图片大小
            img_raw = img.tobytes()      #将图片转化为原生bytes
            print (index,img_raw)
            example = tf.train.Example(
               features=tf.train.Features(feature={
                    "label": tf.train.Feature(int64_list=tf.train.Int64List(value=[index])),
                    'img_raw': tf.train.Feature(bytes_list=tf.train.BytesList(value=[img_raw]))
               }))
            writer.write(example.SerializeToString())
    writer.close()

#=======================================================================================
def read_and_decode(filename):
    # 创建文件队列,不限读取的数量
    filename_queue = tf.train.string_input_producer([filename])
    # create a reader from file queue
    reader = tf.TFRecordReader()
    # reader从文件队列中读入一个序列化的样本
    _, serialized_example = reader.read(filename_queue)
    # get feature from serialized example
    # 解析符号化的样本
    features = tf.parse_single_example(
        serialized_example,
        features={
            'label': tf.FixedLenFeature([], tf.int64),
            'img_raw': tf.FixedLenFeature([], tf.string)
        })
    label = features['label']
    img = features['img_raw']
    img = tf.decode_raw(img, tf.uint8)
    img = tf.reshape(img, [64, 64, 3])
    #img = tf.cast(img, tf.float32) * (1. / 255) - 0.5
    label = tf.cast(label, tf.int32)
    return img, label

#=======================================================================================
if __name__ == '__main__':
    create_record()
    batch = read_and_decode('dog_train.tfrecords')
    init_op = tf.group(tf.global_variables_initializer(), tf.local_variables_initializer())

    with tf.Session() as sess: #开始一个会话
        sess.run(init_op)
        coord=tf.train.Coordinator()
        threads= tf.train.start_queue_runners(coord=coord)

        for i in range(num_samples):
            example, lab = sess.run(batch)#在会话中取出image和label
            img=Image.fromarray(example, 'RGB')#这里Image是之前提到的
            img.save(gen_picture+'/'+str(i)+'samples'+str(lab)+'.jpg')#存下图片;注意cwd后边加上‘/’
            print(example, lab)
        coord.request_stop()
        coord.join(threads)
        sess.close()

#========================================================================================
运行程序,得到的结果都保存在gen_picture文件中。一方面,我们可以通过生成图片的命名,验证label是否与图片对应;另一方面,我们将生成的120张图片按照图片命名中的label,分别放到四个不同的文件夹下,作为后续操作的inputdata数据,如下:
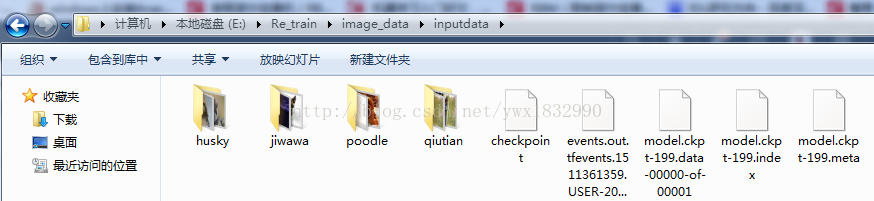
此处生成的四类图片husky,jiwawa,poodle,qiutian;其shape = 64 x 64,大小一致,一共120张。
第二部分:图像数据读取机制
在学习tensorflow的过程中,有很多小伙伴反映读取数据这一块很难理解。确实这一块官方的教程比较简略,网上也找不到什么合适的学习材料。今天这篇文章就以图片的形式,用最简单的语言,为大家详细解释一下tensorflow的数据读取机制,文章的最后还会给出实战代码以供参考。
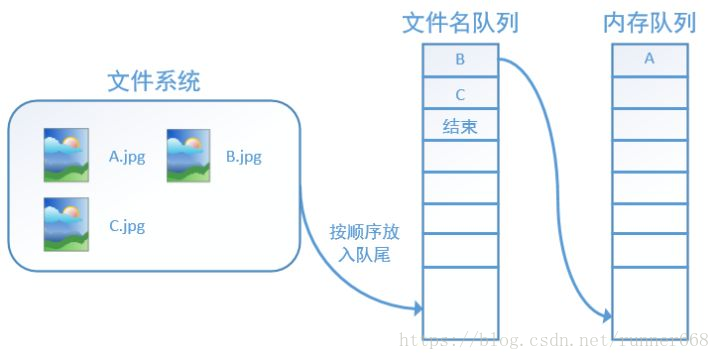
这一部分直接参考:https://zhuanlan.zhihu.com/p/27238630
标题 :