参考:
https://blog.csdn.net/dy_guox/article/details/79081499
https://blog.csdn.net/u010103202/article/details/79899293
https://blog.csdn.net/u010103202/article/details/79899293
一、开发环境搭建
操作系统:Windows7 64位
TensorFlow:1.8
python:3.5
1、下载TensorFlow object detection API
https://github.com/tensorflow/models
我们需要的目标检测在model文件夹下的research文件夹里
也可以直接访问:
https://github.com/tensorflow/models/tree/master/research/object_detection
下载代码库
在models代码库的界面中,有下载整个代码库的按钮,如下图红色箭头标注处所示:
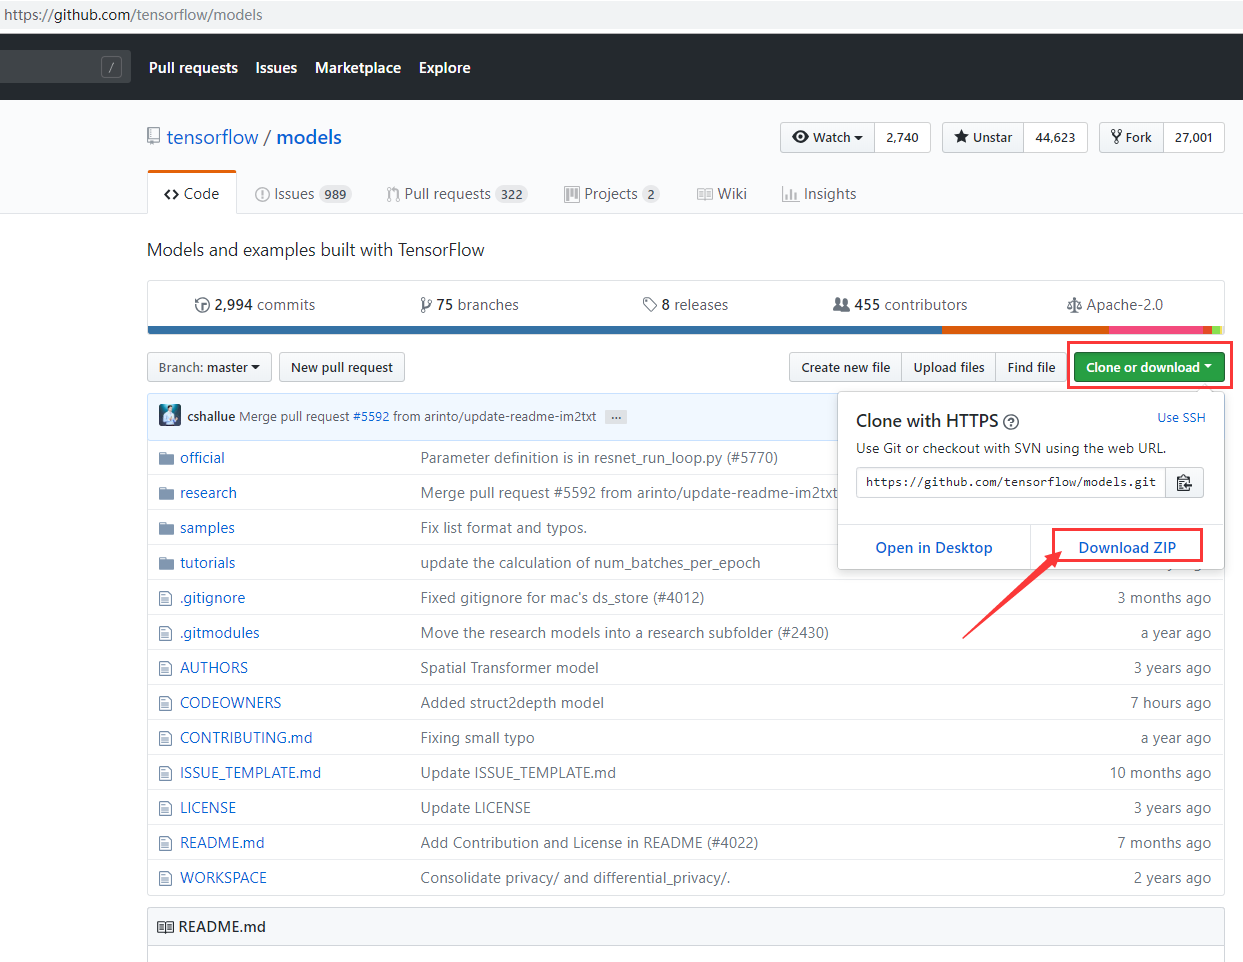
下载完后解压到桌面目标检测文件夹(需要自己创建)
2.下载Protobuf
目的是将proto文件转成py文件
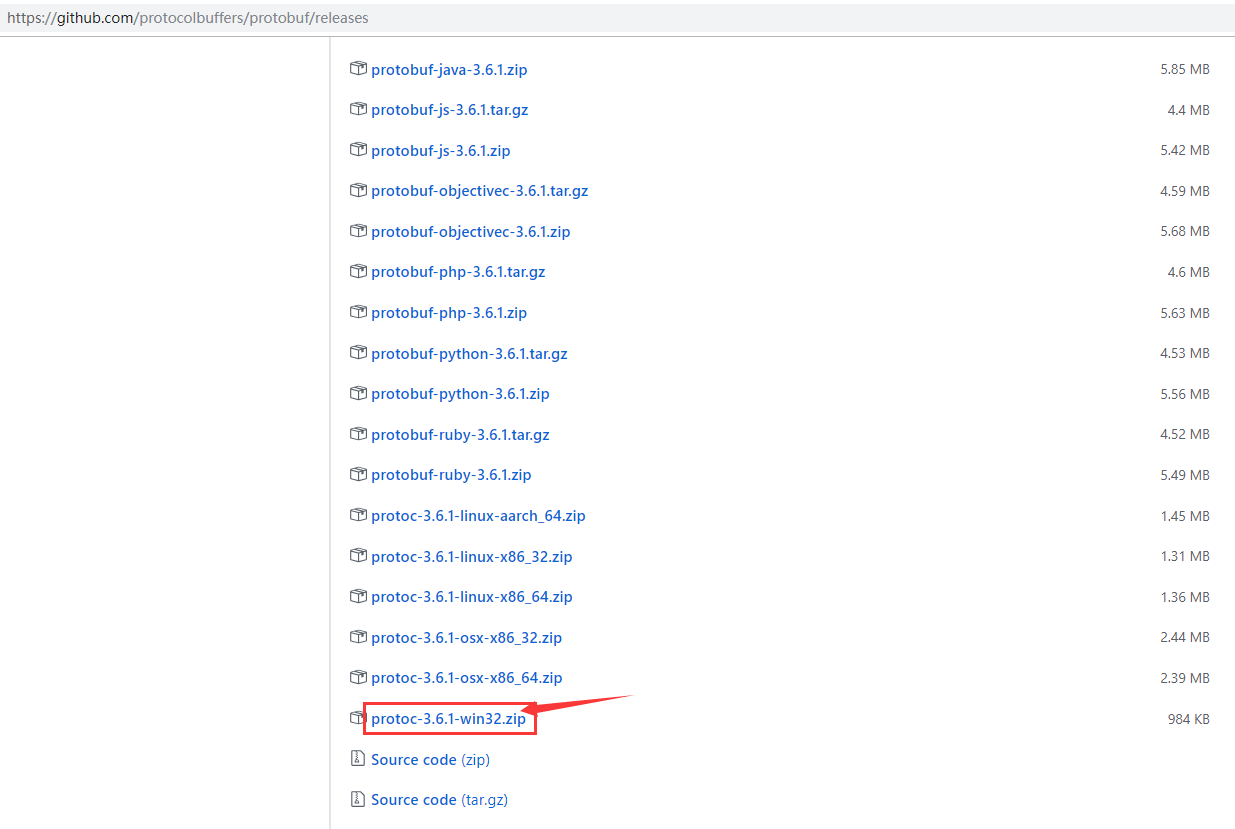
下载Protobuf网址: https://github.com/google/protobuf/releases
下载Protobuf网址页面如下图所示,下图中红色箭头标注处是Protobuf在操作系统Windows中可以直接运行的protoc程序,下载该压缩文件
protoc-3.6.1-win32.zip。
将压缩文件protoc-3.6.1-win32.zip解压后的bin文件夹protoc.exe复制到路径:C:\\Windows
将object_detection\protos文件夹下的.proto文件转成.py
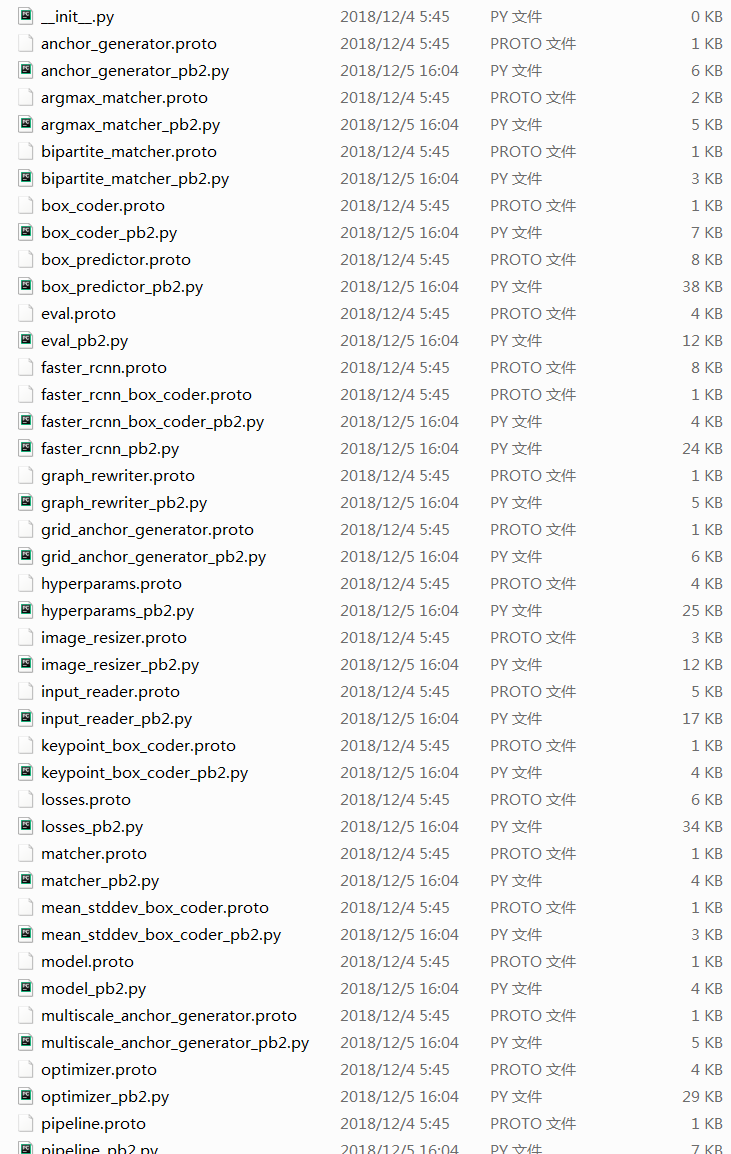
可以看到有很多proto文件
用这段代码将object_detection\protos文件夹下的.proto文件转成.py,只需将E:\目标检测\models-master\research\object_detection\protos/改成你的文件路径
 1 import os
 2 file_list = os.listdir(r'E:\目标检测\models-master\research\object_detection\protos/')
 3 proto_list = [file for file in file_list if '.proto' in file]
 4 print('object_detection/proto文件夹中共有%d个proto文件' %len(proto_list))
 5 for proto in proto_list:
 6     execute_command = 'protoc object_detection/protos/%s --python_out=.' %proto
 7     os.popen(execute_command)
 8 file_list = os.listdir(r'E:\目标检测\models-master\research\object_detection\protos/')
 9 py_list = [file for file in file_list if '.py' in file]
10 print('通过protoc命令产生的py文件共有%d个' %(len(py_list) - 1))
结果是:
object_detection/proto文件夹中共有29个proto文件
通过protoc命令产生的py文件共有29个
就是修改成功,你可以进入protos文件夹查看每个proto文件下都有一个对应的py文件。
3、安装model和slim
在research目录下运行
pythonsetup.py install
在slim目录下运行
pythonsetup.py build
pythonsetup.py install
在slim安装时会出现
error:could not create 'build': 当文件已存在时,无法创建该文件。
这是因为原来clone的文件夹里有一个BUILD文件,将其删除后执行上述命令安装slim即可。
4、PYTHONPATH 环境变量设置
在 ‘此电脑’-‘属性’- ‘高级系统设置’ -‘环境变量’-‘系统变量’ 中新建名为‘PYTHONPATH’的变量,将
models/research/ 及 models/research/slim 两个文件夹的完整目录添加,分号隔开。
接下来可以测试API,在 models/research/ 文件夹下运行命令行:
python object_detection/builders/model_builder_test.p二、测试自带案例
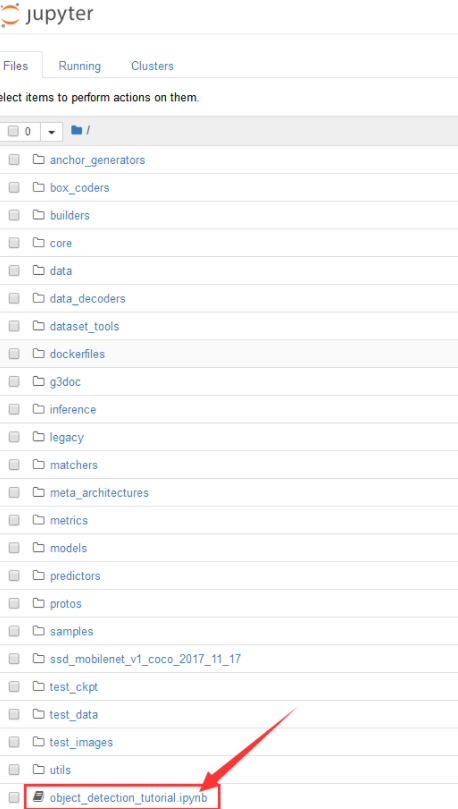
“开始-Anaconda3-Anaconda Prompt”调出命令行,改变工作目录至 models\research\object_detection


然后输入jupyter notebook,就会调用浏览器打开当前文件夹,点开 object_detection_tutorial.ipynb,
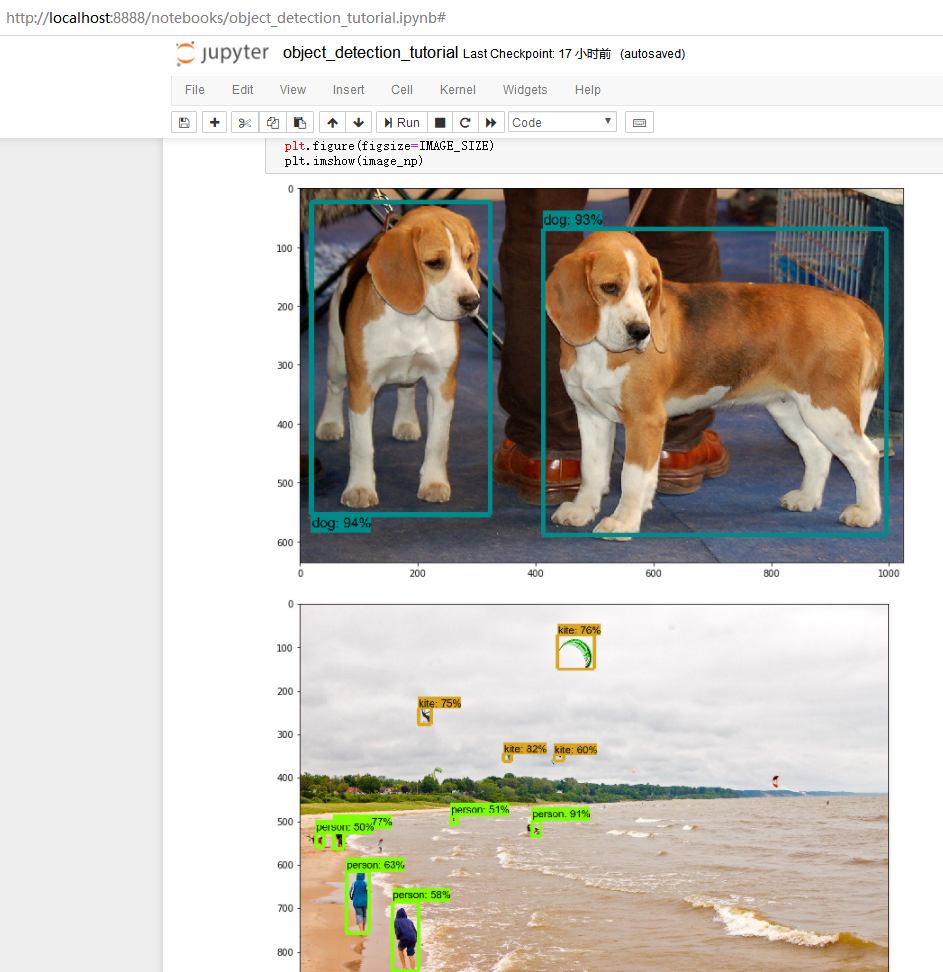
在新标签页中打开 Object Detection Demo,点击上方的 “Cell”-"Run All",

就可以直接看到结果,最后输出的是两张图片的识别结果,分别是狗,以及沙滩。第一次运行由于需要下载训练好的模型,耗时较长。第二次之后可以将 .ipynb文件中 Download Model 即 in[5]部分的代码注释掉,以加快运行速度。
如果在notebook中运行有问题,可以将.ipynb中in[]的代码复制到.py中,然后在 开始-Anaconda3-spyder 中运行。

至此Tensorflow object detection API 的环境搭建与测试工作完成。