前言:vue全家桶的内容我们已经研究过了vuex、vue-router,有兴趣的童鞋可以去看看我之前的两个系列的文章vuex源码解析一、vue-router全解析一,之前结合项目分析vuex的时候,当我们需要在vuex的action中处理路由跳转的时候,没认识vuex-router-sync的时候,我一般都是直接拿到router对象,然后稍微封装了一下进行跳转的,哈哈~~ 在看vue的github官网的时候不小心看到了vuex-router-sync,哈哈!! 才知道原来官方已经有一个工具把store跟router连接起来了,翻了一下vuex-router-sync的源码才知道原来还可以这么操作?于是打算把自己所理解的内容记录下来,欢迎指正,大牛勿喷!!!
我们直接执行:
npm install vuex-router-sync --save
然后配置就很简单了:
import Vue from 'vue'
import App from './App'
import router from './router'
import store from './store'

import {sync} from 'vuex-router-sync'
/* eslint-disable no-new */
new Vue({
  el: '#app',
  router,
  store,
  ddd: {name: 'yasin'},
  render(h) {
    return h(App)
  }
})
只需要通过sync方法把store跟router连接起来就可以了
然后我们在vue组件的mounted方法中打印一下route内容:
mounted(){
      console.log(this.$store.state.route)
    }
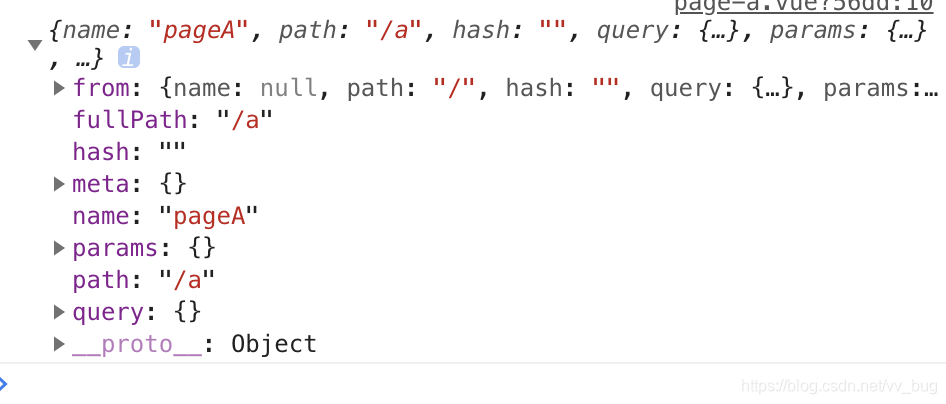
我们可以看到,在store的route对象其实就是我们router中的currentRoute对象(当前路由).
好啦~ 到这我们小伙伴可能要疑问啦,我直接用this.$router.route也可以拿到currentRoute对象啊,为啥还这么复杂呢?这样做又有啥好处呢?不急不急,我们直接看看它的源码来研究下它的功能哈~~
我们找到vuex-router-sync的源码:
exports.sync = function (store, router, options) {
  var moduleName = (options || {}).moduleName || 'route'

  store.registerModule(moduleName, {
    namespaced: true,
    state: cloneRoute(router.currentRoute),
    mutations: {
      'ROUTE_CHANGED': function ROUTE_CHANGED (state, transition) {
        store.state[moduleName] = cloneRoute(transition.to, transition.from)
      }
    }
  })

  var isTimeTraveling = false
  var currentPath

  // sync router on store change
  var storeUnwatch = store.watch(
    function (state) { return state[moduleName]; },
    function (route) {
      var fullPath = route.fullPath;
      if (fullPath === currentPath) {
        return
      }
      if (currentPath != null) {
        isTimeTraveling = true
        router.push(route)
      }
      currentPath = fullPath
    },
    { sync: true }
  )

  // sync store on router navigation
  var afterEachUnHook = router.afterEach(function (to, from) {
    if (isTimeTraveling) {
      isTimeTraveling = false
      return
    }
    currentPath = to.fullPath
    store.commit(moduleName + '/ROUTE_CHANGED', { to: to, from: from })
  })

  return function unsync () {
    // On unsync, remove router hook
    if (afterEachUnHook != null) {
      afterEachUnHook()
    }

    // On unsync, remove store watch
    if (storeUnwatch != null) {
      storeUnwatch()
    }

    // On unsync, unregister Module with store
    store.unregisterModule(moduleName)
  }
}

function cloneRoute (to, from) {
  var clone = {
    name: to.name,
    path: to.path,
    hash: to.hash,
    query: to.query,
    params: to.params,
    fullPath: to.fullPath,
    meta: to.meta
  }
  if (from) {
    clone.from = cloneRoute(from)
  }
  return Object.freeze(clone)
}
好吧,简单的不能再简单了,就70多行代码,这可是在github上好几k的star的库啊~~~ 小伙伴是不是跟我一样惊讶呢? 小伙伴莫及哈,代码虽少,但其中的思路跟用法还是值得我们学习的,这也是我为啥写这篇文章的原因了~ 废话不多说了,我们开始带着源码往下走.
首先是在我们的store中注册了一个module,名字默认为“route”:
store.registerModule(moduleName, {
    namespaced: true,
    state: cloneRoute(router.currentRoute),
    mutations: {
      'ROUTE_CHANGED': function ROUTE_CHANGED (state, transition) {
        store.state[moduleName] = cloneRoute(transition.to, transition.from)
      }
    }
  })
module中提供了一个叫“ROUTE_CHANGED”的mutation处理方法,然后还把router对象中的currentRoute保存在了state中,这也是我们为什么能够通过this.$store.state.route拿到currentRoute的原因.
然后就是监听store中的route对象的变化了,当route发生变化并且当前路由名字不等于需要跳转到路由的时候,直接通过router的push方法进行跳转页面:
 var storeUnwatch = store.watch(
    function (state) { return state[moduleName]; },
    function (route) {
      var fullPath = route.fullPath;
      if (fullPath === currentPath) {
        return
      }
      if (currentPath != null) {
        isTimeTraveling = true
        router.push(route)
      }
      currentPath = fullPath
    },
    { sync: true }
  )
store的watch方法我简单说一下,watch跟我们vue中的watch是一个概念,也就是检测某个属性的变化,然后回调.
最后通过router的全局后置钩子函数监听当前路由对象,修改store中的当前state(当前路由对象):
 // sync store on router navigation
  var afterEachUnHook = router.afterEach(function (to, from) {
    if (isTimeTraveling) {
      isTimeTraveling = false
      return
    }
    currentPath = to.fullPath
    store.commit(moduleName + '/ROUTE_CHANGED', { to: to, from: from })
  })
好啦,整个库的源码算是分析完毕了,小伙伴是不是还是很疑问呢? 这东西怎么用呢? 我们接下来结合一个demo来用用它~
一般来说项目为了让页面跟数据逻辑分离出来,一般一些逻辑处理都在vuex的action中进行了,我就简单结合之前的博客中的demo操作了~
我们运行项目看到有一个a页面:

<template>
  <div id="page-a-container">
    我是a页面
  </div>
</template>
<script>
  export default {
    name: 'pageA',
    mounted(){
      console.log(this.$store.state.route)
    }
  }
</script>
<style scoped>
  #page-a-container{
    background-color: red;
    color: white;
    font-size: 24px;
    height: 100%;
  }
</style>
然后我们项目可能有这么一个需求:“当点击a页面的某个按钮的时候,我们会调后台接口,然后再跳转某个具体的页面~”
我们在a页面放一个“登录”按钮,然后点击去登录,登录成功跳转到登录成功页面:
page-a.vue:
<template>
  <div id="page-a-container">
    我是a页面<br>
    <button @click="onClick">登录</button>
  </div>
</template>
<script>
  export default {
    name: 'pageA',
    mounted() {
      console.log(this.$store.state.route)
    },
    methods: {
      onClick() {
        this.$store.dispatch('login')
      }
    }
  }
</script>
<style scoped>
  #page-a-container {
    background-color: red;
    color: white;
    font-size: 24px;
    height: 100%;
  }
</style>
然后store中的action:
login({state, commit}) {
    setTimeout(() => {
      alert('登录成功')
      commit('route/ROUTE_CHANGED',{to: {path: '/b'}})
    }, 1000)
  }
我们直接模拟一下登录,然后跳转到b页面
好啦!! 我们vuex-router-sync就分析到这啦~~
欢迎入群,欢迎交流,qq群链接: