下面我们来学习一下rabbitMQ消费者配置,话不多说直接上代码。
1.向application.properties文件中添加配置
#rabbitMQ的 5672 端口
spring.rabbitmq.addresses=192.168.31.199:32771
#用户名密码
spring.rabbitmq.username=guest
spring.rabbitmq.password=guest
spring.rabbitmq.virtual-host=/
spring.rabbitmq.connection-timeout=15000

##springboot整合rabbitMQ 消费端配置
spring.rabbitmq.listener.simple.concurrency=5
spring.rabbitmq.listener.simple.max-concurrency=15
spring.rabbitmq.listener.simple.acknowledge-mode=manual
spring.rabbitmq.listener.simple.prefetch=1
2.创建消费者类
package com.youyou.consumer;

import com.rabbitmq.client.Channel;
import com.youyou.entity.Order;
import org.springframework.amqp.rabbit.annotation.*;
import org.springframework.amqp.support.AmqpHeaders;
import org.springframework.messaging.handler.annotation.Headers;
import org.springframework.messaging.handler.annotation.Payload;
import org.springframework.stereotype.Component;

import java.io.IOException;
import java.util.Map;

@Component
public class OrderReceive {


    @RabbitListener(bindings = @QueueBinding(
            value = @Queue(value = "order-queue" ,durable = "true"),
            exchange = @Exchange(name = "order-exchange" , durable = "true" , type = "topic"),
            key = "order.#"
        )
    )
    @RabbitHandler
    public void onMessage(@Payload Order order ,    //
                          @Headers Map<String ,Object> headers ,
                          Channel channel) throws IOException {
        //消费操作
        System.out.println("接收到的订单::" + order.getName());

        Long tag = (Long) headers.get(AmqpHeaders.DELIVERY_TAG);
        //返回ack应答指令
        channel.basicAck(tag,true);
    }
}
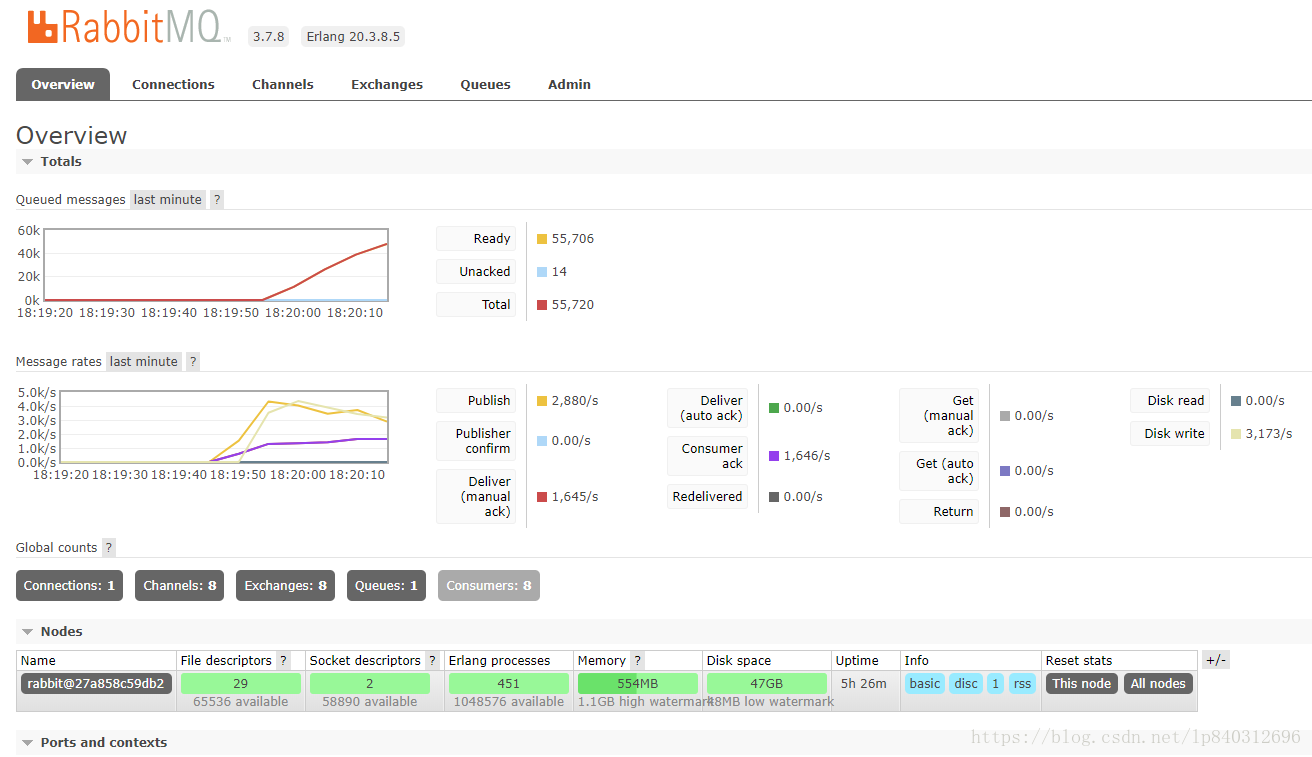
启动项目之后,自动开始监听队列消息。
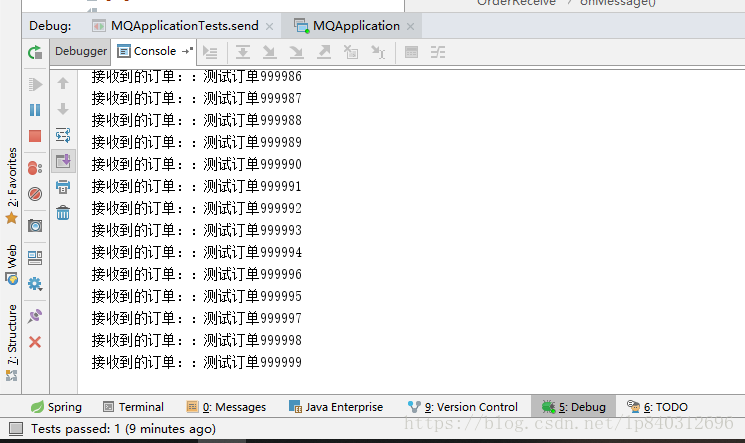
执行100万条数据效果如下:
没有丢失一条记录