【1】添加starter导入组件
pom文件如下:
<dependency>
    <groupId>org.springframework.boot</groupId>
    <artifactId>spring-boot-starter-cache</artifactId>
</dependency>
<dependency>
    <groupId>org.springframework.boot</groupId>
    <artifactId>spring-boot-starter-amqp</artifactId>
</dependency>
<!--<dependency>-->
    <!--<groupId>javax.cache</groupId>-->
    <!--<artifactId>cache-api</artifactId>-->
<!--</dependency>-->
<dependency>
    <groupId>org.springframework.boot</groupId>
    <artifactId>spring-boot-starter-web</artifactId>
</dependency>
<dependency>
    <groupId>org.mybatis.spring.boot</groupId>
    <artifactId>mybatis-spring-boot-starter</artifactId>
    <version>1.3.2</version>
</dependency>
<dependency>
    <groupId>org.springframework.boot</groupId>
    <artifactId>spring-boot-starter-data-redis</artifactId>
</dependency>
<dependency>
    <groupId>mysql</groupId>
    <artifactId>mysql-connector-java</artifactId>
    <scope>runtime</scope>
</dependency>
<dependency>
    <groupId>org.springframework.boot</groupId>
    <artifactId>spring-boot-starter-test</artifactId>
    <scope>test</scope>
</dependency>
【2】RabbitMQ属性配置
application.properties中配置如下:
spring.rabbitmq.host=192.168.2.110
spring.rabbitmq.username=guest
spring.rabbitmq.password=guest
# 下面两个是默认值,可以不用显示指定
spring.rabbitmq.port=5672
spring.rabbitmq.virtual-host=/
【3】测试发送接收消息
引入rabbitmq相关的starter后,RabbitAutoConfiguration就会默认对RabbitMQ进行配置。
主要配置如下:
- 自动配置了连接工厂ConnectionFactory;
- RabbitProperties封装了RabbitMQ的属性配置;
- RabbitTemplate用来发送接收消息;
- AmqpAdmin–RabbitMQ系统管理功能组件。
这里使用RabbitTemplate测试消息发送和接收,源码如下:
@RunWith(SpringRunner.class)
@SpringBootTest
public class SpringBootRabbitMQTests {
@Autowired
RabbitTemplate rabbitTemplate;
@Test
public void testSend(){
Map<String,Object> map = new HashMap<>();
map.put("msg","第一条消息");
map.put("data", Arrays.asList("hello",true,"中"));
rabbitTemplate.convertAndSend("exchange.direct","rabbitmq",map);
}
@Test
public void testReceive(){
Object o = rabbitTemplate.receiveAndConvert("rabbitmq");
System.out.println(o.getClass());
System.out.println(o);
}
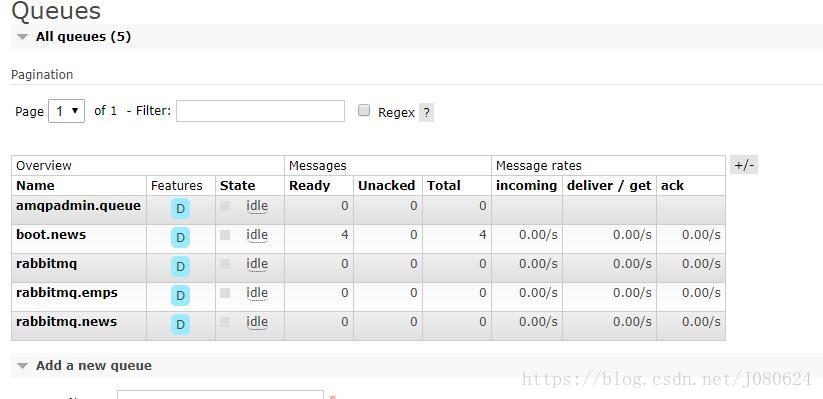
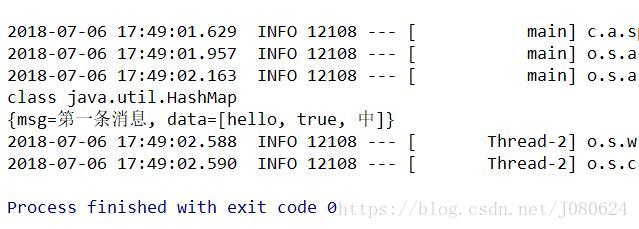
}发送后查看后台队列并获取消息如下图:
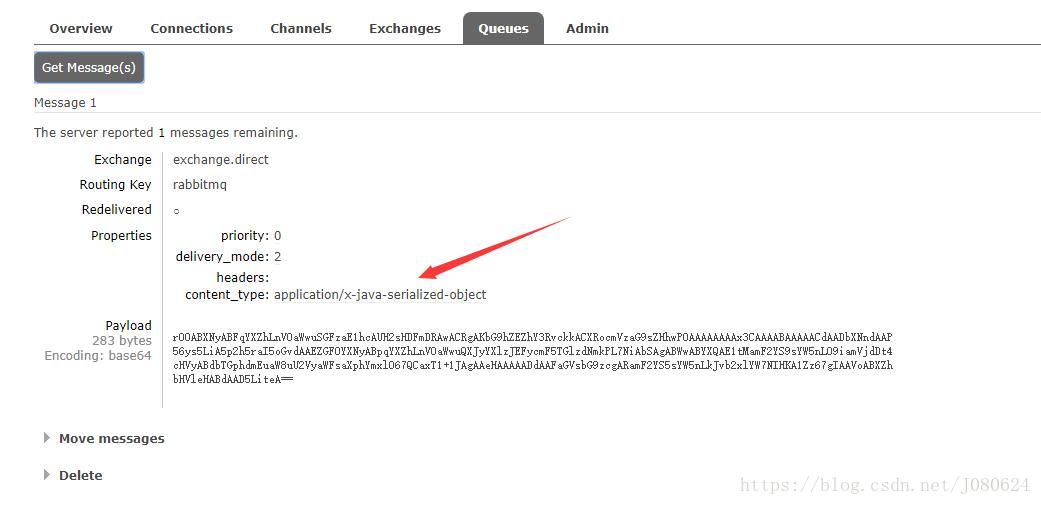
接收如下图所示:
【4】替换默认的MessageConverter
如下图所示,RabbitTemplate默认使用的是SimpleMessageConverter:
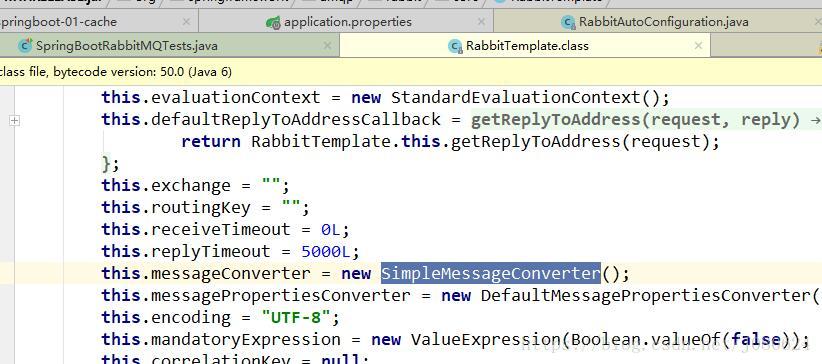
该转换器默认使用SerializationUtils进行序列化和反序列化。
这里如果想将数据序列化为JSON格式,方便查看,可以注册自定义的转换器(ampq包下的转换器)。
源码示例如下:
import org.springframework.amqp.support.converter.Jackson2JsonMessageConverter;
import org.springframework.amqp.support.converter.MessageConverter;
import org.springframework.context.annotation.Bean;
import org.springframework.context.annotation.Configuration;
/**
* Created by Janus on 2018/7/6.
*/
@Configuration
public class MyAMQPConfig {
@Bean
public MessageConverter messageConverter(){
return new Jackson2JsonMessageConverter();
}
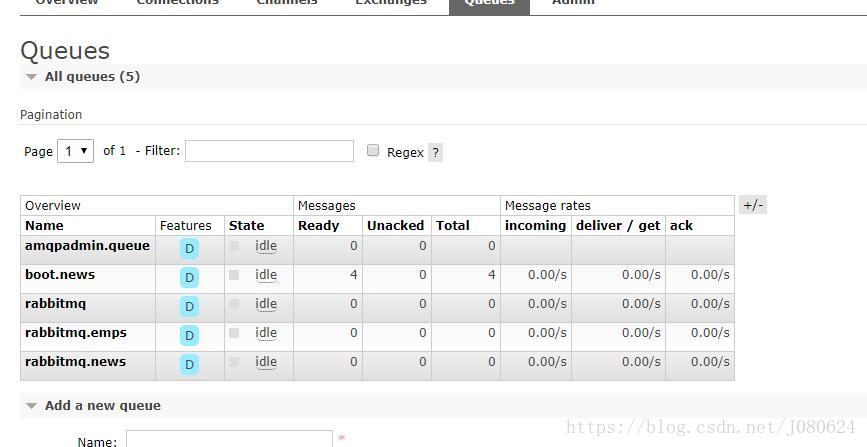
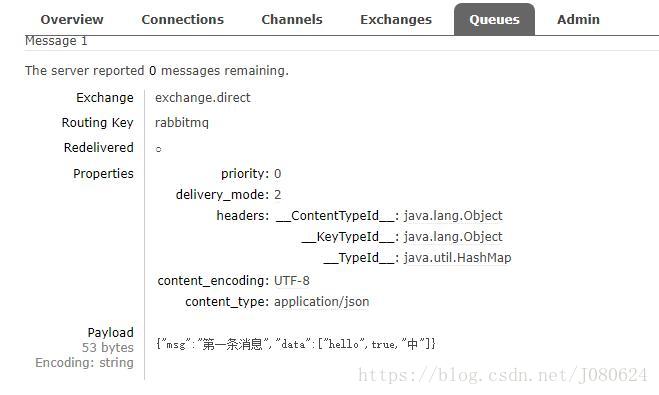
}再次发送消息后台管理页面查看队列:
其他交换器类型的发送和接收,与上面相同,只是改一下对应交换器的名字即可。
【5】基于注解的RabbitMQ
① @EnableRabbit注解开启基于注解的RabbitMQ
@SpringBootApplication
@EnableCaching
@EnableRabbit
public class SpringBoot01CacheApplication {

    public static void main(String[] args) {
        SpringApplication.run(SpringBoot01CacheApplication.class, args);
    }
}
② @RabbitListener
源码如下:
/**
 * Annotation that marks a method to be the target of a Rabbit message
 * listener on the specified {@link #queues()} (or {@link #bindings()}).
 * The {@link #containerFactory()}
 * identifies the {@link org.springframework.amqp.rabbit.listener.RabbitListenerContainerFactory
 * RabbitListenerContainerFactory} to use to build the rabbit listener container. If not
 * set, a <em>default</em> container factory is assumed to be available with a bean
 * name of {@code rabbitListenerContainerFactory} unless an explicit default has been
 * provided through configuration.
 *
 * <p>Processing of {@code @RabbitListener} annotations is performed by
 * registering a {@link RabbitListenerAnnotationBeanPostProcessor}. This can be
 * done manually or, more conveniently, through the {@code <rabbit:annotation-driven/>}
 * element or {@link EnableRabbit} annotation.
 *
 * <p>Annotated methods are allowed to have flexible signatures similar to what
 * {@link MessageMapping} provides, that is
 * <ul>
 * <li>{@link com.rabbitmq.client.Channel} to get access to the Channel</li>
 * <li>{@link org.springframework.amqp.core.Message} or one if subclass to get
 * access to the raw AMQP message</li>
 * <li>{@link org.springframework.messaging.Message} to use the messaging abstraction counterpart</li>
 * <li>{@link org.springframework.messaging.handler.annotation.Payload @Payload}-annotated method
 * arguments including the support of validation</li>
 * <li>{@link org.springframework.messaging.handler.annotation.Header @Header}-annotated method
 * arguments to extract a specific header value, including standard AMQP headers defined by
 * {@link org.springframework.amqp.support.AmqpHeaders AmqpHeaders}</li>
 * <li>{@link org.springframework.messaging.handler.annotation.Headers @Headers}-annotated
 * argument that must also be assignable to {@link java.util.Map} for getting access to all
 * headers.</li>
 * <li>{@link org.springframework.messaging.MessageHeaders MessageHeaders} arguments for
 * getting access to all headers.</li>
 * <li>{@link org.springframework.messaging.support.MessageHeaderAccessor MessageHeaderAccessor}
 * or {@link org.springframework.amqp.support.AmqpMessageHeaderAccessor AmqpMessageHeaderAccessor}
 * for convenient access to all method arguments.</li>
 * </ul>
 *
 * <p>Annotated methods may have a non {@code void} return type. When they do, the result of the
 * method invocation is sent as a reply to the queue defined by the
 * {@link org.springframework.amqp.core.MessageProperties#getReplyTo() ReplyTo}  header of the
 * incoming message. When this value is not set, a default queue can be provided by
 * adding @{@link org.springframework.messaging.handler.annotation.SendTo SendTo} to the method
 * declaration.
 *
 * <p>When {@link #bindings()} are provided, and the application context contains a
 * {@link org.springframework.amqp.rabbit.core.RabbitAdmin},
 * the queue, exchange and binding will be automatically declared.
 *
 * <p>When defined at the method level, a listener container is created for each method. The
 * {@link MessageListener} is a {@link MessagingMessageListenerAdapter}, configured with a
 * {@link org.springframework.amqp.rabbit.listener.MethodRabbitListenerEndpoint}.
 *
 * <p>When defined at the class level, a single message listener container is used to service
 * all methods annotated with {@code @RabbitHandler}. Method signatures of such annotated
 * methods must not cause any ambiguity such that a single method can be resolved for a
 * particular inbound message. The {@link MessagingMessageListenerAdapter} is configured with
 * a {@link org.springframework.amqp.rabbit.listener.MultiMethodRabbitListenerEndpoint}.
 *
 * @author Stephane Nicoll
 * @author Gary Russell
 * @since 1.4
 * @see EnableRabbit
 * @see RabbitListenerAnnotationBeanPostProcessor
 * @see RabbitListeners
 */
@Target({ElementType.TYPE, ElementType.METHOD, ElementType.ANNOTATION_TYPE})
@Retention(RetentionPolicy.RUNTIME)
@MessageMapping
@Documented
@Repeatable(RabbitListeners.class)
public @interface RabbitListener {
    String id() default "";

    String containerFactory() default "";

    String[] queues() default {};

    boolean exclusive() default false;

    String priority() default "";

    String admin() default "";

    QueueBinding[] bindings() default {};

    String group() default "";
}
测试实例如下:
@Service
public class RabbitListenerService {
@RabbitListener(queues = {"rabbitmq"})
public void receive(Map<String,Object> map){
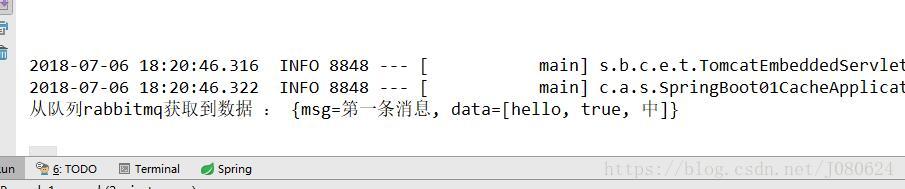
System.out.println("从队列rabbitmq获取到数据 : "+map);
}
}启动项目,一旦rabbitmq队列中有消息, 即会获取并打印,测试结果如下:
③ 获取消息头信息
不光可以直接获取消息体信息,还可以使用Message作为参数,从中分别获取消息体和消息头,源码示例如下:
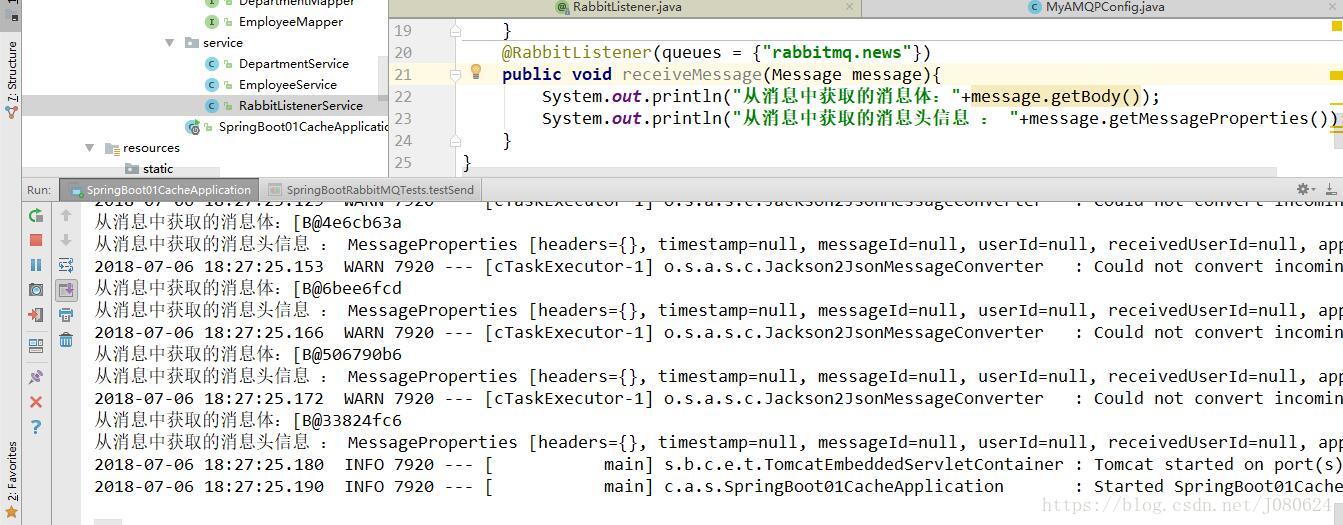
 @RabbitListener(queues = {"rabbitmq.news"})
 public void receiveMessage(Message message){
      System.out.println("从消息中获取的消息体:"+message.getBody());
      System.out.println("从消息中获取的消息头信息 : "+message.getMessageProperties());
  }
测试结果如下图:
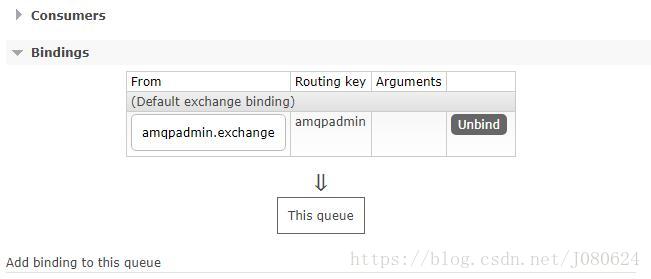
【6】AmqpAdmin编码创建交换器、队列并进行绑定
上面测试是提前创建好了交换器、队列并将其进行了绑定,实际项目中时常会遇到需要编码创建上述组件。这时,就可以使用AmqpAdmin进行操作。
源码示例如下:
    @Autowired
    AmqpAdmin amqpAdmin;

    @Test
    public void createByAmqpAdmin(){
        //创建交换器
        amqpAdmin.declareExchange(new DirectExchange("amqpadmin.exchange"));
        System.out.println("创建交换器完成");
        //创建队列
        amqpAdmin.declareQueue(new Queue("amqpadmin.queue",true));
        Binding binding = new Binding("amqpadmin.queue", Binding.DestinationType.QUEUE,"amqpadmin.exchange","amqpadmin",null);
        amqpAdmin.declareBinding(binding);
    }
测试结果如下: