springBoot整合
1.Juint
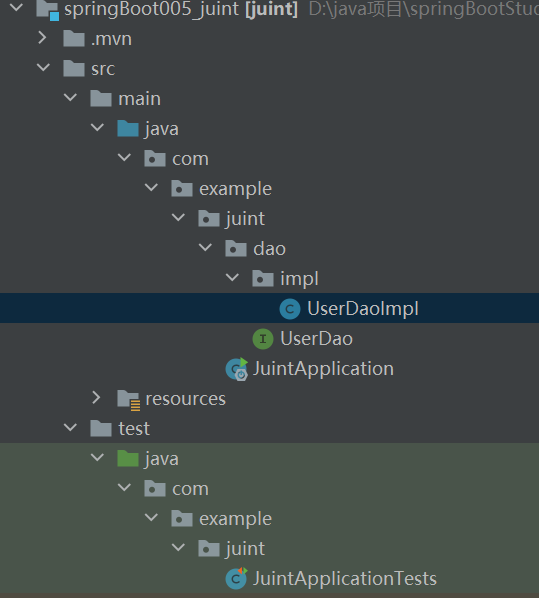
创建项目自动会导入Junit模块
- 导入对应的starer【默认导入】
- 测试类使用@SpringBootTest修饰
- 使用自动装配来测试
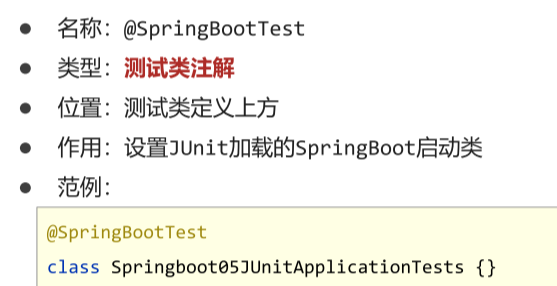
@SpringBootTest
class JuintApplicationTests {


    @Autowired
    private UserDao userDao;
    @Test
    void contextLoads() {


        userDao.login();
    }

}
原理
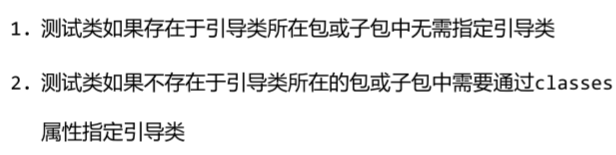
Q:如果将测试类换一个包,无法测试?
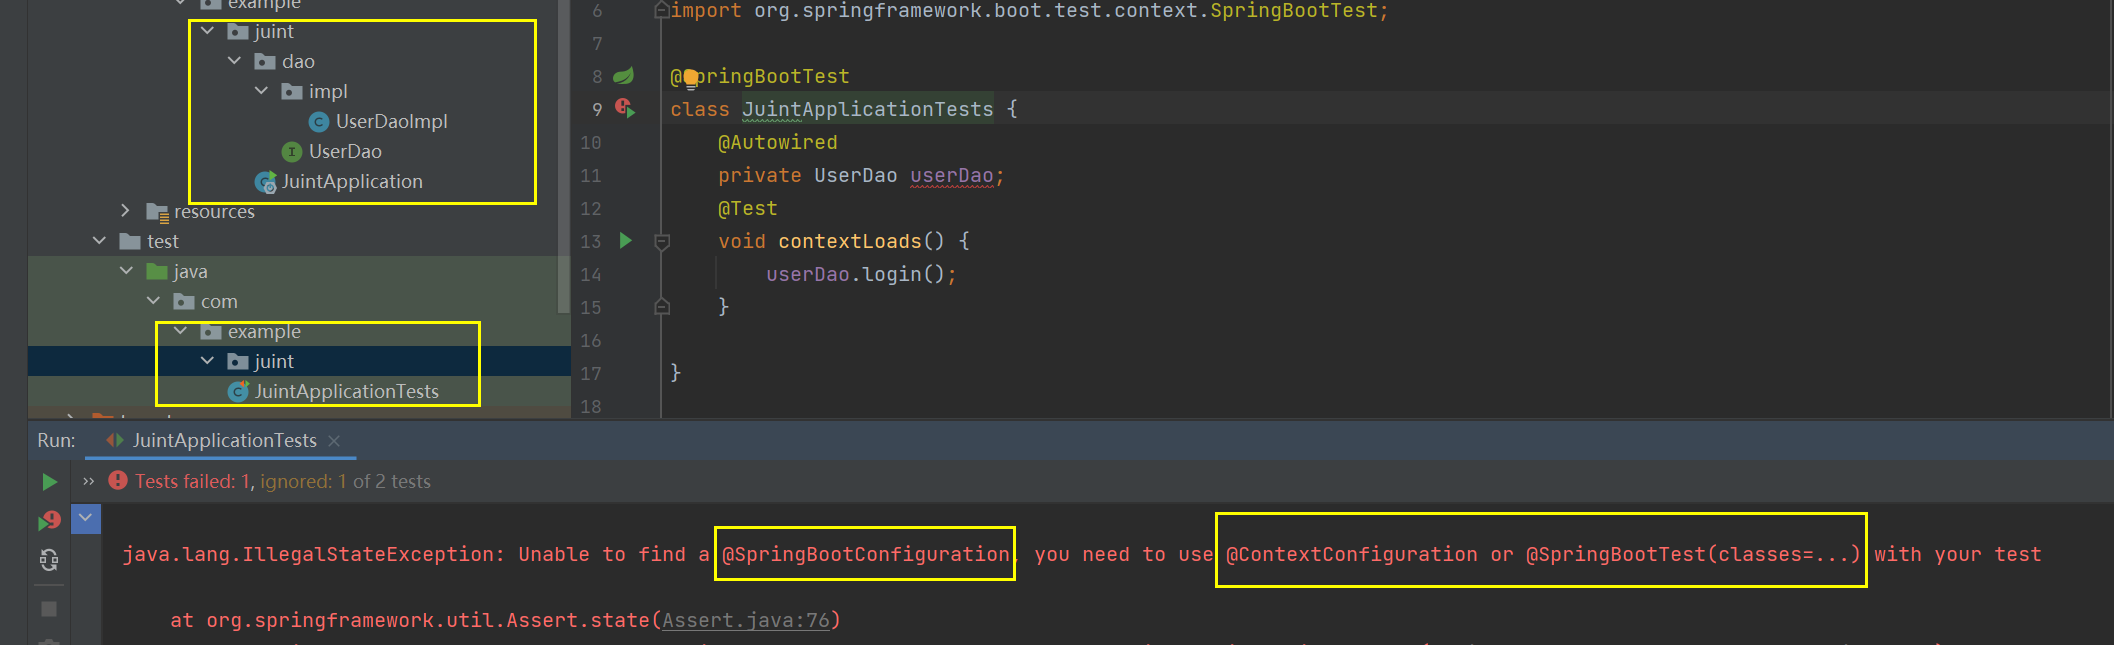
原因:测试需要使用到spring容器中自动装配的对象,如果测试类在启动类的包及其子包,则找的到(默认扫描启动类的包及其子包),否则无效。
解决方法:显式指向启动类@SpringBootTest(classes = JuintApplication.class)
@SpringBootTest(classes = JuintApplication.class)
class JuintApplicationTests {
等效于
@SpringBootTest
@ContextConfiguration(classes = JuintApplication.class)
class JuintApplicationTests {
2.Mybatis
导入依赖
手动导入或者创建项目时候勾选
<!--MyBatis 整合 SpringBoot 的起步依赖-->
<dependency>
 <groupId>org.mybatis.spring.boot</groupId>
 <artifactId>mybatis-spring-boot-starter</artifactId>
 <version>2.0.0</version>
</dependency>

<!--MySQL 的驱动依赖-->
<dependency>
 <groupId>mysql</groupId>
 <artifactId>mysql-connector-java</artifactId>
</dependency>
配置数据源
# 应用名称
spring.application.name=springBoot006_mybatis
# 数据库驱动:
spring.datasource.driver-class-name=com.mysql.cj.jdbc.Driver
# 数据源名称
spring.datasource.name=defaultDataSource
# 数据库连接地址
spring.datasource.url=jdbc:mysql://localhost:3306/mybatis?serverTimezone=UTC
# 数据库用户名&密码:
spring.datasource.username=root
spring.datasource.password=123456
##下面这些内容是为了让MyBatis映射
##指定Mybatis的Mapper文件
#mybatis.mapper-locations=classpath:mappers/*xml
##指定Mybatis的实体目录
#mybatis.type-aliases-package=com.zjh.springboot006_mybatis.mybatis.entity

测试 只使用注解
@Mapper
public interface UserDao {


    @Select("select * from user")
    List<User> getAll();
}
@SpringBootTest
class SpringBoot006MybatisApplicationTests {


    @Autowired
    private UserDao userDao;
    @Test
    void contextLoads() {


        System.out.println(userDao.getAll());
    }

}
SSM搭建
- Controller加上@Controller 把Service用@AutoWired自动注入
- ServiceImpl加上@Service 把Mapper用@AutoWired自动注入
- Mapper层 原本的ssm是在applicationContext.xml中进行mapper包注入
此处为语雀内容卡片,点击链接查看:https://www.yuque.com/u12232008/xpazgo/gel6fb
-
- 1.mapper接口上加@Mapper 【单个】

-
- 2.在Application类上加@MapperScan 【直接扫描整个mapper包】 使用了@MapperScan就不需要@Mapper了,一般使用这个
//@MapperScan("com.zjh.springboot.mapper")
@MapperScan(basePackages = "com.zjh.springboot.mapper")
【使用xml】处理mapper.xml在target无法找到的问题
方法一:放行xml
- 如果mapper.xml和mapper放在同一个包里,要手动指定resource才会被放行到target目录下
在pom.xml中的标签进行配置resource允许java包编译.xml文件
默认情况下,Mybatis 的 xml 映射文件不会编译到 target 的 class 目录下,所以我们需要在 pom.xml 文件中配置 resource 对xml文件放行
      <resources>
          <resource>
              <directory>src/main/java</directory>
              <includes>
                  <include>**/*.xml</include>
              </includes>
          </resource>
      </resources>
方法二:将mapper.xml文件直接放到resource包中的mapper包 【推荐】
必须进行映射文件的路径配置

# 指定 Mybatis 映射文件的路径
mybatis.mapper-locations=classpath:mapper/*.xml
事务支持
-
在service层要使用事务的方法上加
@Transactional -
- 旧的springBoot需要在启动类上加 @EnableTransactionManagement 开启事务支持
Mybatis逆向工程
拷贝GeneratorMapper.xml 文件
- 修改对应的JDBC 驱动包所在位置
- 修改配置数据库连接信息
- 修改包名类名
<?xml version="1.0" encoding="UTF-8"?>
<!DOCTYPE generatorConfiguration
        PUBLIC "-//mybatis.org//DTD MyBatis Generator Configuration 1.0//EN"
        "http://mybatis.org/dtd/mybatis-generator-config_1_0.dtd">
<generatorConfiguration>
    <!-- 指定连接数据库的 JDBC 驱动包所在位置,指定到你本机的完整路径 -->
    <classPathEntry location="D:\mysql-connector-java-8.0.23.jar"/>
    <!-- 配置 table 表信息内容体,targetRuntime 指定采用 MyBatis3 的版本 -->
    <context id="tables" targetRuntime="MyBatis3">
        <!-- 抑制生成注释,由于生成的注释都是英文的,可以不让它生成 -->
        <commentGenerator>
            <property name="suppressAllComments" value="true" />
        </commentGenerator>
        <!-- 配置数据库连接信息 -->
        <jdbcConnection driverClass="com.mysql.cj.jdbc.Driver"
                        connectionURL="jdbc:mysql://localhost:3306/xiaomissm"
                        userId="root"
                        password="123456">
        </jdbcConnection>
        <!-- 生成 model 类,targetPackage 指定 model 类的包名, targetProject 指定
       生成的 model 放在 eclipse 的哪个工程下面-->
        <javaModelGenerator targetPackage="com.zjh.springboot.model"
                            targetProject="src/main/java">
            <property name="enableSubPackages" value="false" />
            <property name="trimStrings" value="false" />
        </javaModelGenerator>
        <!-- 生成 MyBatis 的 Mapper.xml 文件,targetPackage 指定 mapper.xml 文件的
       包名, targetProject 指定生成的 mapper.xml 放在 eclipse 的哪个工程下面 -->
        <sqlMapGenerator targetPackage="com.zjh.springboot.mapper"
                         targetProject="src/main/java">
            <property name="enableSubPackages" value="false" />
        </sqlMapGenerator>
        <!-- 生成 MyBatis 的 Mapper 接口类文件,targetPackage 指定 Mapper 接口类的包
       名, targetProject 指定生成的 Mapper 接口放在 eclipse 的哪个工程下面 -->
        <javaClientGenerator type="XMLMAPPER"
                             targetPackage="com.zjh.springboot.mapper" targetProject="src/main/java">
            <property name="enableSubPackages" value="false" />
        </javaClientGenerator>
        <!-- 数据库表名及对应的 Java 模型类名 -->
        <table tableName="t_student" domainObjectName="Student"
               enableCountByExample="false"
               enableUpdateByExample="false"
               enableDeleteByExample="false"
               enableSelectByExample="false"
               selectByExampleQueryId="false"/>
    </context>
</generatorConfiguration>
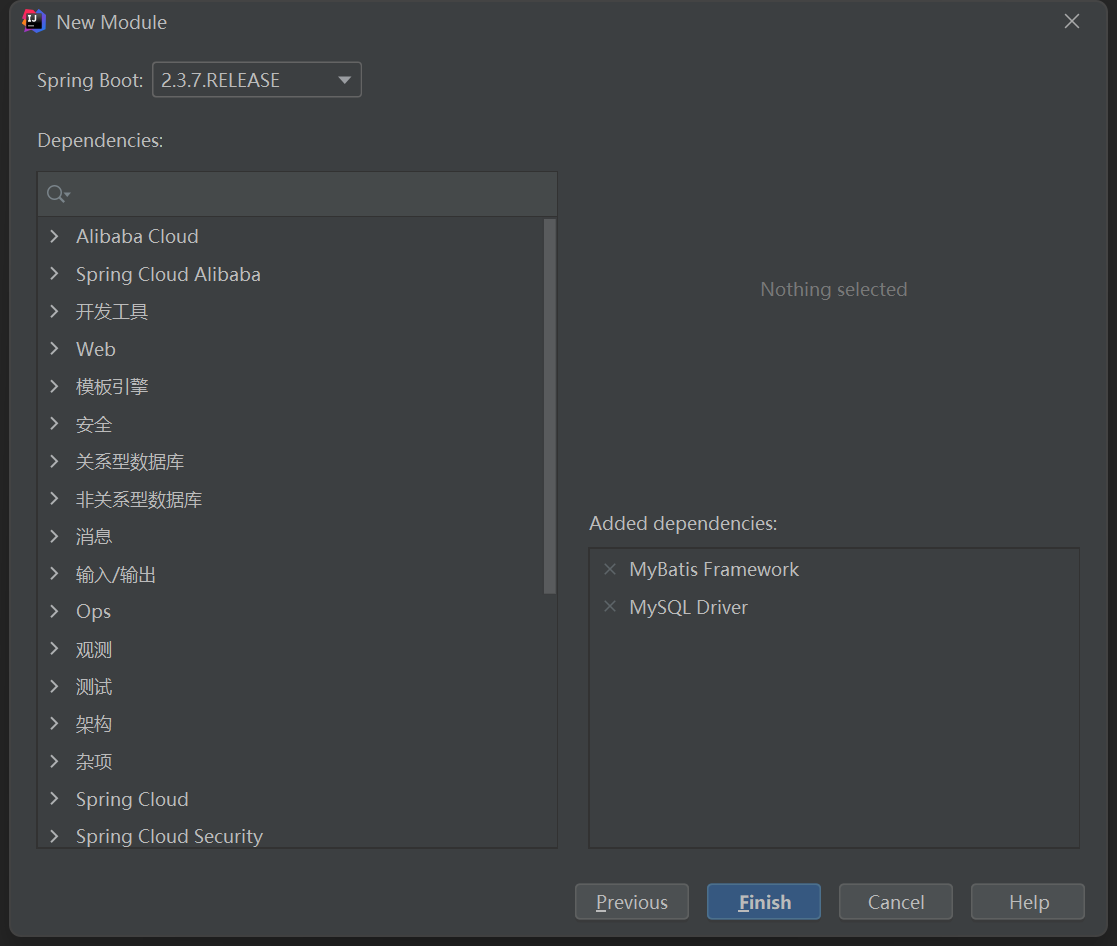
在 pom.xml 文件中添加 mysql 反向工程依赖
<!--mybatis 代码自动生成插件-->
<plugin>
  <groupId>org.mybatis.generator</groupId>
  <artifactId>mybatis-generator-maven-plugin</artifactId>
  <version>1.3.6</version>
  <configuration>
    <!--配置文件的位置-->
    <configurationFile>GeneratorMapper.xml</configurationFile>
    <verbose>true</verbose>
    <overwrite>true</overwrite>
  </configuration>
</plugin>
双击红色选中命令,生成相关文件
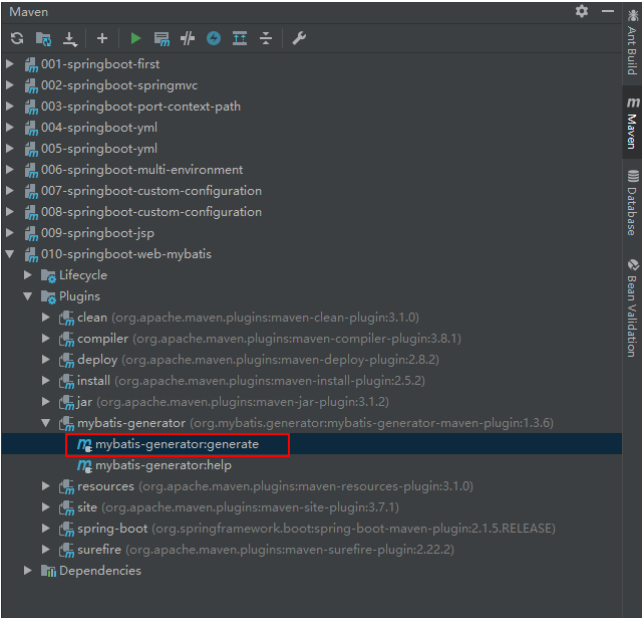
生成成功

如果出现生成的pojo类不符合预期,在GeneratorMapper.xml的<jdbcConnection>中加入<property name="nullCatalogMeansCurrent" value="true" />
<!-- 配置数据库连接信息 -->
        <jdbcConnection driverClass="com.mysql.cj.jdbc.Driver"
                        connectionURL="jdbc:mysql://localhost:3306/classroom"
                        userId="root"
                        password="123456">
            <property name="nullCatalogMeansCurrent" value="true" />
        </jdbcConnection>
集成Redis
此处为语雀内容卡片,点击链接查看:https://www.yuque.com/u12232008/nddmz0/vwrylx
3.Mybatis-plus
3.1导入MP坐标
方法一
由于SpringBoot中未收录MyBatis-Plus的坐标版本,需要指定对应的Version
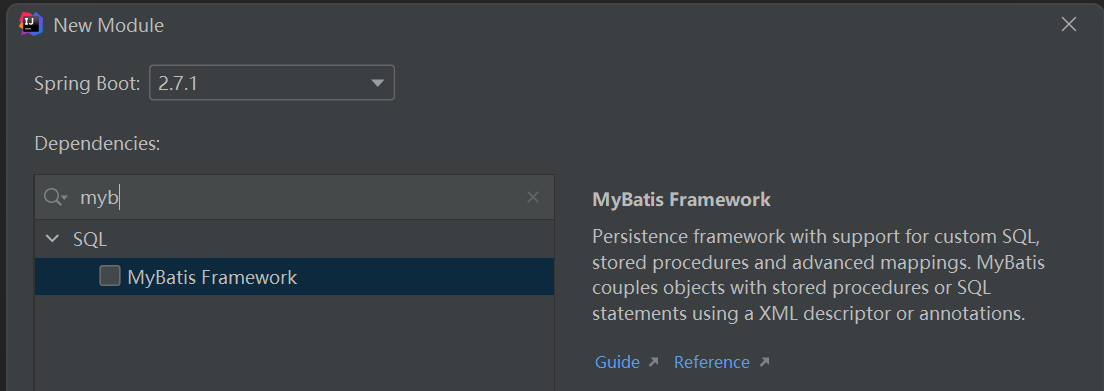
初始只添加mysql坐标,然后到maven仓库查找MP坐标手动加入
<dependency>
    <groupId>com.baomidou</groupId>
    <artifactId>mybatis-plus-boot-starter</artifactId>
    <version>3.5.2</version>
</dependency>
方法二
直接使用aliyun的配置

3.2配置数据库信息
这一步和mybatis一样
# 应用名称
spring.application.name=springBoot006_mybatis
# 数据库驱动:
spring.datasource.driver-class-name=com.mysql.cj.jdbc.Driver
# 数据源名称
spring.datasource.name=defaultDataSource
# 数据库连接地址
spring.datasource.url=jdbc:mysql://localhost:3306/mybatis?serverTimezone=UTC
# 数据库用户名&密码:
spring.datasource.username=root
spring.datasource.password=123456
##下面这些内容是为了让MyBatis映射
##指定Mybatis的Mapper文件
#mybatis.mapper-locations=classpath:mappers/*xml
##指定Mybatis的实体目录
#mybatis.type-aliases-package=com.zjh.springboot006_mybatis.mybatis.entity
3.3继承BaseMapper 添加@Mapper
@Mapper
public interface UserDao extends BaseMapper<User> {


}
@SpringBootTest
class SpringBoot007MpApplicationTests {


    @Autowired
    private UserDao userDao;
    @Test
    void contextLoads() {


        System.out.println(userDao.selectById(1));
    }

}
Druid
坐标
        <dependency>
            <groupId>com.alibaba</groupId>
            <artifactId>druid-spring-boot-starter</artifactId>
            <version>1.2.11</version>
        </dependency>
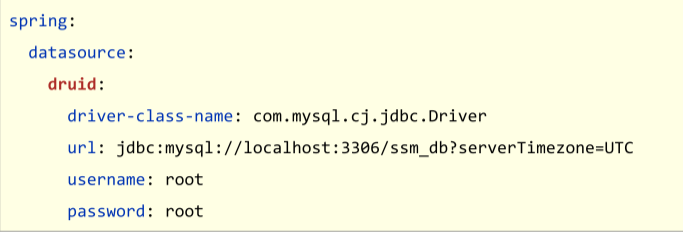
配置
两种方式
方式一
spring.datasource.type=com.alibaba.druid.pool.DruidDataSource
# 应用名称
spring.application.name=springBoot006_mybatis
# 数据库驱动:
spring.datasource.driver-class-name=com.mysql.cj.jdbc.Driver
# 数据源名称
spring.datasource.name=defaultDataSource
# 数据库连接地址
spring.datasource.url=jdbc:mysql://localhost:3306/mybatis?serverTimezone=UTC
# 数据库用户名&密码:
spring.datasource.username=root
spring.datasource.password=123456
#数据库类型
spring.datasource.type=com.alibaba.druid.pool.DruidDataSource

#下面这些内容是为了让MyBatis映射
#指定Mybatis的Mapper文件
mybatis.mapper-locations=classpath:mappers/*xml
##指定Mybatis的实体目录
#mybatis.type-aliases-package=com.zjh.springboot006_mybatis.mybatis.entity
方式二
springBoot集成jsp(了解)
官方推荐使用thymeleaf模板
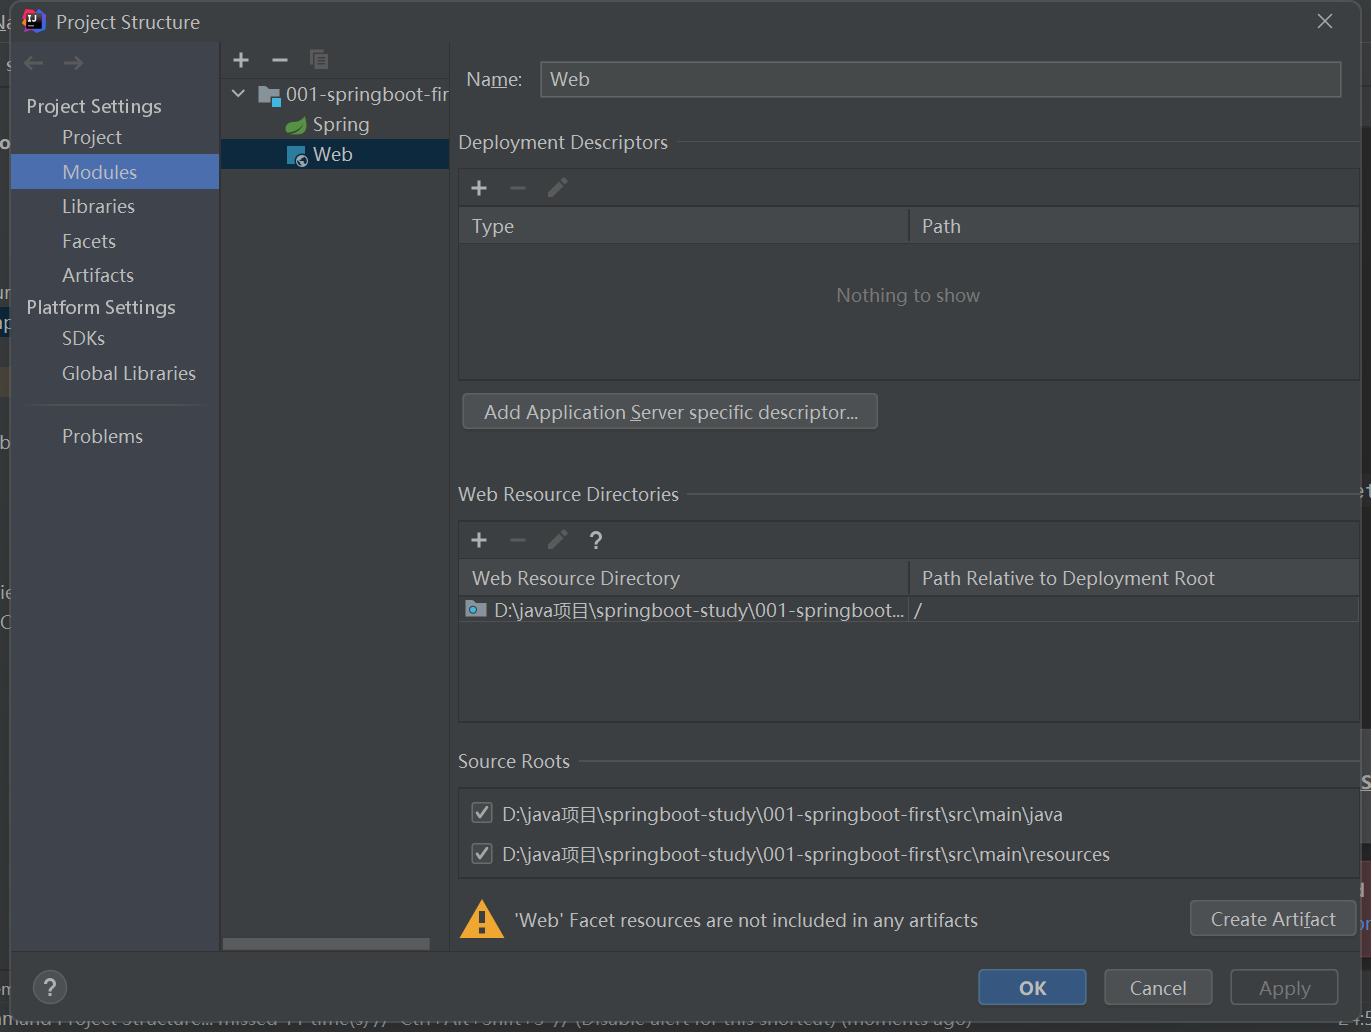
添加webapp文件夹
导入springBoot内嵌Tomcat对jsp的解析依赖
<dependency>
  <groupId>org.apache.tomcat.embed</groupId>
  <artifactId>tomcat-embed-jasper</artifactId>
</dependency>
配置jsp编译路径
SpringBoot 要求 jsp 文件必须编译到指定的 META-INF/resources 目录下才能访问,否则 访问不到。
在pom.xml中的build标签配置
<resources>
    <resource>
        <!--源文件位置-->
        <directory>src/main/webapp</directory>
        <!--指定编译到 META-INF/resources,该目录不能随便写-->
        <targetPath>META-INF/resources</targetPath>
        <!--指定要把哪些文件编译进去,**表示 webapp 目录及子目录,*.*表示所有文件-->
        <includes>
            <include>**/*.*</include>
        </includes>
    </resource>
    <resource>
        <directory>src/main/resources</directory>
        <includes>
            <include>**/*.*</include>
        </includes>
    </resource>
</resources>
注意:不加下面这段
<resource>
        <directory>src/main/resources</directory>
        <includes>
            <include>**/*.*</include>
        </includes>
    </resource>
打包会没有application.properties文件,因为上面指定webapp为resource,会覆盖springBoot默认resources是默认资源文件夹的规则
在配置文件中配置视图解析器
#配置视图解析器
spring.mvc.view.prefix=/
spring.mvc.view.suffix=.jsp
两种方法测试
ModelAndView
@RequestMapping("/hello")
    public ModelAndView hello(){


        ModelAndView modelAndView = new ModelAndView();
        modelAndView.addObject("msg","helloSpringBoot");
        modelAndView.setViewName("hello");
        return modelAndView;
    }
String+Model
@Controller
public class SpringBootController {


 @RequestMapping(value = "/springBoot/jsp")
 public String jsp(Model model) {


 model.addAttribute("data","SpringBoot 前端使用 JSP 页面!");
 return "index";
 }
springBoot集成非web项目(很少用,了解)
方式一:
直接在 main 方法中,根据 SpringApplication.run()方 法获取返回的 Spring 容器对象,再获取业务 bean 进行调用
创建一个 SpringBoot Module
注意:什么都不要勾选
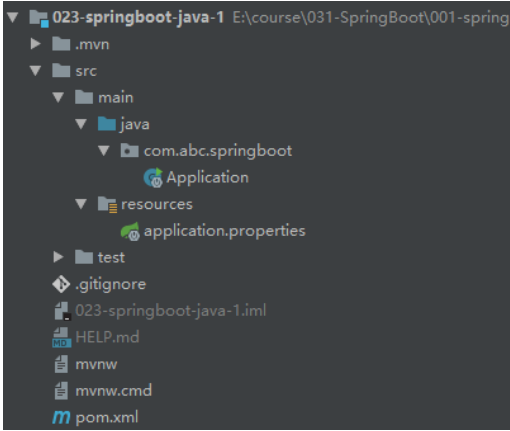
没有webapp文件夹,类似于maven空项目
测试
编写接口和实现类UserServiceImpl
public interface UserService {


 String sayHello(String message);
}
@Service
public class UserServiceImpl implements UserService {


 @Override
 public String sayHello(String message) {


 return "Hello,SpringBoot Java!";
 }
使用@Service把UserServiceImpl注入
在Application 类的main方法中调用UserServiceImpl
@SpringBootApplication
public class Application {


 public static void main(String[] args) {


 /**
 * SpringBoot 程序启动后,返回值是 ConfigurableApplicationContext,它也是一个
Spring 容器对象
 * 它其它相当于原来 Spring 中启动容器 ClassPathXmlApplicationContext context =
new ClassPathXmlApplicationContext("");
 */
 //获取 SpringBoot 程序启动后的 Spring 容器
     ConfigurableApplicationContext context =
    SpringApplication.run(Application.class, args);
     //从 Spring 容器中获取指定 bean 的对象
     UserService userService = (UserService)
    context.getBean("userServiceImpl");
     //调用业务 bean 的方法
     String sayHello = userService.sayHello();
     System.out.println(sayHello);
 }
}
SpringBoot 程序启动后,返回值是ConfigurableApplicationContext,它也是一个Spring 容器对象相当于原来 Spring 中启动容器ClassPathXmlApplicationContext context = new ClassPathXmlApplicationContext("");
这个方法是从容器中取出userServiceImpl的bean对象进行使用
方式二
Spring boot 的入口类实现 CommandLineRunner 接口
@SpringBootApplication
public class Application2 implements CommandLineRunner {


 //第二步:通过容器获取 bean,并注入给 userService
 @Autowired
 private UserService userService;
 public static void main(String[] args) {


 //第一步:SpringBoot 的启动程序,会初始化 spring 容器
 SpringApplication.run(Application2.class,args);
 }
 //覆盖接口中的 run 方法
 @Override
 public void run(String... args) throws Exception {


 //第三步:容器启动后调用 run 方法,在该方法中调用业务方法
 String sayHello = userService.sayHello();
 System.out.println(sayHello);
 }
}
- main方法是静态方法,不能在里面直接调用非静态对象userService
- 实现CommandLineRunner接口,在容器启动后调用run方法,在这里面来调用userService的方法
- 容器启动后默认会执行run里面的代码逻辑
springBoot使用servlet【少用,了解】
方式一:注解
在servlet上添加@WebServlet注解配置访问路径
@WebServlet(urlPatterns = "/myServlet")
相当于之前在web.xml中进行 的配置
@WebServlet(urlPatterns = "/myServlet")
public class MyServlet extends HttpServlet {


 @Override
 protected void doGet(HttpServletRequest request, HttpServletResponse
response) throws ServletException, IOException {


     response.getWriter().print("My SpringBoot Servlet");
     response.getWriter().flush();
     response.getWriter().close();
 }
 @Override
 protected void doPost(HttpServletRequest request, HttpServletResponse
response) throws ServletException, IOException {


     doGet(request,response);
 }
在启动类上添加servlet扫描注解@ServletComponentScan(“com.abc.springboot.servlet”)
@SpringBootApplication
@ServletComponentScan(basePackages = "com.abc.springboot.servlet")
public class Application {


 public static void main(String[] args) {


 SpringApplication.run(Application.class, args);
 }
方式二:配置类(组件注册)
编写普通Servlet,不使用注解
public class MyServlet extends HttpServlet {


 @Override
 protected void doGet(HttpServletRequest request, HttpServletResponse
response) throws ServletException, IOException {


     response.getWriter().print("My SpringBoot Servlet");
     response.getWriter().flush();
     response.getWriter().close();
 }
 @Override
 protected void doPost(HttpServletRequest request, HttpServletResponse
response) throws ServletException, IOException {


     doGet(request,response);
 }
创建一个配置类,用于注册Servlet
@Configuration //将此类作为配置类
public class ServletConfig {


     //@Bean 是一个方法级别上的注解,主要用在配置类里
     /*
     * 相当于一个<beans>
     * <bean id="" class=""/>
     * </beans>
     * */
 @Bean
 public ServletRegistrationBean myServletRegistrationBean() {


     //将自定义 servlet 注册到注册 Servlet 类中,并指定访问路径
     ServletRegistrationBean servletRegistrationBean = new
ServletRegistrationBean(new MyServlet(), "/springboot/myServlet");
     return servletRegistrationBean;
 }
}
不需要扫描servelt包
springBoot使用Filter【少用,了解】
和使用servlet基本一致,也是两种配置方法
方式一:注解
过滤器 使用@WebFilter配置过滤路径
@WebFilter( urlPatterns = "/user/*" )
public class MyFilter implements Filter {


	@Override
	public void doFilter( ServletRequest servletRequest, ServletResponse servletResponse,
			      FilterChain filterChain ) throws IOException, ServletException
	{


		System.out.println( "-------------您已进入过滤器---------------" );
		filterChain.doFilter( servletRequest, servletResponse );
	}
}
@ServletComponentScan
在 主 应 用 程 序 Application 类上添加 @ServletComponentScan("basePackages = “com.abc.springboot.filter”)
@ServletComponentScan( basePackages = "com.abc.springboot.filter" )
@SpringBootApplication
public class Application {


	public static void main( String[] args )
	{


		SpringApplication.run( Application.class, args );
	}
}
}
方式二:配置类 组件扫描
MyFilter不需要加注解
@Configuration /* 定义为配置类 */
public class FilterConfig {


	@Bean
	public FilterRegistrationBean myFilterRegistration()
	{


		/* 注册过滤器 */
		FilterRegistrationBean filterRegistrationBean = new FilterRegistrationBean( new MyFilter() );
		/* 添加过滤路径 */
		filterRegistrationBean.addUrlPatterns( "/user/*" );
		return filterRegistrationBean;
	}
}
设置字符编码
传统的Spring提供的字符编码过滤器【少用】
测试Servlet
@WebServlet("/servlet")
public class MyServlet extends HttpServlet {


	@Override
	protected void doGet( HttpServletRequest req, HttpServletResponse resp ) throws
	ServletException, IOException
	{


		resp.getWriter().print( "Hello World,世界您好!" );
		/* 设置浏览器编码格式 */
		resp.setContentType( "text/html;character=utf-8" );
		resp.getWriter().flush();
		resp.getWriter().close();
	}


	@Override
	protected void doPost( HttpServletRequest req, HttpServletResponse resp )
	throws ServletException, IOException
	{


		doGet( req, resp );
	}
}
启动类加包扫描注解
@ServletComponentScan("com.zjh.springboot.servlet")
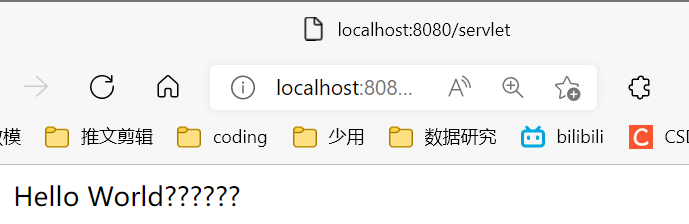
输出乱码
创建配置类,设置字符编码过滤器
@Configuration /* 设置为配置类 */
public class SystemConfig {


    @Bean
    public ServletRegistrationBean myServletRegistration() {


        ServletRegistrationBean servletRegistrationBean =
                new ServletRegistrationBean(new MyServlet(),
                        "/springboot/myServlet");
        return (servletRegistrationBean);
    }


    @Bean
    public FilterRegistrationBean characterFilterRegistration() {


        /*
         * 设置字符编码过滤器
         * CharacterEncoding 是由 Spring 提供的一个字符编码过滤器,之前是配置在
         *web.xml 文件 中
         * */
        CharacterEncodingFilter characterEncodingFilter = new
                CharacterEncodingFilter();
        /* 强制使用指定字符编码 */
        characterEncodingFilter.setForceEncoding(true);
        /* 设置指定字符编码 */
        characterEncodingFilter.setEncoding("UTF-8");
        /* 创建过滤器注册 bean */
        FilterRegistrationBean filterRegistrationBean = new
                FilterRegistrationBean();
        /* 设置字符编码过滤器 */
        filterRegistrationBean.setFilter(characterEncodingFilter);
        /* 设置字符编码过滤器路径 */
        filterRegistrationBean.addUrlPatterns("/*");
        return filterRegistrationBean;
    }
}
对比传统springmvc的字符编码设置
<!--配置全局过滤的filter-->
<filter>
  <filter-name>CharacterEncodingFilter</filter-name>
  <filter-class>org.springframework.web.filter.CharacterEncodingFilter</filter-class>
  <init-param>
    <param-name>encoding</param-name>
    <param-value>UTF-8</param-value>
  </init-param>
</filter>
<filter-mapping>
  <filter-name>CharacterEncodingFilter</filter-name>
  <url-pattern>/*</url-pattern>
</filter-mapping>
关闭springBoot的http字符编码支持
#关闭 springboot 的 http 字符编码支持
#只有关闭该选项后,spring 字符编码过滤器才生效
server.servlet.encoding.enabled=false
测试成功
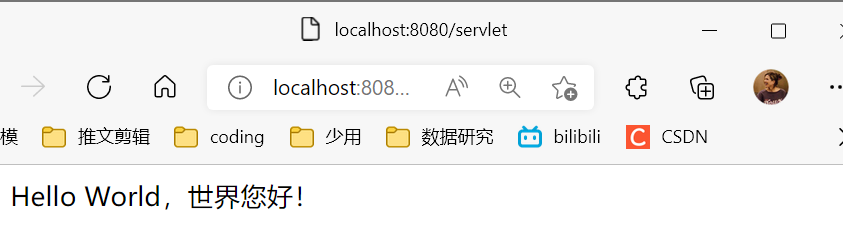
在 application.properties 中配置字符编码(推荐)
编写完servlet后不需要写配置类
直接在application.properties 中配置字符编码
#设置请求响应的字符编码
server.servlet.encoding.enabled=true
server.servlet.encoding.force=true
server.servlet.encoding.charset=UTF-8
测试成功