一个好的系统,几乎都离不开权限控制。要实现访问权限控制的方式有多种多样,可以通过AOP、拦截器实现,也可以使用Shiro框架。现在研究使用Spring Security。
O的K,先创建一个无需权限的Web小例子。(本篇博客接着之前写的系列,已忽略环境配置,如pom.xml 的依赖等等)
在 src/main/resources/static目录下创建 welcome.html 文件:
<!DOCTYPE html>
<html lang="en">
<head>
    <meta charset="UTF-8">
    <title>英雄联盟</title>
</head>
<body>
    <h2>欢迎您来到英雄联盟</h2>
    <h3><a th:href="@{/play}">点击开始游戏</a></h3>
</body>
</html>
在 src/main/resources/static目录下创建 game.html 文件:
<!DOCTYPE html>
<html lang="en">
<head>
    <meta charset="UTF-8">
    <title>欢迎来到英雄联盟</title>
</head>
<body>
    <h2>是时候表演真正的技术了!</h2>
</body>
</html>
创建 loginController 类:
import org.springframework.stereotype.Controller;
import org.springframework.web.bind.annotation.RequestMapping;

@Controller
public class LoginController {

    @RequestMapping("/")
    public String index() {
        return "welcome";
    }

    @RequestMapping("/play")
    public String play() {
        return "game";
    }
}启动服务,浏览器访问:http://localhost:9090/

点击“点击开始游戏”:
O的K,一个没有权限控制的例子搞定。
现在,学习如何使用 Spring Security。
先在 pom.xml 中添加 jar 依赖:
		<dependency>
			<groupId>org.springframework.boot</groupId>
			<artifactId>spring-boot-starter-security</artifactId>
		</dependency>
Spring Security 配置
创建 MySpringSecurityConfig 类继承WebSecurityConfigurerAdapter适配器(如果对适配器理解不深,可以参考):
import org.springframework.beans.factory.annotation.Autowired;
import org.springframework.context.annotation.Configuration;
import org.springframework.security.config.annotation.authentication.builders.AuthenticationManagerBuilder;
import org.springframework.security.config.annotation.web.builders.HttpSecurity;
import org.springframework.security.config.annotation.web.configuration.EnableWebSecurity;
import org.springframework.security.config.annotation.web.configuration.WebSecurityConfigurerAdapter;

@Configuration
@EnableWebSecurity
public class MySpringSecurityConfig extends WebSecurityConfigurerAdapter {

    @Override
    protected void configure(HttpSecurity httpSecurity) throws Exception {
        httpSecurity
                .authorizeRequests()
                .antMatchers("/", "/play").permitAll()
                .anyRequest().authenticated()
                .and()
                .formLogin()
                .loginPage("/login")
                .permitAll()
                .and()
                .logout()
                .permitAll();
    }

    @Autowired
    public void configureGlobal(AuthenticationManagerBuilder auth) throws Exception {
        auth
                .inMemoryAuthentication()
                .withUser("biandan").password("123").roles("Admin");
    }
}
代码说明:
①通过@EnableWebSecurity注解开启Spring Security的功能,继承WebSecurityConfigurerAdapter适配器,并重写它的方法来设置一些安全的细节
②重写configure(HttpSecurity http)方法:
通过authorizeRequests()定义哪些URL需要被保护、哪些不需要被保护。例如以上代码指定了/和/game不需要任何认证就可以访问,其他的路径都必须通过身份验证。
通过formLogin()定义当需要用户登录时候,转到的登录页面。
configureGlobal(AuthenticationManagerBuilder auth)方法,在内存中创建了一个用户,该用户的名称为biandan,密码为123,用户角色为Admin。
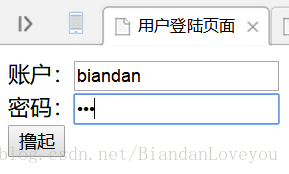
O的K,我们还缺少一个登录的页面,在 src/main/resources/static目录下创建 login.html 文件:
<!DOCTYPE html>
<html lang="en">
<head>
<meta charset="UTF-8">
<title>用户登陆页面</title>
</head>
<body>
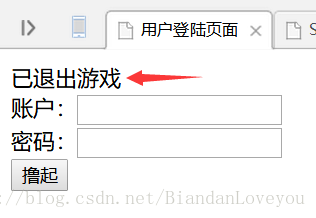
<div th:if="${param.logout}">
已退出游戏
</div>
<form th:action="@{/play}" method="post">
<div><label>账户:<input type="text" name="username"/></label></div>
<div><label>密码:<input type="password" name="password"/></label></div>
<div><input type="submit" value="撸起"/></div>
</form>
</body>
</html>O的K,我们需要提供一个注销的入口,改造一下 game.html 文件:
<!DOCTYPE html>
<html lang="en">
<head>
    <meta charset="UTF-8">
    <title>欢迎来到英雄联盟</title>
</head>
<body>
    <h2>是时候表演真正的技术了!</h2>
    <form th:action="@{/logout}" method="post">
        <input type="submit" value="注销登陆"/>
    </form>
</body>
</html>
改造一下 welcome.html 文件
<!DOCTYPE html>
<html lang="en">
<head>
    <meta charset="UTF-8">
    <title>英雄联盟</title>
</head>
<body>
    <h2>欢迎您来到英雄联盟</h2>
    <h3><a th:href="@{/login}">点击开始游戏</a></h3>
</body>
</html>启动服务,浏览器地址输入:http://localhost:9090/
“点击开始游戏”
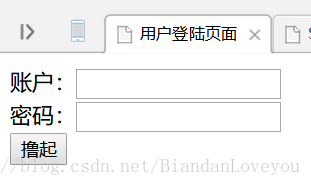
系统判断到请求 /login ,跳转到 login 页面。输入用户名密码:
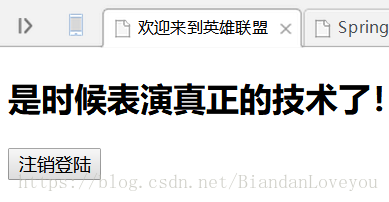
点击“注销登陆”