导语
如何设计一个高效健全的安全策略是保证企业数据安全的的关键,笔者见过设计的比较优秀的安全管理策略也见过设计的比较Low的安全管理策略。如何保证高效的安全策略,在Java中Spring官方提供了安全策略组件Spring Security当然还有很多的安全策略的框架例如Shiro等。下面就对Spring Security进行详细说明。
文章目录
Spring Security介绍
&emps;Spring Security是Spring官方提供的Spring企业级应用安全访问控制解决方案的安全框架。由于是Spring官方提供所以支持了很多的Spring的应用上下文配置,充分的利用了Spring IOC与ID、AOP等技术。为企业级应用提供了声明式的安全解决方案。减少了企业级安全解决方案的设计难度。当然也可以使用其他的优秀安全框架。
在很久之前,Spring Security是基于Spring AOP和Servlet过滤器来实现的安全框架,为什么这样设计呢?首先Servlet 是一个比较健全的服务器端体系,如果要在Servlet上提供一个安全控制策略,并不能直接去修改Servlet,也就是推翻Servlet来重新实现。那么基于这样一个场景,Spring AOP就提供了解决方案,在Servlet中注入切面,实现对于Servlet的增强处理。这样就提供了一个全面的安全解决方案,同时在Web请求和方法调用层面上都可以实现身份认证和授权处理,为J2EE提供了企业级安全解决方案。
Spring 官方为SpringBoot提供了集成Spring Security的组件包spring-boot-starter-security,方便集成Spring Security。
入门小例子
首先来做一个Web应用使用thymeleaf框架
第一步、添加对应的依赖
<?xml version="1.0" encoding="UTF-8"?>
<project xmlns="http://maven.apache.org/POM/4.0.0" xmlns:xsi="http://www.w3.org/2001/XMLSchema-instance"
         xsi:schemaLocation="http://maven.apache.org/POM/4.0.0 https://maven.apache.org/xsd/maven-4.0.0.xsd">
    <modelVersion>4.0.0</modelVersion>
    <parent>
        <groupId>org.springframework.boot</groupId>
        <artifactId>spring-boot-starter-parent</artifactId>
        <version>2.1.6.RELEASE</version>
        <relativePath/> <!-- lookup parent from repository -->
    </parent>
    <groupId>com.nh.security</groupId>
    <artifactId>security</artifactId>
    <version>0.0.1-SNAPSHOT</version>
    <name>security</name>
    <description>Demo project for Spring Boot</description>

    <properties>
        <java.version>1.8</java.version>
    </properties>

    <dependencies>
        <dependency>
            <groupId>org.springframework.boot</groupId>
            <artifactId>spring-boot-starter-web</artifactId>
        </dependency>
        <dependency>
            <groupId>org.springframework.boot</groupId>
            <artifactId>spring-boot-starter-thymeleaf</artifactId>
        </dependency>

        <dependency>
            <groupId>org.springframework.boot</groupId>
            <artifactId>spring-boot-starter-test</artifactId>
            <scope>test</scope>
        </dependency>
    </dependencies>

    <build>
        <plugins>
            <plugin>
                <groupId>org.springframework.boot</groupId>
                <artifactId>spring-boot-maven-plugin</artifactId>
            </plugin>
        </plugins>
    </build>

</project>
第二步、编写配置文件
取消thymeleaf的缓存其他的可以先按照默认的配置。当然如果想配置也可以进行配置
spring.thymeleaf.prefix=classpath:/pages/
spring.thymeleaf.check-template-location=false
spring.thymeleaf.servlet.content-type=text/html
spring.thymeleaf.mode=HTML5
spring.thymeleaf.suffix=.html
spring.thymeleaf.cache=false
这里只配置一个配置
spring.thymeleaf.cache=false
第三步、创建页面
在之前的博客中说过使用了thymeleaf模板引擎之后如果不配置默认在resources/templates目录下面进行首页的设置。不适用任何框架的时候在public目录下面,这里由于使用了thymeleaf模板所以在resources/templates路径下创建index.html文件
<!DOCTYPE html>
<html lang="en" xmlns:th="http://www.thymeleaf.org">
<head>
<meta charset="UTF-8">
<title>首页</title>
</head>
<body>
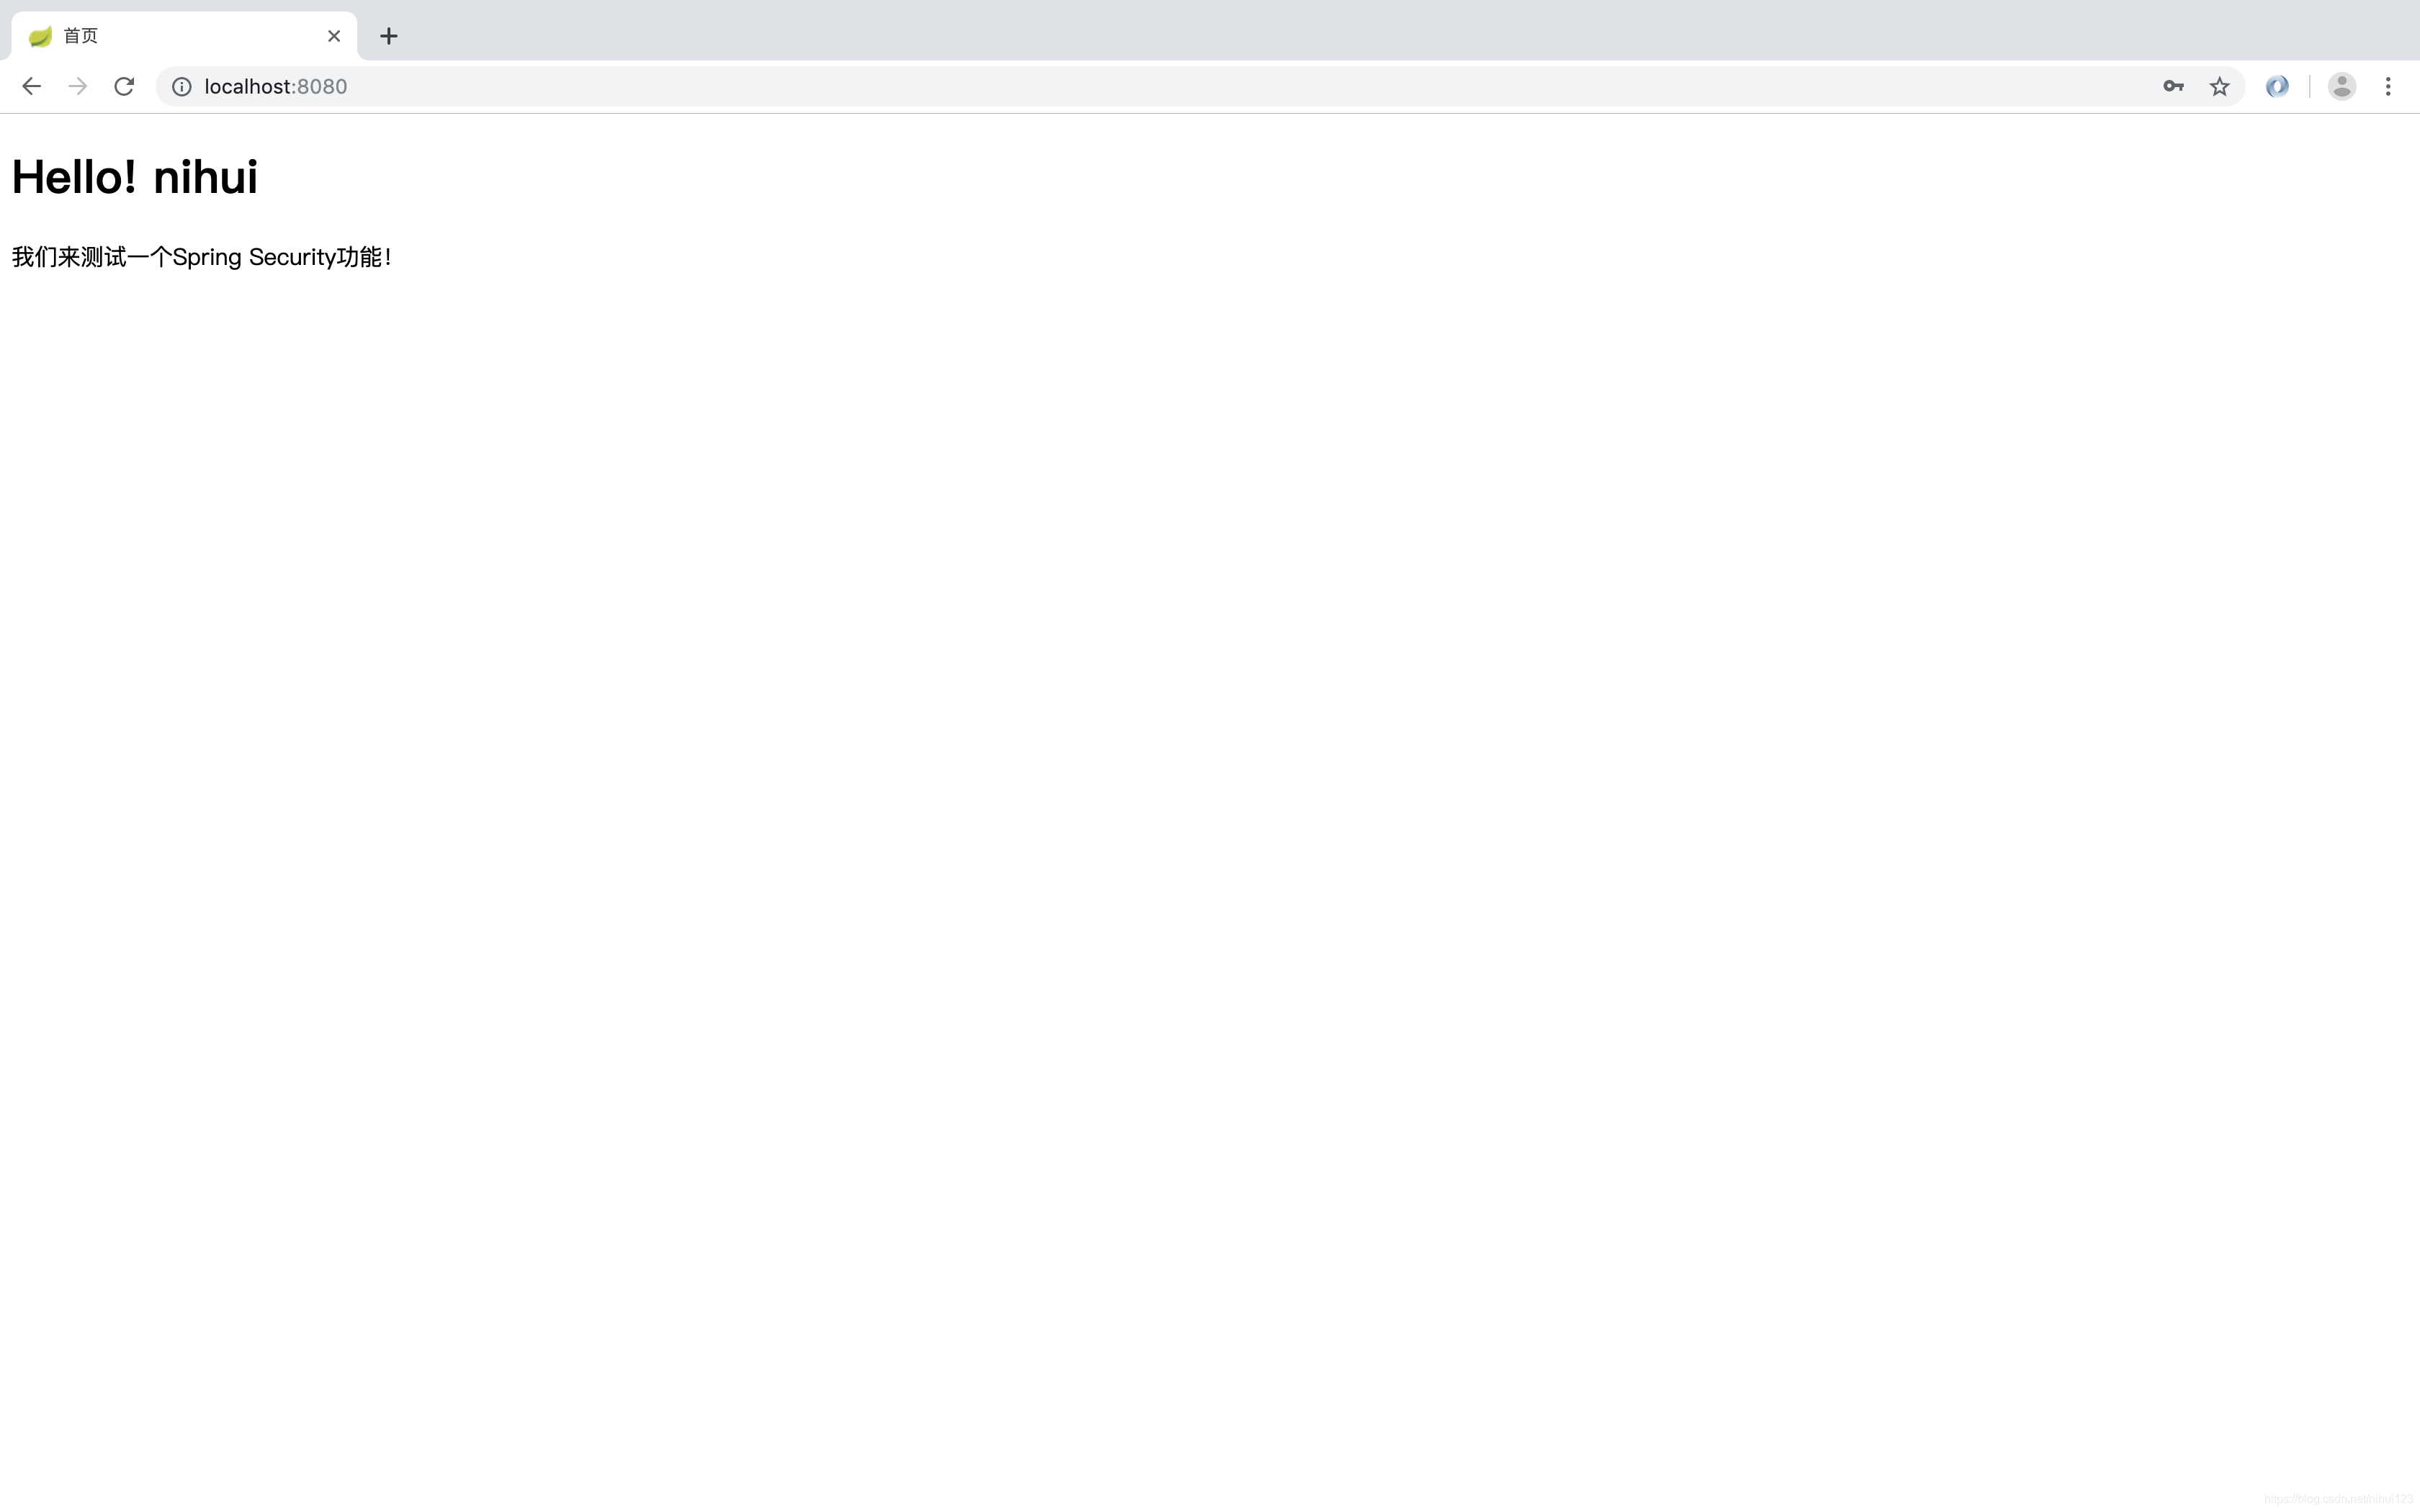
<h1>Hello! nihui</h1>
<p>我们来测试一个Spring Security功能!</p>
</body>
</html>
第四步、创建页面访问接口
这里的页面访问接口可以使用SpringMVC 拦截器来实现资源请求映射,也可以通过下面这种方式来实现。
@Controller
public class PageController {
    @RequestMapping("/")
    public String index(){
        return "index";
    }
}
第五步、启动项目测试效果
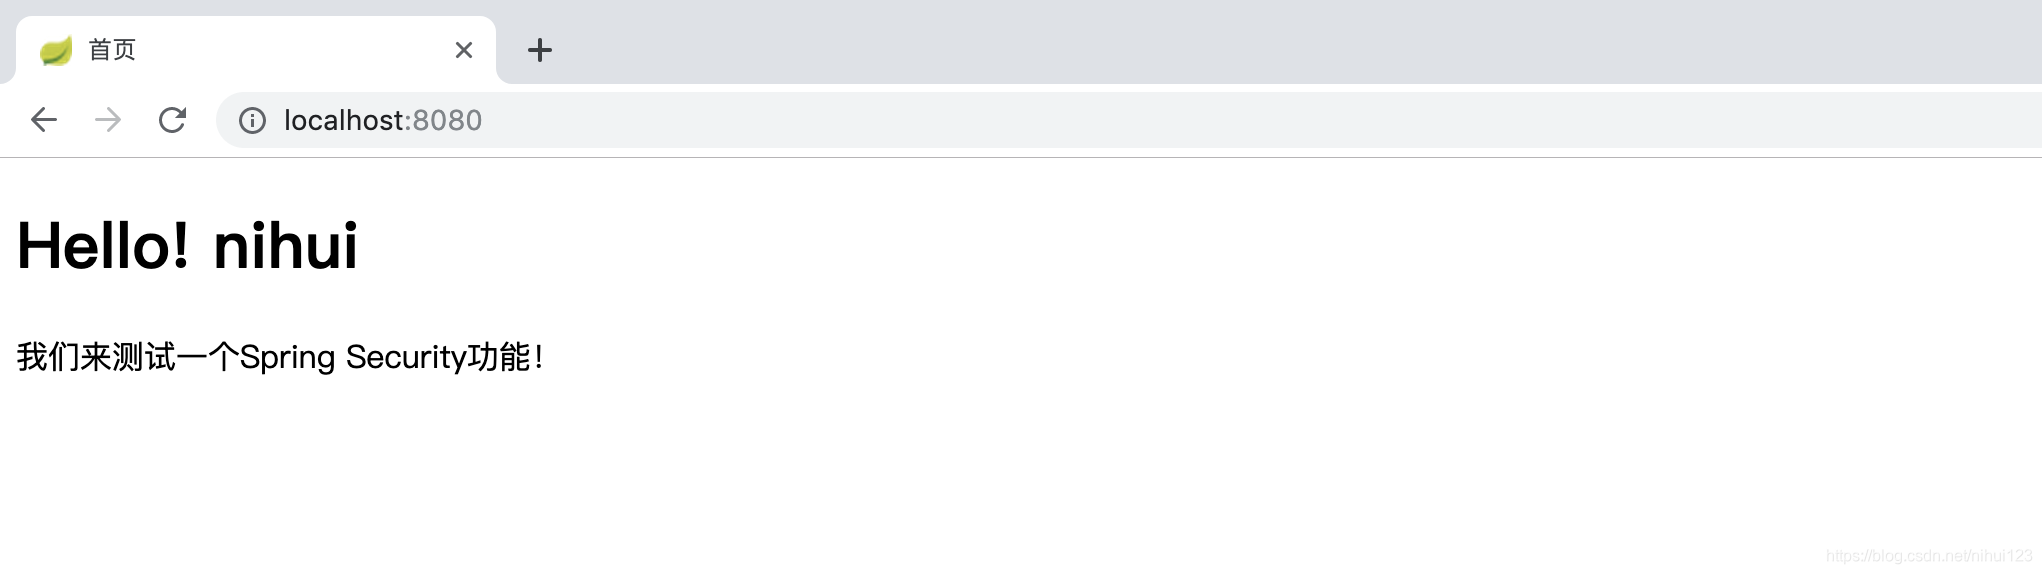
到此就实现了一个页面的请求展示的Web应用。接下来就是实现与Spring Security的整合操作。
与Spring Security整合
第一步、添加Spring Security的依赖
<dependency>
     <groupId>org.springframework.boot</groupId>
     <artifactId>spring-boot-starter-security</artifactId>
</dependency>
添加完成之后可以重新启动刚才的项目会发现控制台输出与之前不一样了
  .   ____          _            __ _ _
 /\\ / ___'_ __ _ _(_)_ __  __ _ \ \ \ \
( ( )\___ | '_ | '_| | '_ \/ _` | \ \ \ \
 \\/  ___)| |_)| | | | | || (_| |  ) ) ) )
  '  |____| .__|_| |_|_| |_\__, | / / / /
 =========|_|==============|___/=/_/_/_/
 :: Spring Boot ::        (v2.1.6.RELEASE)

2019-09-22 20:55:01.647  INFO 3779 --- [           main] com.nh.security.SecurityApplication      : Starting SecurityApplication on nihuideMBP.lan with PID 3779 (/Users/nihui/Documents/IDEAProject/SpringBoot/springboot-24-springsecurity/target/classes started by nihui in /Users/nihui/Documents/IDEAProject/SpringBoot/springboot-24-springsecurity)
2019-09-22 20:55:01.649  INFO 3779 --- [           main] com.nh.security.SecurityApplication      : No active profile set, falling back to default profiles: default
2019-09-22 20:55:02.257  INFO 3779 --- [           main] o.s.b.w.embedded.tomcat.TomcatWebServer  : Tomcat initialized with port(s): 8080 (http)
2019-09-22 20:55:02.273  INFO 3779 --- [           main] o.apache.catalina.core.StandardService   : Starting service [Tomcat]
2019-09-22 20:55:02.273  INFO 3779 --- [           main] org.apache.catalina.core.StandardEngine  : Starting Servlet engine: [Apache Tomcat/9.0.21]
2019-09-22 20:55:02.329  INFO 3779 --- [           main] o.a.c.c.C.[Tomcat].[localhost].[/]       : Initializing Spring embedded WebApplicationContext
2019-09-22 20:55:02.329  INFO 3779 --- [           main] o.s.web.context.ContextLoader            : Root WebApplicationContext: initialization completed in 652 ms
2019-09-22 20:55:02.490  INFO 3779 --- [           main] o.s.s.concurrent.ThreadPoolTaskExecutor  : Initializing ExecutorService 'applicationTaskExecutor'
2019-09-22 20:55:02.571  INFO 3779 --- [           main] o.s.b.a.w.s.WelcomePageHandlerMapping    : Adding welcome page template: index
2019-09-22 20:55:02.633  INFO 3779 --- [           main] .s.s.UserDetailsServiceAutoConfiguration :

Using generated security password: d4ba2efe-4fbc-4833-8d18-bf356806ca7a

2019-09-22 20:55:02.682  INFO 3779 --- [           main] o.s.s.web.DefaultSecurityFilterChain     : Creating filter chain: any request, [org.springframework.security.web.context.request.async.WebAsyncManagerIntegrationFilter@52fc5eb1, org.springframework.security.web.context.SecurityContextPersistenceFilter@749f539e, org.springframework.security.web.header.HeaderWriterFilter@4fcc0416, org.springframework.security.web.csrf.CsrfFilter@1e63d216, org.springframework.security.web.authentication.logout.LogoutFilter@5f14a673, org.springframework.security.web.authentication.UsernamePasswordAuthenticationFilter@2cfbeac4, org.springframework.security.web.authentication.ui.DefaultLoginPageGeneratingFilter@27aae97b, org.springframework.security.web.authentication.ui.DefaultLogoutPageGeneratingFilter@7a639ec5, org.springframework.security.web.authentication.www.BasicAuthenticationFilter@41f35f7c, org.springframework.security.web.savedrequest.RequestCacheAwareFilter@551de37d, org.springframework.security.web.servletapi.SecurityContextHolderAwareRequestFilter@bb095, org.springframework.security.web.authentication.AnonymousAuthenticationFilter@14151bc5, org.springframework.security.web.session.SessionManagementFilter@1473b8c0, org.springframework.security.web.access.ExceptionTranslationFilter@56de6d6b, org.springframework.security.web.access.intercept.FilterSecurityInterceptor@41aaedaa]
2019-09-22 20:55:02.736  INFO 3779 --- [           main] o.s.b.w.embedded.tomcat.TomcatWebServer  : Tomcat started on port(s): 8080 (http) with context path ''
2019-09-22 20:55:02.739  INFO 3779 --- [           main] com.nh.security.SecurityApplication      : Started SecurityApplication in 1.291 seconds (JVM running for 1.63)
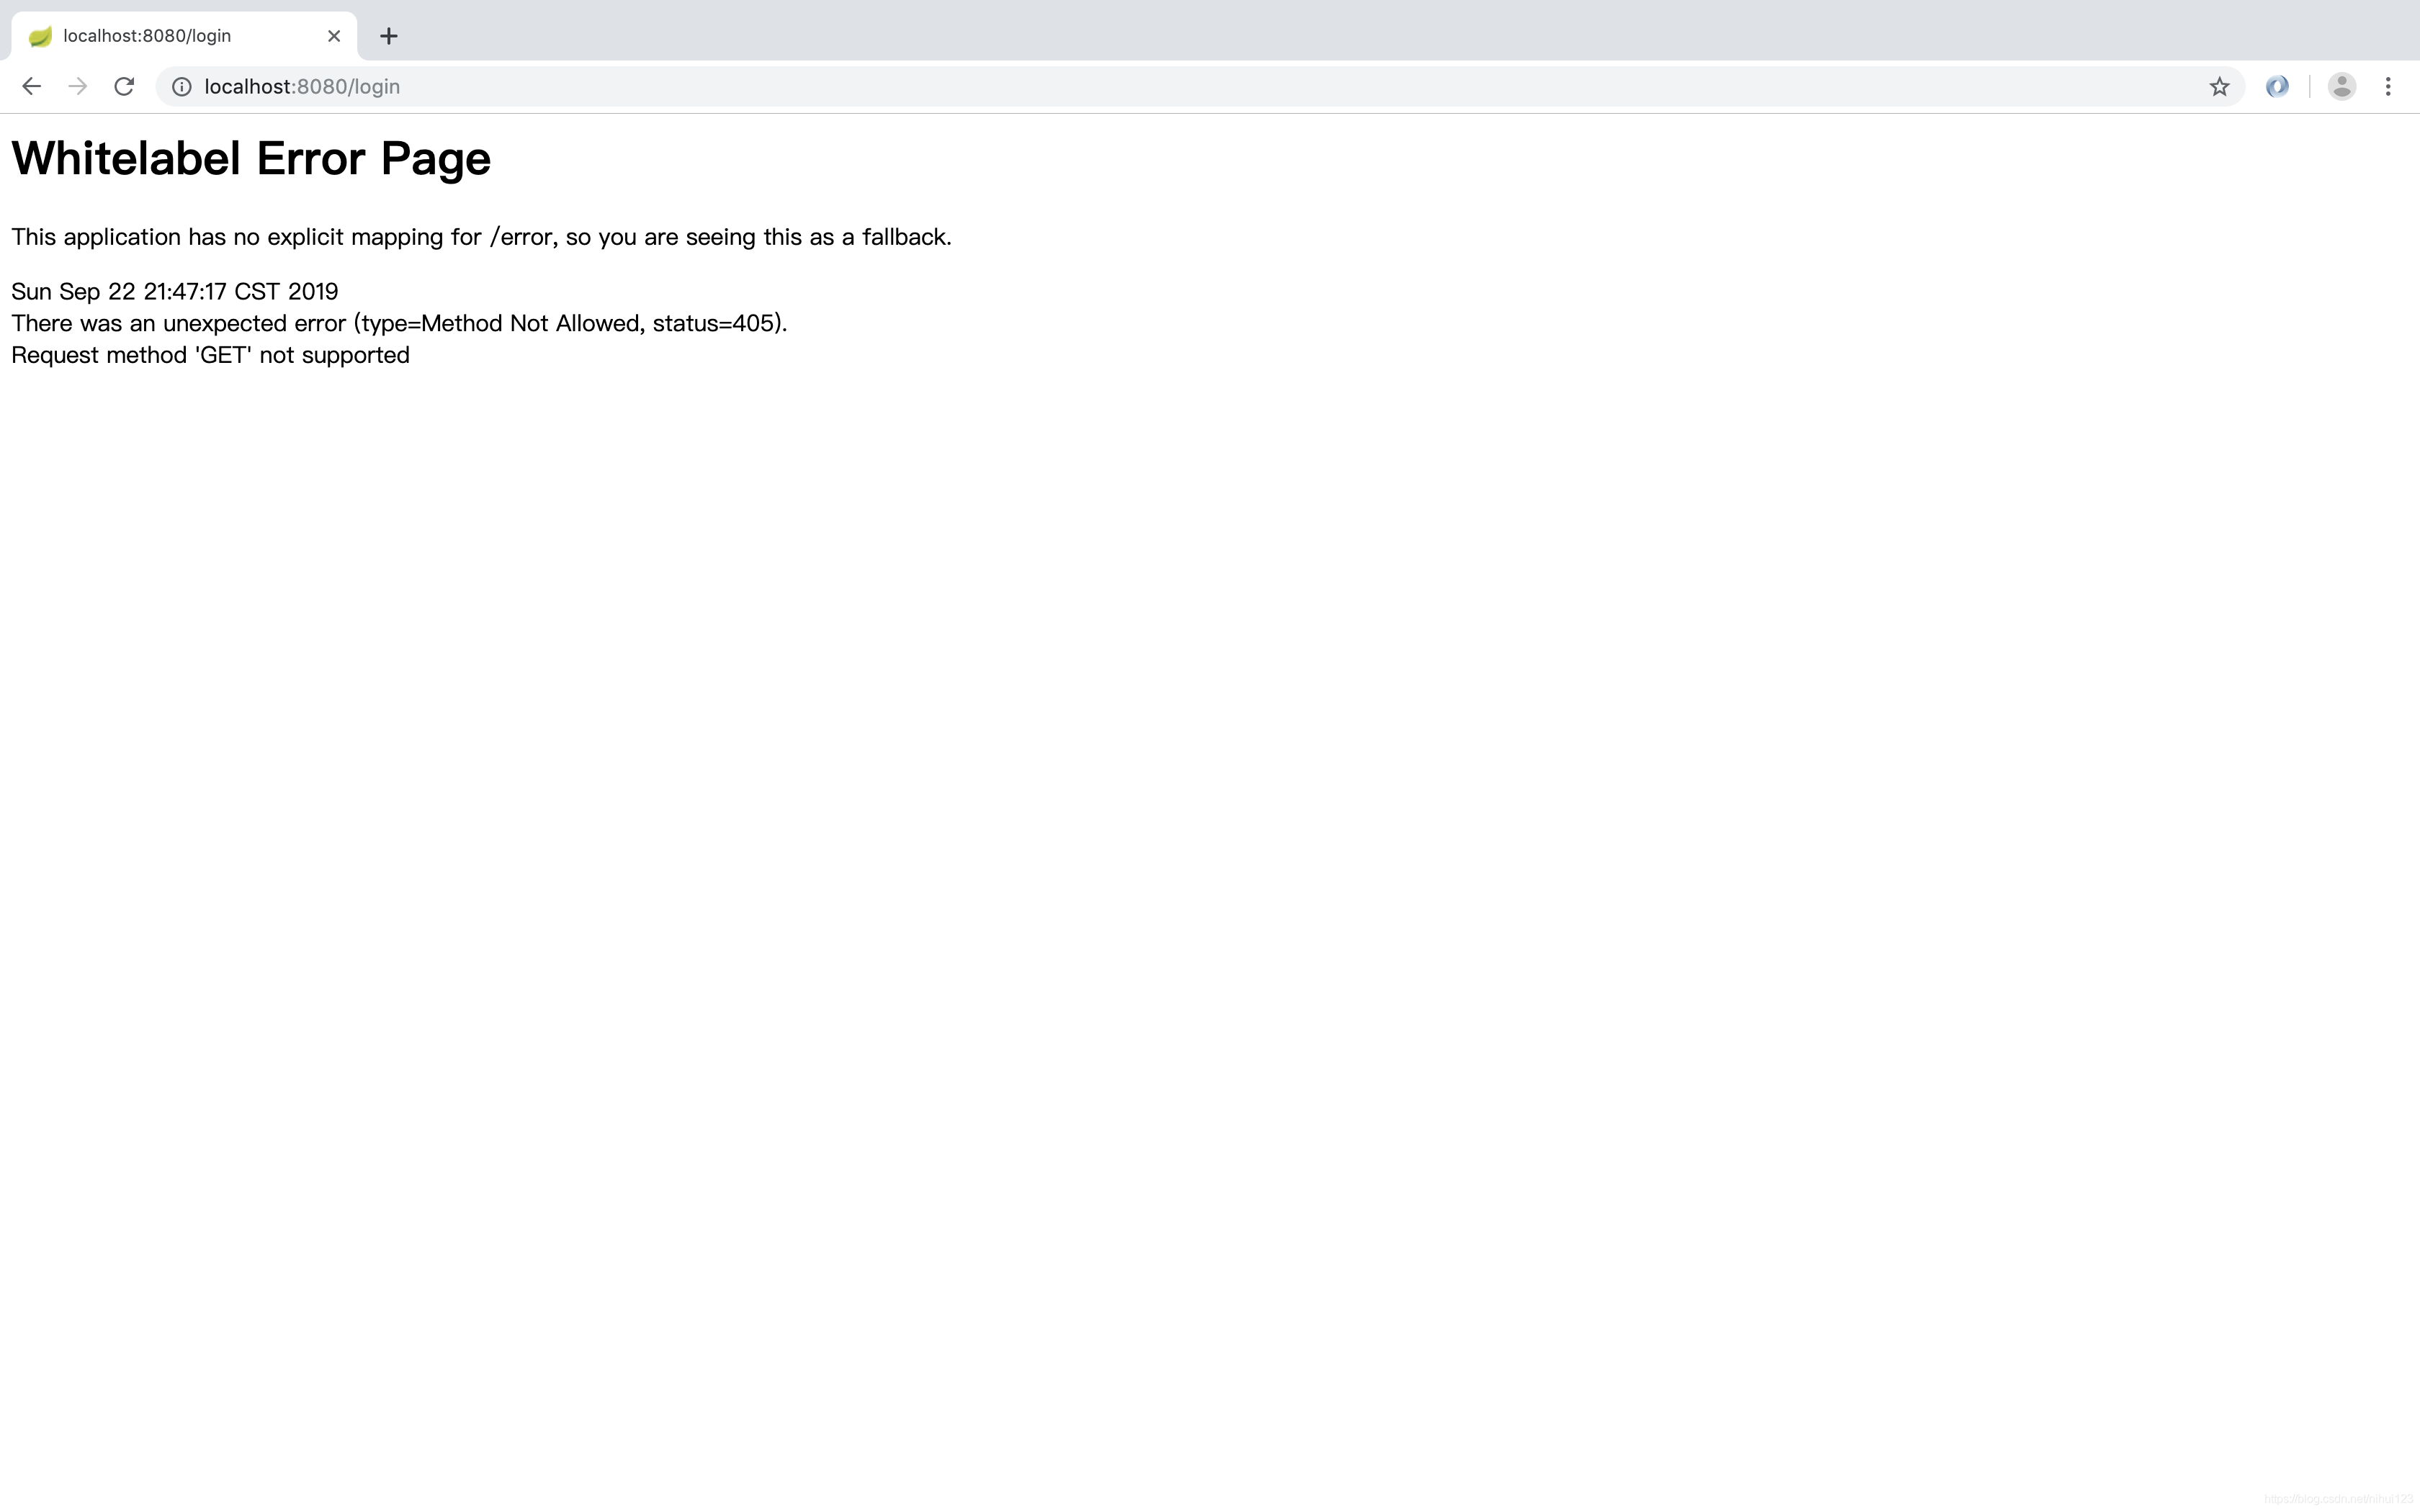
继续访问http://localhost:8080/ 会发现如下的现象
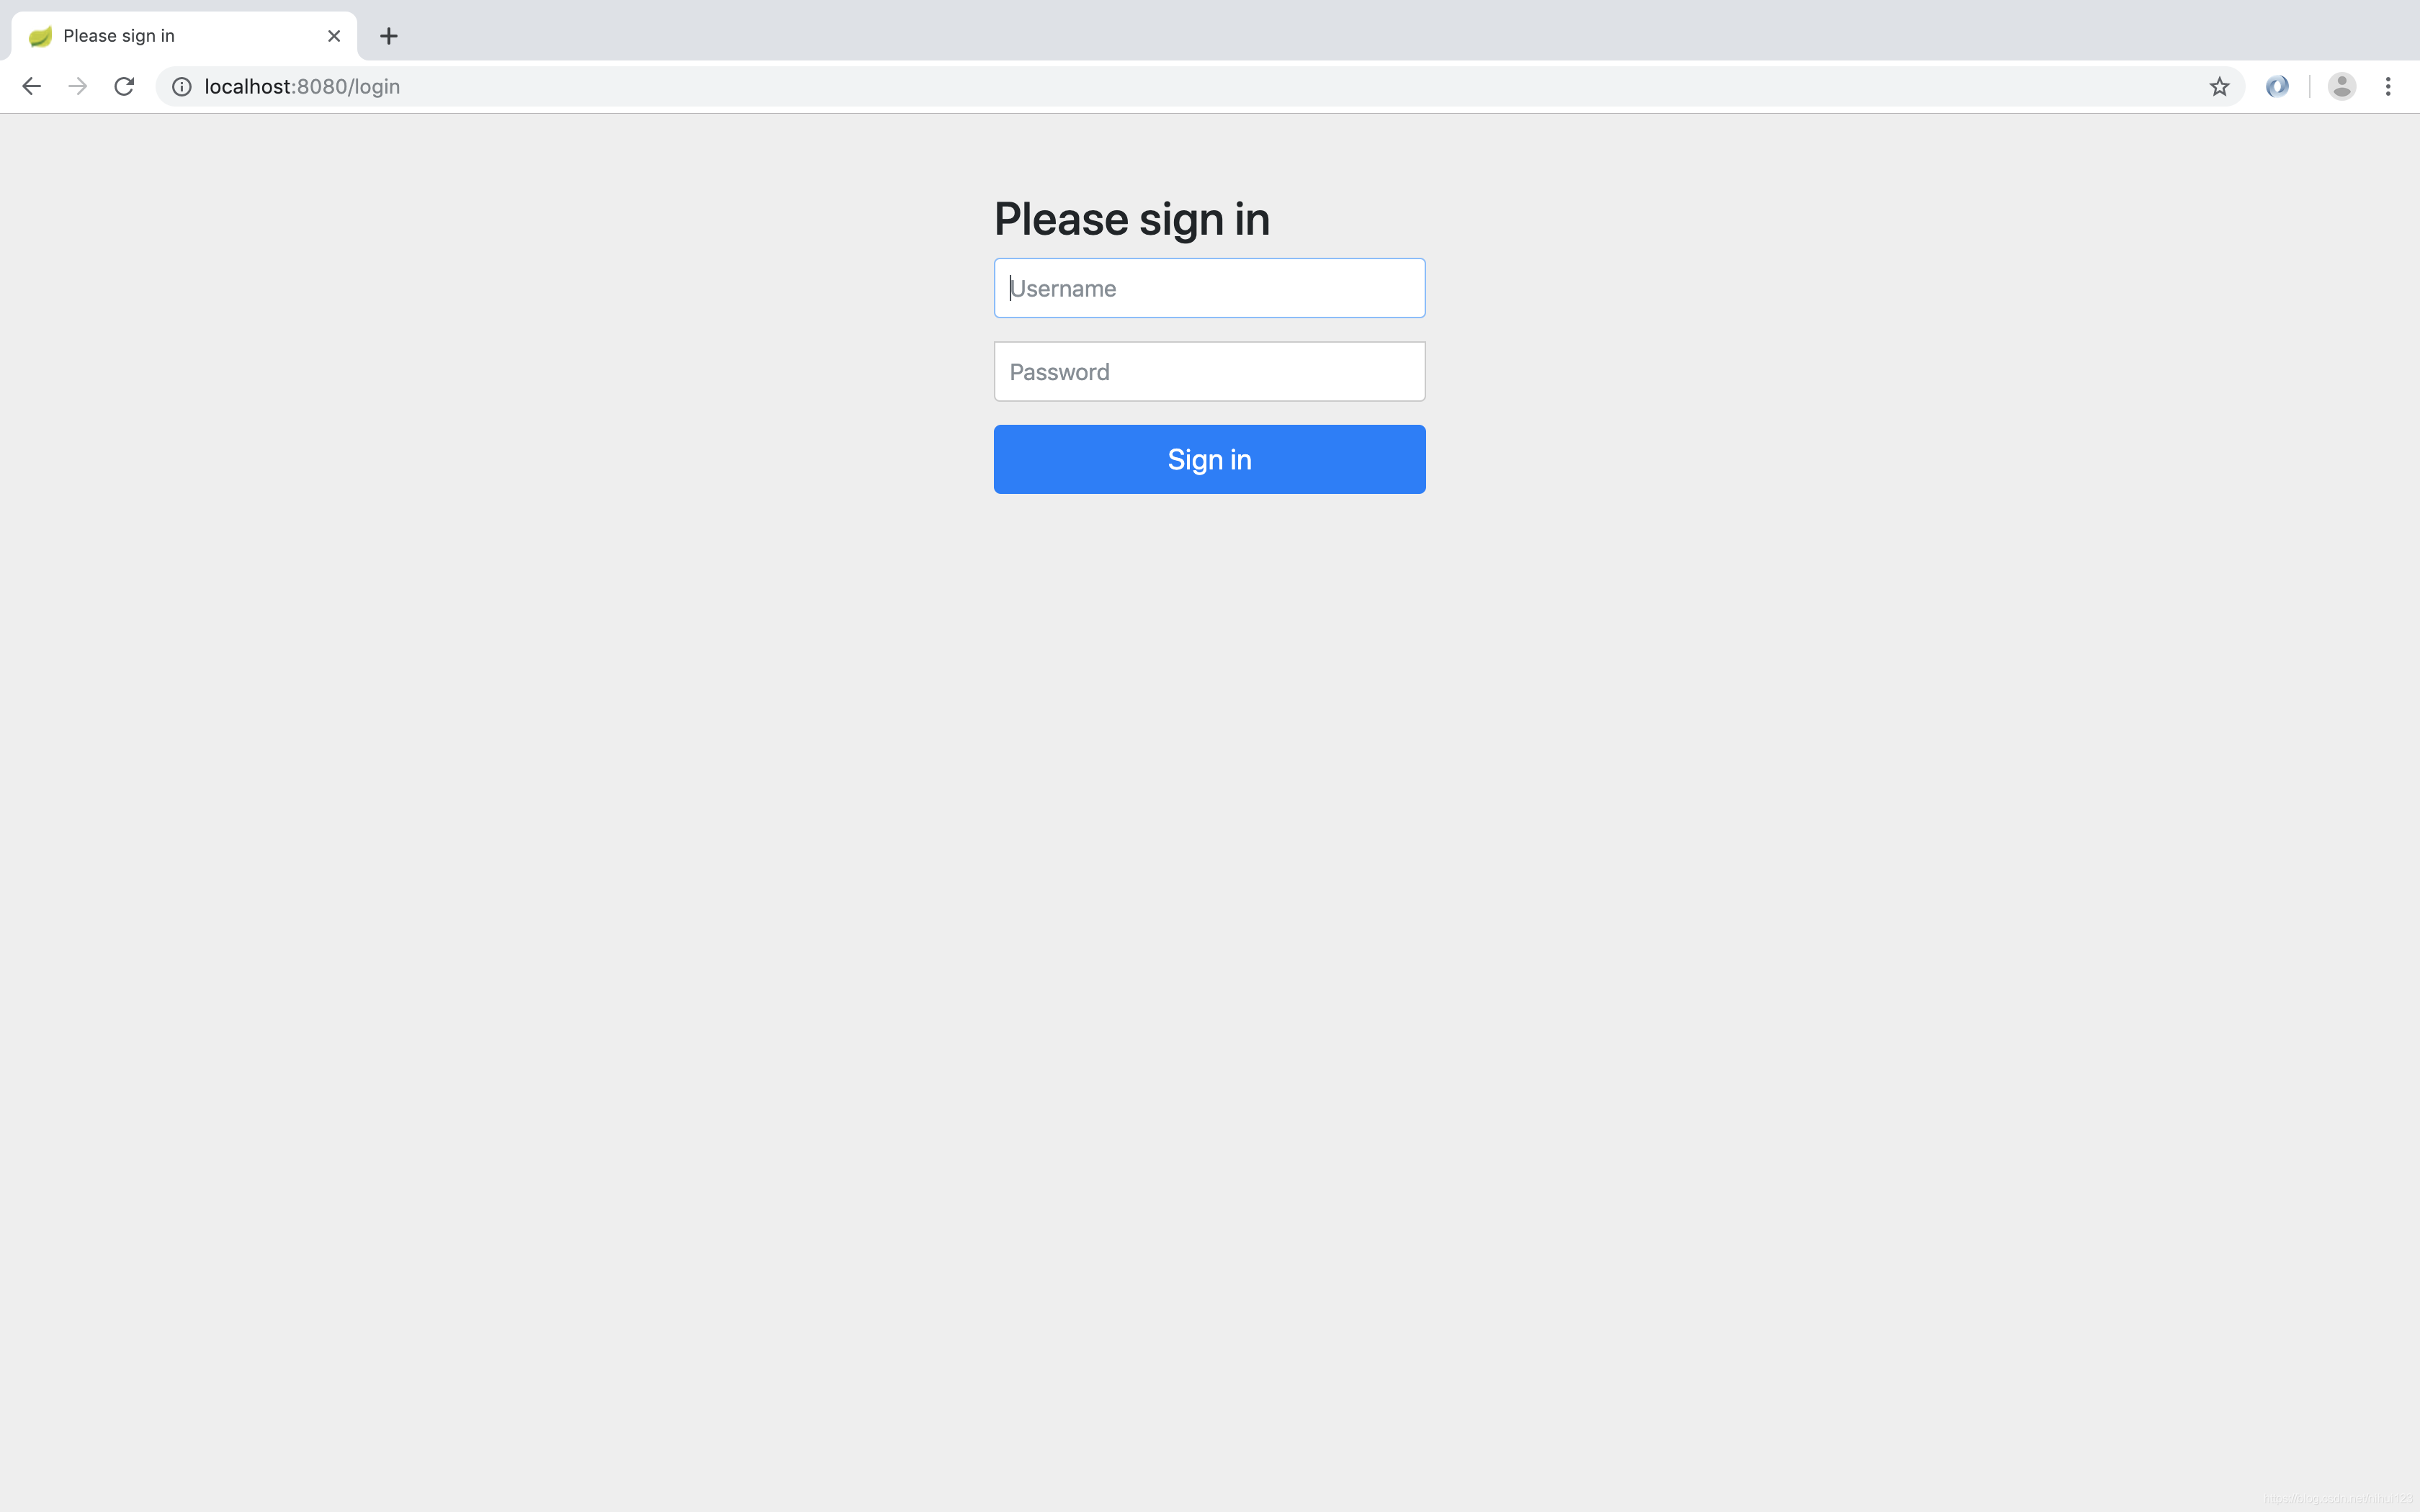
这也就是说SpringBoot整合SpringSecurity之后会自动给所有的请求都做登陆保护,那么这个登陆的用户名和密码是什么呢?这个就要从上面控制台去查找可以发现如下的一段输出
Using generated security password: d4ba2efe-4fbc-4833-8d18-bf356806ca7a
那么这是登陆的密码,用户名是什么呢?
简单分析
2019-09-22 20:55:02.490  INFO 3779 --- [           main] o.s.s.concurrent.ThreadPoolTaskExecutor  : Initializing ExecutorService 'applicationTaskExecutor'
2019-09-22 20:55:02.571  INFO 3779 --- [           main] o.s.b.a.w.s.WelcomePageHandlerMapping    : Adding welcome page template: index
2019-09-22 20:55:02.633  INFO 3779 --- [           main] .s.s.UserDetailsServiceAutoConfiguration :
会发现上面输入信息中提示用户名和密码是通过UserDetailsServiceAutoConfiguration类进行配置的可以对这个类进行搜索。Ctrl+N或者是Command + N 。
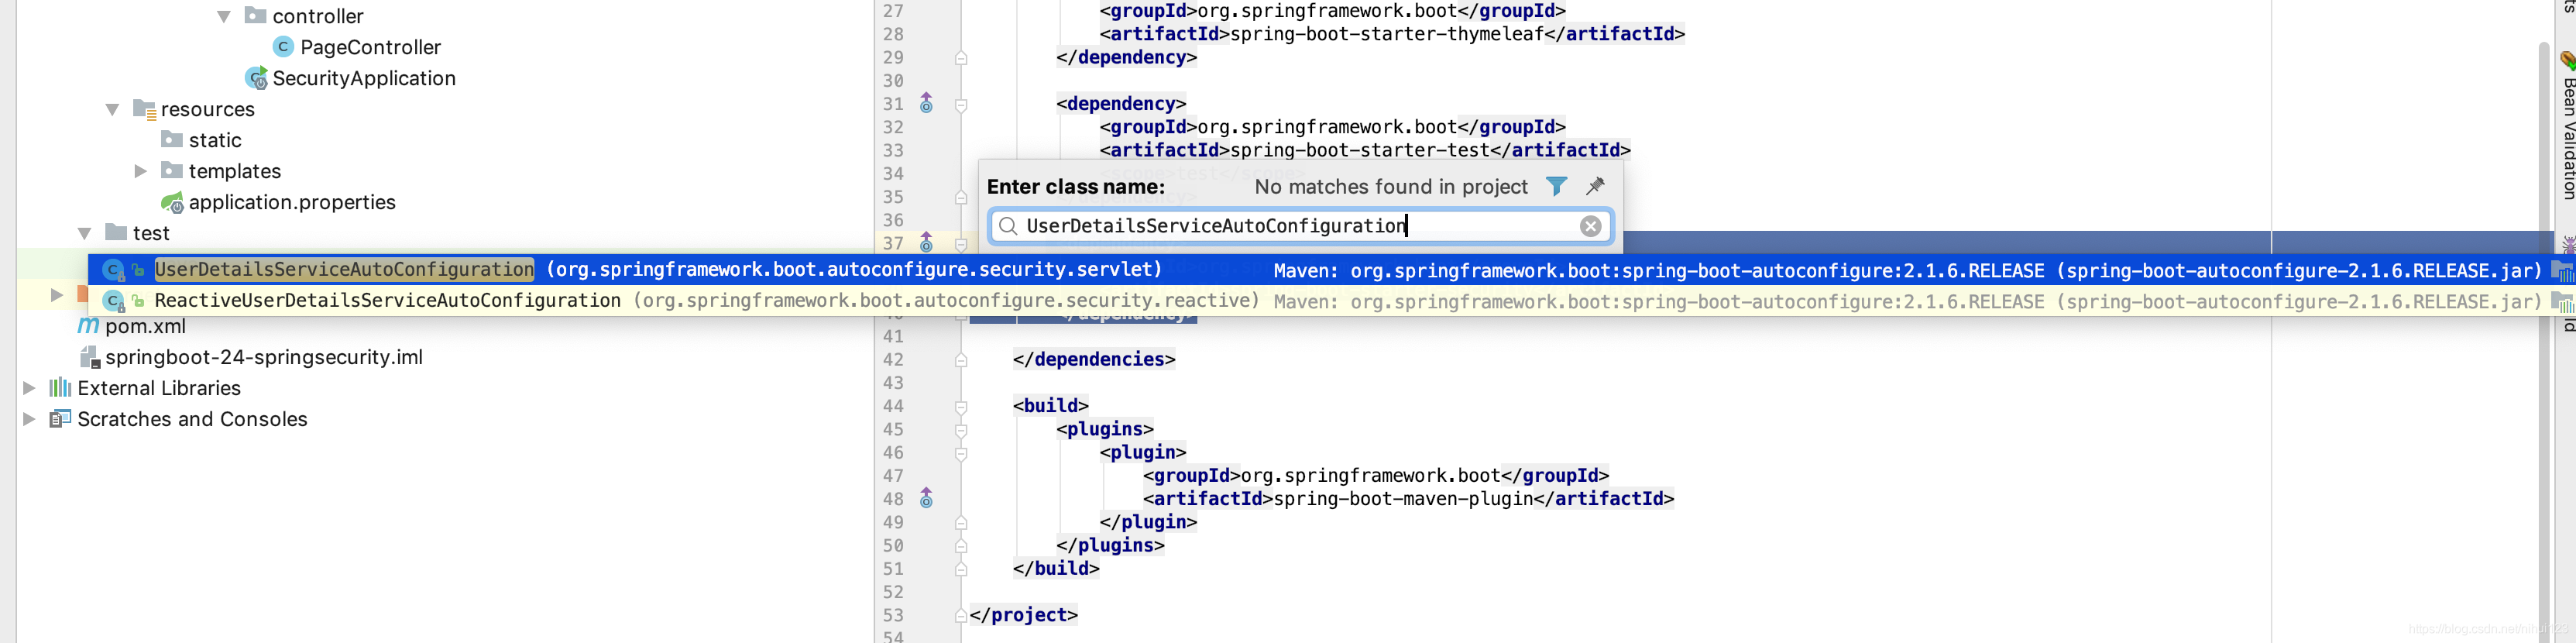
进入其中会看到如下的一些内容
@Configuration
@ConditionalOnClass(AuthenticationManager.class)
@ConditionalOnBean(ObjectPostProcessor.class)
@ConditionalOnMissingBean({ AuthenticationManager.class, AuthenticationProvider.class, UserDetailsService.class })
public class UserDetailsServiceAutoConfiguration {

	private static final String NOOP_PASSWORD_PREFIX = "{noop}";

	private static final Pattern PASSWORD_ALGORITHM_PATTERN = Pattern.compile("^\\{.+}.*$");

	private static final Log logger = LogFactory.getLog(UserDetailsServiceAutoConfiguration.class);

	@Bean
	@ConditionalOnMissingBean(
			type = "org.springframework.security.oauth2.client.registration.ClientRegistrationRepository")
	@Lazy
	public InMemoryUserDetailsManager inMemoryUserDetailsManager(SecurityProperties properties,
			ObjectProvider<PasswordEncoder> passwordEncoder) {
		SecurityProperties.User user = properties.getUser();
		List<String> roles = user.getRoles();
		return new InMemoryUserDetailsManager(
				User.withUsername(user.getName()).password(getOrDeducePassword(user, passwordEncoder.getIfAvailable()))
						.roles(StringUtils.toStringArray(roles)).build());
	}

	private String getOrDeducePassword(SecurityProperties.User user, PasswordEncoder encoder) {
		String password = user.getPassword();
		if (user.isPasswordGenerated()) {
			logger.info(String.format("%n%nUsing generated security password: %s%n", user.getPassword()));
		}
		if (encoder != null || PASSWORD_ALGORITHM_PATTERN.matcher(password).matches()) {
			return password;
		}
		return NOOP_PASSWORD_PREFIX + password;
	}

}
其中getOrDeducePassword方法提供了一个用户名了密码的配置,而这里使用了一个User对象,进入这个User对象中。
public static class User {

		/**
		 * Default user name.
		 */
		private String name = "user";

		/**
		 * Password for the default user name.
		 */
		private String password = UUID.randomUUID().toString();

		/**
		 * Granted roles for the default user name.
		 */
		private List<String> roles = new ArrayList<>();

		private boolean passwordGenerated = true;

		public String getName() {
			return this.name;
		}

		public void setName(String name) {
			this.name = name;
		}

		public String getPassword() {
			return this.password;
		}

		public void setPassword(String password) {
			if (!StringUtils.hasLength(password)) {
				return;
			}
			this.passwordGenerated = false;
			this.password = password;
		}

		public List<String> getRoles() {
			return this.roles;
		}

		public void setRoles(List<String> roles) {
			this.roles = new ArrayList<>(roles);
		}

		public boolean isPasswordGenerated() {
			return this.passwordGenerated;
		}

	}
根据User类中提供的信息可以看到passwordGenerated的默认策略是true,当用户被设置密码的时候更新为false,也就是说没有设置密码的使用默认生成密码,设置密码的时候使用设置好的密码,默认的用户名是user,也就是说SpringSecurity提供了用户名密码配置策略。下面就对用户名和密码进行配置。
spring.security.user.name=admin
spring.security.user.password=admin
spring.security.user.roles=admin
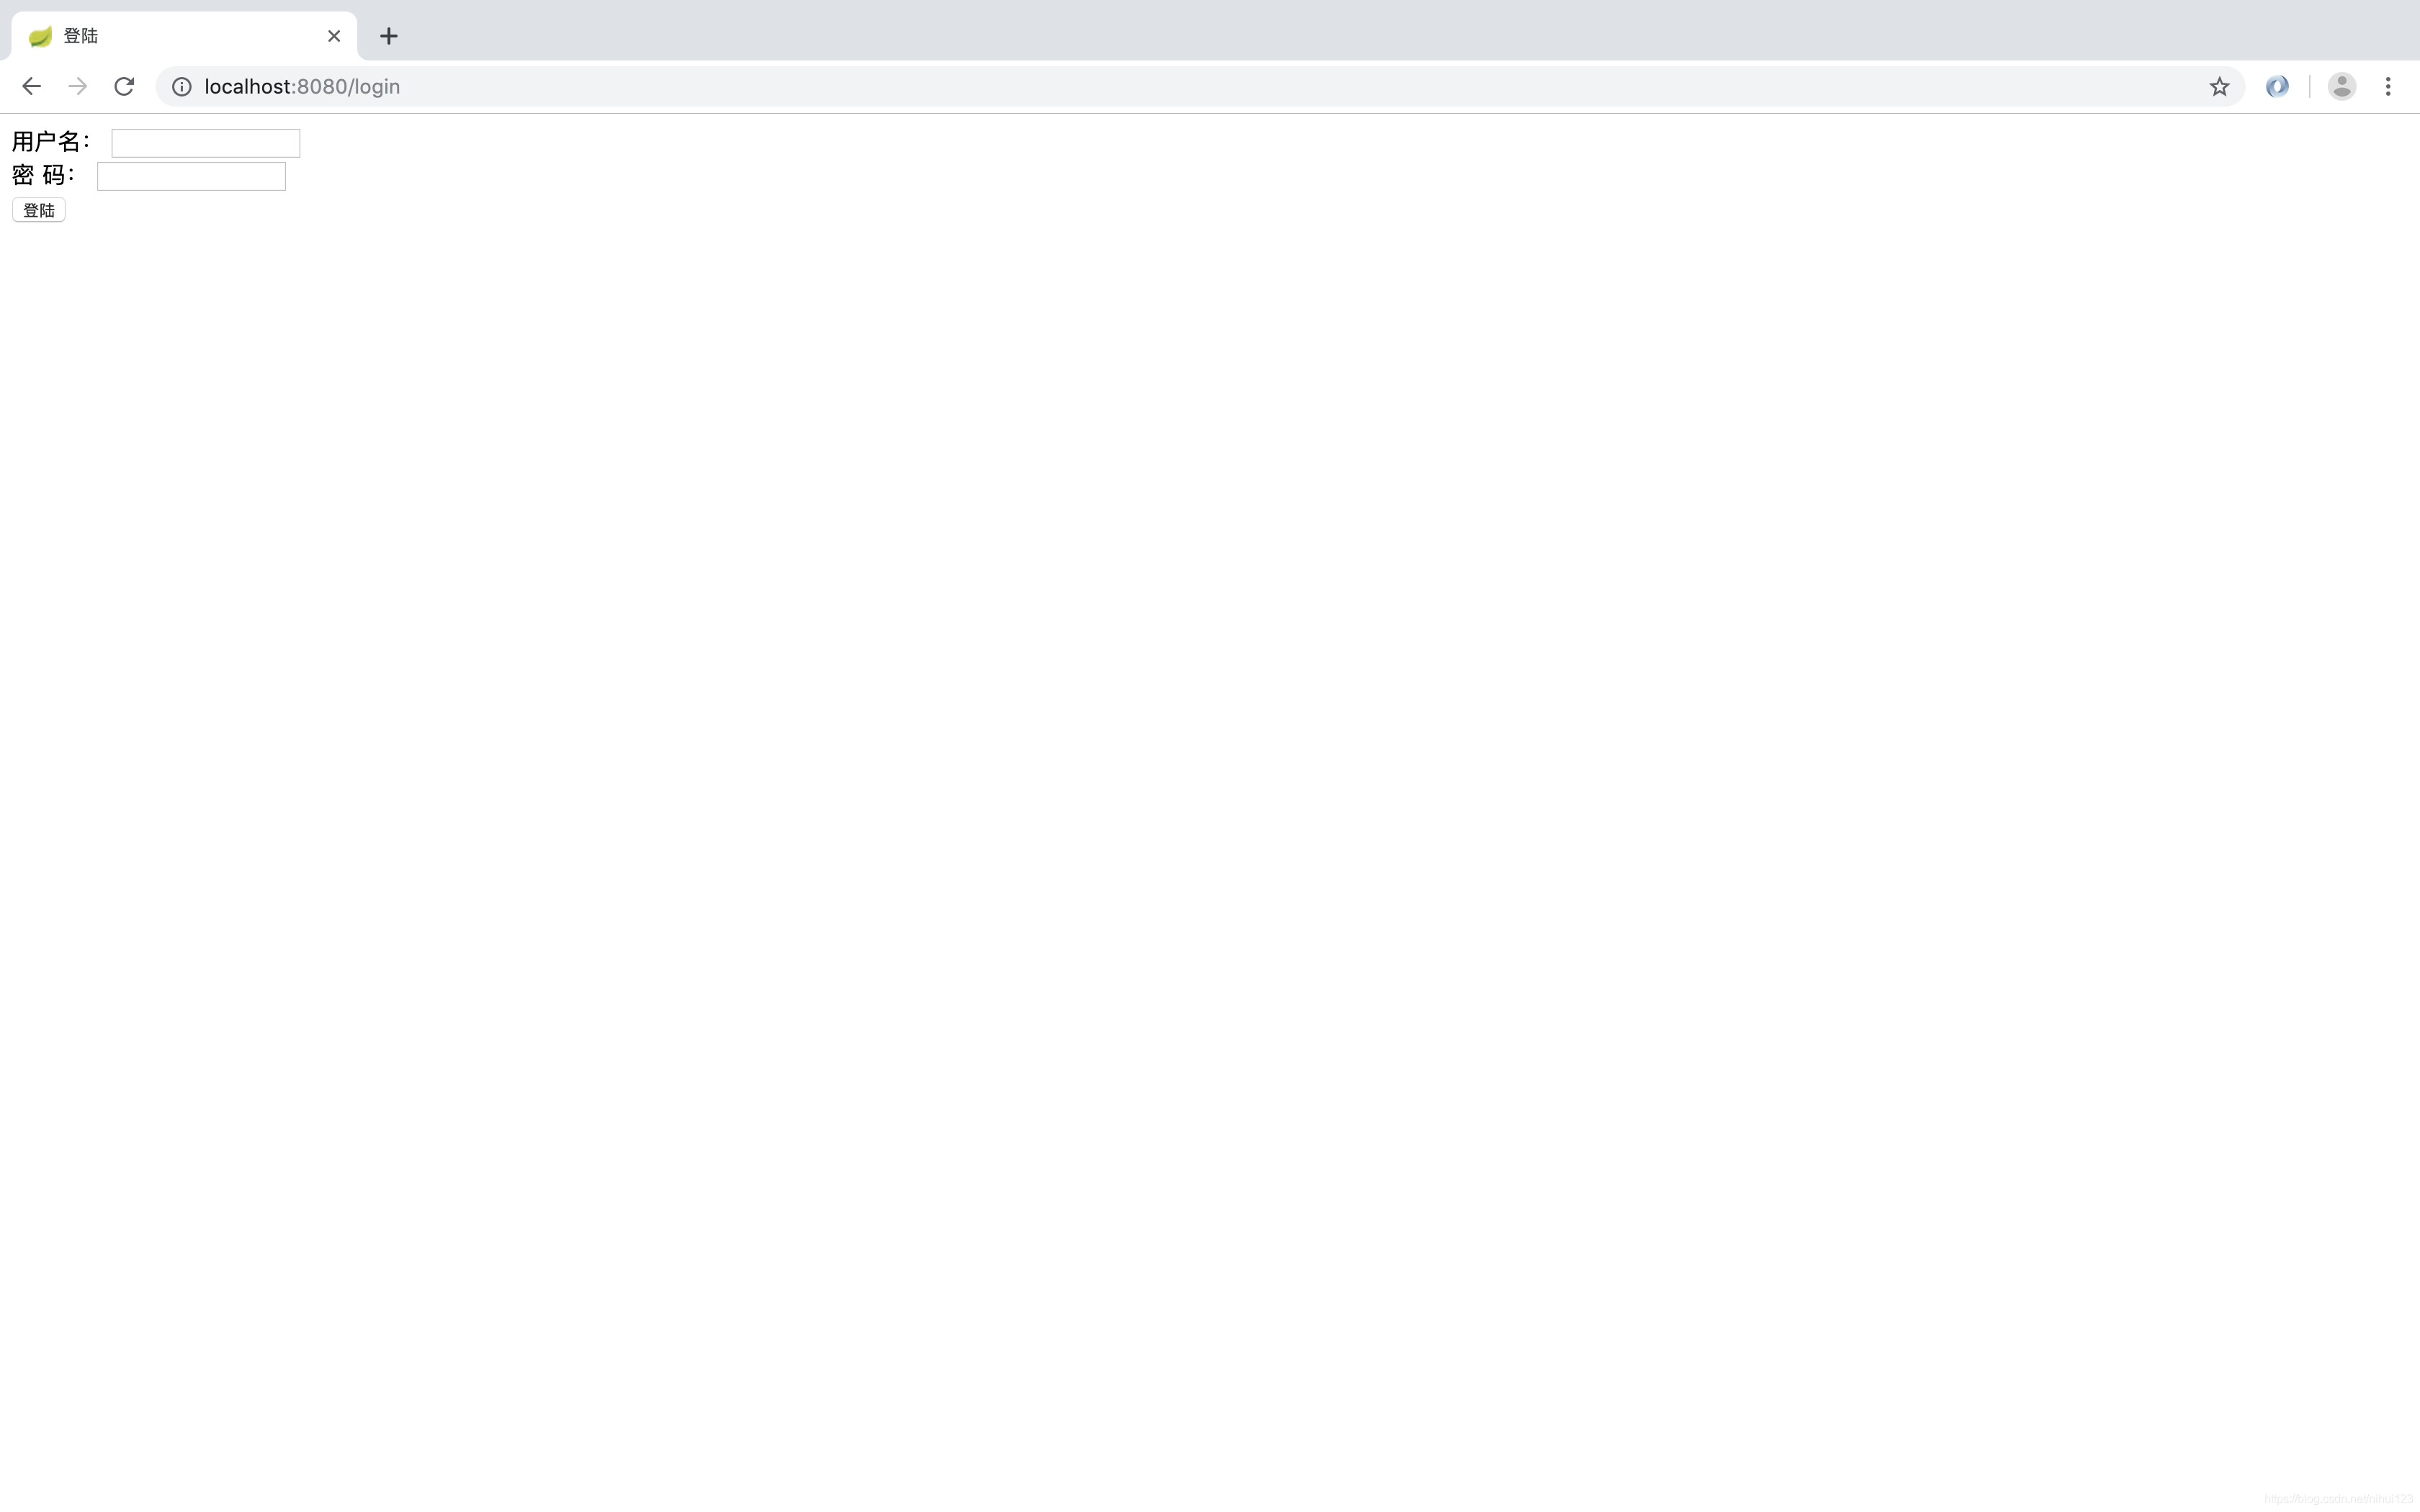
配置完成之后再重新启动应用,访问http://localhost:8080/ 输入配置好的用户名和密码。
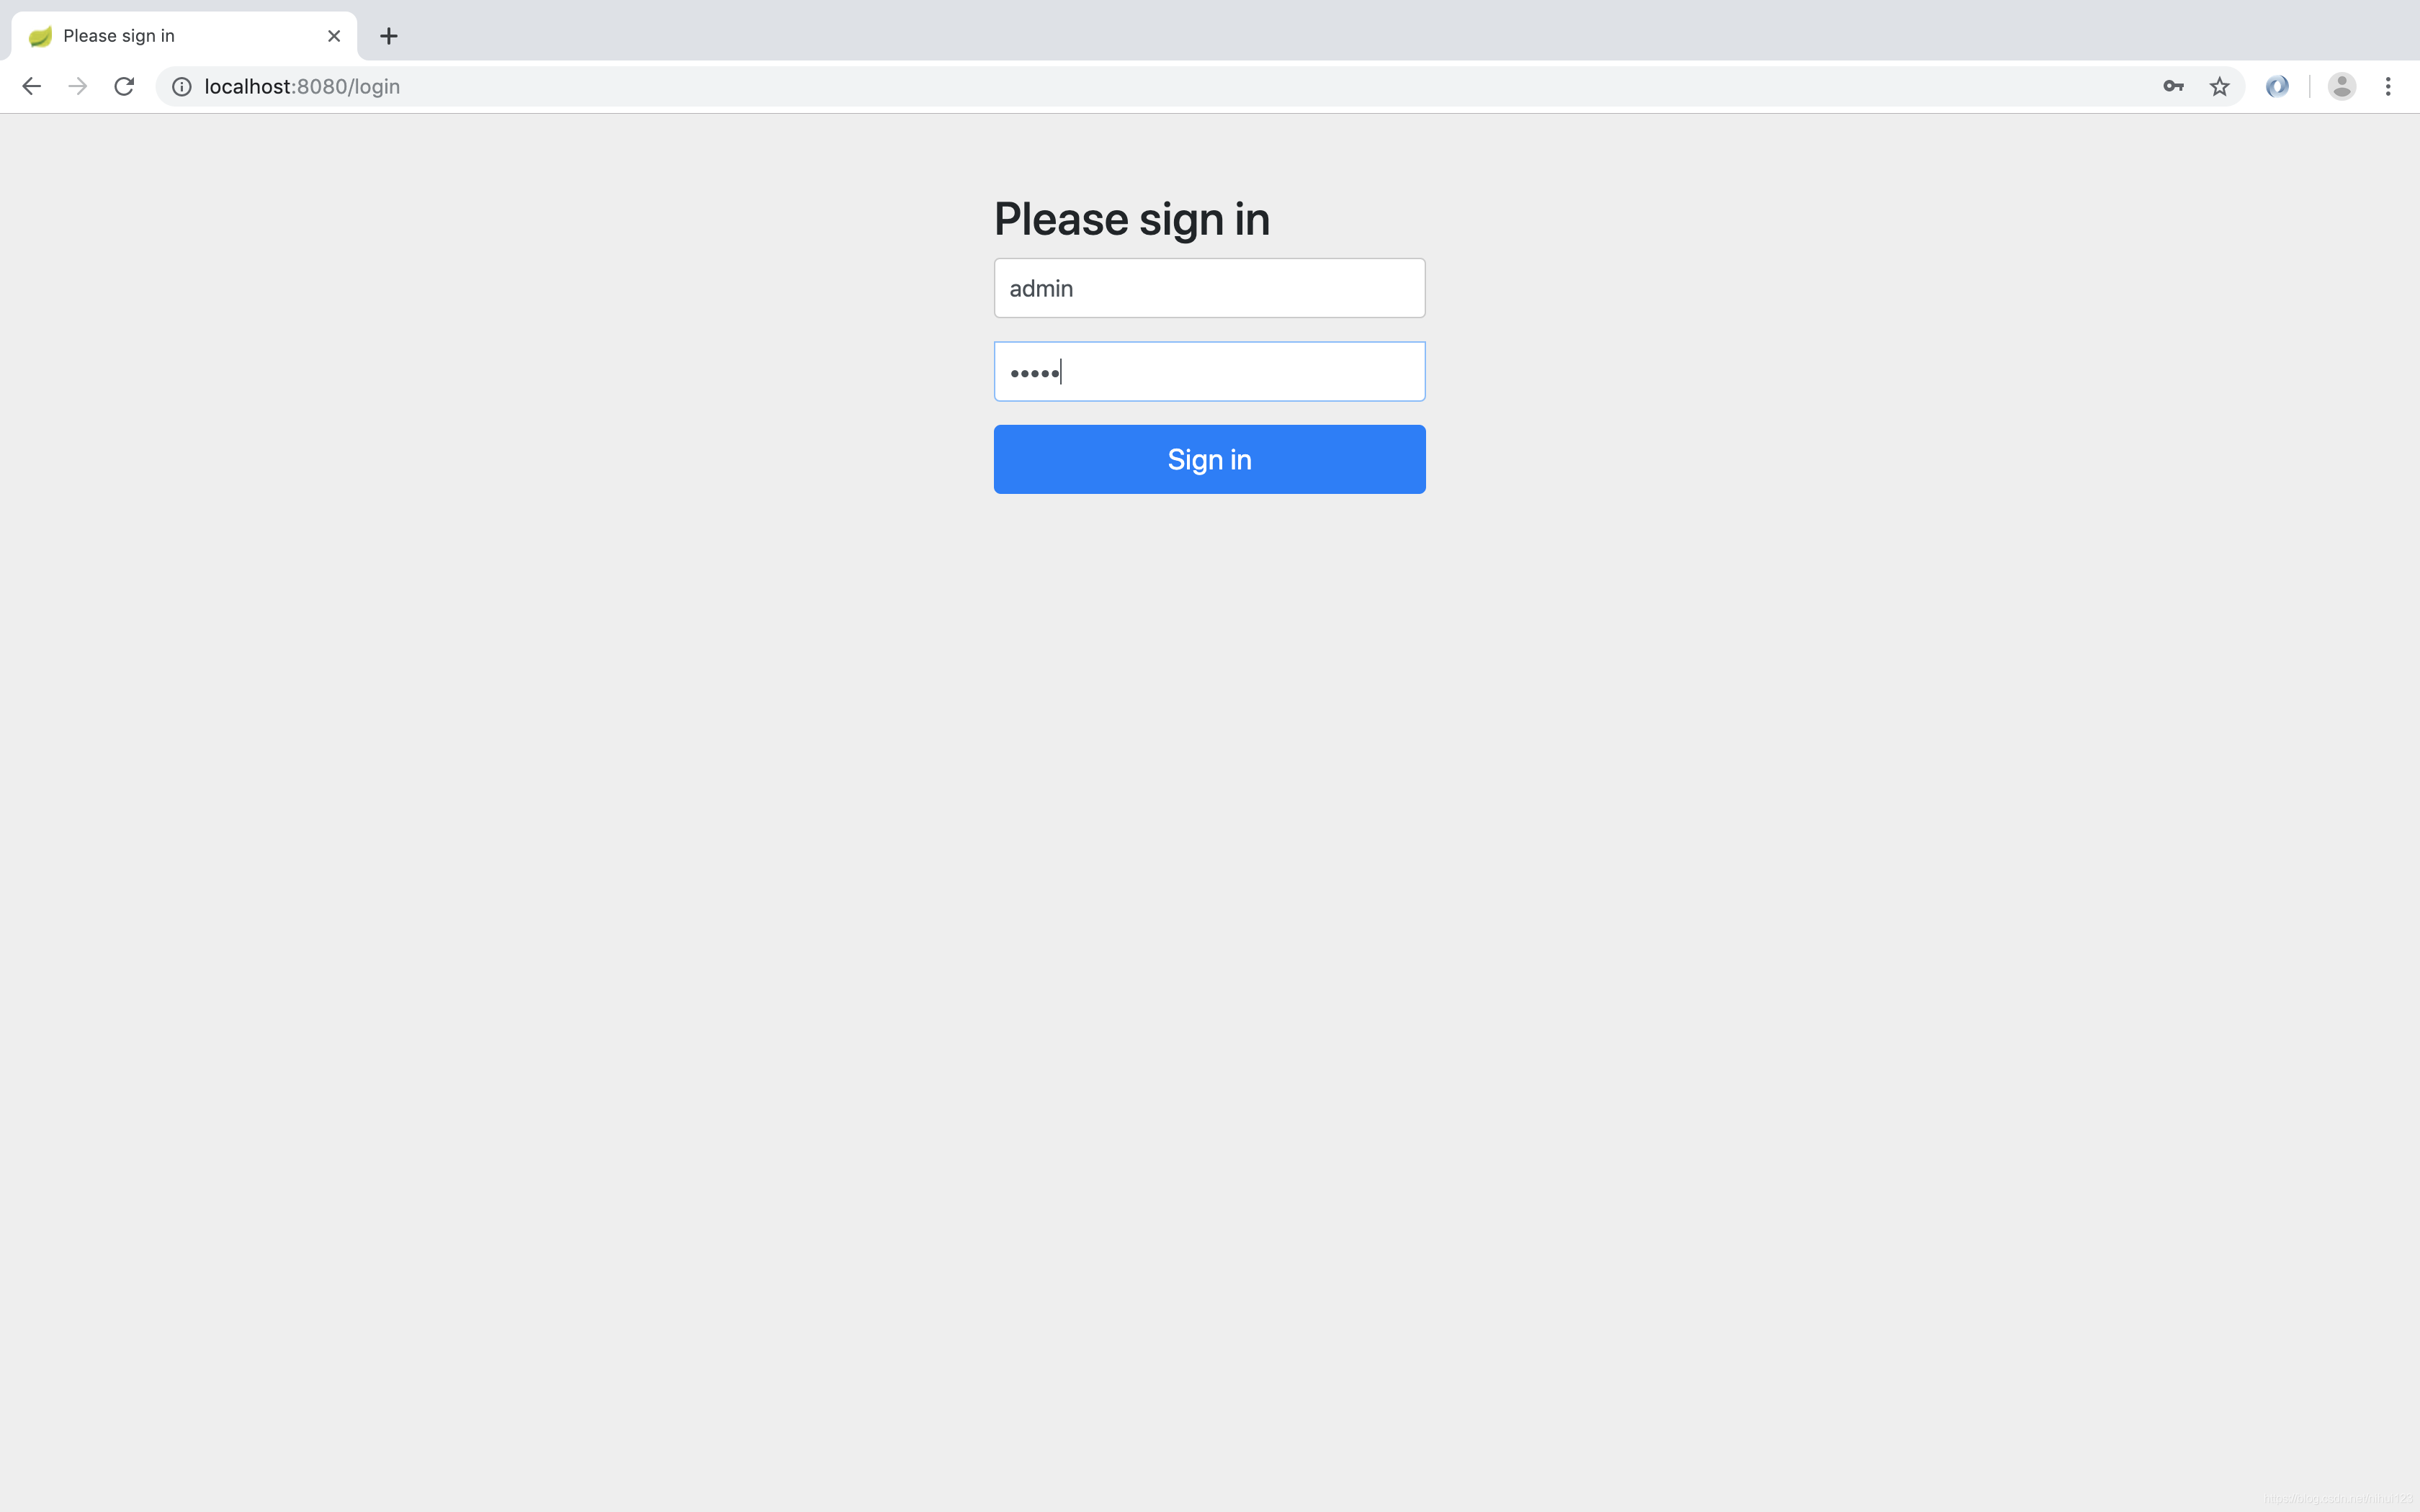
完成登陆之后就可以看到正常的显示页面了。那么到底是怎么进行配置的呢?下面就来看看如何去修改一些默认的配置呢?将用户体系修改为自己的用户体系呢?
登陆认证
上面的小例子,使用了最简单的方式实现了SpringSecurity提供的认证功能,在实际项目的过程中需要使用自己的用户权限进行配置,那么就会出现有些页面是对某些用户显示的,而有些页面是对于另外一些用户显示的。就涉及到了用户角色、数据库设计等等操作。当然这些都可以通过Security实现。
实现自定义的登陆操作
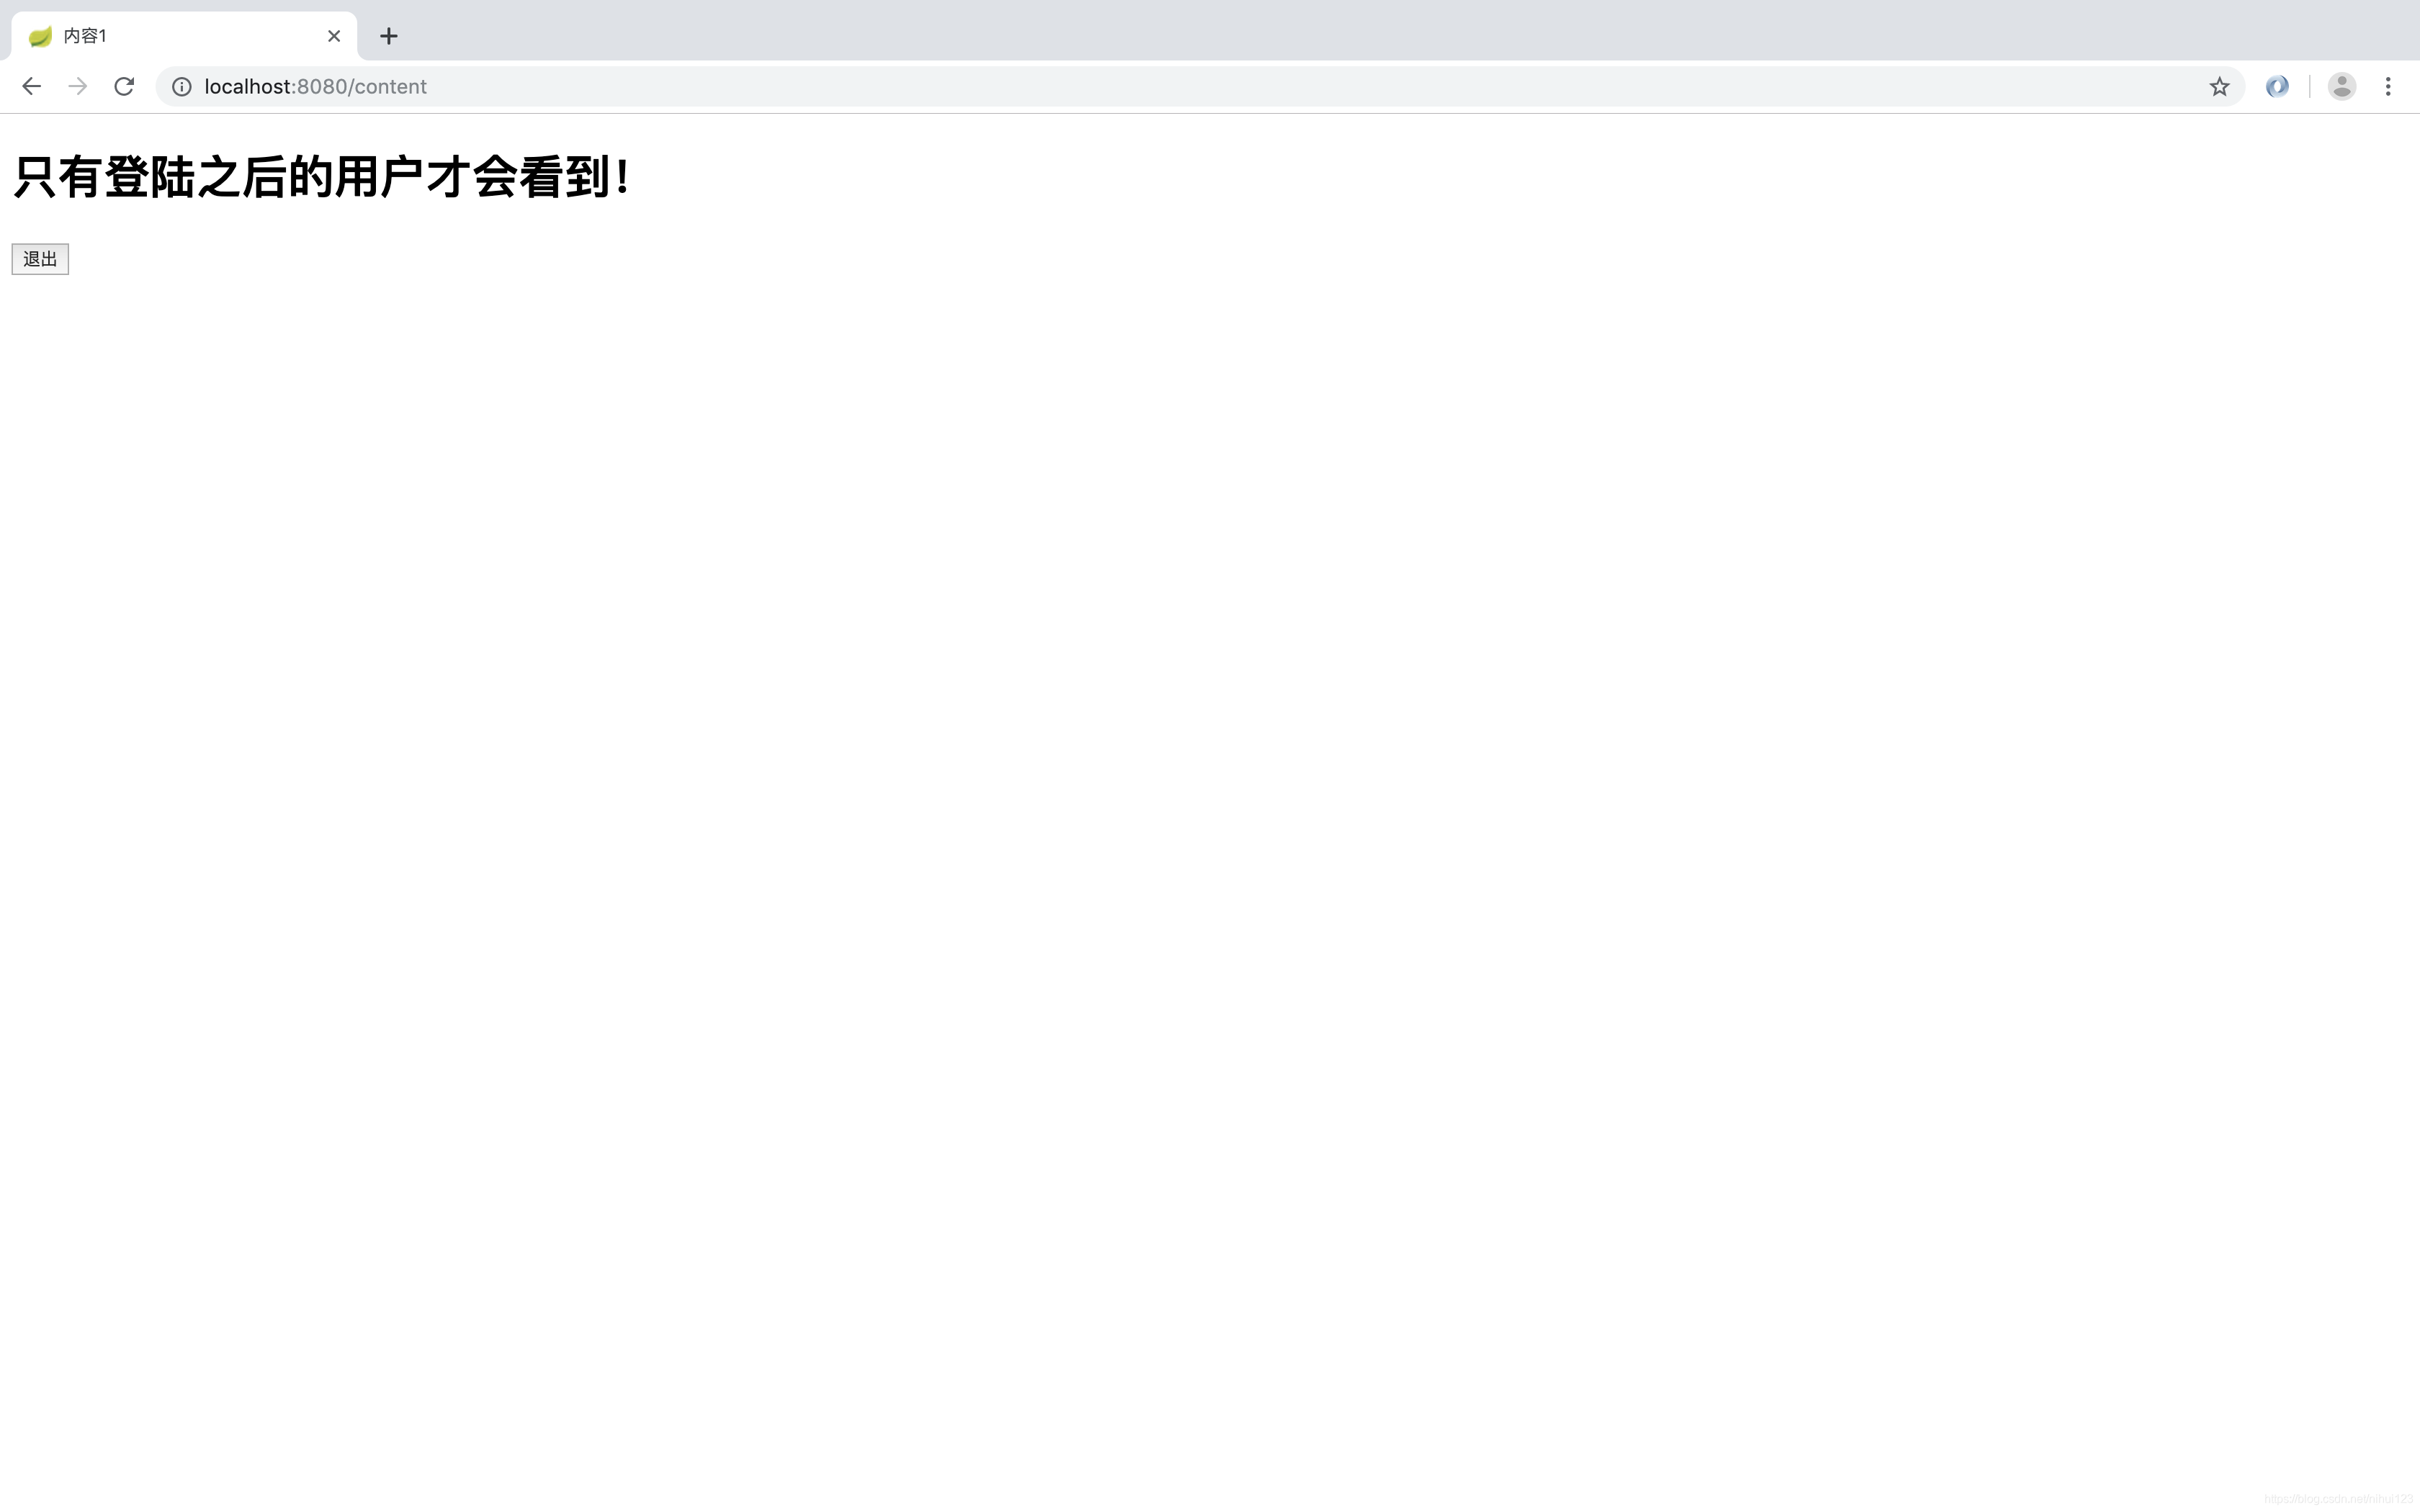
创建一个内容页面这个页面只有登陆之后的用户才可以查看,否则就会跳转到登陆页面,登陆成功之后才可以访问。当用户没有登陆的时候自动跳转的都是自定的登陆页面。
<!DOCTYPE html>
<html lang="en" xmlns:th="http://www.thymeleaf.org">
<head>
    <meta charset="UTF-8">
    <title>内容1</title>
</head>
<body>
<h1>只有登陆之后的用户才会看到!</h1>
</body>
</html>
自定义登陆页
<!DOCTYPE html>
<html lang="en" xmlns:th="http://www.thymeleaf.org">
<head>
    <meta charset="UTF-8">
    <title>登陆</title>
</head>
<body>

<div th:if="${param.error}">
    用户名密码错误
</div>

<div th:if="${param.logout}">
    您已经退出系统
</div>
<form th:action="@{/login}" method="post">
    <div>
        <label>用户名:</label>
        <input type="text" name="username"/>
    </div>
    <div>
        <label>密 码:</label>
        <input type="text" name="password"/>
    </div>
    <div><input type="submit" value="登陆"/></div>
</form>
</body>
</html>
@Controller
public class PageController {
    @RequestMapping("/")
    public String index(){
        return "index";
    }

    @RequestMapping("/content")
    public String content(){
        return "content";
    }

//    @RequestMapping(value = "/login",method = RequestMethod.POST);
    @PostMapping
    public String login(){
        return "login";
    }
}
配置安全策略
@Configuration
@EnableWebSecurity
public class SecurityConfig extends WebSecurityConfigurerAdapter {

    @Override
    protected void configure(HttpSecurity http) throws Exception {
        http.authorizeRequests()
                    .antMatchers("/","/home").permitAll()
                    .anyRequest().authenticated()
                    .and()
                .formLogin()
	                .loginPage("/login")
                    .permitAll()
                    .and()
                .logout()
                    .permitAll()
                    .and()
                .csrf()
                    .ignoringAntMatchers("/logout");
    }
}
- @EnableWebSecurity 表示开启Spring Security 权限控制和认证功能
- .antMatchers("/","/home").permitAll() 配置不用登陆就可以访问的请求
- .anyRequest().authenticated() 表示其他请求都必须要有权限认证
- .formLogin() 定制登陆信息
- .loginPage("/login") 自定义登陆页,若注释掉使用默认登陆页
- .logout() 退出功能,Spring Security 自动监控了 /logout 功能
- .ignoringAntMatchers("/logout"); Spring Security 默认启动了同源请求控制,这里是选择忽略退出请求的同源限制。
为了测试功能可以在之前的index.html页面中加入如下代码
<p>点击<a th:href="@{/content}">这里</a>会有惊喜哦!</p>
在content页面中加入如下代码
<form method="post" action="/logout">
    <button type="submit">退出</button>
</form>
其中退出的时候默认发Post请求,这些修改完成之后就可以重新启动项目了。访问http://localhost:8080/ 之后会看到如下的结果。并没有进行安全验证。当我们点击这里的时候会出现什么样的效果呢?

会发现点击跳转按钮之后并没有如愿跳转到登陆页面中,而是出现了报错
请注意笔者的代码,不要复制粘贴及使用!
修改了一段代码之后才会出现自定义的登陆页面(这问题留给读者自己解决一下吧!),这里我们使用一下这个页面
结束语
到这里关于SpringSecurity登陆、退出、请求授权页面,退出之后的跳转登陆等功能就说完了,这个也是最为常用的一种权限控制,当然也可以在这个基础上继续开发新的功能,这里笔者就是将简单的功能做了展示。
角色权限
在使用Java开发的时候也可以通过动态获取用户名和密码的方式来进行开发,只需要在配置类中加入如下的操作。
@Autowired
public void configureGlobal(AuthenticationManagerBuilder auth) throws Exception {
        auth.inMemoryAuthentication()
                .passwordEncoder(new BCryptPasswordEncoder())
                .withUser("user")
                    .password(new BCryptPasswordEncoder().encode("123456")).roles("USER");
}
在SpringBoot 2.x 中配置用户名密码需要明确的指明密码的加密方式。当配置文件和代码中都配置了用户名密码的时候,会优先使用代码中的用户名和密码,重启项目之后就可以使用代码中的用户名和密码进行登陆操作了。当然可以更具角色不同来设置不同的登陆用户以及密码操作。
@Autowired
public void configureGlobal(AuthenticationManagerBuilder auth) throws Exception {
        auth.inMemoryAuthentication()
                .passwordEncoder(new BCryptPasswordEncoder())
                .withUser("user")
                    .password(new BCryptPasswordEncoder().encode("123456")).roles("USER")
                .and()
                .withUser("admin")
                    .password(new BCryptPasswordEncoder().encode("admin")).roles("ADMIN","USER");
}
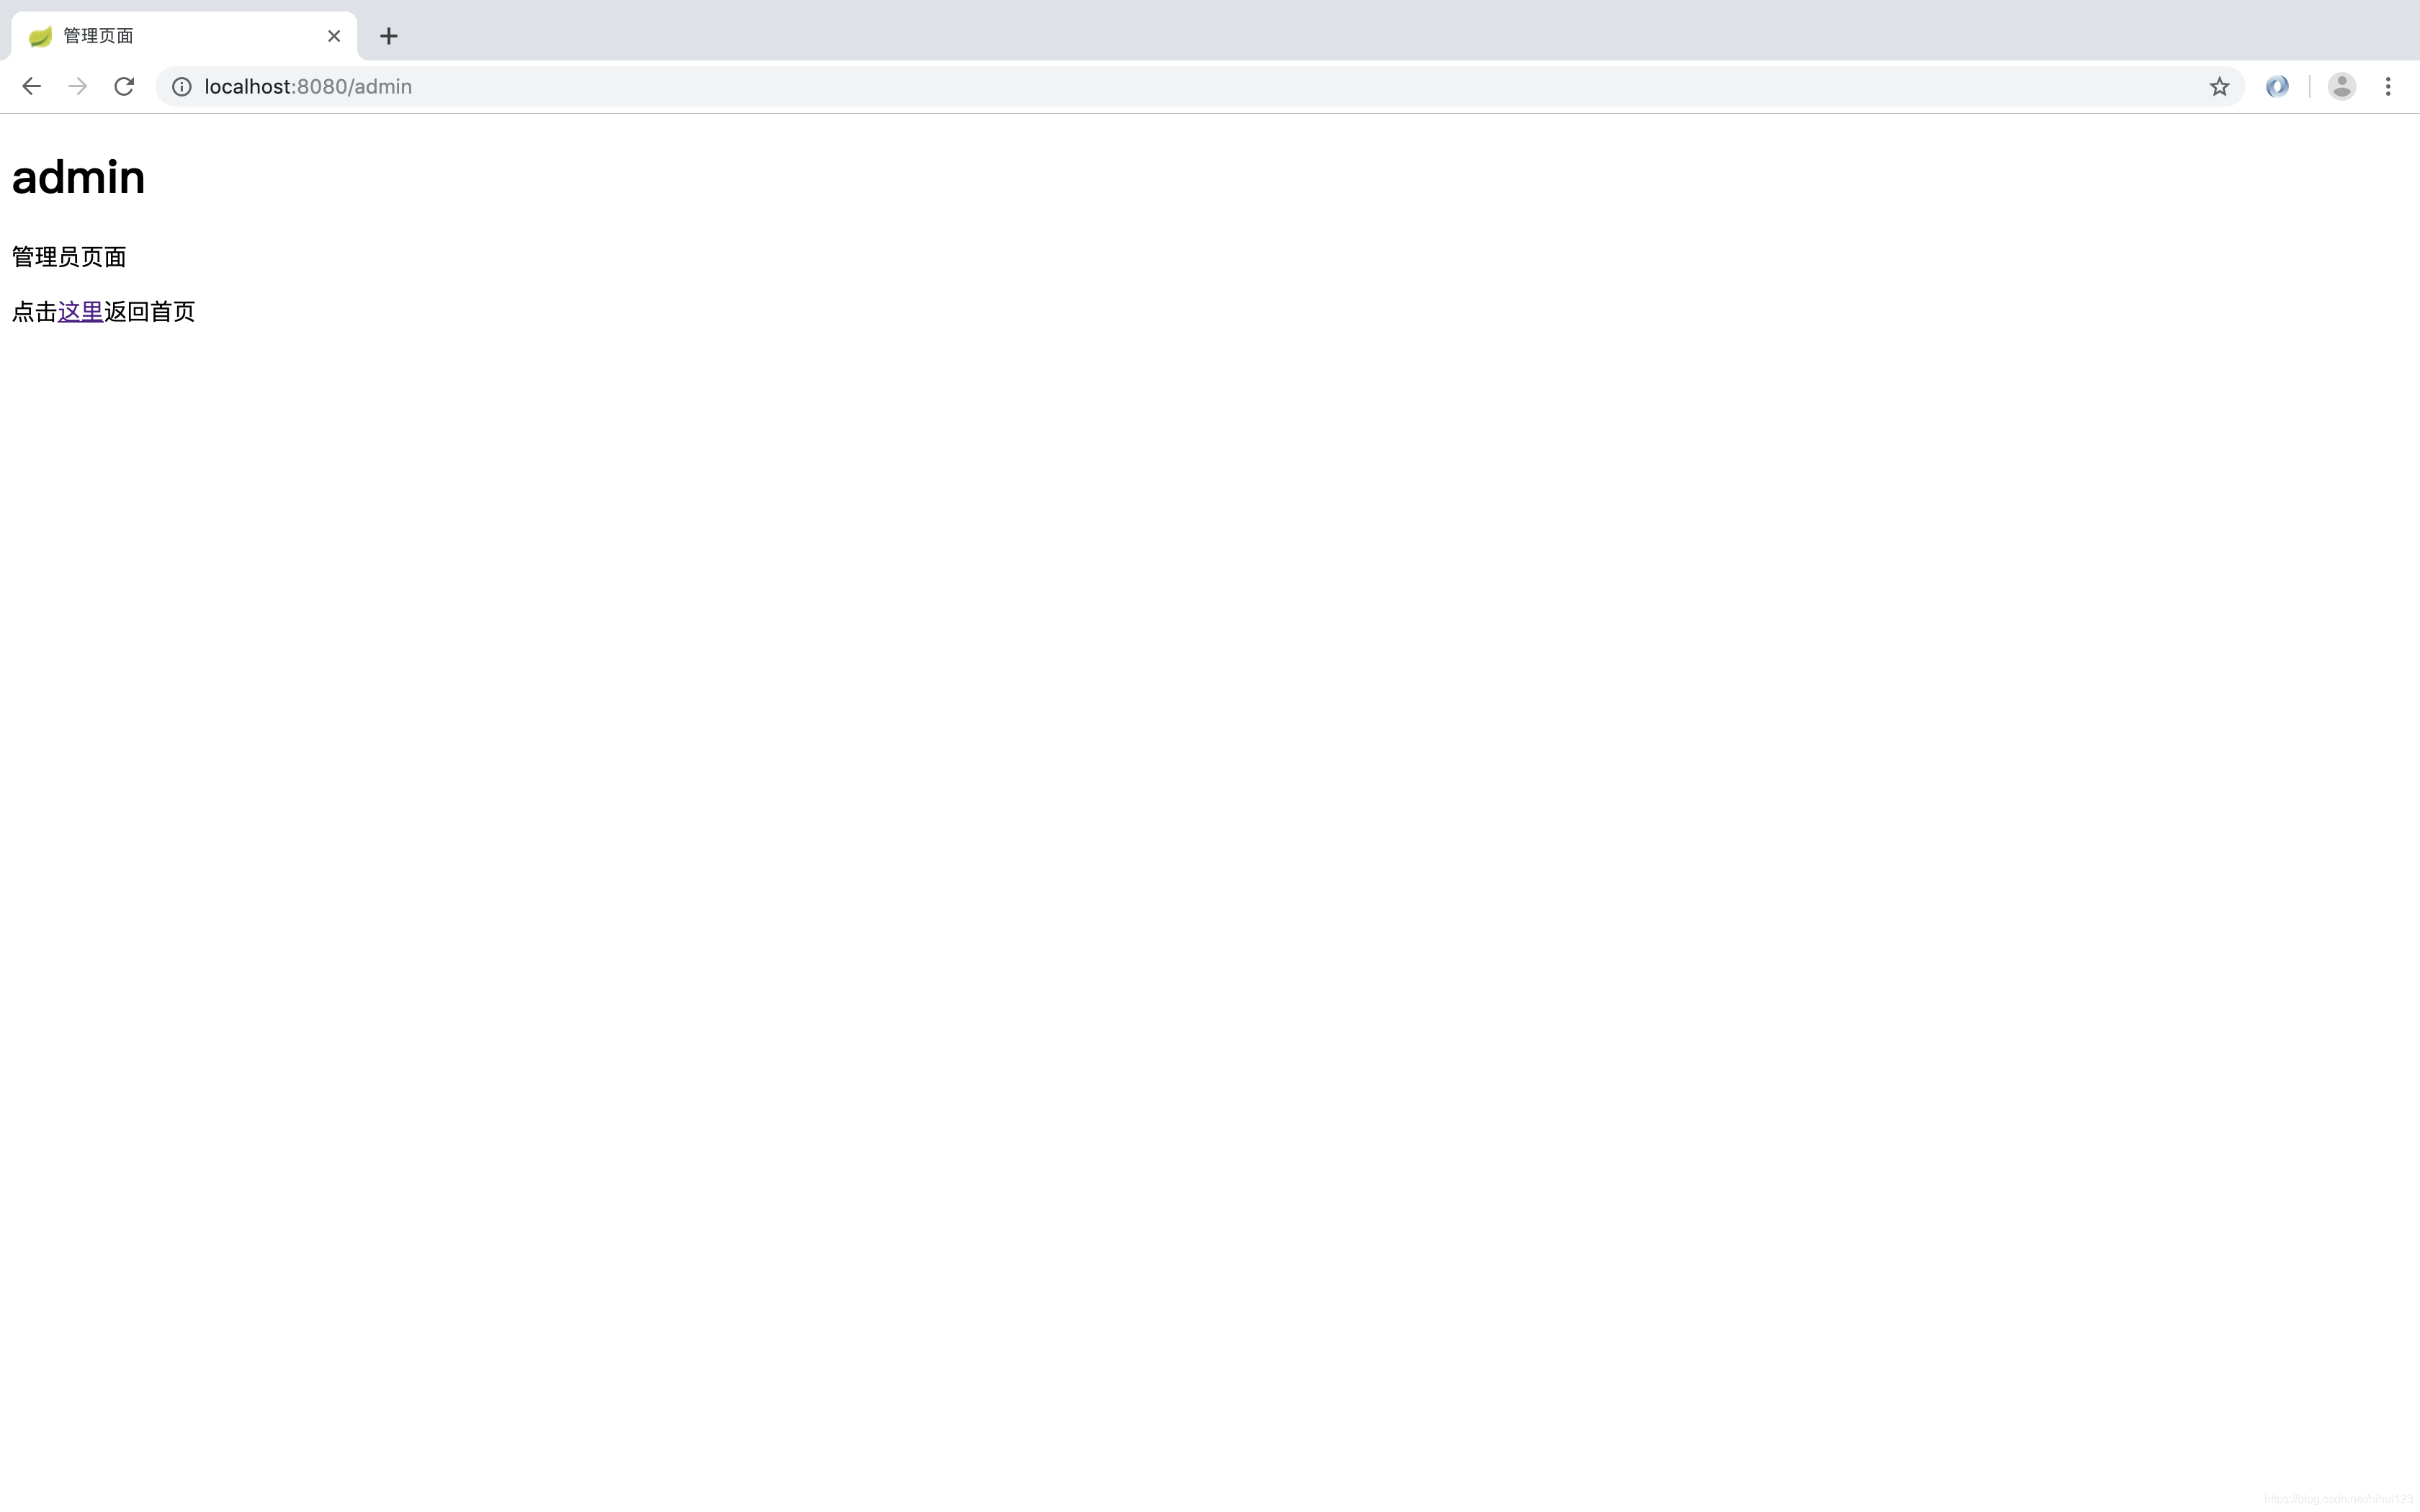
增加管理员页面
<!DOCTYPE html>
<html lang="en"  xmlns:th="http://www.thymeleaf.org">
<head>
    <meta charset="UTF-8">
    <title>管理页面</title>
</head>
<body>
<h1>admin</h1>
<p>管理员页面</p>
<p>点击<a th:href="@{/}" >这里</a>返回首页</p>
</body>
</html>
增加后端访问控制
@RequestMapping("/admin")
public String admin(){
   return "admin";
}
增加用户角色配置
 @Override
    protected void configure(HttpSecurity http) throws Exception {
        http.authorizeRequests()
                    .antMatchers("/","/home").permitAll()
                    .antMatchers("/admin/**").hasRole("ADMIN")
                    .antMatchers("/content/**").access("hasRole('ADMIN') or hasRole('USER')")

                    .anyRequest().authenticated()
                    .and()
                .formLogin()
                    .loginPage("/login")
                    .permitAll()
                    .and()
                .logout()
                    .permitAll()
                    .and()
                .csrf()
                    .ignoringAntMatchers("/logout");
    }
- .antMatchers("/","/home").permitAll() 表示这些所有的用户都可以访问。permitAll()表示所有人都可以访问
- .antMatchers("/admin/**").hasRole(“ADMIN”) 表示有管理员角色的人才可以访问
- .antMatchers("/content/**").access(“hasRole(‘ADMIN’) or hasRole(‘USER’)”) 表示有管理员角色和用户角色的人可以访问
- .antMatchers("/admin/**").hasIpAddress("192.168.123.123),表示只有固定IP地址的用户可以访问。
| 方法名称 | 控制说明 |
|---|---|
| access(String) | Spring EL 表达式结果为true的时候可以访问 |
| anonymous() | 匿名可访问 |
| denyAll() | 用户不可访问 |
| fullyAuthenticated() | 用户完全认证可访问(非 remember me 下自动登录) |
配置完成之后重新启动项目可以使用Admin登录系统,所有页面都可以访问,使用User登录之后只能访问不受限制的目录说明权限配置是成功的。
值得注意的是hasRole()方法和access()虽然都是给角色赋值权限,但是有所区别的是,hasRole所修饰的角色"/admin/**",那么拥有ADMIN权限的用户访问地址xxx/admin和xxx/admin/*都是可以的。但是如果使用access()修饰的角色那么访问xxx/admin权限受限,请求xxx/admin/可以通过。
方法的安全级别
上面是使用了之前提到的一个Spring AOP的功能与Servlet整合的请求路径控制来实现权限控制的,而Servlet可以进行方法级别的配置,那么怎么进行配置呢?
@PreAuthorize/@PostAuthorize
Spring的@PreAuthorize/@PostAuthorize这两个注解比较适合作为方法级别的安全控制,同样也是支持Spring EL表达式,提供基于表达式的权限控制
- @PreAuthorize : 适合进入方法前进行权限验证,@PreAuthorize 可以将用户角色/权限作为参数传入到方法中
- @PostAuthorize 使用的场景并不是很多,在方法执行之后在进行权限的验证操作。
@Secured
这个注解用来定义业务方法的安全配置属性列表,可以在需要角色指定的方法上使用,并且只有指定角色/权限的用户才可以调用这个方法,如果有人不具备要求的角色但使用了这个方法就会抛出AccessDenied异常。
例如可以在Service层进行标注该注解并指定用户角色列表
@Secured("ADMIN") //表示只有管理员才可以进行增加操作。
public void add();
如果在项目中需要通过角色控制来进行不同的操作,这些都可以通过数据库存储的数据进行配置,在实际的项目开发中,就会将用户、权限、角色等信息存储到数据库中,这样可以方便将整个权限控制部署到整个项目中。
总结
通过上面的内容,个人总结了一些SpringSecurity中使用到的一些场景,对于其中提到的Spring与Servlet如果不是很了解的话可以继续深入的了解Spring的原理,当然Spring Security是一款强大的安全策略解决方案,如果想更好的使用SpringSecurity可以更加深入的了解。但是在了解之前最好先熟悉Spring原理。可以支持笔者后期关于Spring原理级别的的分析内容。