一、引入
在SpringBoot中引入SpringSecurity
<!--spring boot security引入-->
        <dependency>
            <groupId>org.springframework.boot</groupId>
            <artifactId>spring-boot-starter-security</artifactId>
</dependency>
二、创建权限基本相关类
目的是让用户拥有某种权限角色,以访问那些设置权限的资源
1. 创建用户类
@Entity
@Table(name="user")
public class User {
    @Id
    @GeneratedValue
    @JsonIgnore private long id; //jasonIgnore返回时用来在直接返回忽略一些字段
    private String name;
    @JsonIgnore    private String password;
    @JsonIgnore    private List<Role> roles;
    //与角色表进行关联,并创建一张新表来维护二者关系
    @ManyToMany(cascade = {CascadeType.REFRESH},fetch = FetchType.EAGER)
    @JoinTable(name = "user_role",
            joinColumns = {@JoinColumn(name = "user_id")},
            inverseJoinColumns = {@JoinColumn(name = "roles_id")})
   //get/set省略
 }
2.创建角色类
@Entity
@Table(name = "role")
public class Role {
    @Id
    @GeneratedValue
    private long id;
    private String name;
    public Role(){}
    ....
}
3.在系统用户中组装user,以便在系统auth.userDetailsService获取符合该类的信息
public class SecurityUser extends User implements UserDetails
{

    private static final long serialVersionUID = 1L;
    public SecurityUser(User user) {
        if(user != null)
        {
            this.setId(user.getId());
            this.setName(user.getName());
            this.setPassword(user.getPassword());
            this.setRoles(user.getRoles());
        }
    }
    @Override
    public Collection<? extends GrantedAuthority> getAuthorities() {
        Collection<GrantedAuthority> authorities = new ArrayList<GrantedAuthority>();
        List<Role> roles = this.getRoles();
        if(roles != null)
        {
            for (Role role : roles) {
                SimpleGrantedAuthority authority = new SimpleGrantedAuthority(role.getName());
                authorities.add(authority);
            }
        }
        return authorities;
    }

    @Override
  @JsonIgnore  public String getPassword() {
        return super.getPassword();
    }

    @Override
    public String getUsername() {
        return super.getName();
    }
    @Override
    public boolean isAccountNonExpired() {
        return true;
    }
    @Override
    public boolean isAccountNonLocked() {
        return true;
    }
    @Override
    public boolean isCredentialsNonExpired() {
        return true;
    }
    @Override
    public boolean isEnabled() {
        return true;
    }

}
4.创建UserService
@Component
public class UserService implements UserDetailsService {
    @Autowired
    private SysUserRepository userRepository;
    @Override
    public UserDetails loadUserByUsername(String s) throws UsernameNotFoundException {
        User user = userRepository.findByName(s);
        if (user == null) {
            throw new UsernameNotFoundException("用户名不存在");
        }
        System.out.println("s:"+s);
        System.out.println("username:"+user.getName()+";password:"+user.getPassword());
        return new SecurityUser(user);
    }
}
注释:
- User 与Role类是多对多的关系,比如一个管理员用户,可以有普通用户的权限,和管理员的权限,因此我创建了一张user_role表来维护他们之间的关系
- SecurityUser和UserService组合,一个实现的是UserDetails类一个实现的是UserDetailsService类,在下边的安全配置类中需要用这个UserDetailsService的对象,实现登录的验证
- SecurityUser类实现了对系统对用户的要求的组装
三、创建权限配置类
@Configuration
public class WebSecurityConfig extends WebSecurityConfigurerAdapter {

    @Bean //即返回上边创建的UserService类对象
        UserDetailsService customUserService() {
            return new UserService();
        }
        @Override
      protected void configure(AuthenticationManagerBuilder auth)
      throwsException{
        auth.userDetailsService(customUserService())//就返回的对象,进行密码验证
        .passwordEncoder(passwordEncoder());//我这里采取的是 BCrypt加密算法
        }
   @Bean
   public BCryptPasswordEncoder passwordEncoder() {
        return   new BCryptPasswordEncoder();
    }
    @Override
        protected void configure(HttpSecurity http)
        throws Exception {
            http.authorizeRequests().
                    antMatchers("/",
                 .permitAll()
                    .antMatchers("/manage/**").hasRole("ADMIN")
                    .anyRequest().authenticated().
                    and().
                    formLogin().
                    loginProcessingUrl("/login").
                    usernameParameter("username")
                    .passwordParameter("password")
                    .defaultSuccessUrl("/login1")//成功后跳转界面
                    .and()
                    .logout().logoutUrl("/logout")//登出默认api
                    .and()
                    //开启cookie保存用户数据
                    .rememberMe()
                    //设置cookie有效期
                    .tokenValiditySeconds(60 * 60 * 24 * 7)
                    .and()
                    .logout().permitAll()
                    .and().csrf().disable();
        }


    }
注释:
- 首先用到了auth.userDetailsService(customUserService()),就是用来获取我们查询到的相关信息
- .passwordEncoder(passwordEncoder())进行密码比较,方法为我们创建用户对象时采用的加密方法,即将数据库的存储的加密密码,和用户登录提交的代码通过此方式进行加密后进行比对,如果前期想要明文存储进行测试的话,可以自己创建加密类,如下:
public class MyPasswordEncoder implements PasswordEncoder {

    @Override
    public String encode(CharSequence arg0) {
        return arg0.toString();
    }

    @Override
    public boolean matches(CharSequence arg0, String arg1) {
        return arg1.equals(arg0.toString());
    }

}
注释接上:
3.protected void configure(HttpSecurity http),则是我们进行权限控制的主要部分, http.authorizeRequests().antMatchers(” “,” “).permitAll()中填入不用登录验证开放api接口,当然接口分为两类,一类是不需要登录验证就能访问的,所以我把他们放到了前面的位置,如果想设置某些网址需要验证帐号登录并且有某种权限时可以在网址后接.hasRole(“ADMIN”).anyRequest().authenticated()。
注意role的写法,一般设置权限角色时在数据库存储时常常写成ROLE_ADMIN,在这里只需要后半部分就可以了
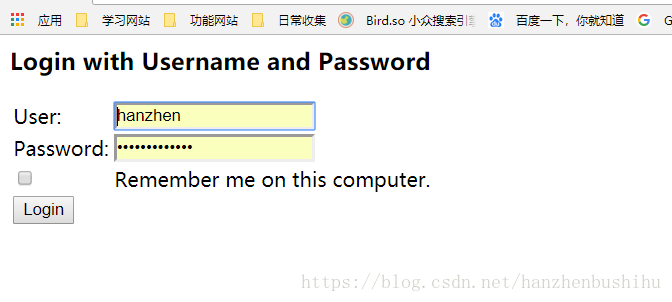
4.and(). formLogin()此后部分是登录验证的设置,我们设置以帐号密码的登录方式,那么usernameParameter(“username”) .passwordParameter(“password”),就是在登录验证时采用的post请求时字段key的值, loginProcessingUrl(“/login”)是进行登录处理的页面,因为,我写的项目是纯为安卓设置的数据大部分都是用json的所以就默认用了”/login”,这是一个系统自带的简陋界面,如果需要自定义页面进行的话,可以参考其他教程。
5.其余的配置上边有注释,就不多说了
系统自带登录界面
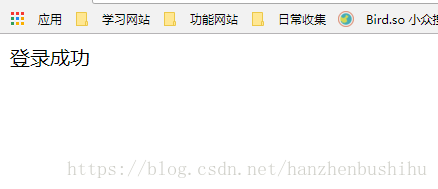
登录跳转界面: