《精通
Spring Boot 42
讲》共分五⼤部分,这是最后⼀部分的内容了,主要包含安全、测试、部署、监
控及综合实践。对于安全访问控制主要讲解
Spring Boot Security
的使⽤;监控主要使⽤
Spring Boot
Actuator
和
Spring Boot Admin
,在实际的⽣产应⽤中这两个组件⾮常实⽤;
Spring Boot
对测试的⽀持
是全⾯的,这⼀部分将会对其进⾏整理汇总;
Spring Boot
部署很简单,如果结合了
Docker
的使⽤,
更⽅便部署、运维、⽔平扩展;最后,将⽤⼀个真实的实战案例来回顾
Spring Boot
课程内容。
安全是⼀个企业的底裤,为企业阻挡了外部⾮正常的访问,保证了企业内部数据安全;业内已经有多起因数
据泄露给公司造成重⼤损失的事件,到现在安全问题越发受到⾏业内公司的重视。数据泄露很⼤⼀部分原因
是⾮正常权限访问导致,是合适的安全框架保护企业服务安全变的⾮常紧迫,在
Java
领域
Spring Security
⽆疑是最佳选择之⼀。
Spring Security 介绍
Spring Security
是⼀个能够基于
Spring
的企业应⽤系统提供声明式的安全访问控制解决⽅案的安全框架。它
提供了⼀组可以在
Spring
应⽤上下⽂中配置的
Bean
,充分利⽤了
Spring IoC
、
DI
(控制反转
Inversion of
Control
,
DI:Dependency Injection
依赖注⼊)和
AOP
(⾯向切⾯编程)功能,为应⽤系统提供声明式的安
全访问控制功能,减少了为企业系统安全控制编写⼤量重复代码的⼯作。
Spring Security
的前身是
Acegi Security
,它是⼀个基于
Spring AOP
和
Servlet
过滤器的安全框架。它提供
全⾯的安全性解决⽅案,同时在
Web
请求级和⽅法调⽤级处理身份确认和授权,为基于
J2EE
企业应⽤软件
提供了全⾯安全服务。
Spring Boot
提供了集成
Spring Security
的组件包
spring-boot-starter-security
,⽅便我们在
Spring Boot
项
⽬中使⽤
Spring Security
。
快速上⼿
先来做⼀个
Web
系统。
(
1
)添加依赖:
<dependency>
 <groupId>org.springframework.boot</groupId>
 <artifactId>spring-boot-starter-web</artifactId>
</dependency>
<dependency>
 <groupId>org.springframework.boot</groupId>
 <artifactId>spring-boot-starter-thymeleaf</artifactId>
</dependency>
(
2
)配置⽂件
配置⽂件中将
Thymeleaf
的缓存先去掉。
spring.thymeleaf.cache=false
(
3
)创建⻚⾯
在
resources/templates
⽬录下创建⻚⾯
index.html
,在⻚⾯简单写两句话。
<!DOCTYPE html>
<html xmlns="http://www.w3.org/1999/xhtml" xmlns:th="http://www.thymeleaf.org">
<head>
 <title>index</title>
</head>
<body>
<h1>Hello!</h1>
<p>今天天⽓很好,来⼀个纯洁的微笑吧!</p>
</body>
</html>
(
4
)添加访问⼊⼝
创建
SecurityController
类,在类中添加访问⻚⾯的⼊⼝:
@Controller
public class SecurityController {
 @RequestMapping("/")
 public String index() {
 return "index";
 }
}
添加完成后启动项⽬,在浏览器中访问地址:
http://localhost:8080/
,⻚⾯展示结果如下:
Hello!
今天天⽓很好,来⼀个纯洁的微笑吧!
以上完成了⼀个特别简单的
Web
⻚⾯请求、展示信息。
(
5
)添加
Spring Security
依赖
现在在项⽬中添加
spring-boot-starter-security
的依赖包。
在
pom.xml
添加:
<dependency>
 <groupId>org.springframework.boot</groupId>
 <artifactId>spring-boot-starter-security</artifactId>
</dependency>
添加完成后重启项⽬,再次访问地址:
http://localhost:8080/
,⻚⾯会⾃动弹出了⼀个登录框,如下:
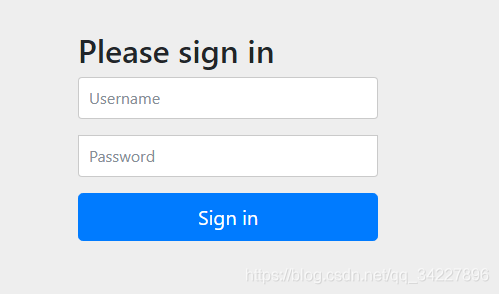
说明
Spring Security
⾃动给所有访问请求做了登录保护,那么这个登录名和密码是什么呢,如果观察⽐较仔
细的话,会发现添加了
spring-boot-starter-security
依赖包重启后的项⽬,在控制台打印了⼀⻓串字符,如
下:
2018-11-09 12:27:46.052 INFO 26240 --- [ restartedMain] .s.s.UserDetailsServiceA
utoConfiguration :
Using generated security password: d2c87183-ada6-4f26-b803-db2e60b01079
根据打印信息可以看出,这应该就是登录的密码了。
(
6
)进⾏分析
根据上⾯的打印信息,可以看出密码是由
UserDetailsServiceAutoConfifiguration
类打印出的,在
IEDA
连续
按两次
Shift
键,调出
IEDA
的类搜索框,输出类名
UserDetailsServiceAutoConfifiguration
,查看它的源码,
具体打印代码如下:
private String getOrDeducePassword(User user, PasswordEncoder encoder) {
 String password = user.getPassword();
 if (user.isPasswordGenerated()) {
 logger.info(String.format("%n%nUsing generated security password: %s%n", u
ser.getPassword()));
 }
 return encoder == null && !PASSWORD_ALGORITHM_PATTERN.matcher(password).matche
s() ? "{noop}" + password : password;
}
可以看出
User
就是我们需要的登录⽤户信息,打开
User
其源码如下:
public static class User {
 private String name = "user";
 private String password = UUID.randomUUID().toString();
 private List<String> roles = new ArrayList<>();
 private boolean passwordGenerated = true;
 //省略⼀部分
 public void setPassword(String password) {
 if (!StringUtils.hasLength(password)) {
 return;
 }
 this.passwordGenerated = false;
 this.password = password;
 }
 //省略⼀部分
}
根据
User
类的信息发现,
passwordGenerated
默认值为
true
,当⽤户被设置密码时更新为
false
;也就是说
如果没有设置密码
passwordGenerated
的值为
true
。
password
的值默认由
UUID
⽣产的⼀段随机字符串,
⽤户名默认为
user
。综上,⽤户名
user
和控制台打印的密码便是系统默认的登录和密码,登录成功后跳转
到⾸⻚。
当然,如果想修改⽤户名和密码,可以在
application.properties
重新进⾏配置,例如:
# security
spring.security.user.name=admin
spring.security.user.password=admin
配置完成之后重启项⽬,再次访问
http://localhost:8080/
,在跳转出来的登录⻚⾯输⼊上述⽤户名和密码,可 以登录成功。
登录认证
上述是
Spring Security
最简单的集成演示,在实际项⽬使⽤过程中,有的⻚⾯不需要进⾏验证,有的⻚⾯需
要进⾏验证,账户密码需要存储到数据库、⻆⾊权限相关联等,其实这些
Spring Security
轻松可实现。
创建⻚⾯
content.html
,此⻚⾯只有登录⽤户才可查看,否则会跳转到登录⻚⾯,登录成功后才能访问。可
以⾃定义登录⻚⾯,当⽤户未登录时跳转到⾃定义登录⻚⾯。
GitChat
<!DOCTYPE html>
<html xmlns="http://www.w3.org/1999/xhtml" xmlns:th="http://www.thymeleaf.org">
<body>
<h1>content</h1>
<p>我是登录后才可以看的⻚⾯</p>
</body>
</html>
登录⻚⾯:
<!DOCTYPE html>
<html xmlns="http://www.w3.org/1999/xhtml"
 xmlns:th="http://www.thymeleaf.org"
 xmlns:sec="http://www.thymeleaf.org/thymeleaf-extras-springsecurity3">
<head>
 <title>login</title>
</head>
<body>
<div th:if="${param.error}">
 ⽤户名或密码错
</div>
<div th:if="${param.logout}">
 您已注销成功
</div>
<form th:action="@{/login}" method="post">
 <div><label> ⽤户名 : <input type="text" name="username"/> </label></div>
 <div><label> 密 码 : <input type="password" name="password"/> </label></div>
 <div><input type="submit" value="登录"/></div>
</form>
</body>
</html>
后台添加访问⼊⼝:
@RequestMapping("/content")
public String content() {
 return "content";
}
@RequestMapping(value = "/login", method = RequestMethod.GET)
public String login() {
 return "login";
}
进⾏配置
index.html
可以直接访问,但
content.html
需要登录后才可查看,没有登录⾃动调整到
login.html
,创建
SecurityConfifig
类继承于
WebSecurityConfifigurerAdapter
。
@Configuration
@EnableWebSecurity
public class SecurityConfig extends WebSecurityConfigurerAdapter {
 @Override
 protected void configure(HttpSecurity http) throws Exception {
 http.authorizeRequests()
 .antMatchers("/", "/home").permitAll()
 .anyRequest().authenticated()
 .and()
 .formLogin()
 // .loginPage("/login")
 .permitAll()
 .and()
 .logout()
 .permitAll()
 .and()
 .csrf()
 .ignoringAntMatchers("/logout");
 }
}- @EnableWebSecurity,开启 Spring Security 权限控制和认证功能。
- antMatchers("/", "/home").permitAll(),配置不⽤登录可以访问的请求。
- anyRequest().authenticated(),表示其他的请求都必须要有权限认证。
- formLogin(),定制登录信息。
- loginPage("/login"),⾃定义登录地址,若注释掉则使⽤默认登录⻚⾯。
- logout(),退出功能,Spring Security ⾃动监控了 /logout。
- ignoringAntMatchers("/logout"),Spring Security 默认启⽤了同源请求控制,在这⾥选择忽略退出请求 的同源限制。
我们在
index
⻚⾯添加⼀个挑战
content
⻚⾯的链接,同时在
content
⻚⾯添加⼀个退出的链接。
index
⻚⾯:
<p>点击 <a th:href="@{/content}">这⾥</a> 进⼊受限⻚⾯</p>
content
⻚⾯:
<form method="post" action="/logout">
 <button type="submit">退出</button>
</form>
退出请求默认只⽀持
post
请求,修改完成之后重启项⽬,访问地址
http://localhost:8080/
可以看到
index
⻚
⾯内容,点击链接跳转到
content
⻚⾯时,会⾃动跳转到
http://localhost:8080/login
登录⻚⾯,登录成功后
GitChat
会⾃动跳转到
http://localhost:8080/content
,在
content
⻚⾯单击
“
退出
”
按钮,会退出登录状态,跳转到登录
⻚⾯并提示已经退出。
登录、退出、请求受限⻚⾯,退出后跳转到登录⻚⾯,是最常⻅的安全控制案例,是账户系统最基本的安全
保障,接下来介绍如何通过⻆⾊来控制权限。
⻆⾊权限
也可以在
Java
代码中配置⽤户登录名和密码,在上⾯创建的
SecurityConfifig
类中添加⽅法
confifigureGlobal()
。
@Autowired
public void configureGlobal(AuthenticationManagerBuilder auth) throws Exception {
 auth.inMemoryAuthentication()
 .passwordEncoder(new BCryptPasswordEncoder())
 .withUser("user")
 .password(new BCryptPasswordEncoder()
 .encode("123456")).roles("USER");
}
在
Spring Boot 2.x
中配置密码需要指明密码的加密⽅式。当⾯配置⽂件和
SecurityConfifig
类中都配置了⽤户
名和密码时,会使⽤代码中的⽤户名和密码。添加完上述代码,重启项⽬后,即可⽤最新的⽤户名和密码登
录系统。
在上述代码中有这么⼀段
roles("USER")
指明了⽤户⻆⾊,⻆⾊就是
Spring Security
最重要的概念之⼀,往
往通过⽤户来控制权限⽐较繁琐,在实际项⽬中,往往都是将⽤户关联到⻆⾊,给⻆⾊赋予⼀定的权限,通
过⻆⾊来控制⽤户访问请求。
为了演示不同⻆⾊拥有不同权限,再添加⼀个管理员
admin
和 ⻆⾊
ADMIN
。
@Autowired
public void configureGlobal(AuthenticationManagerBuilder auth) throws Exception {
 auth.inMemoryAuthentication()
 .passwordEncoder(new BCryptPasswordEncoder())
 .withUser("user")
 .password(new BCryptPasswordEncoder()
 .encode("123456")).roles("USER")
 .and()
 .withUser("admin")
 .password(new BCryptPasswordEncoder()
 .encode("admin")).roles("ADMIN", "USER");
}
admin
⽤户拥有
USER
和
ADMIN
的⻆⾊,
user
⽤户拥有
USER
⻆⾊,添加
admin.html
⻚⾯设置只有
ADMIN
⻆⾊的⽤户才可以访问。
admin.html
:
<!DOCTYPE html>
<html xmlns="http://www.w3.org/1999/xhtml" xmlns:th="http://www.thymeleaf.org"
 xmlns:sec="http://www.thymeleaf.org/thymeleaf-extras-springsecurity3">
<head>
 <title>admin</title>
</head>
<body>
 <h1>admin</h1>
 <p>管理员⻚⾯</p>
 <p>点击 <a th:href="@{/}">这⾥</a> 返回⾸⻚</p>
</body>
</html>
添加后端访问:
@RequestMapping("/admin")
public String admin() {
 return "admin";
}
我们再将上述的
confifigure()
⽅法修改如下:
@Override
protected void configure(HttpSecurity http) throws Exception {
 http.authorizeRequests()
 .antMatchers("/resources/**", "/").permitAll()
 .antMatchers("/admin/**").hasRole("ADMIN")
 .antMatchers("/content/**").access("hasRole('ADMIN') or hasRole('USER'
)")
 .anyRequest().authenticated()
 .and()
 .formLogin()
// .loginPage("/login")
 .permitAll()
 .and()
 .logout()
 .permitAll()
 .and()
 .csrf()
 .ignoringAntMatchers("/logout");
}
重点看这些:
- antMatchers("/resources/**", "/").permitAll(),地址 "/resources/ **" 和 "/" 所有⽤户都可访问,permitAllGitChat 表示该请求任何⼈都可以访问;
- antMatchers("/admin/**").hasRole("ADMIN"),地址 "/admin/**" 开头的请求地址,只有拥有 ADMIN ⻆ ⾊的⽤户才可以访问;
- antMatchers("/content/**").access("hasRole('ADMIN') or hasRole('USER')"),地址 "/content/**" 开头的 请求地址,可以给⻆⾊ ADMIN 或者 USER 的⽤户来使⽤;
- antMatchers("/admin/**").hasIpAddress("192.168.11.11"),只有固定 IP 地址的⽤户可以访问。
更多的权限控制⽅式参看下表:
| ⽅方法名 |
解释 |
| access(String) |
Spring EL 表达式结果为 true 时可访问 |
| anonymous() |
匿匿名可访问 |
| denyAll() |
⽤用户不不可以访问 |
| fullyAuthenticated() |
⽤用户完全认证可访问(⾮非 remember me 下⾃自动登录)
扫描二维码关注公众号,回复:
10407782 查看本文章

|
| hasAnyAuthority(String...) |
参数中任意权限的⽤用户可访问 |
| hasAnyRole(String...) |
参数中任意⻆角⾊色的⽤用户可访问 |
| hasAuthority(String) |
某⼀一权限的⽤用户可访问 |
| hasRole(String) |
某⼀一⻆角⾊色的⽤用户可访问 |
| permitAll() |
所有⽤用户可访问 |
| rememberMe() |
允许通过 remember me 登录的⽤用户访问 |
| authenticated() |
⽤用户登录后可访问 |
| hasIpAddress(String) |
⽤用户来⾃自参数中的 IP 时可访问 |
配置完成重新启动项⽬,使⽤⽤户
admin
登录系统,所有⻚⾯都可以访问,使⽤
user
登录系统,只可访问
不受限地址和 以
"/content/**"
开头的请求,说明权限配置成功。
值得注意的是
hasRole()
和
access()
虽然都可以给⻆⾊赋予权限,但有所区别,⽐如
hasRole()
修饰的⻆⾊
"/admin/**"
,那么拥有
ADMIN
权限的⽤户访问地址
xxx/admin
和
xxx/admin/*
均可,如果使⽤
access()
修
饰的⻆⾊,那么访问地址
xxx/admin
权限受限,请求
xxx/admin/
可以通过。
⽅法级别的安全
上⾯是通过请求路径来控制权限,也可以在⽅法上添加注解来限制控制访问权限。
@PreAuthorize / @PostAuthorize
Spring
的
@PreAuthorize/@PostAuthorize
注解更适合⽅法级的安全,也⽀持
Spring EL
表达式语⾔,提供
了基于表达式的访问控制。
- @PreAuthorize 注解:适合进⼊⽅法前的权限验证,@PreAuthorize 可以将登录⽤户的⻆⾊ / 权限参数 传到⽅法中。
- @PostAuthorize 注解:使⽤并不多,在⽅法执⾏后再进⾏权限验证。
@PreAuthorize("hasAuthority('ADMIN')")
@RequestMapping("/admin")
public String admin() {
 return "admin";
}
这样只要拥有⻆⾊
ADMIN
的⽤户才可以访问此⽅法。
@Secured
此注释是⽤来定义业务⽅法的安全配置属性的列表,可以在需要安全
[
⻆⾊
/
权限等
]
的⽅法上指定
@Secured
,并且只有那些⻆⾊
/
权限的⽤户才可以调⽤该⽅法。如果有⼈不具备要求的⻆⾊
/
权限但试图调
⽤此⽅法,将会抛出
AccessDenied
异常。
示例:
public interface UserService {
 List<User> findAllUsers();
 @Secured("ADMIN")
 void updateUser(User user);
 @Secured({ "USER", "ADMIN" })
 void deleteUser();
}
如此项⽬中便可根据⻆⾊来控制⽤户拥有不同的权限。为了⽅便演示,内容中所有⽤户和⻆⾊信息均写死在
代码中,在实际项⽬使⽤中,会将⽤户、⻆⾊、权限控制等信息存储到数据库中,以更加⽅便灵活的⽅式去
配置整个项⽬的权限。
总结
通过本课内容的学习,我们了解到
Spring Security
是⼀个专注认证和权限控制的⼀套安全框架。
Spring Boot
有对应的组件包帮助集成,在
Spring Boot
项⽬中,可以通过不同的注解和配置来控制不同⽤户、不同⻆⾊
的访问权限。
Spring Security
是⼀款⾮常强⼤的安全控制框架,本课内容只是演示了常⻅的使⽤场景,若⼤
家感兴趣可以线下继续学习了解。
