1、前言
TensorFlow Object Detection API提供了很多训练好的模型,我们可以直接用这些模型实现物体检测,这些模型数据集分为COCO(90类)、Kitti、Open Images、iNaturalist Species、AVA 。实现步骤参照第三章。
当然,我们也可以用他们预训练好模型(包括模型的架构、参数fine-turn)训练自己的数据。比方说我们要检测石头,但是这些数据集没有石头,这时就需要自己训练了。
但如果说要完全自己训练一个模型,从头开始的话,问题在于:(1)训练时间长;(2)效果不好;因此,我选择的是用TensorFlow Object Detection API提供的预训练模型进行对自己的数据进训练,好处在于:(1)模型框架不用自己设计;(2)权重参数fune-turn提供好了;(3)训练出来的效果比较好
模型下载地址:https://github.com/tensorflow/models/blob/master/research/object_detection/g3doc/detection_model_zoo.md,每个模型都提供了训练好的模型以及预训练模型;
以ssd_mobilenet_v1举个例子,下载后里面包含文件有:
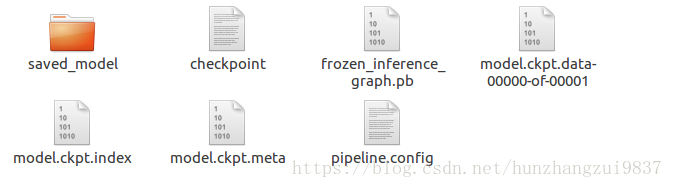
其中,frozen_inference_graph.pb为训练好的模型,可以直接使用。ckpt文件就是预训练模型,用来训练自己的数据。
好了,话不多说,下面开始我们的训练之旅吧!
2、前期准备
(1)在Ubuntu16.04上搭建好Tensorflow或者Tensorflow-gpu环境
这部分可以参考我的博客第一章 Ubuntu16.04搭建Tensorflow-GPU
(2)收集需要训练的图片
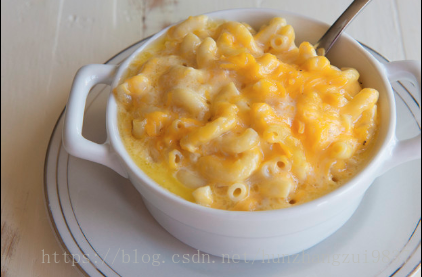
你要检测什么就要收集什么样本,我建议在google图片里面去找,或者自己拍照也可以,数据量越大,最后测试效果越好。我测试是macnchess。如图:
(3)下载TensorFlow模型
TensorFlow模型下载地址:https://github.com/tensorflow/models
下载protoc:protoc releases page编译TensorFlow Object Detection API ,解压进入下载目录执行:
sudo ./configure
sudo make check
sudo make install
在TensorFlow模型的research目录分别执行:
protoc object_detection/protos/*.proto --python_out=.
export PYTHONPATH=$PYTHONPATH:`pwd`:`pwd`/slim
sudo python3 setup.py install
3、Labellmg
这一步是把收集的图片样本进行位置标记,步骤参照一个大神的github,里面写的相当详细,最后每一张图片会对应生成一个xml文件。
github地址:https://github.com/tzutalin/labelImg
如果需要标记好的可以下载:labeled macaroni and cheese,里面包含10张测试xml文件和90张训练xml文件,分别在test和train文件里。
4、TFRecord 格式转换
要训练自己的数据,需要将其转换为google的特定数据格式:TFRecord 。步骤如下:
(1)xml转csv
参照一位大牛的github,他训练的是raccoon,网址:https://github.com/datitran/raccoon_dataset,里面有一个xml_to_csv.py文件,然后针对我自己训练的macncheess,进行稍微的修改:
def main():
    image_path = os.path.join(os.getcwd(), 'annotations')
    xml_df = xml_to_csv(image_path)
    xml_df.to_csv('raccoon_labels.csv', index=None)
    print('Successfully converted xml to csv.')
修改为:
def main():
    for directory in ['train','test']:
        image_path = os.path.join(os.getcwd(), 'images/{}'.format(directory))
        xml_df = xml_to_csv(image_path)
        xml_df.to_csv('data/{}_labels.csv'.format(directory), index=None)
        print('Successfully converted xml to csv.')
其中,test里面是测试的图片以及xml文件,train里面的训练的图片和xml文件。
然后,在当前目录新建一个data文件夹,再在终端执行:
python3 xml_to_csv.py注意:xml_to_csv.py和test、train文件需保持在同一个目录,最好实在下载的TensorFlow模型research目录里。
成功之后,在data目录就会出现test_labels.csv和train_labels.csv两个文件
(2)cvs转TFRecord
还是在网址https://github.com/datitran/raccoon_dataset找到generate_tfrecord.py文件,还是稍作修改:
# TO-DO replace this with label map
def class_text_to_int(row_label):
    if row_label == 'raccoon':
        return 1
    else:
        None
修改为:
# TO-DO replace this with label map
def class_text_to_int(row_label):
    if row_label == 'macncheese':
        return 1
    else:
None注意:需要训练多少个类别,依次往下加。
最后执行:
python3 generate_tfrecord.py --csv_input=data/train_labels.csv --output_path=data/train.record成功之后,在data目录就会出现test.record和train.record两个文件。
5、训练自己的数据
(1)在data文件夹里新建一个object-detection.pbtxt文件,里面写入:
item {
  id: 1
  name: 'macncheese'
}注意:你训练了多少种类就依次往下加。
(2)下载预训练模型,并保存在research目录里
(3)在research目录新建一个model文件夹,把research/object_detection/sample/configs目录里面的ssd_mobilenet_v1_pets.config拷贝到里面,然后进行以下修改:
num_classes: 1(训练了多少类就行写多少,我只训练了一类)
model {
  ssd {
    num_classes: 1
    box_coder {
      faster_rcnn_box_coder {
        y_scale: 10.0
        x_scale: 10.0
        height_scale: 5.0
        width_scale: 5.0
      }
    }
batch_size: 1(根据你的GPU性能来设置,性能越好设置越大)
train_config: {
  batch_size: 1
  optimizer {
    rms_prop_optimizer: {
      learning_rate: {
        exponential_decay_learning_rate {
          initial_learning_rate: 0.004
          decay_steps: 800720
          decay_factor: 0.95
        }
      }
      momentum_optimizer_value: 0.9
      decay: 0.9
      epsilon: 1.0
    }
  }
fine_tune_checkpoint: 这里是预训练模型的路径
fine_tune_checkpoint: "/home/bjw/Desktop/models-master/research/ssd_mobilenet_v1_coco_2018_01_28/model.ckpt"num_steps: 设置训练次数
num_steps: 2000train_input_reader: 分别输入input_path和label_map_path的路径(都在data文件夹里)
train_input_reader: {
  tf_record_input_reader {
    input_path: "/home/bjw/Desktop/models-master/research/data/train.record"
  }
  label_map_path: "/home/bjw/Desktop/models-master/research/data/object_detection.pbtxt"
}
eval_input_reader: 分别输入input_path和label_map_path的路径(都在data文件夹里)
eval_input_reader: {
  tf_record_input_reader {
    input_path: "/home/bjw/Desktop/models-master/research/data/test.record"
  }
  label_map_path: "/home/bjw/Desktop/models-master/research/data/object_detection.pbtxt"
  shuffle: false
  num_readers: 1
}
(4)开始训练,执行:
python3 object_detection/legacy/train.py \
    --logtostderr --train_dir=/home/bjw/Desktop/models-master/research/model/ \
--pipeline_config_path=/home/bjw/Desktop/models-master/research/model/ssd_mobilenet_v1_pets.config其中,train_dir 为生成模型的目录;
pipeline_config_path为ssd_mobilenet_v1_pets.config位置目录
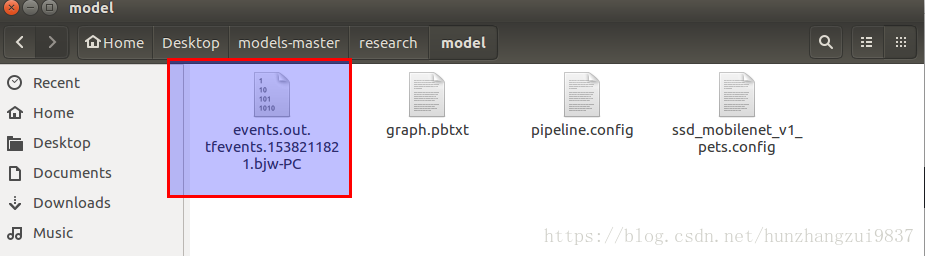
执行过程中会出现events.out.tfevents.xxxxx文件,该文件是模型训练时保存的实时数据(比如loss)。
在该目录执行下面命令,实现Tensorboard可视化。
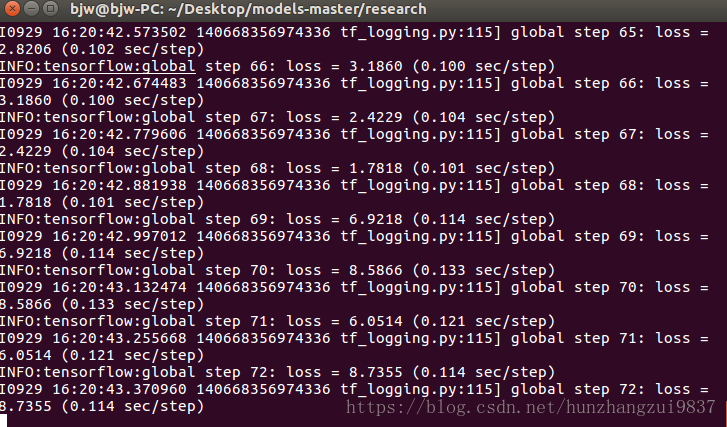
tensorboard --logdir='model'下面是训练过程截图:
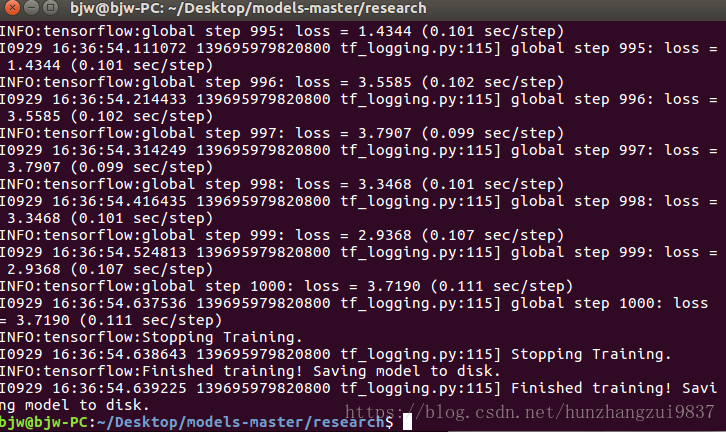
训练完成:
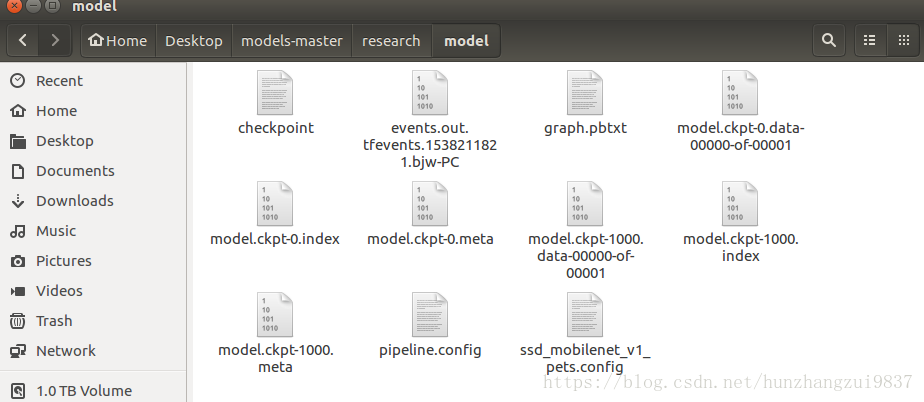
在model文件夹生成:
6、模型测试
在research目录执行:
python3 object_detection/export_inference_graph.py \
    --input_type image_tensor \
    --pipeline_config_path model/ssd_mobilenet_v1_pets.config \
    --trained_checkpoint_prefix model/model.ckpt-1000 \
    --output_directory mac_n_cheese_inference_graph
其中, pipeline_config_path为指定ssd_mobilenet_v1_pets.config的路径
trained_checkpoint_prefix为自己训练好的模型路径
output_directory为输出inference.pb的目录
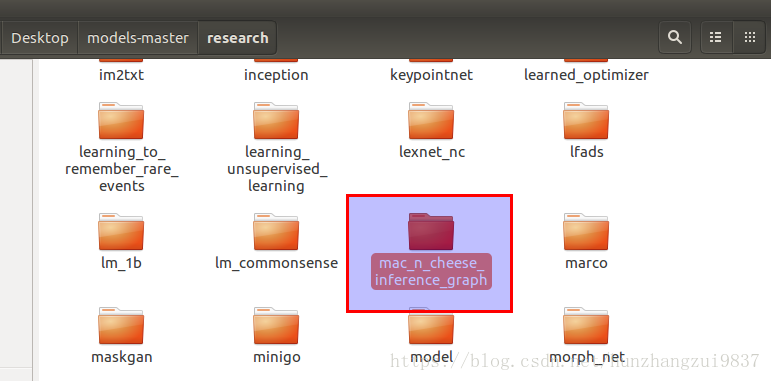
下面是生成mac_n_cheese_inference_graph文件
里面包含:
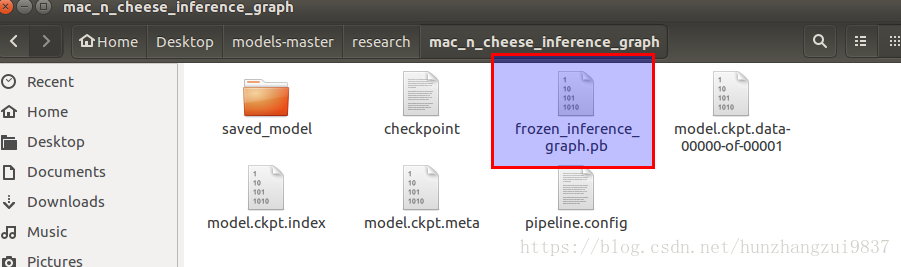
其中, frozen_inference_graph.pb就是我们想要的东西
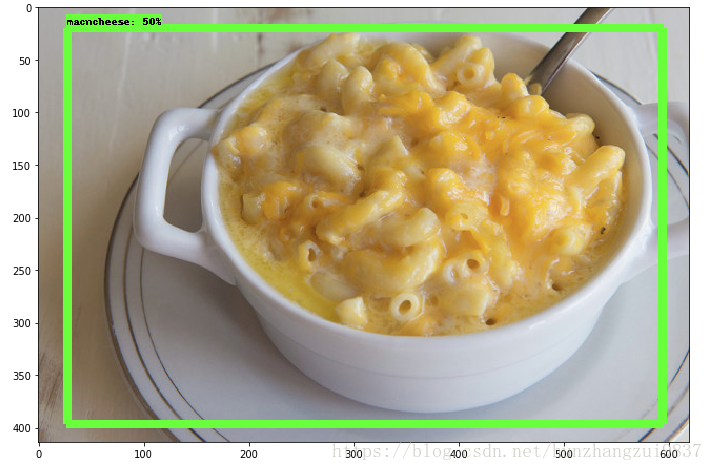
最后进行测试:
进入jupyter,修改research/object_detection里面的object_detection_tutorial.ipynb代码:
import numpy as np
import os
import six.moves.urllib as urllib
import sys
import tarfile
import tensorflow as tf
import zipfile

from distutils.version import StrictVersion
from collections import defaultdict
from io import StringIO
from matplotlib import pyplot as plt
from PIL import Image

# This is needed since the notebook is stored in the object_detection folder.
sys.path.append("..")
from object_detection.utils import ops as utils_ops

if StrictVersion(tf.__version__) < StrictVersion('1.9.0'):
    raise ImportError('Please upgrade your TensorFlow installation to v1.9.* or later!')
# This is needed to display the images.
%matplotlib inline
from utils import label_map_util

from utils import visualization_utils as vis_util
CWD_PATH = os.getcwd()
MODEL_NAME = 'mac_n_cheese_inference_graph'

#DOWNLOAD_BASE = 'http://download.tensorflow.org/models/object_detection/'
# Path to frozen detection graph. This is the actual model that is used for the object detection.
PATH_TO_FROZEN_GRAPH = os.path.join(CWD_PATH , MODEL_NAME , 'frozen_inference_graph.pb')

# List of the strings that is used to add correct label for each box.
PATH_TO_LABELS = os.path.join(CWD_PATH,'data', 'object-detection.pbtxt')
#opener = urllib.request.URLopener()
#opener.retrieve(DOWNLOAD_BASE + MODEL_FILE, MODEL_FILE)
#tar_file = tarfile.open(MODEL_FILE)
#for file in tar_file.getmembers():
    #file_name = os.path.basename(file.name)
    #if 'frozen_inference_graph.pb' in file_name:
        #tar_file.extract(file, os.getcwd())
detection_graph = tf.Graph()
with detection_graph.as_default():
    od_graph_def = tf.GraphDef()
    with tf.gfile.GFile(PATH_TO_FROZEN_GRAPH, 'rb') as fid:
        serialized_graph = fid.read()
        od_graph_def.ParseFromString(serialized_graph)
        tf.import_graph_def(od_graph_def, name='')
def load_image_into_numpy_array(image):
    (im_width, im_height) = image.size
    return np.array(image.getdata()).reshape((im_height, im_width, 3)).astype(np.uint8)
# For the sake of simplicity we will use only 2 images:
# image1.jpg
# image2.jpg
# If you want to test the code with your images, just add path to the images to the TEST_IMAGE_PATHS.
PATH_TO_TEST_IMAGES_DIR = 'test_images'
TEST_IMAGE_PATHS = [ os.path.join(PATH_TO_TEST_IMAGES_DIR, 'image{}.jpg'.format(i)) for i in range(1, 3) ]

# Size, in inches, of the output images.
IMAGE_SIZE = (12, 8)
def run_inference_for_single_image(image, graph):
    with graph.as_default():
        with tf.Session() as sess:
            # Get handles to input and output tensors
            ops = tf.get_default_graph().get_operations()
            all_tensor_names = {output.name for op in ops for output in op.outputs}
            tensor_dict = {}
            for key in ['num_detections', 'detection_boxes', 'detection_scores',
                    'detection_classes', 'detection_masks']:
                tensor_name = key + ':0'
                if tensor_name in all_tensor_names:
                    tensor_dict[key] = tf.get_default_graph().get_tensor_by_name(tensor_name)
            if 'detection_masks' in tensor_dict:
                # The following processing is only for single image
                detection_boxes = tf.squeeze(tensor_dict['detection_boxes'], [0])
                detection_masks = tf.squeeze(tensor_dict['detection_masks'], [0])
                # Reframe is required to translate mask from box coordinates to image coordinates and fit the image size.
                real_num_detection = tf.cast(tensor_dict['num_detections'][0], tf.int32)
                detection_boxes = tf.slice(detection_boxes, [0, 0], [real_num_detection, -1])
                detection_masks = tf.slice(detection_masks, [0, 0, 0], [real_num_detection, -1, -1])
                detection_masks_reframed = utils_ops.reframe_box_masks_to_image_masks(
                    detection_masks, detection_boxes, image.shape[0], image.shape[1])
                detection_masks_reframed = tf.cast(
                    tf.greater(detection_masks_reframed, 0.5), tf.uint8)
                # Follow the convention by adding back the batch dimension
                tensor_dict['detection_masks'] = tf.expand_dims(
                    detection_masks_reframed, 0)
            image_tensor = tf.get_default_graph().get_tensor_by_name('image_tensor:0')

            # Run inference
            output_dict = sess.run(tensor_dict,
                             feed_dict={image_tensor: np.expand_dims(image, 0)})

            # all outputs are float32 numpy arrays, so convert types as appropriate
            output_dict['num_detections'] = int(output_dict['num_detections'][0])
            output_dict['detection_classes'] = output_dict[
                'detection_classes'][0].astype(np.uint8)
            output_dict['detection_boxes'] = output_dict['detection_boxes'][0]
            output_dict['detection_scores'] = output_dict['detection_scores'][0]
            if 'detection_masks' in output_dict:
                output_dict['detection_masks'] = output_dict['detection_masks'][0]
    return output_dict
for image_path in TEST_IMAGE_PATHS:
    image = Image.open(image_path)
    # the array based representation of the image will be used later in order to prepare the
    # result image with boxes and labels on it.
    image_np = load_image_into_numpy_array(image)
    # Expand dimensions since the model expects images to have shape: [1, None, None, 3]
    image_np_expanded = np.expand_dims(image_np, axis=0)
    # Actual detection.
    output_dict = run_inference_for_single_image(image_np, detection_graph)
    # Visualization of the results of a detection.
    vis_util.visualize_boxes_and_labels_on_image_array(
        image_np,
        output_dict['detection_boxes'],
        output_dict['detection_classes'],
        output_dict['detection_scores'],
        category_index,
        instance_masks=output_dict.get('detection_masks'),
        use_normalized_coordinates=True,
        line_thickness=8)
    plt.figure(figsize=IMAGE_SIZE)
    plt.imshow(image_np)
run all: