rhcs是用来实现高可用的一个红帽套件。
下来我将介绍如何安装配置rhcs和用rhcs实现httpd的高可用。
操作系统版本:redhat6.5
master:server1
slave:server2
在server1上搭建web管理界面
实验之前给两台节点上安装httpd
rhcs的安装
1.配置yum源,安装相应的软件
#ricci是master和slave都要安装
#配置yum源

[root@server1 ~]# vim /etc/yum.repos.d/rhel-source.repo

[rhel-source]
name=Red Hat Enterprise Linux $releasever - $basearch - Source
baseurl=http://172.25.60.250/rhel6.5
enabled=1
igpgcheck=0

[HighAvailability]
name=HighAvailability
baseurl=http://172.25.60.250/rhel6.5/HighAvailability
gpgcheck=0

[LoadBalancer]
name=LoadBalancer
baseurl=http://172.25.60.250/rhel6.5/LoadBalancer
gpgcheck=0


[ResilientStorage]
name=ResilientStorage
baseurl=http://172.25.60.250/rhel6.5/ResilientStorage
gpgcheck=0

[ScalableFileSystem]
name=ScalableFileSystem
baseurl=http://172.25.60.250/rhel6.5/ScalableFileSystem
gpgcheck=0
#安装ricci,打开ricci后会出现11111端口
[root@server1 ~]# yum install ricci -y
[root@server1 ~]# passwd ricci
[root@server1 ~]# /etc/init.d/ricci start
[root@server1 ~]# chkconfig ricci on
[root@server1 ~]# netstat -antlp
tcp 0 0 :::11111 :::* LISTEN 1205/ricci
#luci为rhcs的web管理界面
[root@server1 ~]# yum install -y luci
[root@server1 ~]# chkconfig luci on
[root@server1 ~]# /etc/init.d/luci start
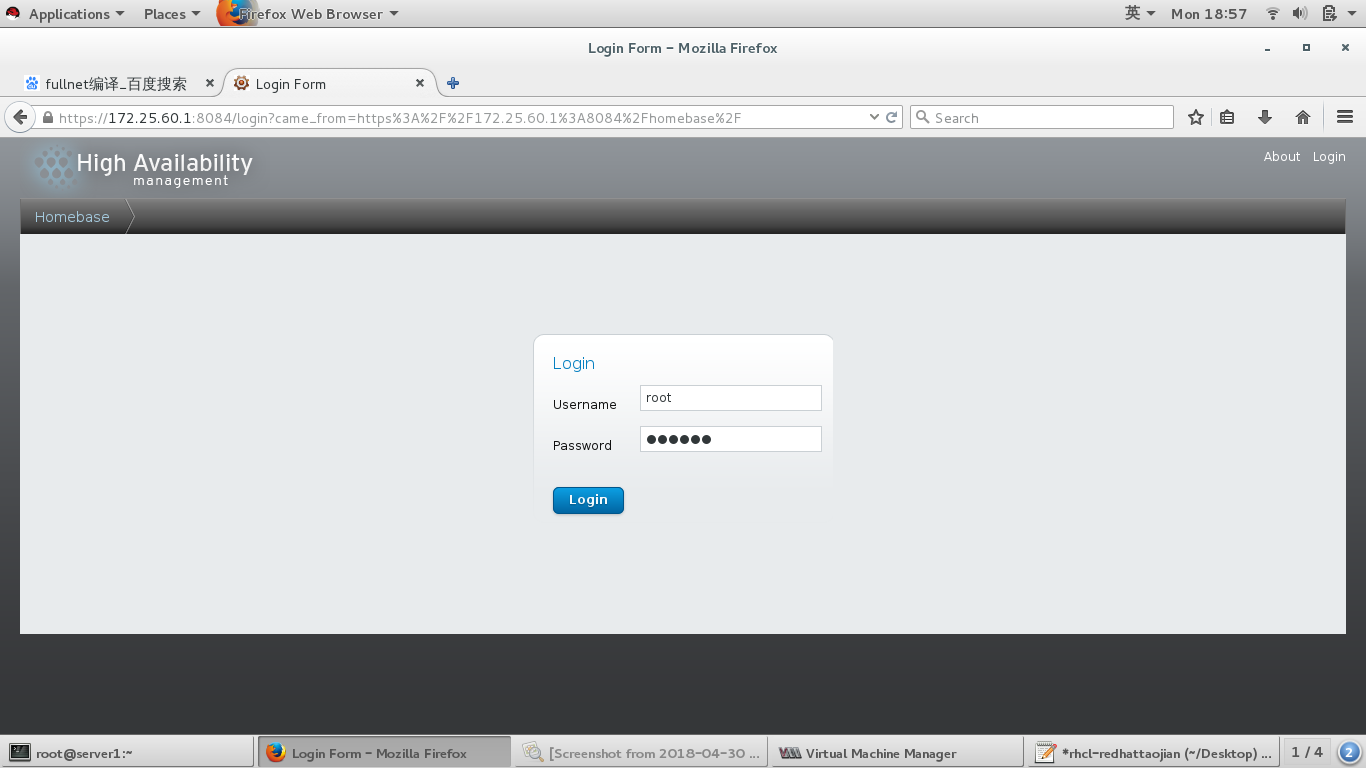
2.浏览器访问查看
访问 https://172.25.60.1:8084 ,会出现以下页面
用户 操作系统用户
密码 系统的密码
登陆后会出现以下界面

点击Manage Clusters,上图红框,添加节点,我的节点是server1和server2,因为勾选了加入节点后重启,所以server1和server2加入后会重新启动。

添加之后
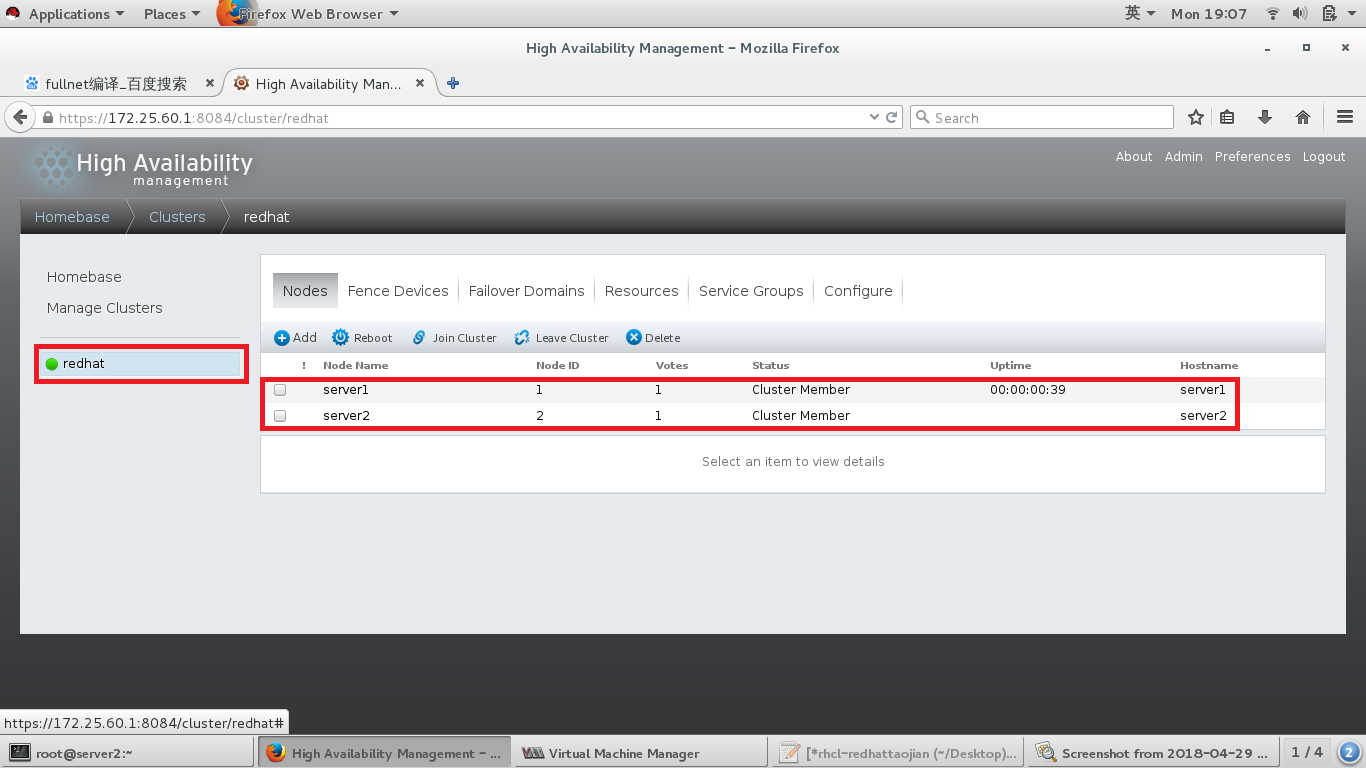
此时,可以在结点上使用以下命令进行查看


脑裂:当两台高可用节点网络之间出现问题时或者master夯住时,master给slave主机发送的心跳slave接收不到,此时就会通过选举机制在slave中重新选举出master接管旧的master的资源,但是当网络恢复或者旧的master恢复之后,旧的master会继续履行master的职责,就会和新的master进行资源的争夺,出现脑裂。为了防止脑裂,就出现了fence。
fence:当master出现问题但没有挂掉时,将master强制挂掉,新的master产生之后就会出现脑裂现象。
fence添加
#fence分为外部fence和内部fence,我以外部fence为例,因为两台高可用节点是虚拟机,所以我用物理机充当fence设备
[root@foundation60 ~]# systemctl status libvirtd
[root@foundation60 ~]# rpm -qa | grep fence
[root@foundation40 rhcl-redhat]# yum install fence-virtd-0.3.2-2.el7.x86_64  fence-virtd-libvirt-0.3.2-2.el7.x86_64 fence-virtd-multicast-0.3.2-2.el7.x86_64 -y
[root@foundation40 rhcl-redhat]# cd /etc/
[root@foundation40 etc]# fence_virtd -c
Module search path [/usr/lib64/fence-virt]:
Available backends:
libvirt 0.1
Available listeners:
multicast 1.2
serial 0.4
Listener modules are responsible for accepting requests
from fencing clients.
Listener module [multicast]:
The multicast listener module is designed for use environments
where the guests and hosts may communicate over a network using
multicast.
The multicast address is the address that a client will use to
send fencing requests to fence_virtd.
Multicast IP Address [225.0.0.12]:
Using ipv4 as family.
Multicast IP Port [1229]:
Setting a preferred interface causes fence_virtd to listen only
on that interface. Normally, it listens on all interfaces.
In environments where the virtual machines are using the host
machine as a gateway, this *must* be set (typically to virbr0).
Set to 'none' for no interface.
Interface [virbr0]: br0
The key file is the shared key information which is used to
authenticate fencing requests. The contents of this file must
be distributed to each physical host and virtual machine within
a cluster.
Key File [/etc/cluster/fence_xvm.key]:
Backend modules are responsible for routing requests to
the appropriate hypervisor or management layer.
Backend module [libvirt]:
Configuration complete.
=== Begin Configuration ===
backends {
libvirt {
uri = "qemu:///system";
}
}
listeners {
multicast {
port = "1229";
family = "ipv4";
interface = "br0";
address = "225.0.0.12";
key_file = "/etc/cluster/fence_xvm.key";
}
}
fence_virtd {
module_path = "/usr/lib64/fence-virt";
backend = "libvirt";
listener = "multicast";
}
=== End Configuration ===
Replace /etc/fence_virt.conf with the above [y/N]? y
#以上配置都记录在/etc/fence_virt.conf文件中
[root@foundation60 etc]# cat /etc/fence_virt.conf
fence_virtd {
	listener = "multicast";
	backend = "libvirt";
	module_path = "/usr/lib64/fence-virt";
}

listeners {
	multicast {
		key_file = "/etc/cluster/fence_xvm.key";
		address = "225.0.0.12";
		interface = "br0";
		family = "ipv4";
		port = "1229";
	}

}

backends {
	libvirt {
		uri = "qemu:///system";
	}

}
#第一次做时是没有该目录,需要自己创建
[root@foundation40 etc]# mkdir /etc/cluster
[root@foundation40 etc]# cd clust
#创建了一个key
[root@foundation40 cluster]# dd if=/dev/urandom
  of=fence_xvm.key bs=128 count=1
[root@foundation40 cluster]# ls
fence_xvm.key
#将key发送给高可用节点
[root@foundation40 cluster]# scp fence_xvm.key server1:/etc/cluster/
[root@foundation40 cluster]# scp fence_xvm.key server4:/etc/cluster/
访问 https://172.25.60.1:8084,rhcs中添加fence
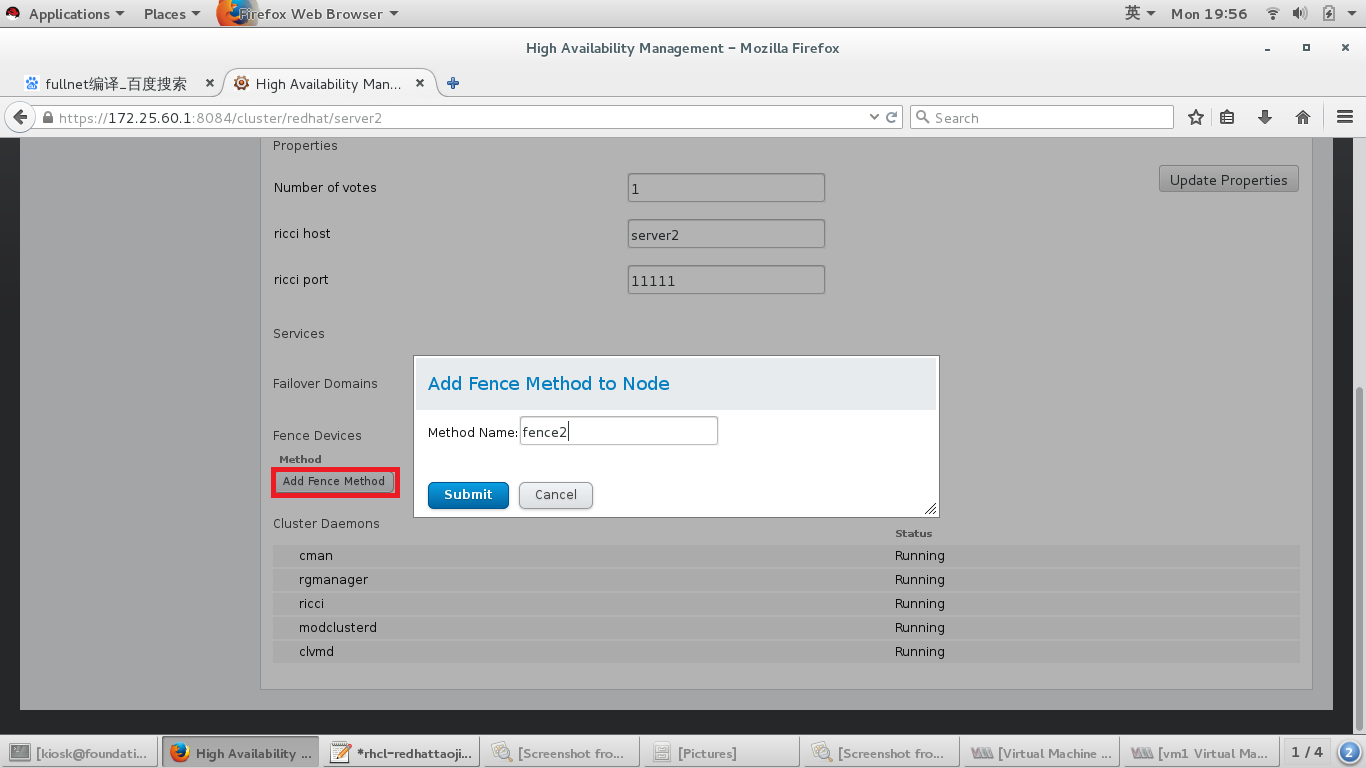
#添加fence设备,根据自己需要添加
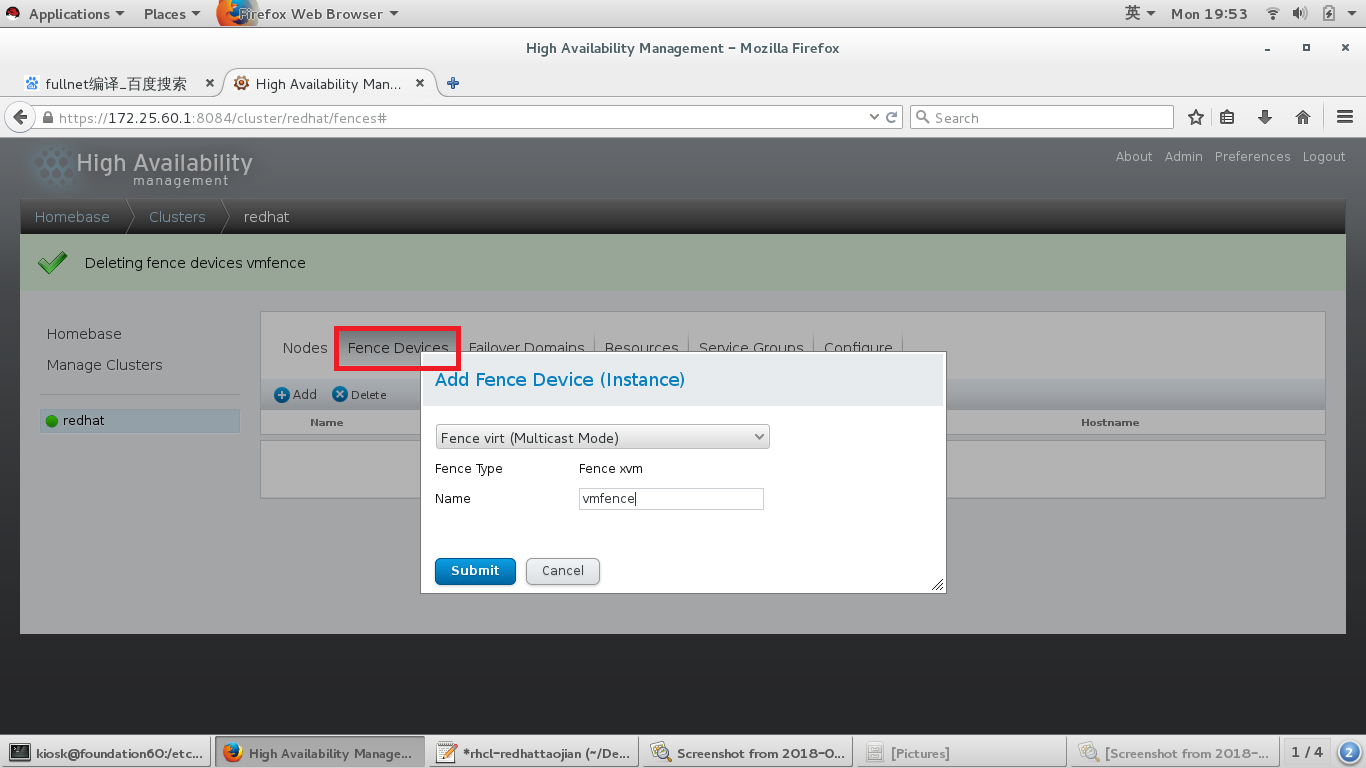
#给两个节点添加fence,我的节点是虚拟机,Domain处添加的是虚拟机的UUID


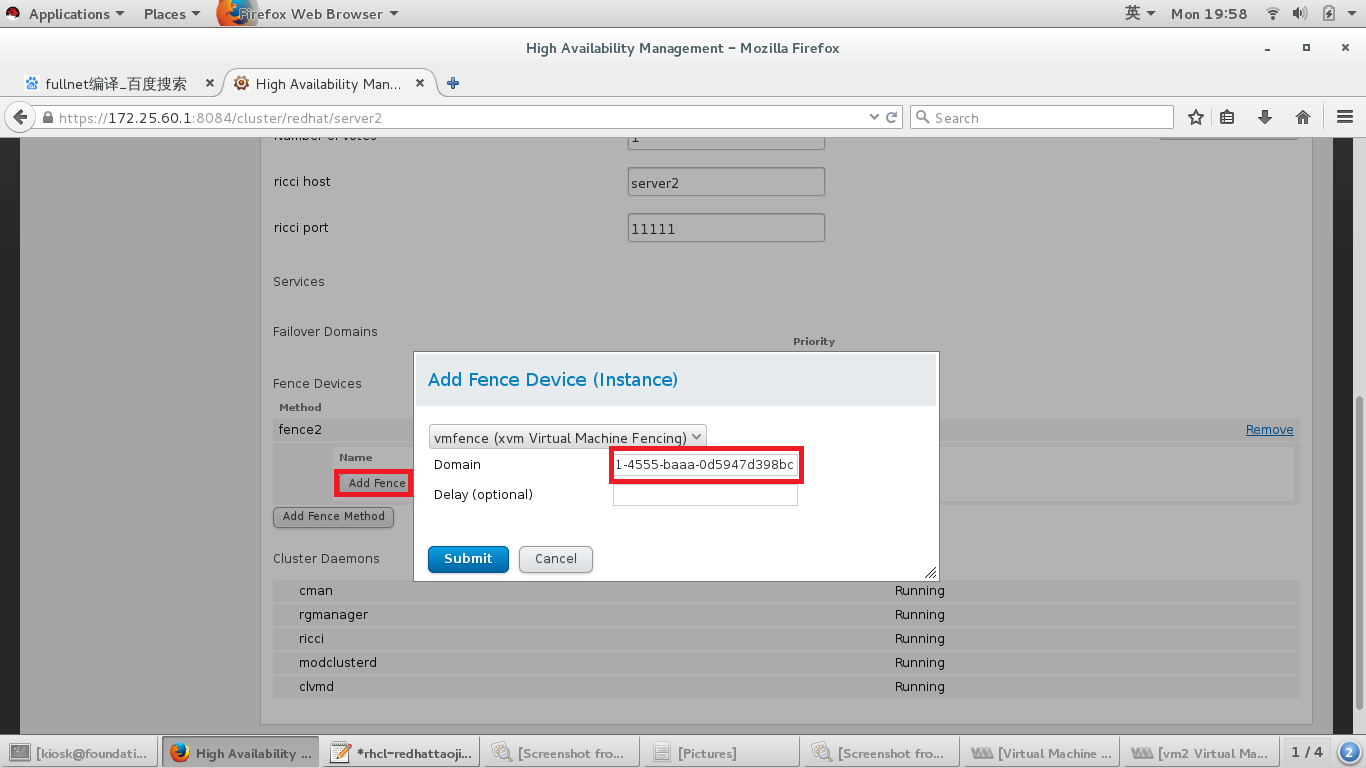
#添加完之后
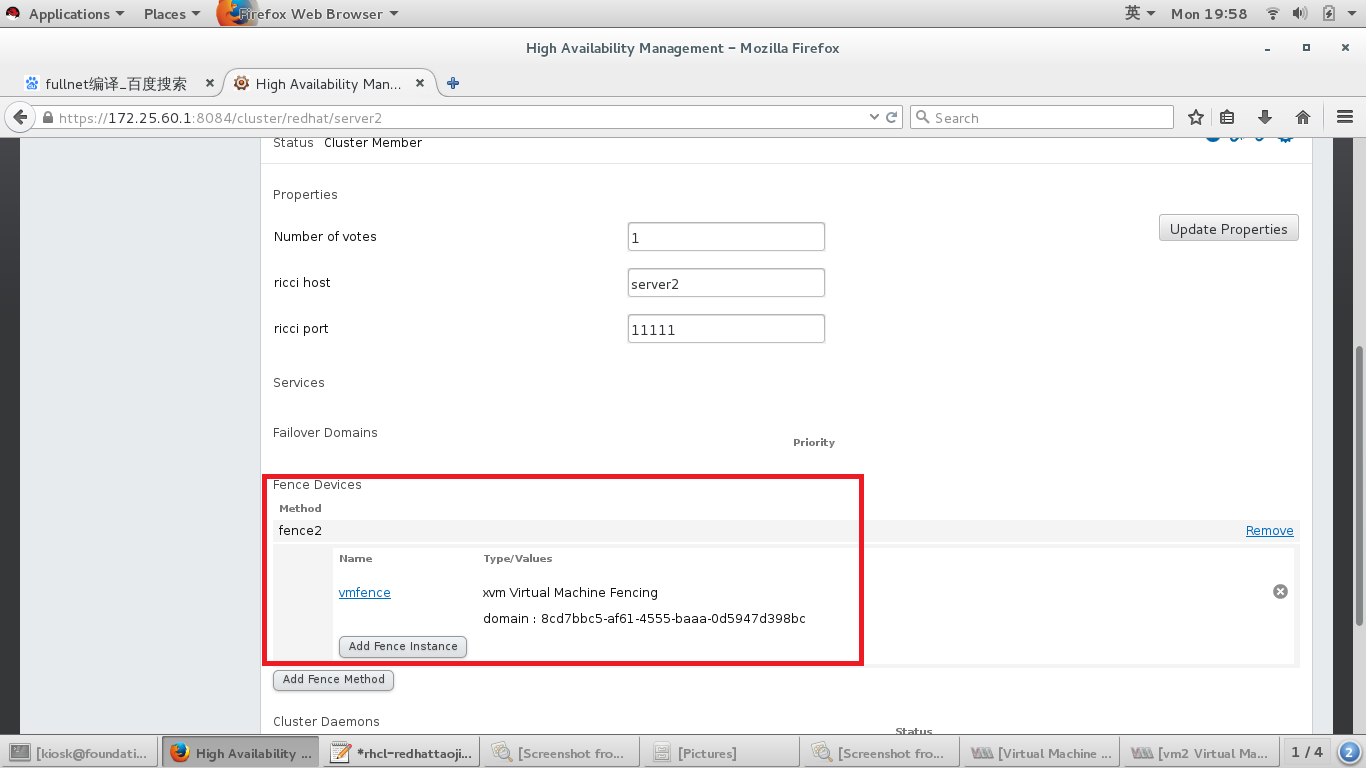

fence添加成功,下来添加服务
#创建集群

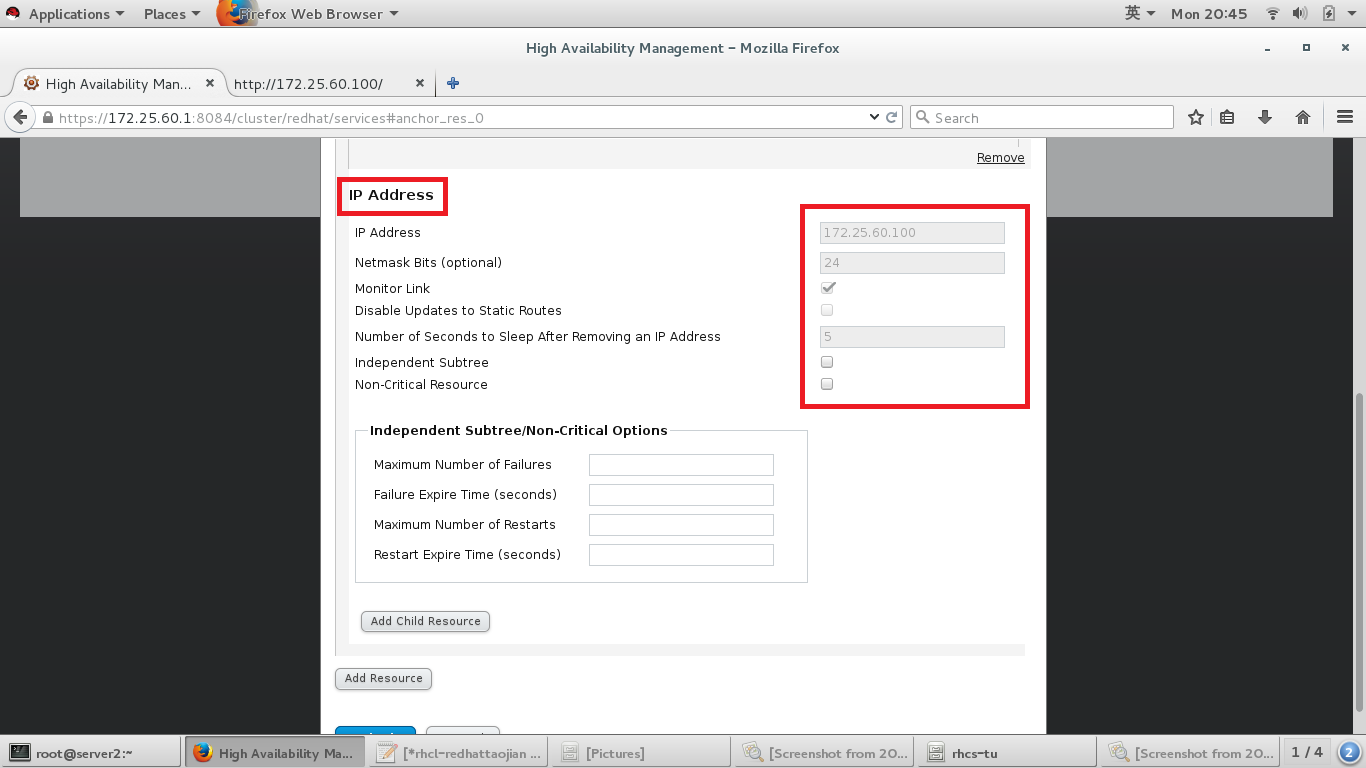
#添加ViP资源

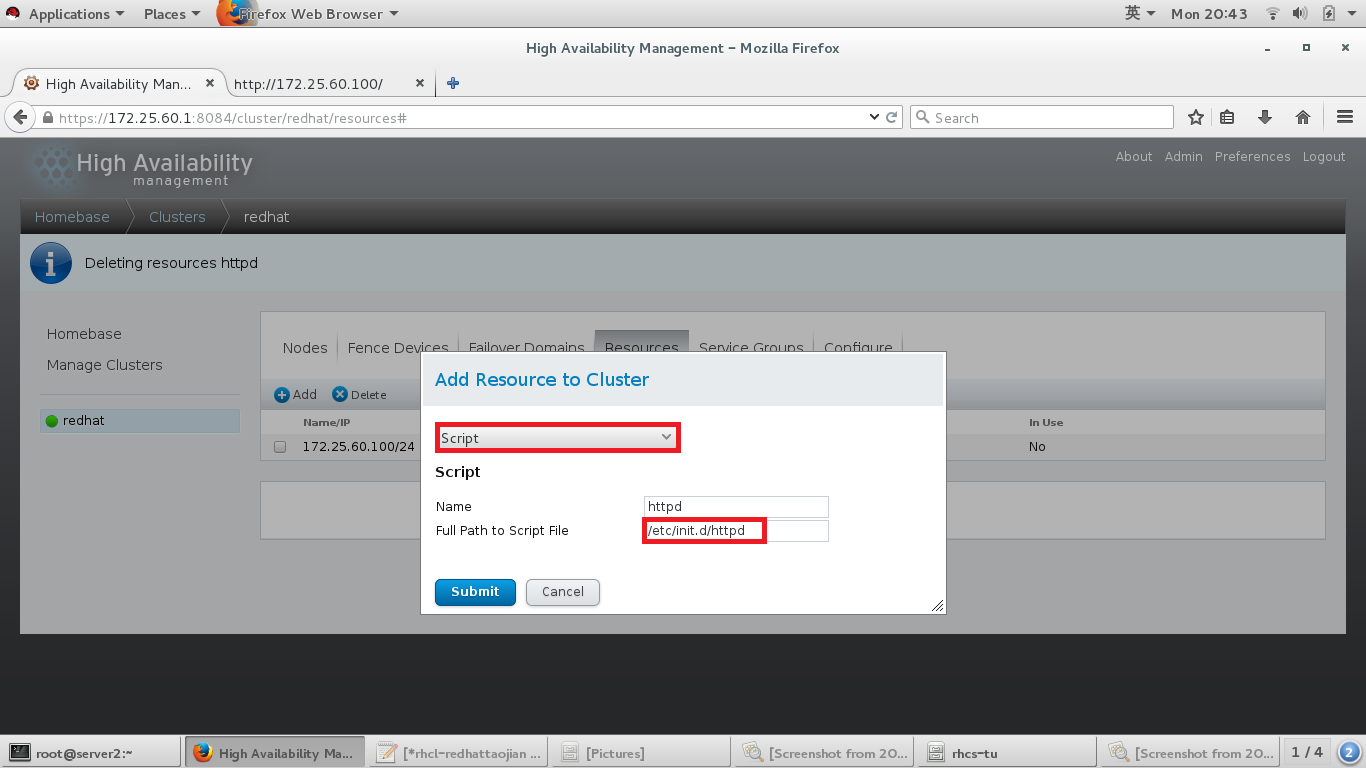
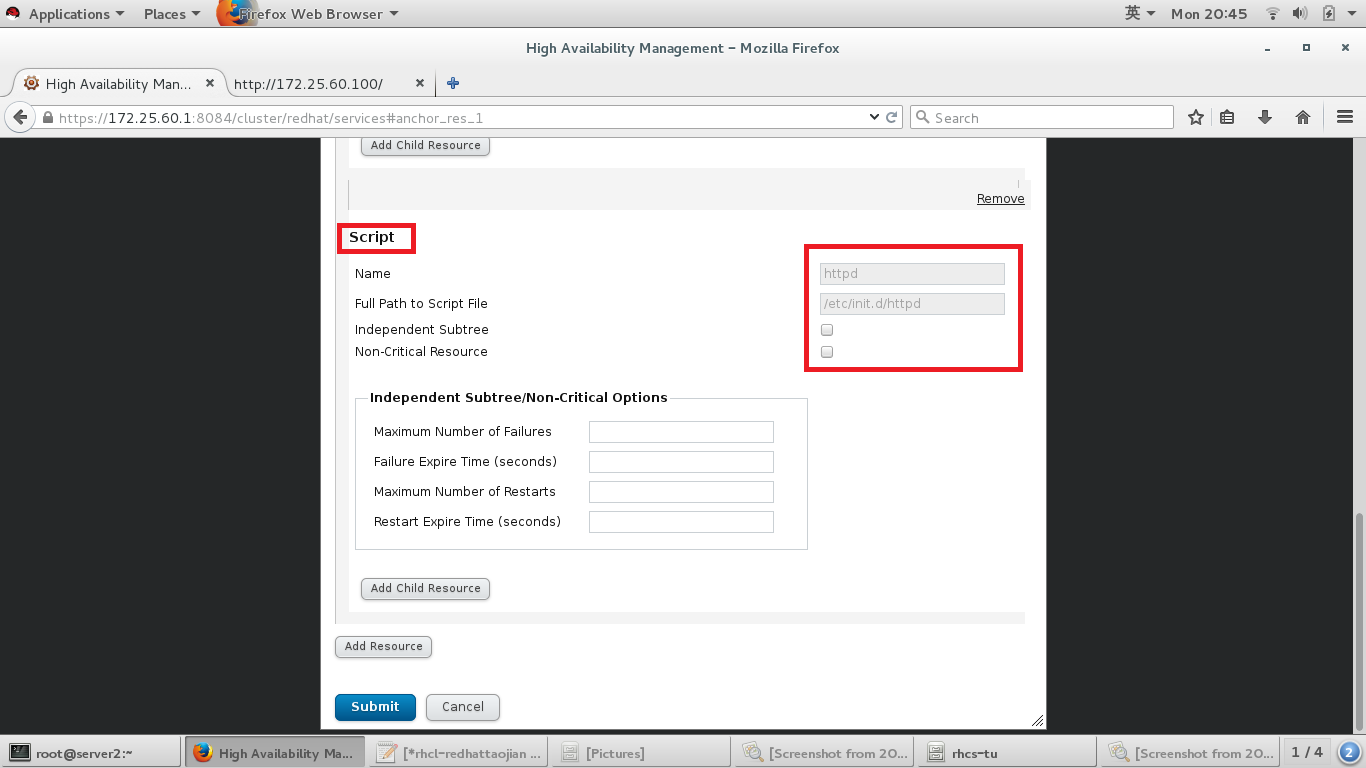
#添加脚本资源,及脚本路径
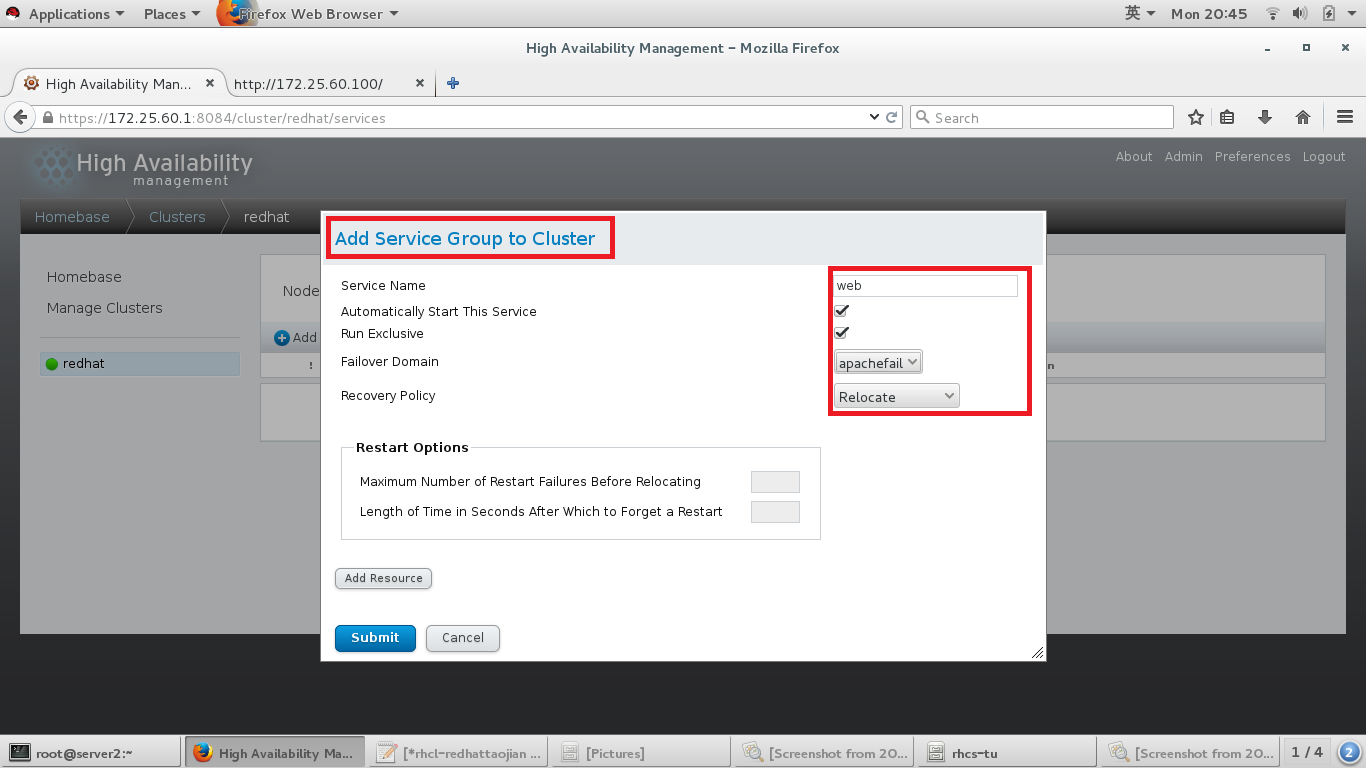
#添加服务组集群
#给服务组集群中添加资源
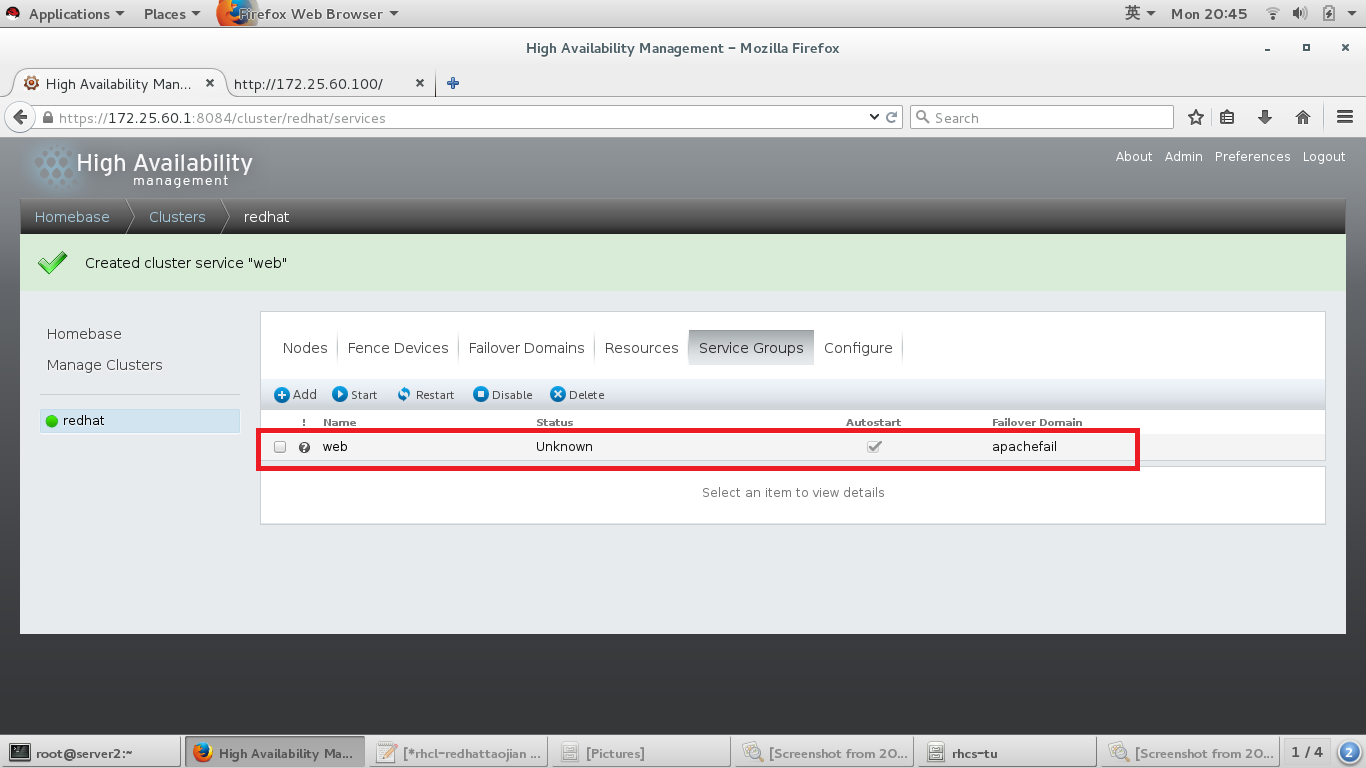
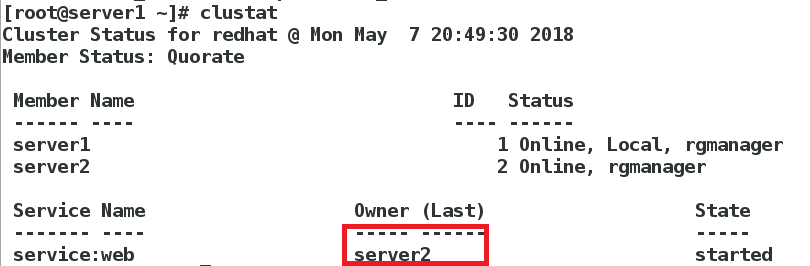
#在节点上使用以下命令查看,资源在哪台节点上

#master上就会添加一个vip资源
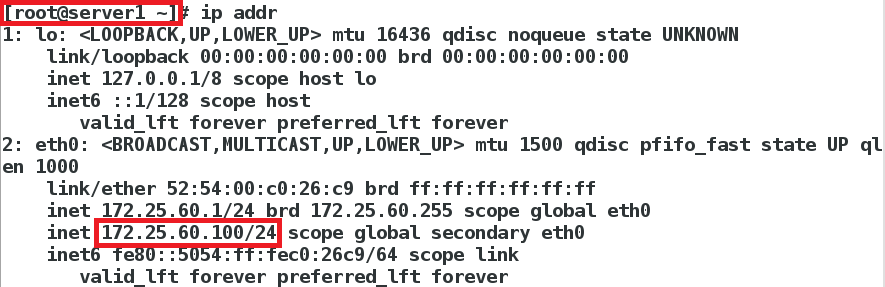
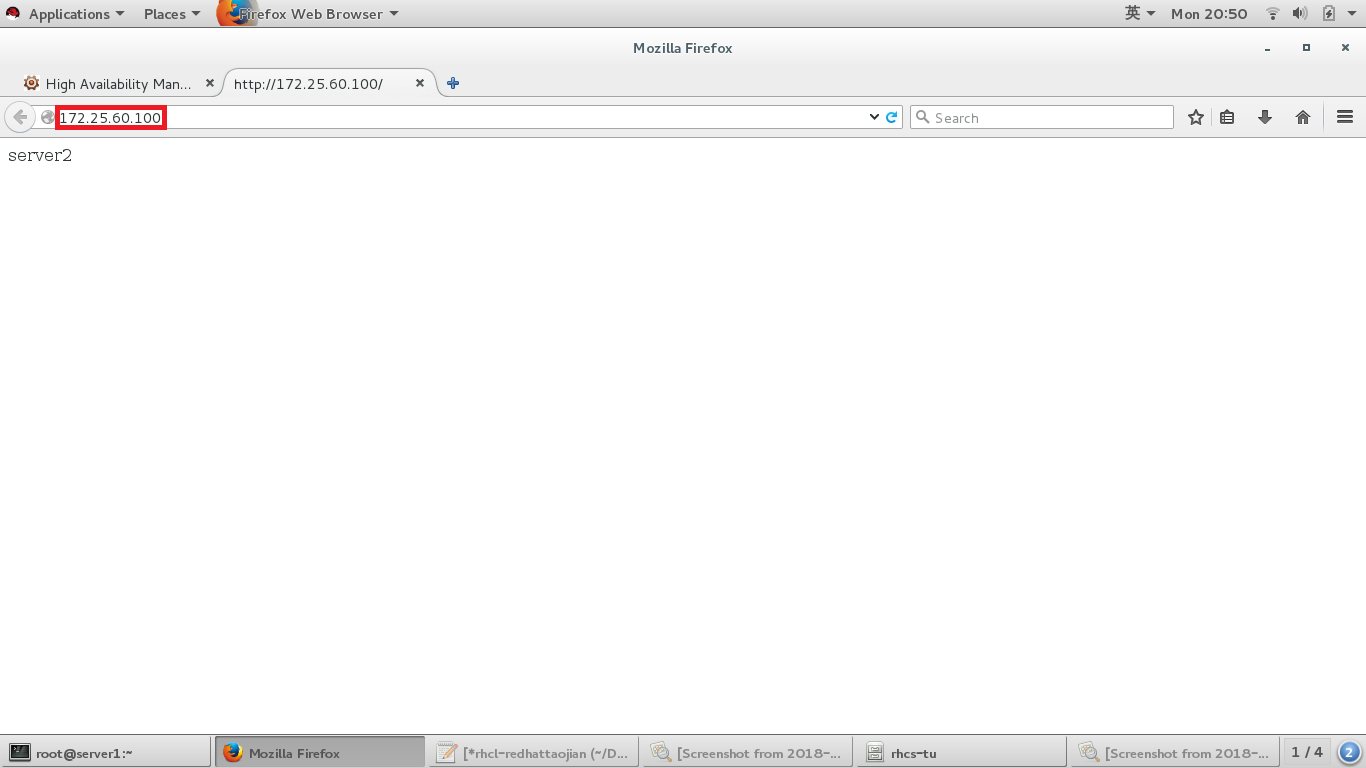
#浏览器访问vip

#删掉master上的vip,由于fence的存在,资源就会转移到slave上