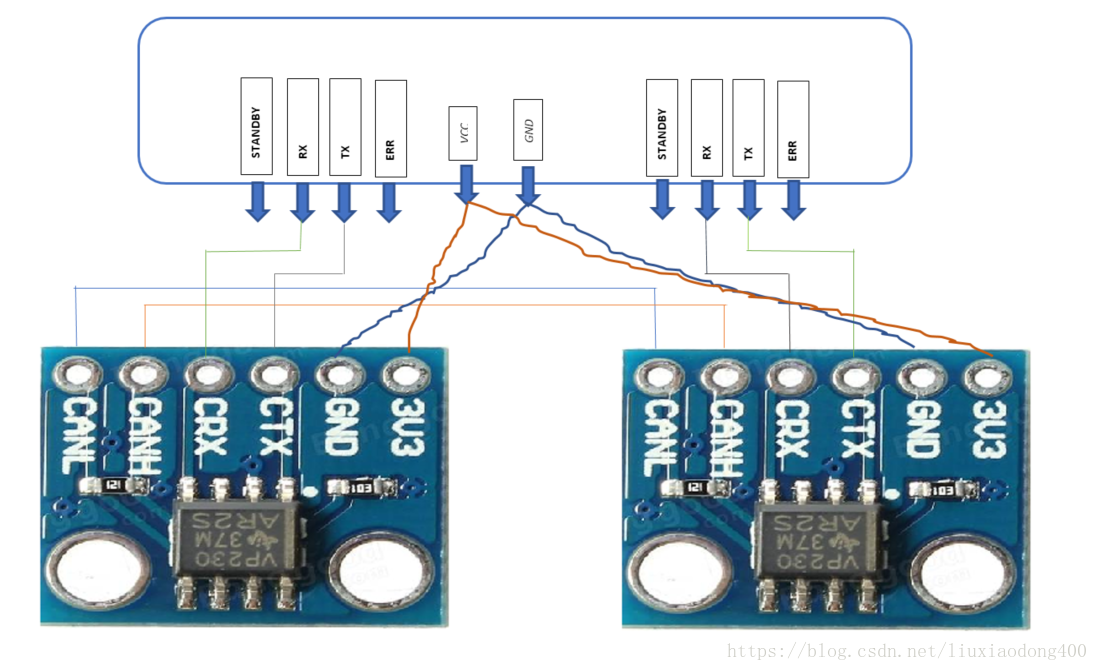
一、CAN通信芯片硬件接线图
强调:这里必须使用3.3v电平,必须使用3.3v电平,必须使用3.3v电平的通信芯片,使用TX2的3.3V给CAN通信芯片供电。
二、端口对应
Port : J26
Pin No Details
1 ===== CAN wake
2 ===== 3.3V
3 ===== CAN0 STAND BY
5 ===== CAN0 RX
7 ===== CAN0 TX
9 ===== CAN0 ERR
11,21,10,28 ==== GND
13 ==== CAN1 STANDBY
15 ==== CAN1 RX
17 ==== CAN1 TX
19 ==== CAN1 ERR
三、终端命令执行步骤
These are the steps can be followed to 强调:enable and check CAN on TX2.
1.Enable kernel support for mttcan(Other required modules are already supported)
CONFIG_MTTCAN = m (Here mttcan is compiled as a module)
2.Insert CAN BUS subsystem support module.
modprobe can
3.Insert Raw CAN protocol module (CAN-ID filtering)
modprobe can_raw
4.Real CAN interface support (for our case, it is: mttcan)
modprobe mttcan (dependent module is can_dev: can driver with netlink support)
5.CAN interface settings for both the controllers
ip link set can0 type can bitrate 500000 dbitrate 2000000 berr-reporting on fd on
ip link set up can0
ip link set can1 type can bitrate 500000 dbitrate 2000000 berr-reporting on fd on
ip link set up can1
CAN interfaces are up now. Use ifconfig to list all the interfaces which are up.
6.Installation of user app to check CAN communication
sudo apt-get install can-utils
7.Commands to run to check CAN packet send/receive
broadcasting a can data packet:
cansend
e.g. cansend can0 123#abcdabcd
Receiving a can data packet:
candump can_interface
e.g. candump can1
Different tools (i.e. cangen, cangw etc) can be used for various filtering options.
8.To check the interface statistics
ip -details -statistics link show can0
ip -details -statistics link show can1