系列文章:
用OpenCV实现Photoshop算法(四): 色阶调整用OpenCV实现Photoshop算法(五): 亮度对比度调整
用OpenCV实现Photoshop算法(六): 变为黑白图像
用OpenCV实现Photoshop算法(七): 调整色相饱和度
用OpenCV实现Photoshop算法(九): 高反差保留
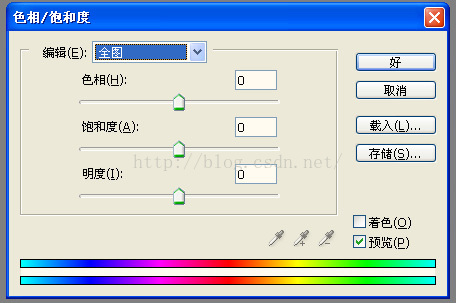
七、调整色相饱和度
Photoshop 的色相/饱和度调整,可以对全图、红、黄、绿、青、蓝、洋红六个通道进行设置。
每个通道可设置: 色相(hue), 饱和度(satuation), 明度(Lightness)三个调整值。
(一)颜色空间 (Color Space)
颜色空间也称彩色模型(又称彩色空间). 常用颜色空间有:RGB, HSL, CYMK, Lab等。
对于RGB图像,所谓色相/饱和度调整,就是把 RGB 转为 HSL, 再对色相(H), 饱和度(S), 明度(L)进行调整,然后再转回RGB.
(二)OpenCV代码实现
1,我用OpenCV 编写了多个 颜色空间转换函数, 在源文件 ColorSpace.hpp, ColorSpace.cpp中
2,我用OpenCV 编写了一个 HSL类,实现色相/饱和度调整。在源文件 ColorSpace.hpp, ColorSpace.cpp中
3, 使用方法: HSL类有一个属性channels[7], 定义了7个颜色通道。每个通道有hue, saturation, brightness三个值。设置好所需通道和值,再调用HSL类的adjust()方法即可对图像进行 色相/饱和度调整。
4, 源文件及例程源码下载在这里: 调整色相饱和度源码
(三)例程
使用HSL类,进行色相/饱和度调整。
#include <iostream>
#include "opencv2/core.hpp"
#include "opencv2/imgproc.hpp"
#include "opencv2/highgui.hpp"

#include "HSL.hpp"

using namespace std;
using namespace cv;

static string window_name = "photo";
static Mat src;

static HSL hsl;
static int color = 0;
static int hue = 180;
static int saturation = 100;
static int brightness = 100;

static void callbackAdjust(int , void *)
{
	Mat dst;

	hsl.channels[color].hue = hue - 180;
	hsl.channels[color].saturation = saturation - 100;
	hsl.channels[color].brightness = brightness - 100;

	hsl.adjust(src, dst);

	imshow(window_name, dst);
}

static void callbackAdjustColor(int , void * )
{
	hue = hsl.channels[color].hue + 180;
	saturation = hsl.channels[color].saturation + 100;
	brightness = hsl.channels[color].brightness + 100;

	setTrackbarPos("hue", window_name, hue);
	setTrackbarPos("saturation", window_name, saturation);
	setTrackbarPos("brightness", window_name, brightness);
	callbackAdjust(0, 0);
}


int main()
{
	src = imread("building.jpg");

	if ( !src.data ) {
		cout << "error read image" << endl;
		return -1;
	}

	namedWindow(window_name);
	createTrackbar("color", window_name, &color, 6, callbackAdjustColor);
	createTrackbar("hue", window_name, &hue, 2*hue, callbackAdjust);
	createTrackbar("saturation", window_name, &saturation, 2*saturation, callbackAdjust);
	createTrackbar("brightness", window_name, &brightness, 2*brightness, callbackAdjust);
	callbackAdjust(0, 0);

	waitKey();
	return 0;

}
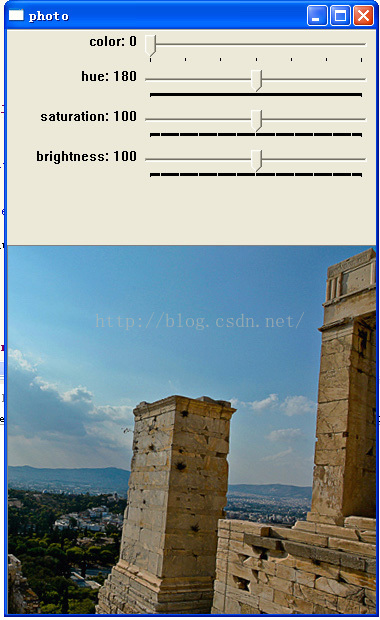
运行效果:
原图:
对蓝色通道(color = 5)调整hue, brightness后
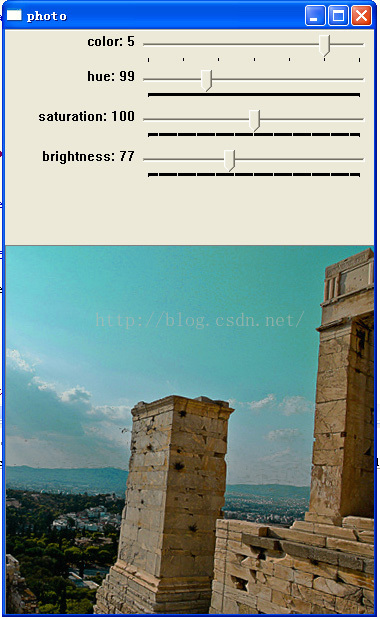
再对全图(color = 0)调整saturation, brightness后
