此篇文章记录Dissolve Effect(溶解特效)的制作过程
软件环境
Unity 2018.1.2f1
Packages: Lightweight Render Pipeline 1.1.11
Dissolve Effect最终效果
创建工程及初始设定
New Project & New Scene;
创建Lightweight Pipeline Asset,打开Vertex Lighting与HDR,关联到Graphics Settings当中;
在场景中放置Monkey Model,创建默认材质Default,Albedo = (25, 25, 25, 0)
摄像机Clear Flags设置为Solid Color = (80, 80, 80, 0), FOV = 40;
Player Settings的Color Space = Linear;

初始设定预览
溶解特效
使用Simple Noise结点生成随机Alpha贴图,AlphaClipThreshold与Alpha一起控制片段的显示或隐藏:当片段的Alpha < AlphaClipThreshold时,此片段将被丢弃,即隐藏不显示出来。
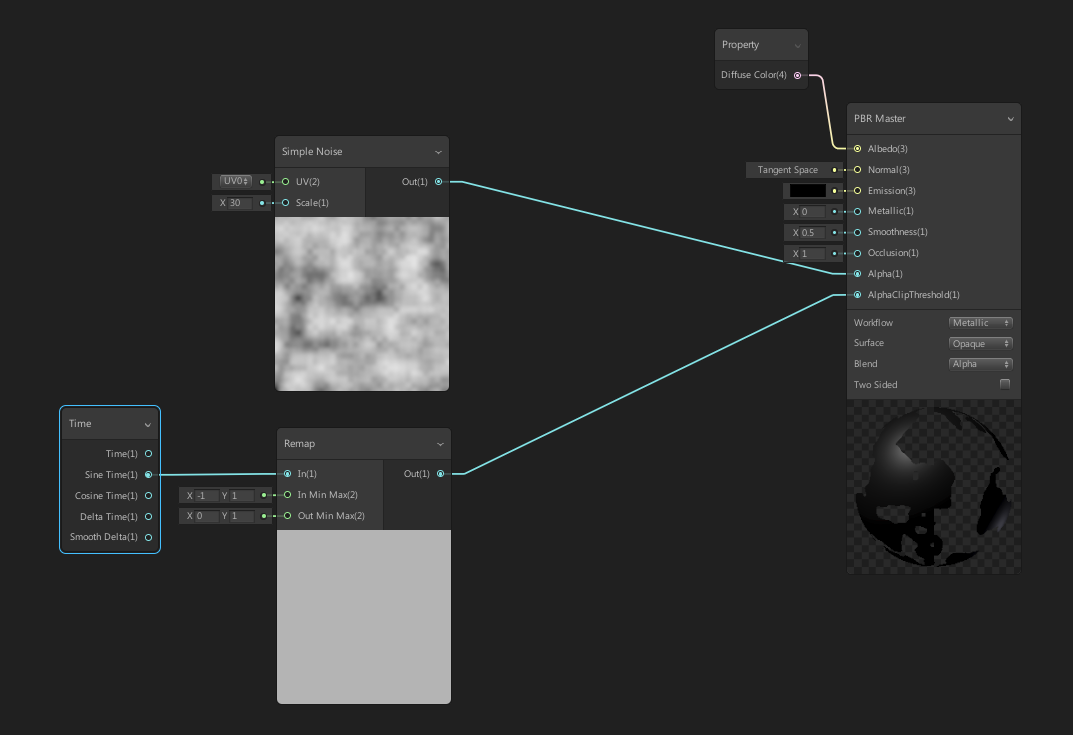
Dissolve Shader Graph
溶解特效预览
溶解边缘发光特效
使用Step结点将Alpha贴图转换为黑白分明的贴图,黑白贴图与Color相乘后输入到Emission;
Step Node: Returns 1 if the value of input In is greater than or equal to the value of input Edge, otherwise returns 0.
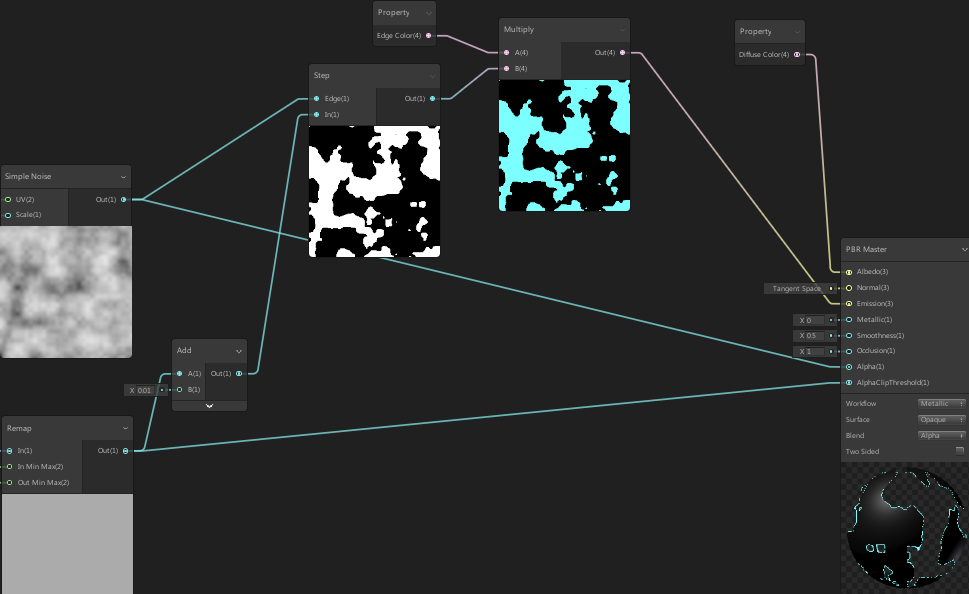
边缘发光特效Shader Graph

边缘发光特效预览
Post Processing Effects
选中Main Camera,添加组件Post Process Layer(Layer = PostPorcessing);

Post Process Layer
创建Post-process Volume(GameObject -> 3D Object -> Post-process Volume),设置Layer = PostProcessing,Blend Distance = 1。调整Volume大小,将Monkey Model包含在内部;

Post-process Volume
新建Post-processing Profile:
a) Add effect: Color Grading(Mode = ACES)
b) Add effect: Bloom(Intensity = 2, Threshold = 1)

Post-processing Profile
添加后期处理特效后,最终效果如下图