三步走:
1. 将配置文件中心化
目标:配置文件统一放在config-server项目中
配置文件更新后,重启config-server服务及调用服务如core服务获取最新配置信息
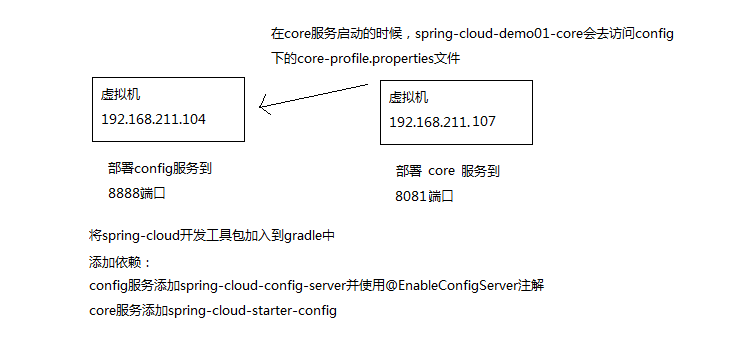
其实这样只是完成了配置文件中心化,由于还要重启调用服务,未实现热更新功能
config源码:https://gitee.com/constfafa/config-server-demo01-config
core源码:https://gitee.com/constfafa/config-server-demo01-core
2. 实现热更新功能
目标:配置文件更新后,重启config-server服务,无需重启调用服务
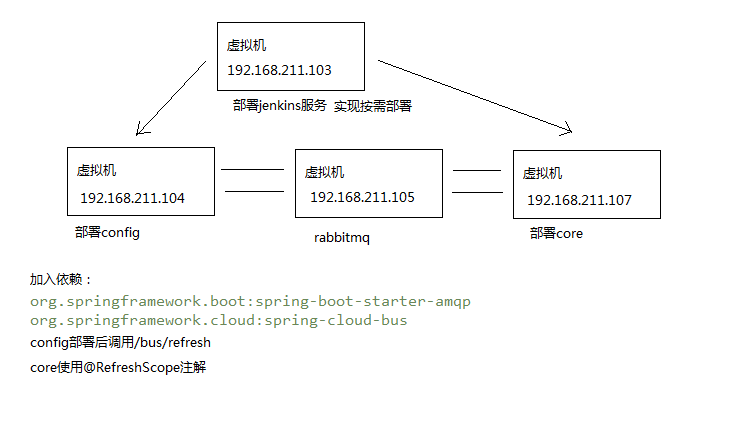
Config部署完成后调用/bus/refresh
@SpringBootApplication
@EnableConfigServer
public class ConfigApplication {

	private static final Logger LOGGER = LoggerFactory.getLogger(ConfigApplication.class);

	public static void main(String[] args) {

		SpringApplication.run(ConfigApplication.class, args);
		String url = "http://192.168.211.104:8888/bus/refresh";
		try {
			HttpResponse httpResponse = Request.Post(url).execute().returnResponse();
			int statusCode = httpResponse.getStatusLine().getStatusCode();
			if (statusCode == 200) {
				LOGGER.info("配置文件更新推送成功");
			}
		} catch (IOException e) {
			e.printStackTrace();
		}
	}
}
注意:这里是直接通过http发送post请求的方式实现更新,还有一种方法是git hook的方式。
其中url应该配置到配置文件中
调用服务core使用@RefreshScope注解
其起作用的机制是@Configuration中显式声明的bean在再次使用的时候会去显式调用其放在config服务器上的core-dev.properties
@Refresh与@RestController以及@Value一同使用
@Refresh与@Configuration及@Bean一同使用
当更新config中core的配置文件core-dev.properties并重新启动后,会看到core的日志显示
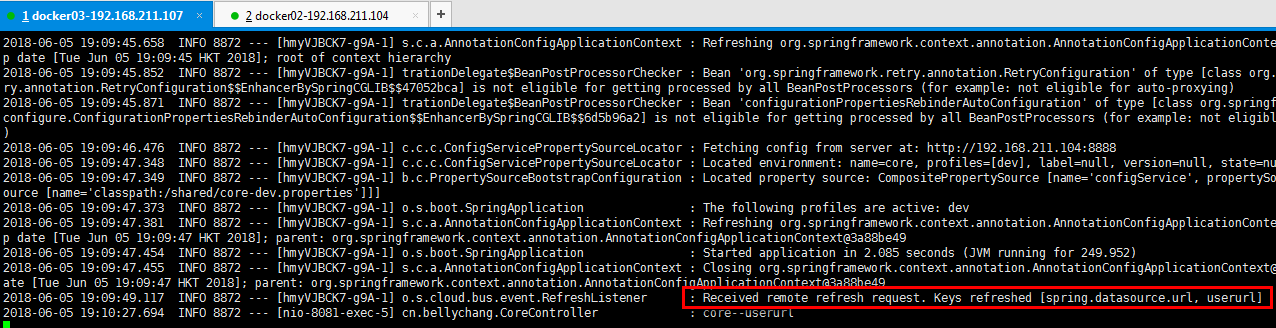
而调用服务core无需重新启动
这样其实就比较好的实现了热更新
rabbitmq显示为
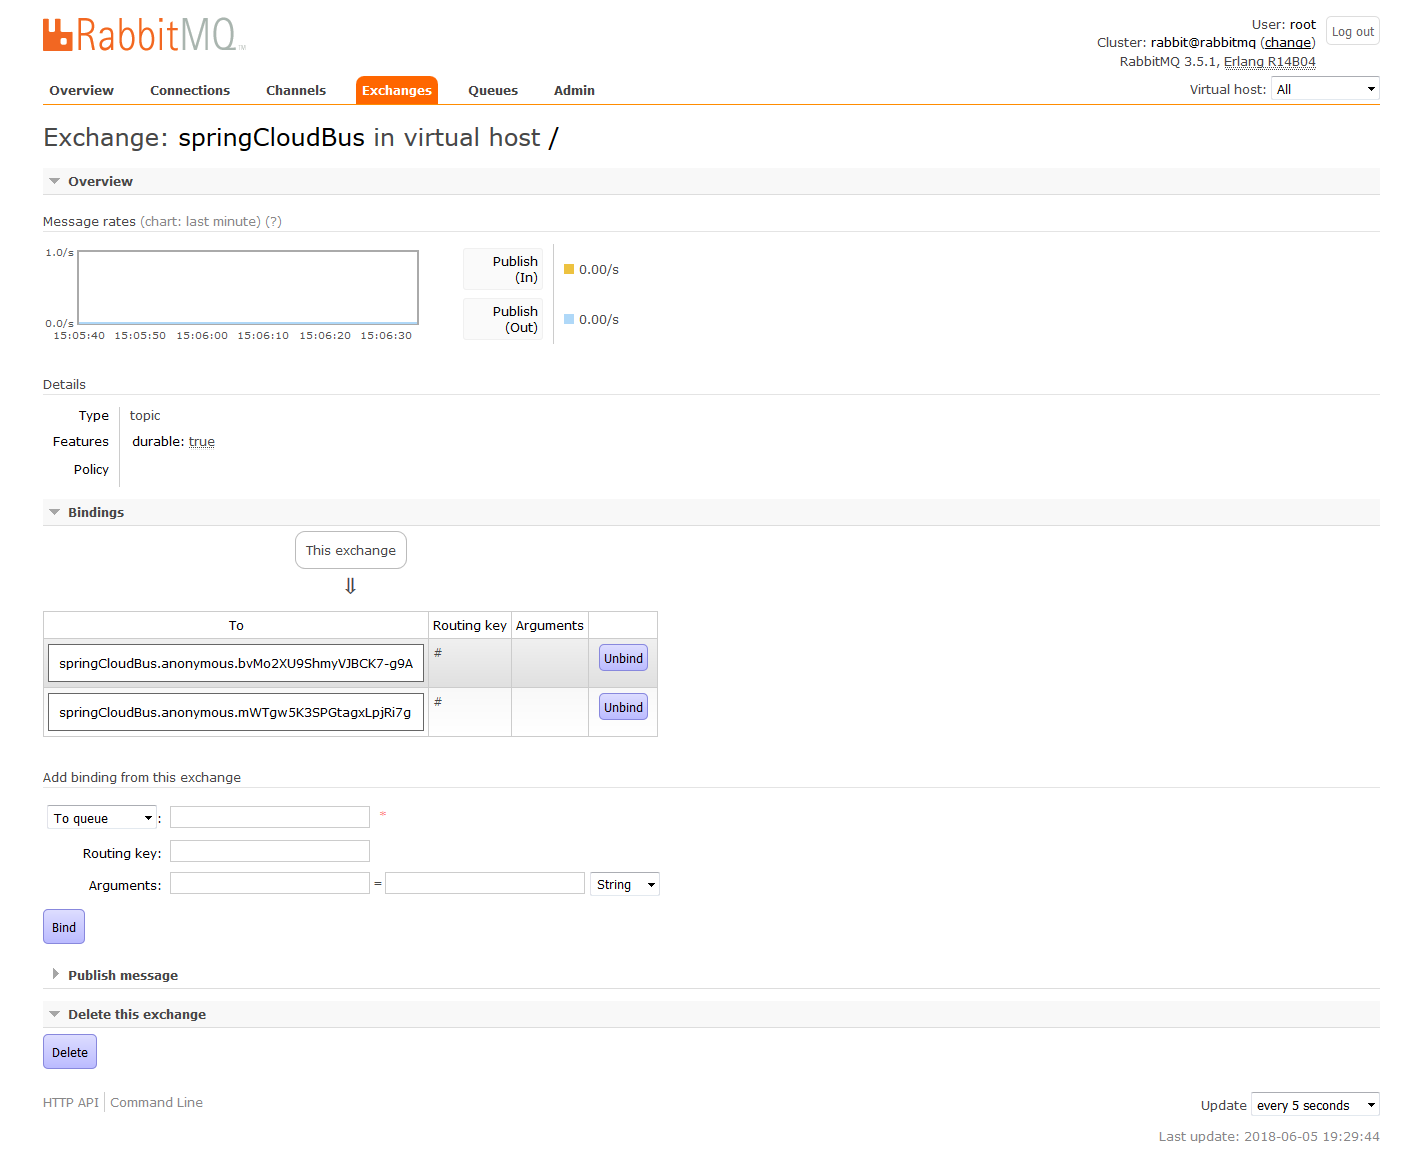
在这里使用了rabbitmq作为消息队列,也可以使用kafka起到同样的作用
config源码:https://gitee.com/constfafa/config-server-demo02-config
core源码:https://gitee.com/constfafa/config-server-demo02-core
3. 加入eureka,实现服务发现
在第二步中,存在一个不足,就是配置中服务还是直接配置的url,如果加入eureka,实现服务发现,那就非常好了
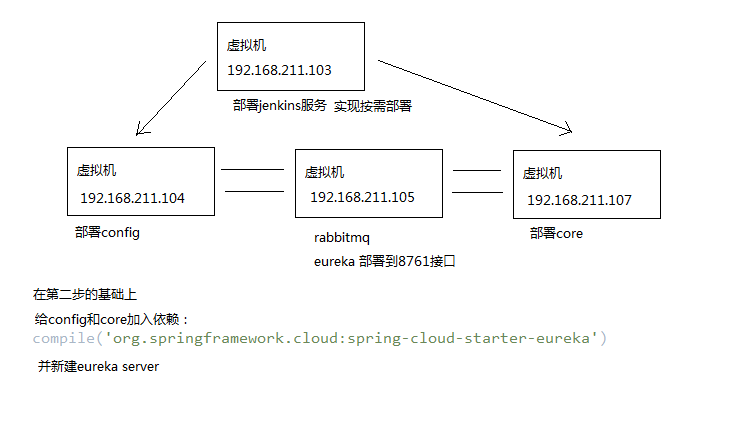
config的配置文件中配置eureka
eureka:
  instance:
    prefer-ip-address: true
  client:
    service-url:
      defaultZone: http://192.168.211.105:8761/eureka/
core的配置文件中配置eureka,并通过eureka服务发现机制发现config-server服务
spring:
  application:
    name: core
  profiles:
    active: dev
  cloud:
    inetutils:
      ignored-interfaces[0]: eth0
      default-ip-address: 192.168.211.107
    config:
      #uri: http://192.168.211.104:8888
      name: core #对应core-dev.properties文件中core部分
      fail-fast: true
      password: root
      username: user
      discovery:
        enabled: true
        service-id: config-server

eureka:
  instance:
    prefer-ip-address: true
  client:
    service-url:
      defaultZone: http://192.168.211.105:8761/eureka/
这样config-server更换地址或者集群化都不会影响core服务
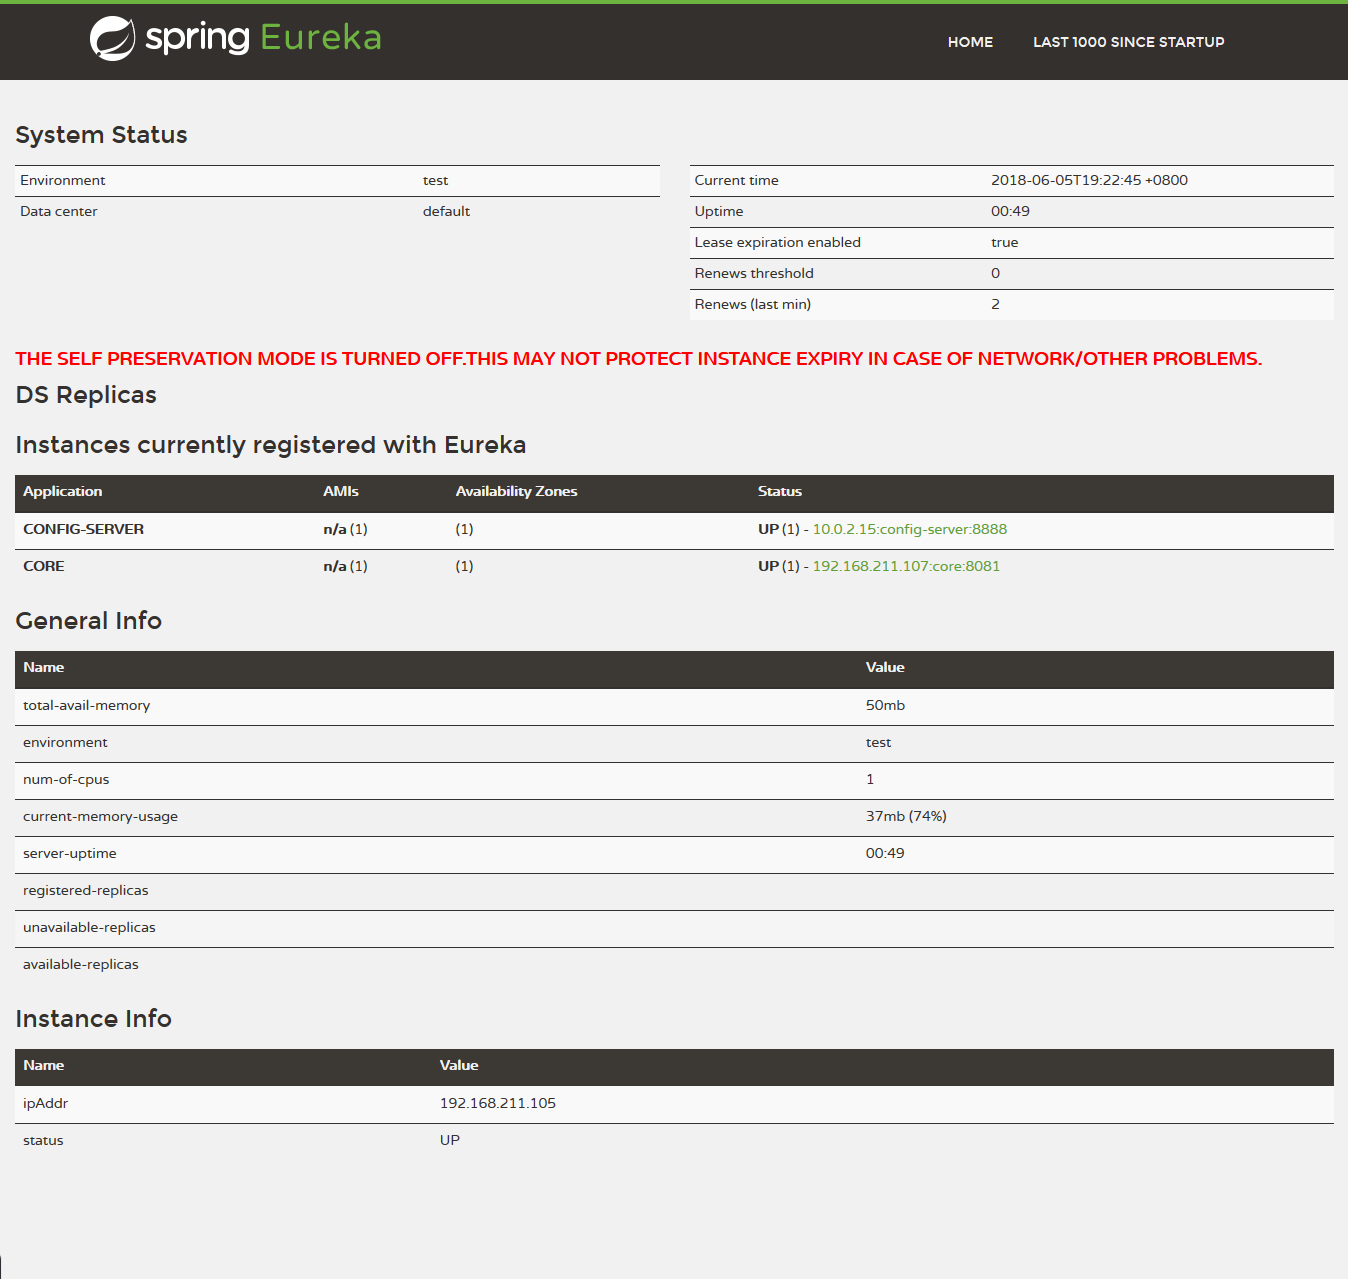
部署两个服务之后的Eureka
注:
在进行eureka配置的时候有几个注意事项:
1. 由于使用的是虚拟机,两个网卡:eth0采用NAT,保证可以连接互联网;eth1采用HOST-ONLY,保证虚拟机互通。
所以设置spring.cloud.inetutils.ignored-interfaces[0]=eth0
并设置指定ip spring.cloud.inetutils.default-ip-address:192.168.211.107
参考:
springCloud(6):Eureka的自我保护模式、多网卡下的IP选择、Eureka的健康检查
最终源码:
config:https://gitee.com/constfafa/config-server-demo03-config
core:https://gitee.com/constfafa/config-server-demo03-core
eureka-server:https://gitee.com/constfafa/eureka-server