一、概述
1. 配置环境
版本:Spring Boot版本2.0.3.RELEASE,Spring Cloud版本Finchley.SR1,RabbitMQ 3.7.7
说明:本文章是在https://www.cnblogs.com/wslook/p/9994251.html的基础上完成,
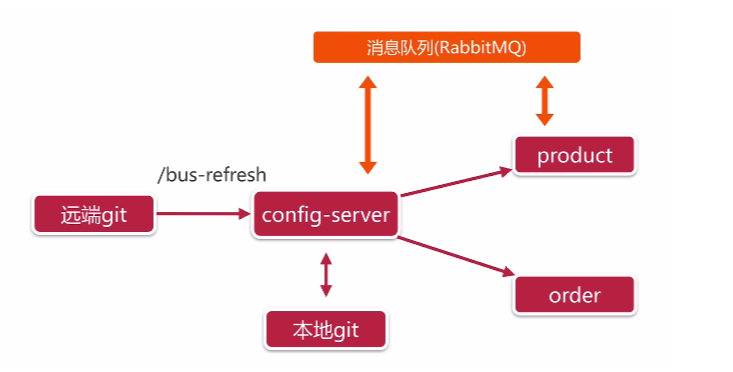
2. 实现原理(如下图所示)
- 通过消息队列MQ传递消息
- 修改配置,对外暴露/actuator/bus-refresh接口
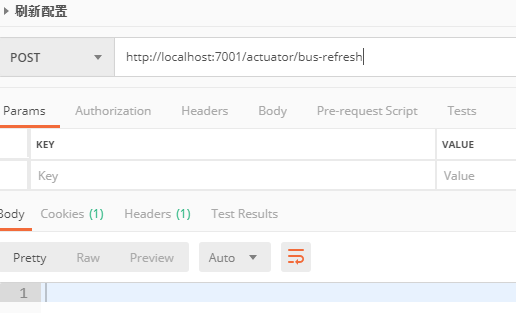
- 手动访问/actuator/bus-refresh刷新配置;或者在git服务器(码云、GitHub等)上配置WebHooks,实现自动调用/actuator/bus-refresh接口,从而刷新配置(推荐)
二、Config Server端配置
1. 添加依赖
<dependency>
    <groupId>org.springframework.cloud</groupId>
    <artifactId>spring-cloud-starter-bus-amqp</artifactId>
</dependency>
2. 修改配置
spring:
  # Rabbitmq配置
  rabbitmq:
    cache:
      channel:
        checkout-timeout: 1s
    host: 192.168.2.246
    port: 5672
    username: admin
    password: admin

#暴露/actuator/bus-refresh接口
management:
  endpoints:
    web:
      exposure:
        include: "*"
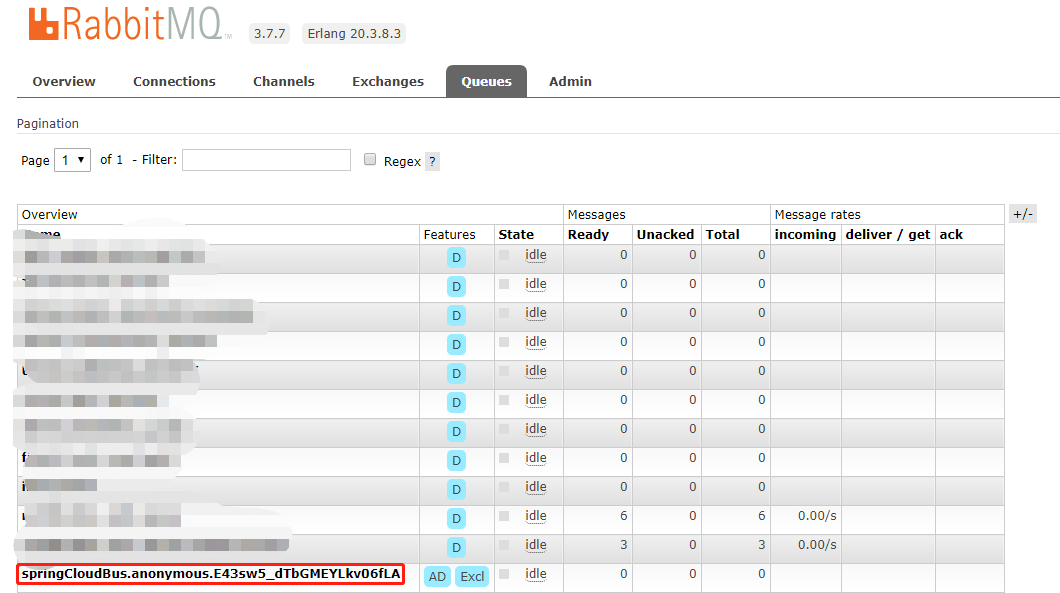
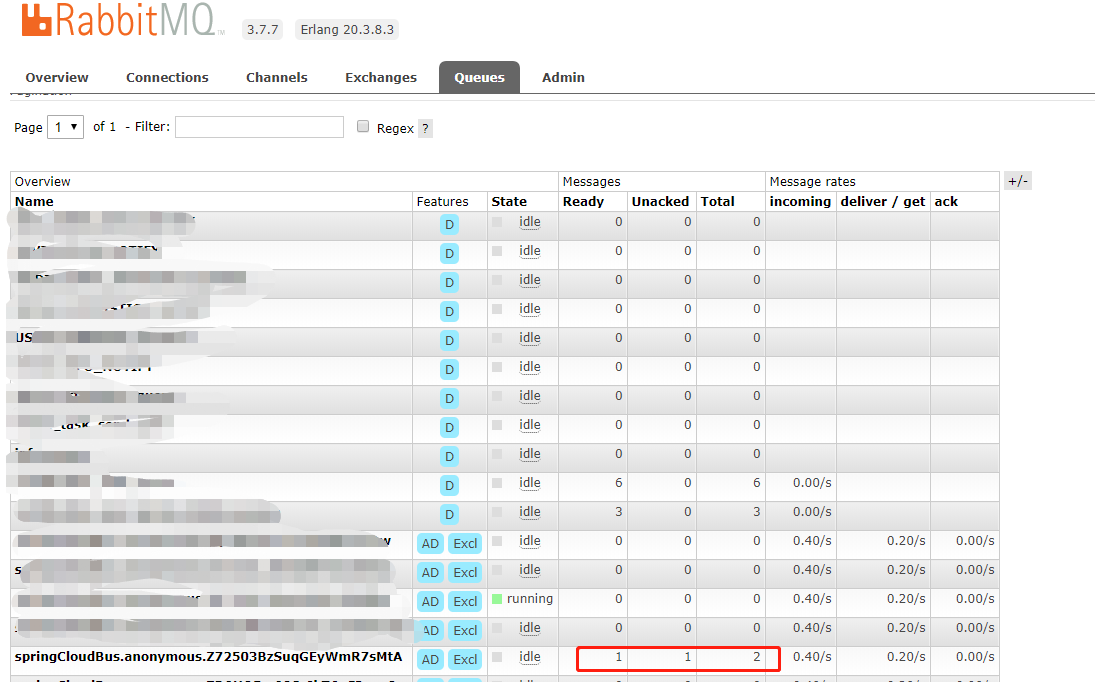
3. 启动Config-Server,查看MQ,会多出来一个队列
三、Config Client端配置
1. 添加依赖
<dependency>
    <groupId>org.springframework.cloud</groupId>
    <artifactId>spring-cloud-starter-bus-amqp</artifactId>
</dependency>
2. 添加RabbitMQ配置
spring:
  # Rabbitmq配置
  rabbitmq:
    cache:
      channel:
        checkout-timeout: 1s
    host: 192.168.2.246
    port: 5672
    username: admin
    password: admin
3. 在使用属性的地方,增加@RefreshScope注解,防止刷新后配置不生效----------但测试发现,不添加@RefreshScope注解也能动态刷新配置
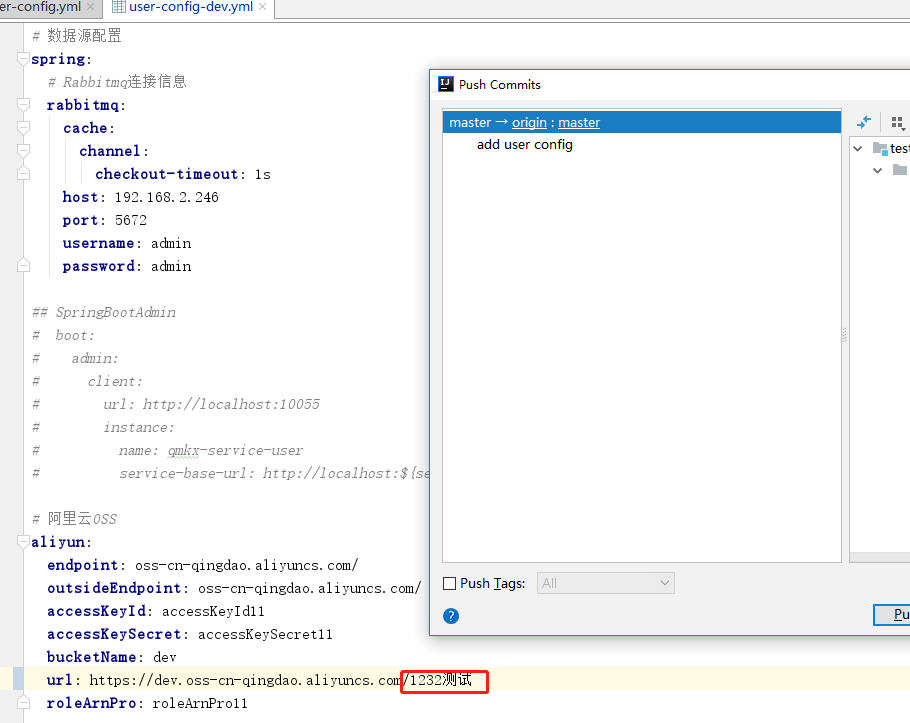
//@RefreshScope
@Configuration
@ConfigurationProperties("aliyun")
public class OSSProperties {

    /**
     * 内网连接地址
     */
    private String endpoint;

    /**
     * 外网连接地址
     */
    private String outsideEndpoint;

    private String accessKeyId;

    private String accessKeySecret;

    private String bucketName;

    /**
     * 外网访问地址
     */
    private String url;

    private String roleArnPro;

    ...get set...

}
四、测试(这里使用手动刷新的方式)
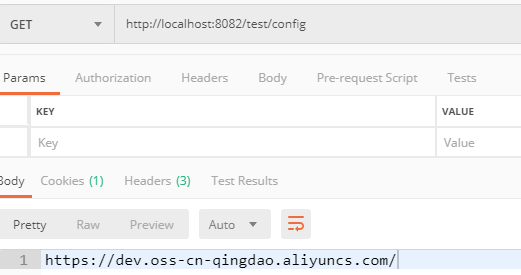
1. 启动Client端服务,使用postman请求测试接口
2. 修改git服务器上的配置
3. 调用Config Server的/actuator/bus-refresh接口
Config Server控制台日志:

Config Client控制台日志:

RabbitMQ管理页面:
4. 重新请求测试接口,发现在没重启的情况下,配置已经改变
