最近在学习开发一个APP
在布局的时候想到底部状态栏的实现方式,在网上找了一种实现方式,与大家分享
更详细内容参考https://blog.csdn.net/jxq1994/article/details/52573506
使用LinearLayout + TextView实现了底部导航栏的效果
项目结构:
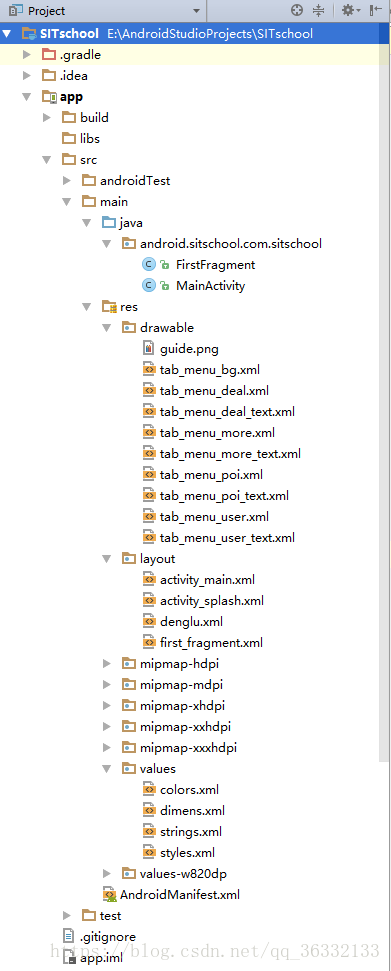
第一步:在drawable目录下新建底部资源文件
图片Drawable资源:tab_menu_deal.xml
<?xml version="1.0" encoding="utf-8"?>
<selector xmlns:android="http://schemas.android.com/apk/res/android">
    <item  android:state_selected="true"/>
</selector>文字资源:tab_menu_deal_text.xml
<?xml version="1.0" encoding="utf-8"?>
<selector xmlns:android="http://schemas.android.com/apk/res/android">
    <item  android:state_selected="true"/>
</selector>
背景资源 tab_menu_bg.xml:
<?xml version="1.0" encoding="utf-8"?>
<selector xmlns:android="http://schemas.android.com/apk/res/android">
    <item android:state_selected="true">
        <shape>
            <solid android:color="#FFC4C4C4"/>
            </shape>
        </item>
</selector>
其余三个(more,poi, user)同理,代码都是一样的哦。
第二部:编写activity布局
activity_main.xml
<?xml version="1.0" encoding="utf-8"?>
<RelativeLayout xmlns:android="http://schemas.android.com/apk/res/android"
    xmlns:tools="http://schemas.android.com/tools"
    android:id="@+id/activity_main"
    android:layout_width="match_parent"
    android:layout_height="match_parent"
    android:paddingBottom="@dimen/activity_vertical_margin"
    android:paddingLeft="@dimen/activity_horizontal_margin"
    android:paddingRight="@dimen/activity_horizontal_margin"
    android:paddingTop="@dimen/activity_vertical_margin"
    tools:context="android.sitschool.com.sitschool.MainActivity">

    <RelativeLayout
        android:id="@+id/tab_title"
        android:layout_width="match_parent"
        android:layout_height="48dp">
        <TextView
            android:id="@+id/txt_top"
            android:layout_width="match_parent"
            android:layout_height="match_parent"
            android:gravity="center"
            android:textSize="18sp"
            android:text= "草拟吗" />

        <View
            android:layout_width="match_parent"
            android:layout_height="2px"
            android:layout_alignParentBottom="true"/>
    </RelativeLayout>

    <LinearLayout
        android:id="@+id/tab_menu"
        android:layout_width="match_parent"
        android:layout_height="56dp"
        android:orientation="horizontal"
        android:layout_alignParentBottom="true">

        <TextView
            android:id="@+id/txt_deal"
            android:layout_width="0dp"
            android:layout_height="match_parent"
            android:layout_weight="1"
            android:background="@drawable/tab_menu_bg"
            android:drawablePadding="3dp"
            android:drawableTop="@drawable/tab_menu_deal"
            android:gravity="center"
            android:textColor="@drawable/tab_menu_deal_text"
            android:text="点餐"/>

        <TextView
            android:id="@+id/txt_poi"
            android:layout_width="0dp"
            android:layout_height="match_parent"
            android:layout_weight="1"
            android:background="@drawable/tab_menu_bg"
            android:drawablePadding="3dp"
            android:drawableTop="@drawable/tab_menu_poi"
            android:gravity="center"
            android:textColor="@drawable/tab_menu_poi_text"
            android:text="商铺"/>

        <TextView
            android:id="@+id/txt_user"
            android:layout_width="0dp"
            android:layout_height="match_parent"
            android:layout_weight="1"
            android:background="@drawable/tab_menu_bg"
            android:drawablePadding="3dp"
            android:drawableTop="@drawable/tab_menu_user"
            android:gravity="center"
            android:textColor="@drawable/tab_menu_user_text"
            android:text="用户"/>

        <TextView
            android:id="@+id/txt_more"
            android:layout_width="0dp"
            android:layout_height="match_parent"
            android:layout_weight="1"
            android:background="@drawable/tab_menu_bg"
            android:drawablePadding="3dp"
            android:drawableTop="@drawable/tab_menu_more"
            android:gravity="center"
            android:textColor="@drawable/tab_menu_more_text"
            android:text="更多"/>

    </LinearLayout>

    <View
        android:id="@+id/div_tab_bar"
        android:layout_width="match_parent"
        android:layout_height="2px"
        android:layout_above="@id/tab_menu"/>

    <FrameLayout
        android:id="@+id/fragment_container"
        android:layout_width="match_parent"
        android:layout_height="match_parent"
        android:layout_below="@id/tab_title"
        android:layout_above="@id/tab_menu">
    </FrameLayout>


</RelativeLayout>
Step 3:创建一个Fragment的简单布局与类:
first_fragment.xml:
<?xml version="1.0" encoding="utf-8"?>
<LinearLayout xmlns:android="http://schemas.android.com/apk/res/android"
android:orientation="vertical" android:layout_width="match_parent"
android:layout_height="match_parent">


<TextView
    android:id="@+id/txt_content"
    android:layout_width="match_parent"
    android:layout_height="match_parent"
    android:gravity="center"
    android:text="呵呵"
    android:textSize="20sp"/>

</LinearLayout>
- 1
- 2
- 3
- 4
- 5
- 6
- 7
- 8
- 9
- 10
- 11
- 12
- 13
- 14
- 15
- 16
- 17
FirstFragment.java:
public class FirstFragment extends Fragment {
    private String context;
    private TextView mTextView;

    public  FirstFragment(String context){
        this.context = context;
    }

    @Nullable
    @Override
    public View onCreateView(LayoutInflater inflater, ViewGroup container, Bundle savedInstanceState) {
        View view = inflater.inflate(R.layout.first_fragment,container,false);
        mTextView = (TextView)view.findViewById(R.id.txt_content);
        //mTextView = (TextView)getActivity().findViewById(R.id.txt_content);
        mTextView.setText(context);
        return view;
    }
}
- 1
- 2
- 3
- 4
- 5
- 6
- 7
- 8
- 9
- 10
- 11
- 12
- 13
- 14
- 15
- 16
- 17
- 18
- 19
Step 4:编写MainActivity.java
public class MainActivity extends AppCompatActivity implements View.OnClickListener{
    private TextView topBar;
    private TextView tabDeal;
    private TextView tabPoi;
    private TextView tabMore;
    private TextView tabUser;

    private FrameLayout ly_content;

    private FirstFragment f1,f2,f3,f4;
    private FragmentManager fragmentManager;

    @Override
    protected void onCreate(Bundle savedInstanceState) {
        super.onCreate(savedInstanceState);
        requestWindowFeature(Window.FEATURE_NO_TITLE);
        setContentView(R.layout.activity_main);

        bindView();

    }

    //UI组件初始化与事件绑定
    private void bindView() {
        topBar = (TextView)this.findViewById(R.id.txt_top);
        tabDeal = (TextView)this.findViewById(R.id.txt_deal);
        tabPoi = (TextView)this.findViewById(R.id.txt_poi);
        tabUser = (TextView)this.findViewById(R.id.txt_user);
        tabMore = (TextView)this.findViewById(R.id.txt_more);
        ly_content = (FrameLayout) findViewById(R.id.fragment_container);

        tabDeal.setOnClickListener(this);
        tabMore.setOnClickListener(this);
        tabUser.setOnClickListener(this);
        tabPoi.setOnClickListener(this);

    }

     //重置所有文本的选中状态
    public void selected(){
        tabDeal.setSelected(false);
        tabMore.setSelected(false);
        tabPoi.setSelected(false);
        tabUser.setSelected(false);
    }

     //隐藏所有Fragment
    public void hideAllFragment(FragmentTransaction transaction){
        if(f1!=null){
            transaction.hide(f1);
        }
        if(f2!=null){
            transaction.hide(f2);
        }
        if(f3!=null){
            transaction.hide(f3);
        }
        if(f4!=null){
            transaction.hide(f4);
        }
    }

    @Override
    public void onClick(View v) {
        FragmentTransaction transaction = getFragmentManager().beginTransaction();
        hideAllFragment(transaction);
        switch(v.getId()){
            case R.id.txt_deal:
                selected();
                tabDeal.setSelected(true);
                if(f1==null){
                    f1 = new FirstFragment("第一个Fragment");
                    transaction.add(R.id.fragment_container,f1);
                }else{
                    transaction.show(f1);
                }
                break;

            case R.id.txt_more:
                selected();
                tabMore.setSelected(true);
                if(f2==null){
                    f2 = new FirstFragment("第二个Fragment");
                    transaction.add(R.id.fragment_container,f2);
                }else{
                    transaction.show(f2);
                }
                break;

            case R.id.txt_poi:
                selected();
                tabPoi.setSelected(true);
                if(f3==null){
                    f3 = new FirstFragment("第三个Fragment");
                    transaction.add(R.id.fragment_container,f3);
                }else{
                    transaction.show(f3);
                }
                break;

            case R.id.txt_user:
                selected();
                tabUser.setSelected(true);
                if(f4==null){
                    f4 = new FirstFragment("第四个Fragment");
                    transaction.add(R.id.fragment_container,f4);
                }else{
                    transaction.show(f4);
                }
                break;
        }

        transaction.commit();
    }
}
- 1
- 2
- 3
- 4
- 5
- 6
- 7
- 8
- 9
- 10
- 11
- 12
- 13
- 14
- 15
- 16
- 17
- 18
- 19
- 20
- 21
- 22
- 23
- 24
- 25
- 26
- 27
- 28
- 29
- 30
- 31
- 32
- 33
- 34
- 35
- 36
- 37
- 38
- 39
- 40
- 41
- 42
- 43
- 44
- 45
- 46
- 47
- 48
- 49
- 50
- 51
- 52
- 53
- 54
- 55
- 56
- 57
- 58
- 59
- 60
- 61
- 62
- 63
- 64
- 65
- 66
- 67
- 68
- 69
- 70
- 71
- 72
- 73
- 74
- 75
- 76
- 77
- 78
- 79
- 80
- 81
- 82
- 83
- 84
- 85
- 86
- 87
- 88
- 89
- 90
- 91
- 92
- 93
- 94
- 95
- 96
- 97
- 98
- 99
- 100
- 101
- 102
- 103
- 104
- 105
- 106
- 107
- 108
- 109
- 110
- 111
- 112
- 113
- 114
- 115
- 116
实现效果图如下:
