Android利用android studio自动生成底部导航栏
使用Bottom Navigation Activity+Fragment+ViewPager实现底部导航栏
文章目录
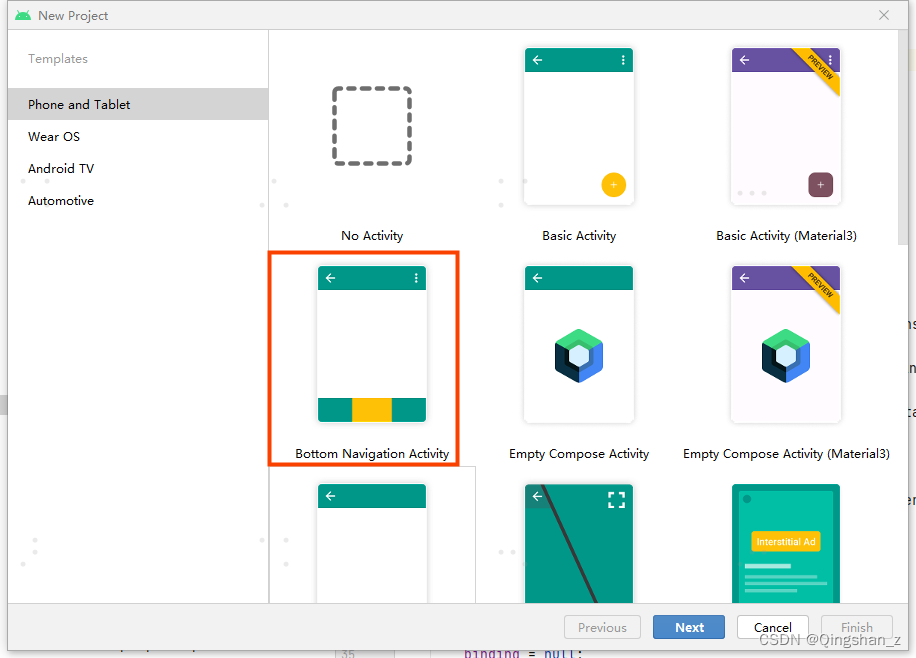
1.新建项目,选择Bottom Navigation Activity
自动生成的底部导航栏如下图所示:

自动生成的文件结构如下图所示。

2.更改底部导航栏名字
底部导航栏的名字用的事string资源,直接在[values]-[strings]中更改需要的string资源,我这里是用了4个fragment
然后去底部导航栏资源[navigation]-[mobile_navigation]中更改调用的字符串资源
3.更改底部导航栏图标
1)我用的是android studio自动生成的图标
在[drawable]资源中,右键–new–Vector Asset
2)点击下图中的图标,进行图标的选择。(这部分我看过很多资料说也可以自己在xml文件的pathData自己画图标,也可以自己添加png格式的图标。)

删除原有图标,并按照上述步骤创建好自己需要的所有图标。(一般不超过5个)
3)剩下的就是要更改包名、类名、fragment资源名,以及调用的路径名。注意下面几个文件。改全就好。


4.更改主题颜色
colorPrimary是主图颜色
colorPrimaryVariant是顶部摄像头那行所在状态栏的颜色

如下图所示

5.分析自动生成的MainActivity.xml的布局方式ConstrainLayout布局
生成的底部导航栏和Fragment使用的都是ConstrainLayout布局
<?xml version="1.0" encoding="utf-8"?>
<androidx.constraintlayout.widget.ConstraintLayout xmlns:android="http://schemas.android.com/apk/res/android"
    xmlns:app="http://schemas.android.com/apk/res-auto"
    android:id="@+id/container"
    android:layout_width="match_parent"
    android:layout_height="match_parent"
    android:paddingTop="?attr/actionBarSize">
<!--底部导航栏-->
    <com.google.android.material.bottomnavigation.BottomNavigationView
        android:id="@+id/nav_view"
        android:layout_width="0dp"
        android:layout_height="wrap_content"
        android:background="?android:attr/windowBackground"
        app:layout_constraintBottom_toBottomOf="parent"
        app:layout_constraintHorizontal_bias="0.0"
        app:layout_constraintLeft_toLeftOf="parent"
        app:layout_constraintRight_toRightOf="parent"
        app:menu="@menu/bottom_nav_menu" />

<!--    在这里调整fragment的布局 -->
    <fragment
        android:id="@+id/nav_host_fragment_activity_main"
        android:name="androidx.navigation.fragment.NavHostFragment"
        android:layout_width="match_parent"
        android:layout_height="match_parent"
        app:defaultNavHost="true"
        app:layout_constraintBottom_toTopOf="@id/nav_view"
        app:layout_constraintHorizontal_bias="1.0"
        app:layout_constraintLeft_toLeftOf="parent"
        app:layout_constraintRight_toRightOf="parent"
        app:layout_constraintTop_toTopOf="parent"
        app:layout_constraintVertical_bias="1.0"
        app:navGraph="@navigation/mobile_navigation" />

</androidx.constraintlayout.widget.ConstraintLayout>

<!-- 基本方向约束 -->
<!-- 我的什么位置在谁的什么位置 -->
app:layout_constraintTop_toTopOf=""           我的顶部和谁的顶部对齐
app:layout_constraintBottom_toBottomOf=""     我的底部和谁的底部对齐
app:layout_constraintLeft_toLeftOf=""         我的左边和谁的左边对齐
app:layout_constraintRight_toRightOf=""       我的右边和谁的右边对齐
app:layout_constraintStart_toStartOf=""       我的开始位置和谁的开始位置对齐
app:layout_constraintEnd_toEndOf=""           我的结束位置和谁的结束位置对齐
app:layout_constraintTop_toBottomOf=""        我的顶部位置在谁的底部位置
app:layout_constraintStart_toEndOf=""         我的开始位置在谁的结束为止
<!-- ...以此类推 -->