一、vue3迁移过程
vite官网:点击这里
兼容性注意:Vite 需要 Node.js 版本 >= 12.0.0。不然的话使用npm install安装依赖包的时候会出现各种问题。
1、创建vite项目
npm init @vitejs/app
根据提示把项目名、选择创建的项目类型(我们这里选vue),语言(javascript)
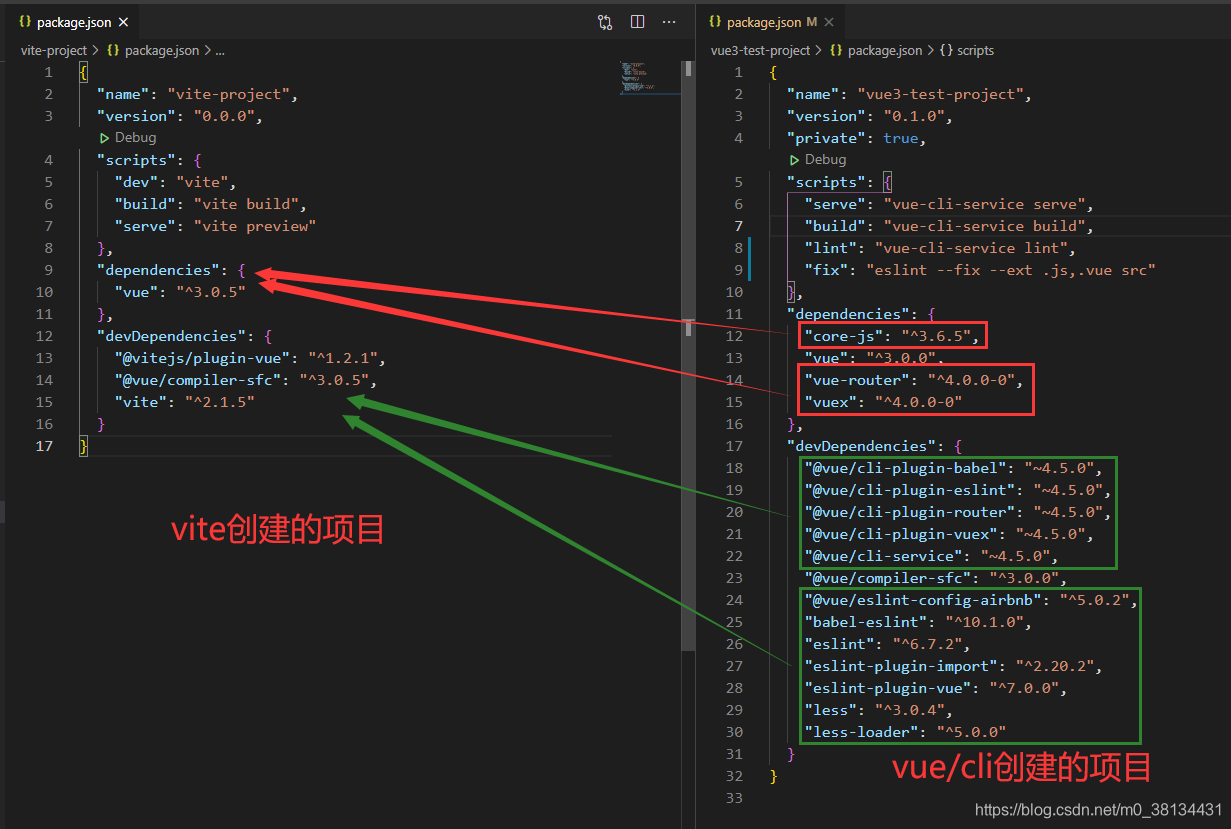
2、把vue/cli创建的vue3项目中package.json依赖包搬到vite的package.json中
搬完了之后记得使用 npm install 安装依赖包。
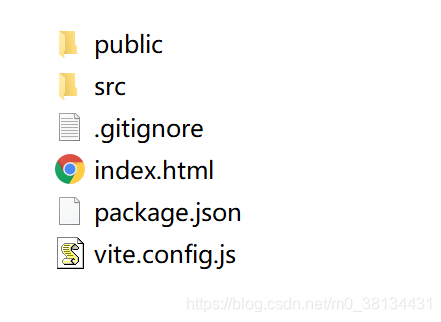
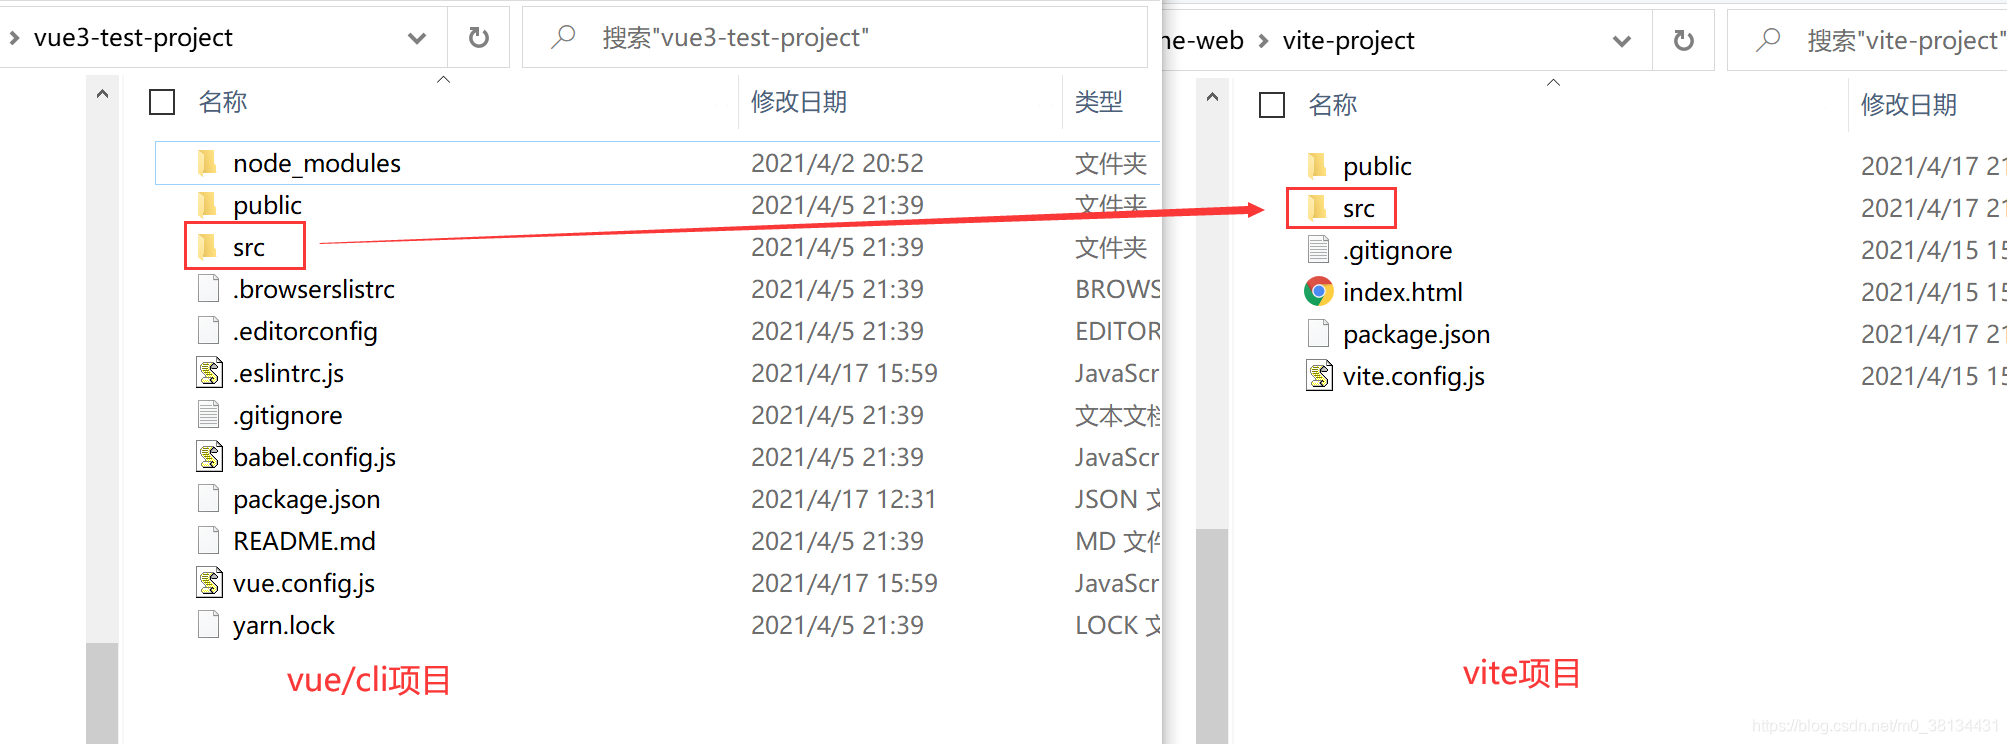
3、把vue/cli项目中的src目录整个搬到vite项目中替换掉src目录
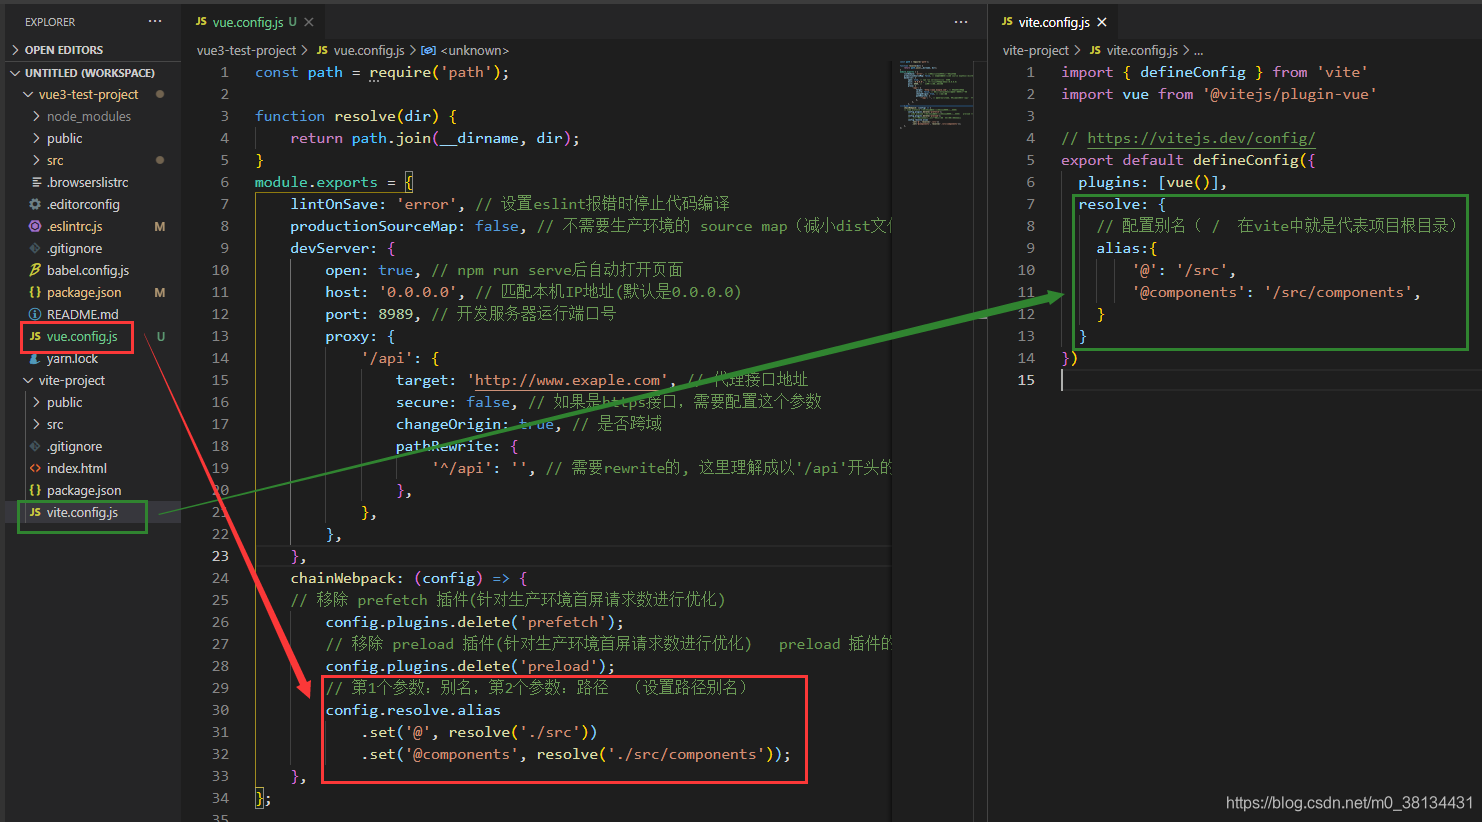
4、修改vite配置文件
如果之前项目中有引用别名或者是配置了代理之类的,就需要把vue.config.js文件相应代码按照vite中配置文件的要求在vite.config.js写好。
vite配置文件参考:这里
如果不配置的话,vite中运行时vue项目组件中有使用@的地方就会报错。
5、运行项目
npm run dev
如果期间有其他报错的话,可百度查看如何解决。
二、vue2迁移过程
vue2的迁移过程和上面说的vue3迁移过程差不多,但是在第4步那里有点特殊!!!
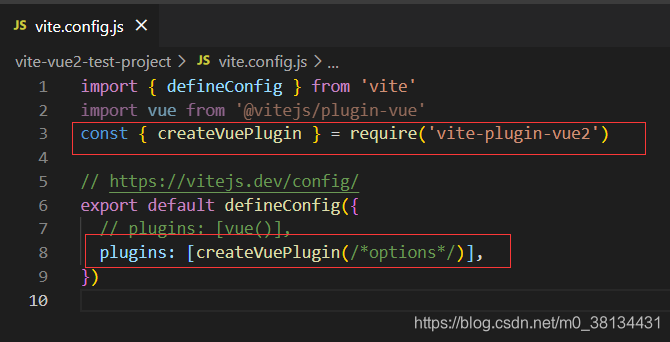
修改vite配置文件
1、安装vite支持vue2的插件:vite-plugin-vue2
npm install vite-plugin-vue2 -D
2、在配置文件vite.config.vue中引入并修改配置

三、vite配置的其他注意点
1、vite中对eslint的配置不做约束,直接按照正常eslint的配置方式进行即可
vite在开发中eslint不直接参与文件处理, 可以只使用编辑工具进行提示, 在生产环境发布时校验一次即可。
1)、安装了eslint和babel-eslint
npm install eslint babel-eslint -D
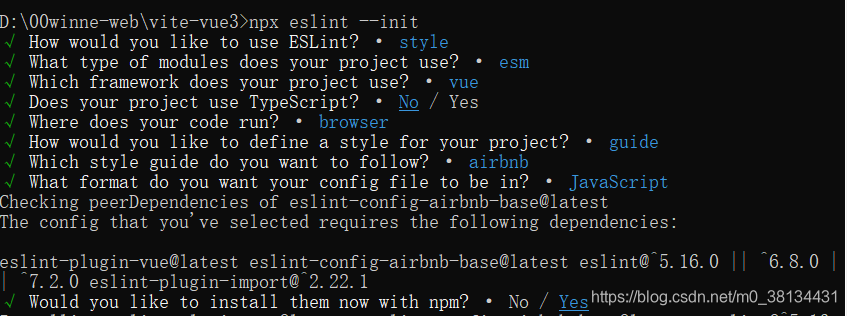
2)、创建配置文件.eslintrc.js
npx eslint --init
如果运行该命令报错如下:
 则查看是不是node版本过高,换到版本为14.16.0时是正常的。
根据提示按照自己的需要选好配置项。
3)、修改.eslintrc.js配置
我们需要对.eslintrc.js进行配置,最终配置如下(供参考,rules配置项需要根据项目编码规范进行修改):
module.exports = {


    env: {


        browser: true,
        es2021: true,
        commonjs: true,
        node: true,
        jest:true,
    },
    extends: [
        'plugin:vue/essential',
        'airbnb-base',
    ],
    globals: {


        Atomics: 'readonly',
        SharedArrayBuffer: 'readonly',
    },
    parserOptions: {


        ecmaVersion: 12,
        sourceType: 'module',
    },
    plugins: [
        'vue',
    ],
    rules: {


        'no-unused-vars': ['warn', {

     args: 'none' }],
        'linebreak-style': ['off', 'windows'],
        'no-console': 'off',
        'import/no-unresolved': 'off',
        'import/no-extraneous-dependencies': 'off',
        'no-use-before-define': 'off',
        'no-param-reassign': 'off',
        'no-plusplus': 'off',
        'no-lonely-if': 'off',
        'consistent-return': 'off',
        'no-unused-expressions': ['error', {

     allowShortCircuit: true, allowTernary: true }],
        'global-require': 'off',
        'array-callback-return': 'off',
        'import/prefer-default-export': 'off',
        'prefer-promise-reject-errors': 'off',
        'no-continue': 'off',
        indent: ['error', 4, {

     SwitchCase: 1 }],
        'no-trailing-spaces': 'off',
        'import/no-dynamic-require': 'off',
        'no-shadow': 'off',
        'max-len': ['error', {


            ignoreComments: true,
            code: 100,
            ignoreTrailingComments: true,
            ignoreUrls: true,
            ignoreStrings: true,
            ignoreTemplateLiterals: true,
            ignoreRegExpLiterals: true,
        }],
        eqeqeq: ['warn', 'smart'],
        radix: ['error', 'as-needed'],
        'no-underscore-dangle': 'off',
        'vue/no-multiple-template-root': 'off',
    },
};
4)、在package.json中的scripts配置项中添加自动修复指令
"fix": "eslint --fix src"
5)、eslint校验生效,如有eslint报错进行修复即可。
2、vite在开发中修改了vite.config.js文件是直接能监听到的,如果页面还没效果那么直接刷新浏览器即可,无需重新启动服务。而vue/cli修改vue.config.js之后还要重新启动服务。
3、想查看vite中的环境变量可以打印import.meta.env查看。
console.log(import.meta.env)

在vue/cli项目中是 process.env。
console.log(process.env)

4、vite的其他配置
4.1 配置PostCSS
i:需要安装的插件:
cnpm install postcss autoprefixer -D
ii:在项目根目录中创建postcss.config.js文件
module.exports = {


    plugins: [
        require('autoprefixer'),
    ],
};
4.2 配置支持typescript语法
vite中使直接支持typescript语法的。
如果js文件想用ts语法,那么直接把.js改为.ts即可;如果是.vue等组件文件,那么在script 标签添加lang="ts"属性(<script lang="ts">)。
<template>
    <ul>
        <li
            v-for="item in courses"
            :key="item.id"
        >
            {

   {item.name}}
        </li>
    </ul>
</template>

<script lang="ts">
import {

       defineComponent, ref } from 'vue';

interface Course {


    id: number,
    name: string
}

export default defineComponent({


    setup() {


        const courses = ref<Course[]>([]);
        setTimeout(() => {


            courses.value.push({


                id: 1,
                name: 'winne'
            })
        }, 1000);

        return {


            courses,
        };
    }
});
</script>

<style scoped>
a {


  color: #42b983;
}
</style>
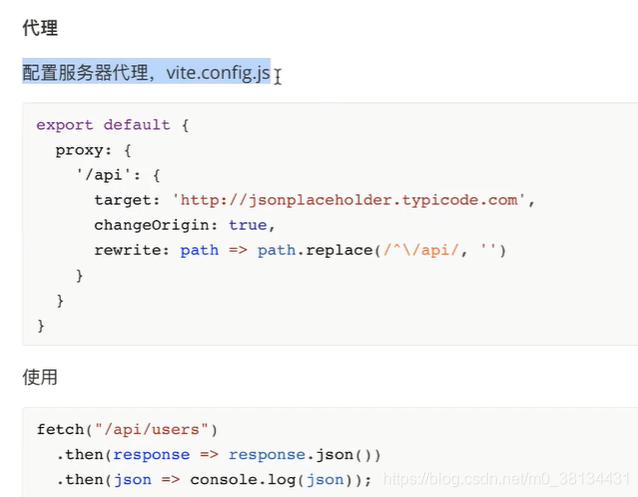
4.3 配置代理
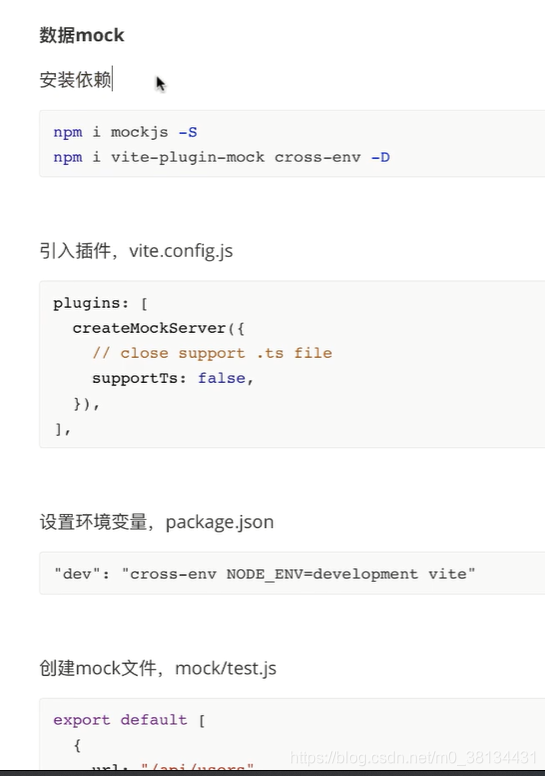
4.4 配置mockjs
比较简单的mockjs配置和使用方式可以参考这里。