准备:
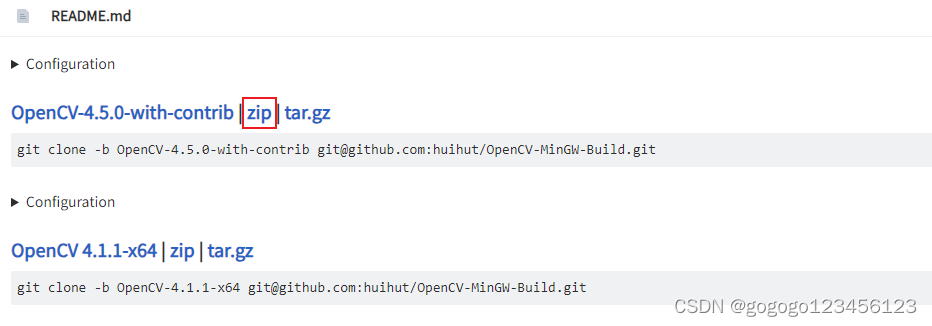
1、下载opencv
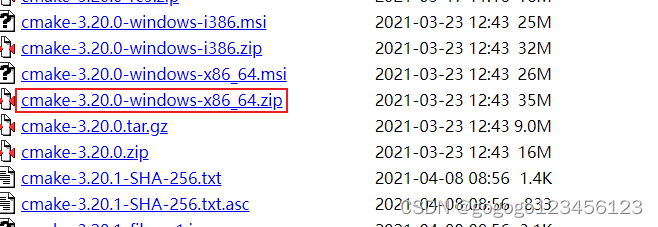
2、下载CMake
 3、
3、
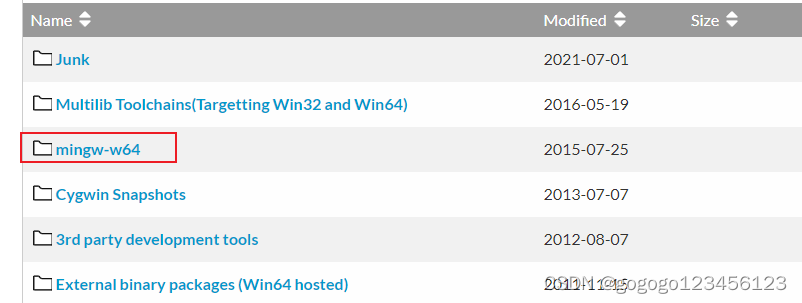
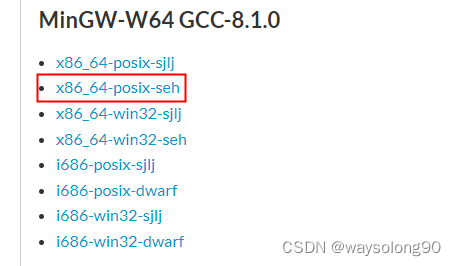
3、下载MinGw
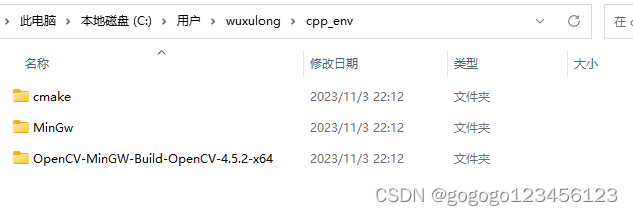
下载完解压放到一个文件夹里面,便于环境管理,文件夹我重命名了,解压出来文件名不一样正常
环境变量配置
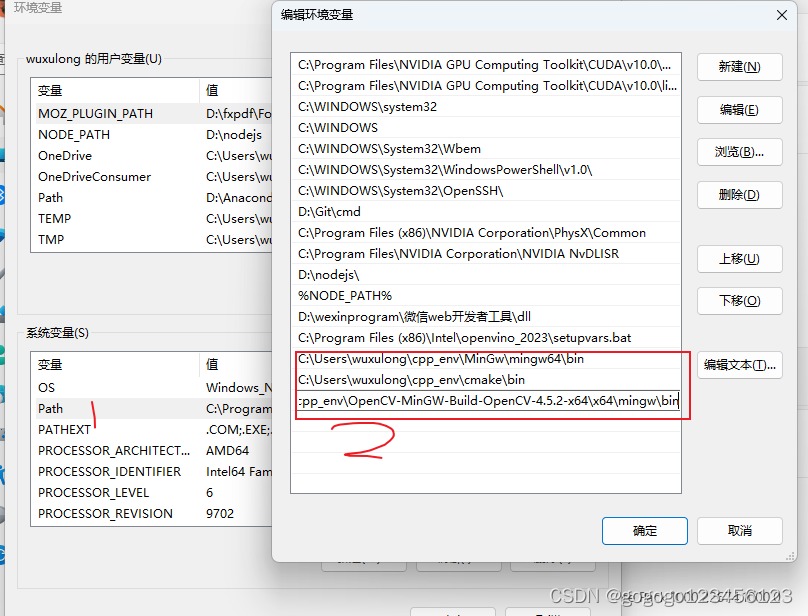
C:\Users\wuxulong\cpp_env\MinGw\mingw64\bin
C:\Users\wuxulong\cpp_env\cmake\bin
C:\Users\wuxulong\cpp_env\OpenCV-MinGW-Build-OpenCV-4.5.2-x64\x64\mingw\bin
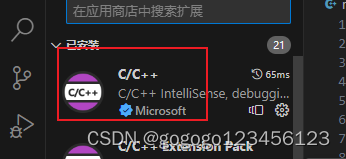
4、安装vscode扩展
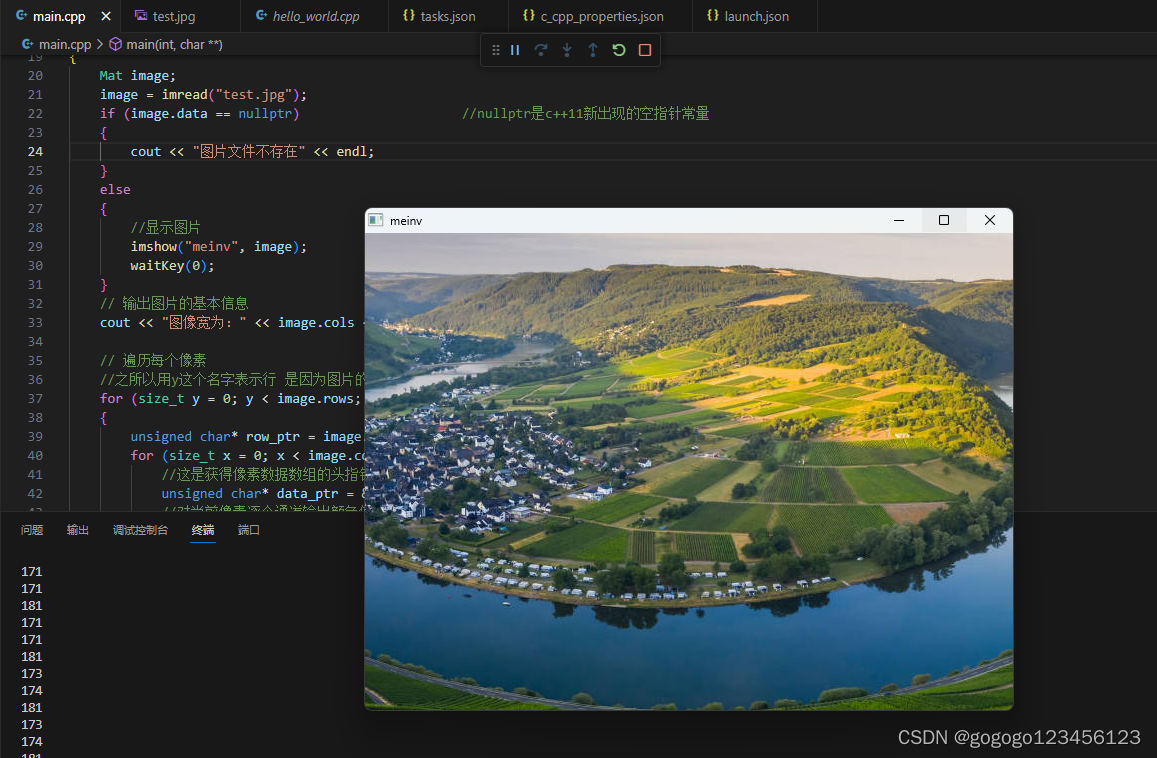
5、新建main.cpp

/***********************  显示指定地址的图片*****************************/
#include<iostream>
#include<opencv2/core/core.hpp>
#include<opencv2/highgui/highgui.hpp>
using namespace std;
using namespace cv;

int main(int argc, char** argv)
{


    Mat image;
    image = imread("test.jpg");
    if (image.data == nullptr)                     //nullptr是c++11新出现的空指针常量
    {


        cout << "图片文件不存在" << endl;
    }
    else
    {


        //显示图片
        imshow("meinv", image);
        waitKey(0);
    }
    // 输出图片的基本信息
    cout << "图像宽为:" << image.cols << "\t高度为:" << image.rows << "\t通道数为:" << image.channels() << endl;

    // 遍历每个像素
    //之所以用y这个名字表示行 是因为图片的坐标系中行号就是y
    for (size_t y = 0; y < image.rows; y++)
    {


        unsigned char* row_ptr = image.ptr<unsigned char>(y);
        for (size_t x = 0; x < image.cols; ++x) {


            //这是获得像素数据数组的头指针,注意像素数据可能会有多个通道所以才需要用数组存储
            unsigned char* data_ptr = &row_ptr[x * image.channels()];
            //对当前像素逐个通道输出颜色值
            for (int i = 0; i < image.channels(); ++i) {


                cout << int(data_ptr[i])<<endl;
            }
        }
    }
    system("pause");
    return 0;
}
6、新建task.json
{


	"version": "2.0.0",
	"tasks": [
		{


			"type": "cppbuild",
			"label": "g++.exe build active file",
			"command": "C:\\Users\\wuxulong\\cpp_env\\MinGw\\mingw64\\bin\\g++.exe",
			"args": [
                "-fdiagnostics-color=always",
                "-g",
                // "-std=c++11",
                "${file}",
                "-o",
                "${fileDirname}\\${fileBasenameNoExtension}.exe",
                "-I",
                "C:\\Users\\wuxulong\\cpp_env\\OpenCV-MinGW-Build-OpenCV-4.5.2-x64\\include",
                "-I",
                "C:\\Users\\wuxulong\\cpp_env\\OpenCV-MinGW-Build-OpenCV-4.5.2-x64\\include\\opencv2",
                "-L",
                "C:\\Users\\wuxulong\\cpp_env\\OpenCV-MinGW-Build-OpenCV-4.5.2-x64\\x64\\mingw\\lib",
                "-L",
                "C:\\Users\\wuxulong\\cpp_env\\OpenCV-MinGW-Build-OpenCV-4.5.2-x64\\x64\\mingw\\bin",
                "-l",
                "libopencv_calib3d452",
                "-l",
                "libopencv_core452",
                "-l",
                "libopencv_dnn452",
                "-l",
                "libopencv_features2d452",
                "-l",
                "libopencv_flann452",
                "-l",
                "libopencv_gapi452",
                "-l",
                "libopencv_highgui452",
                "-l",
                "libopencv_imgcodecs452",
                "-l",
                "libopencv_imgproc452",
                "-l",
                "libopencv_ml452",
                "-l",
                "libopencv_objdetect452",
                "-l",
                "libopencv_photo452",
                "-l",
                "libopencv_stitching452",
                "-l",
                "libopencv_video452",
                "-l",
                "libopencv_videoio452"
            ],
			"options": {


				"cwd": "C:\\mingw64\\bin"
			},
			"problemMatcher": [
				"$gcc"
			],
			"group": {


                "kind": "build",
                "isDefault": true//表示快捷键Ctrl+Shift+B可以运行该任务
            },
			// "group": "build",
			"detail": "编译器: C:\\mingw64\\bin\\g++.exe"
		}
	]
}
7、新建launch.json
{


    // Use IntelliSense to learn about possible attributes.
    // Hover to view descriptions of existing attributes.
    // For more information, visit: https://go.microsoft.com/fwlink/?linkid=830387
    "version": "0.2.0",
    "configurations": [

        {


            "name": "(gdb) Launch",
            "preLaunchTask": "g++.exe build active file",//调试前执行的任务,就是之前配置的tasks.json中的label字段
            "type": "cppdbg",//配置类型,只能为cppdbg
            "request": "launch",//请求配置类型,可以为launch(启动)或attach(附加)
            "program": "${fileDirname}\\${fileBasenameNoExtension}.exe",//调试程序的路径名称
            "args": [],//调试传递参数
            "stopAtEntry": false,
            "cwd": "${workspaceFolder}",
            "environment": [],
            "externalConsole": false,//true显示外置的控制台窗口,false显示内置终端
            "MIMode": "gdb",
            "miDebuggerPath": "C:\\Users\\wuxulong\\cpp_env\\MinGw\\mingw64\\bin\\gdb.exe",
            "setupCommands": [
                {


                    "description": "Enable pretty-printing for gdb",
                    "text": "-enable-pretty-printing",
                    "ignoreFailures": true
                }
            ]
        }
    ]
  }
8、新建c_cpp_properties.json
{


    "configurations": [
        {


       "name": "Win32",
          "includePath": [
                "${workspaceFolder}/**",
                "C:\\Users\\wuxulong\\cpp_env\\OpenCV-MinGW-Build-OpenCV-4.5.2-x64\\include",//修改这里
                "C:\\Users\\wuxulong\\cpp_env\\OpenCV-MinGW-Build-OpenCV-4.5.2-x64\\include\\opencv2"//修改这里
                // "C:\\Users\\wuxulong\\cpp_env\\OpenCV-MinGW-Build-OpenCV-4.5.2-x64\\include\\opencv2\\core\\core.hpp"
               // "F:\\Tools\\opencv\\build\\include\\opencv"
           ],
           "defines": [
            "_DEBUG",
            "UNICODE",
            "_UNICODE"
            ],
           "windowsSdkVersion": "10.0.18362.0",
           "compilerPath": "C:\\Users\\wuxulong\\cpp_env\\MinGw\\mingw64\\bin\\g++.exe",//修改这里
           "cStandard": "c11",
           //"cStandard": "c17",
           "cppStandard": "c++17",
           "intelliSenseMode": "gcc-x64"
           //"intelliSenseMode": "windows-gcc-x64"
           //"intelliSenseMode": "${default}"
       }
   ],
   "version": 4
}
9、运行 快捷键F5