本文转载于:Ubuntu18.04 vscode(c++)配置opencv successful
需要准备的东西:vscode vscode-c++编译环境 opencv,主要是修改三个文档,launch.json , c_cpp_properties.json , tasks.json
vscode配置c++网上的教程较多,在这里就不再赘述。
1、新建一个cpp文件,保存。
2、vscode左侧方的debug按钮(小虫子)–Debug -> Open Configurations -> 打开备选框 -> C++(GDB/LLDB) -> g++ build and debug active file
3、回到资源管理器(左侧栏的第一个图标)

4、上述操作后打开launch.json文件并且修改为:
{


    // Use IntelliSense to learn about possible attributes.
    // Hover to view descriptions of existing attributes.
    // For more information, visit: https://go.microsoft.com/fwlink/?linkid=830387
    "version": "0.2.0",
    "configurations": [
        {


            "name": "(gdb) Launch",
            "type": "cppdbg",
            "request": "launch",
            "program": "${workspaceFolder}/${fileBasenameNoExtension}.o",
            "args": [],
            "stopAtEntry": false,
            "cwd": "${workspaceFolder}",
            "environment": [],
            "externalConsole": true,
            "MIMode": "gdb",
            "preLaunchTask": "build",//也就是添加一个launch之间的任务,任务名为build,这个build就是我们在tasks.json中设置的任务名。
            "setupCommands": [
                {


                    "description": "Enable pretty-printing for gdb",
                    "text": "-enable-pretty-printing",
                    "ignoreFailures": true
                }
            ]
        }
    ]
}
5、按键ctrl+shift+P,后输入选择Configure Task,在备选框中选择C/C++:cpp build active file选项,则新建一个tasks.json文件。
{


    // See https://go.microsoft.com/fwlink/?LinkId=733558
    // for the documentation about the tasks.json format
    "version": "2.0.0",
    "tasks": [
        {


            "label": "build",
            "type": "shell",
            "command": "g++",
            "args": [
                "-g", "-std=c++11", "${file}", "-o", "${fileBasenameNoExtension}.o",// 设置动态链接库
                "-I", "/usr/local/include",
                "-I", "/usr/local/include/opencv2",
                "-I", "/usr/local/include/opencv4",
                "-L", "/usr/local/lib",
                "-l", "opencv_core",
                "-l", "opencv_imgproc",
                "-l", "opencv_imgcodecs",
                "-l", "opencv_video",
                "-l", "opencv_ml",
                "-l", "opencv_highgui",
                "-l", "opencv_objdetect",
                "-l", "opencv_flann",
                "-l", "opencv_imgcodecs",
                "-l", "opencv_photo",
                "-l", "opencv_videoio"
            ],// 编译命令参数
            }
     ]
}
6、Ctrl + Shift + P 打开搜索框,键入c++,会出现备选项目,选择图示Edit configurations (JSON)
并且将c_cpp_properties.json修改为:
{


    "configurations": [
        {


            "name": "Linux",
            "includePath": [
                "${workspaceFolder}/**",
                "/usr/local/include", //请确保你的opencv opencv2头文件夹安装在这个目录
                "/usr/include"
            ],
            "defines": [],
            "compilerPath": "/usr/bin/gcc",
            "cStandard": "c11",
            "cppStandard": "c++17",
            "intelliSenseMode": "clang-x64"
        }
    ],
    "version": 4
}
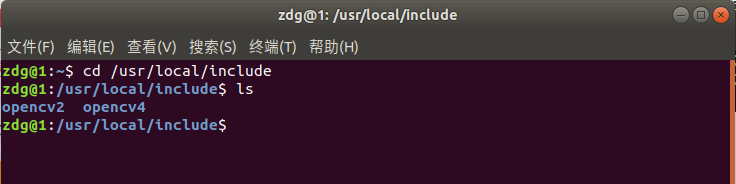
opencv安装的目录要在/usr/local/include里面。
可以输入命令 :
cd /usr/local/include
ls
结果如下:
7,回到测试文件,F5运行如下测试程序:
#include <iostream>
#include<opencv2/opencv.hpp>
using namespace std;
using namespace cv;
int main()
{


    cout<<"hello world"<<endl;
    VideoCapture capture(0);
    while (1)
    {


        Mat frame;
        capture>>frame;
        imshow("src",frame);
        waitKey(1);
    }
}