【三维重建】【深度学习】NeuS代码Pytorch实现–测试阶段代码解析(下)
论文提出了一种新颖的神经表面重建方法,称为NeuS,用于从2D图像输入以高保真度重建对象和场景。在NeuS中建议将曲面表示为有符号距离函数(SDF)的零级集,并开发一种新的体绘制方法来训练神经SDF表示,因此即使没有掩模监督,也可以实现更准确的表面重建。NeuS在高质量的表面重建方面的性能优于现有技术,特别是对于具有复杂结构和自遮挡的对象和场景。本篇博文将根据代码执行流程解析测试阶段具体的功能模块代码。
文章目录
前言
在详细解析NeuS网络之前,首要任务是搭建NeuS【win10下参考教程】所需的运行环境,并完成模型的训练和测试,展开后续工作才有意义。
本博文将对NeuS测试阶段涉及的剩余功能代码模块进行解析。
博主将各功能模块的代码在不同的博文中进行了详细的解析,点击【win10下参考教程】,博文的目录链接放在前言部分。
这里的代码段是exp_runner.py文件的__main__函数部分,在此前的博文中博主已经详细讲解了train模块和validate_mesh模块,本博文讲最后讲解的interpolate_view模块代码。
if args.mode == 'train':
    runner.train()
elif args.mode == 'validate_mesh':
    runner.validate_mesh(world_space=True, resolution=512, threshold=args.mcube_threshold)
elif args.mode.startswith('interpolate'):  # Interpolate views given two image indices
    _, img_idx_0, img_idx_1 = args.mode.split('_')
    img_idx_0 = int(img_idx_0)
    img_idx_1 = int(img_idx_1)
    runner.interpolate_view(img_idx_0, img_idx_1)
validate_mesh附加
在之前的博文中已经对代码进行了详细的讲解,这里只是补充说明resolution参数的作用。
runner.validate_mesh(world_space=True, resolution=512, threshold=args.mcube_threshold)
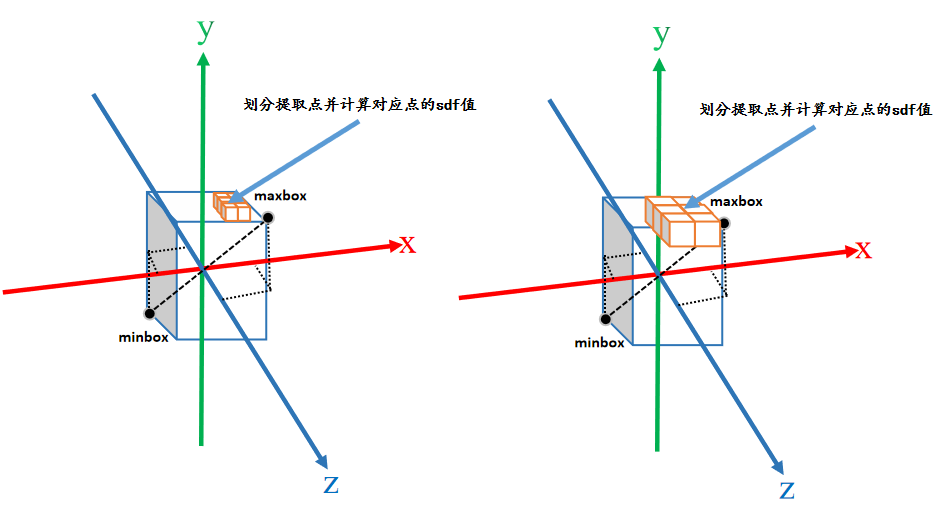
如下图所示,resolution的数值越大,提取点(体素)的数量越多,则重建效果越细致。
interpolate_view
属于exp_runner.py文件的Runner类中的成员方法,将渲染产生的图片合成视频(mp4格式)保存。
def interpolate_view(self, img_idx_0, img_idx_1):
    # 保存渲染的图片
    images = []
    # 渲染生成的图片帧数
    n_frames = 60
    for i in range(n_frames):
        print(i)
        # 根据图像序号,分别作为起点和终点,渲染出介意俩图片之间的图片
        images.append(self.render_novel_image(img_idx_0,
                                              img_idx_1,
                                              np.sin(((i / n_frames) - 0.5) * np.pi) * 0.5 + 0.5,
                      resolution_level=4))
    # 将图片倒放一遍
    for i in range(n_frames):
        images.append(images[n_frames - i - 1])

    # 图片合成mp4格式
    fourcc = cv.VideoWriter_fourcc(*'mp4v')
    # 指定视频保存路径
    video_dir = os.path.join(self.base_exp_dir, 'render')
    os.makedirs(video_dir, exist_ok=True)

    h, w, _ = images[0].shape

    # 合成视频
    writer = cv.VideoWriter(os.path.join(video_dir,
                                         '{:0>8d}_{}_{}.mp4'.format(self.iter_step, img_idx_0, img_idx_1)),
                            fourcc, 30, (w, h))
    for image in images:
        writer.write(image)
    writer.release()
这里还将渲染产生的图片反方向再加入列表里,所以合成的视频感觉从一点就是推过去而后又拉回来。
render_novel_image
完成NeuS模型训练后,根据俩个相机位姿渲染出从一个位姿运动到另一个位姿的过程中的多个图片,从而验证模型训练的效果。
首先需要gen_rays_between函数生成运动过程中某个位置的整张图片(下采样后)的光线rays,然后获取rays光线上采样点(前景)的最远点和最近点,最后通过renderer函数获取所需的结果。
def render_novel_image(self, idx_0, idx_1, ratio, resolution_level):
    """
    Interpolate view between two cameras.
    """
    rays_o, rays_d = self.dataset.gen_rays_between(idx_0, idx_1, ratio, resolution_level=resolution_level)
    H, W, _ = rays_o.shape
    rays_o = rays_o.reshape(-1, 3).split(self.batch_size)
    rays_d = rays_d.reshape(-1, 3).split(self.batch_size)

    out_rgb_fine = []
    for rays_o_batch, rays_d_batch in zip(rays_o, rays_d):
        # 最近点和最远点
        near, far = self.dataset.near_far_from_sphere(rays_o_batch, rays_d_batch)
        # 背景颜色
        background_rgb = torch.ones([1, 3]) if self.use_white_bkgd else None
        render_out = self.renderer.render(rays_o_batch,
                                          rays_d_batch,
                                          near,
                                          far,
                                          cos_anneal_ratio=self.get_cos_anneal_ratio(),
                                          background_rgb=background_rgb)

        out_rgb_fine.append(render_out['color_fine'].detach().cpu().numpy())
        del render_out
    # 渲染出图片
    img_fine = (np.concatenate(out_rgb_fine, axis=0).reshape([H, W, 3]) * 256).clip(0, 255).astype(np.uint8)
    return img_fine
gen_rays_between
Dataset数据管理器的定义的函数,在models/dataset.py文件下。博主【NeuS总览】的博文中,已经简单介绍过这个过程。
def gen_rays_between(self, idx_0, idx_1, ratio, resolution_level=1):
    """
    Interpolate pose between two cameras.
    在两个摄影机之间的插值,获得新的摄影机并在世界空间中生成光线
    """
    # idx_0是起点图像
    # idx_1是终点图像
    # 下采样倍数
    l = resolution_level
    # 理解为将图像尺寸缩放为原始输入图像尺寸的(1/l*1/l)倍
    tx = torch.linspace(0, self.W - 1, self.W // l)
    ty = torch.linspace(0, self.H - 1, self.H // l)
    pixels_x, pixels_y = torch.meshgrid(tx, ty)

    # 由像素坐标系转换到对应的空间坐标系
    p = torch.stack([pixels_x, pixels_y, torch.ones_like(pixels_y)], dim=-1)  # [w, h, 3]
    p = torch.matmul(self.intrinsics_all_inv[0, None, None, :3, :3], p[:, :, :, None]).squeeze()  # [w, h, 3]

    # 相机坐标下的单位方向向量
    rays_v = p / torch.linalg.norm(p, ord=2, dim=-1, keepdim=True)  # [w, h, 3]

    # 这行代码好像没啥作用
    trans = self.pose_all[idx_0, :3, 3] * (1.0 - ratio) + self.pose_all[idx_1, :3, 3] * ratio

    # idx_0图像的外参(逆)
    pose_0 = self.pose_all[idx_0].detach().cpu().to(self.device).numpy()
    # idx_1图像的外参(逆)
    pose_1 = self.pose_all[idx_1].detach().cpu().to(self.device).numpy()
    # idx_0图像的外参
    pose_0 = np.linalg.inv(pose_0)
    # idx_1图像的外参
    pose_1 = np.linalg.inv(pose_1)
    # idx_0旋转矩阵
    rot_0 = pose_0[:3, :3]
    # idx_1旋转矩阵
    rot_1 = pose_1[:3, :3]
    # 旋转矩阵表示的旋转的对象
    rots = Rot.from_matrix(np.stack([rot_0, rot_1]))    # [2,3,3]
    key_times = [0, 1]
    # 确定对应的时间和旋转量 2个pose对应俩个时间
    slerp = Slerp(key_times, rots)
    # 获得rot_0到rot_1的ratio的旋转矩阵rot_ratio(ratio在0~1之间)
    # 简单理解就是rot_0变换到rot_1的期间的中间过程rot_ratio
    rot = slerp(ratio)  # [3,3]
    # 4×4的单位矩阵
    pose = np.diag([1.0, 1.0, 1.0, 1.0])
    pose = pose.astype(np.float32)

    # 将旋转矩阵rot覆盖到pose对应位置上
    pose[:3, :3] = rot.as_matrix()
    # 将位移矩阵覆盖到pose对应位置上 (p1-p0)*r+p0=(1-r)*p0+p1*r
    pose[:3, 3] = ((1.0 - ratio) * pose_0 + ratio * pose_1)[:3, 3]

    # 对外参pose求逆
    pose = np.linalg.inv(pose)
    # 旋转矩阵
    rot = torch.from_numpy(pose[:3, :3]).cuda()
    # 平移矩阵
    trans = torch.from_numpy(pose[:3, 3]).cuda()
    # 世界坐标系下的单位方向向量
    rays_v = torch.matmul(rot[None, None, :3, :3], rays_v[:, :, :, None]).squeeze()  # [w, h, 3]
    # 相机光心在世界坐标系下的位置
    rays_o = trans[None, None, :3].expand(rays_v.shape)  # [w, h, 3]
    # [h, w, 3] [h, w, 3]
    return rays_o.transpose(0, 1), rays_v.transpose(0, 1)
代码的执行示意图如下图所示,函数返回了rays_o(光心)和rays_v(单位方向向量)。

根据俩个相机位姿算出第三个相机位姿,R和T的计算方式有点区别。R的计算借助cipy.spatial.transform.Rotation,具体原理博主是参考ChatGPT的。
总结
尽可能简单、详细的介绍NeuS测试阶段剩余代码:interpolate_view渲染合成视频。