一、功能说明
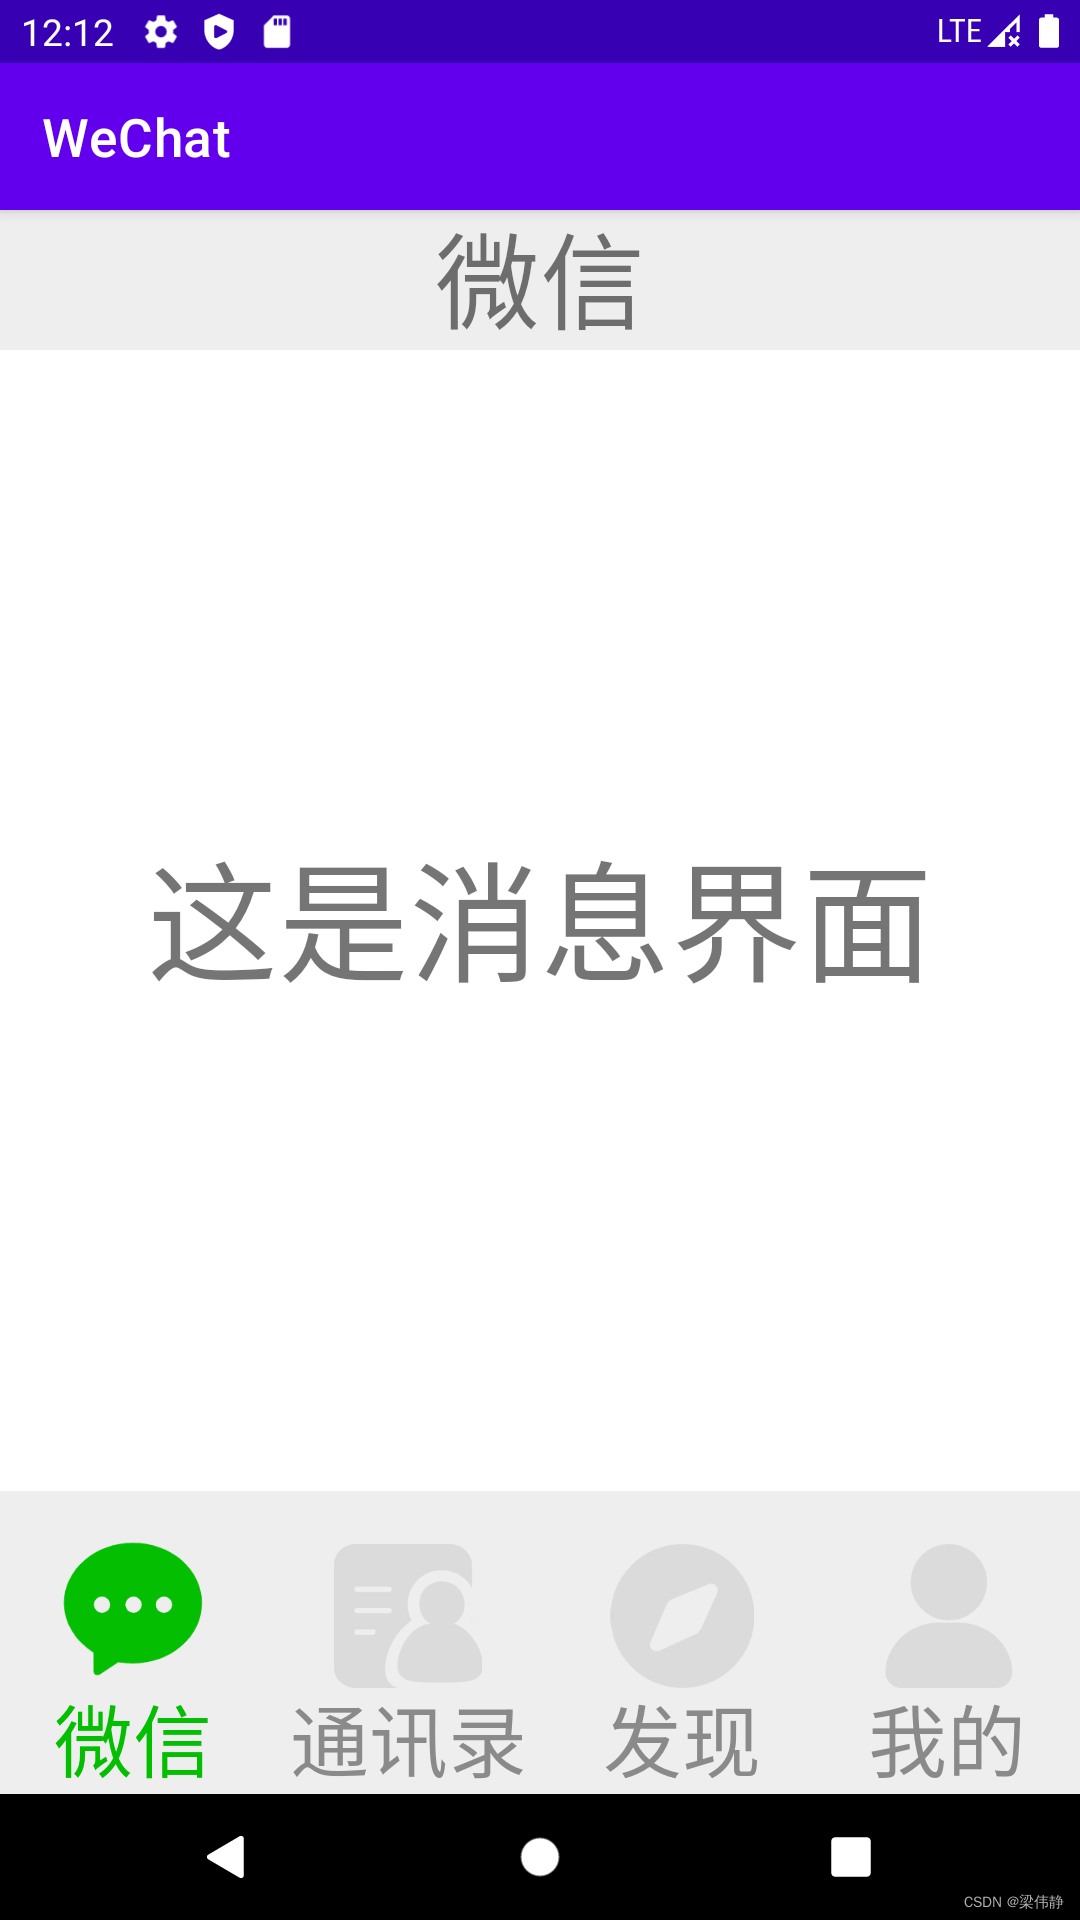
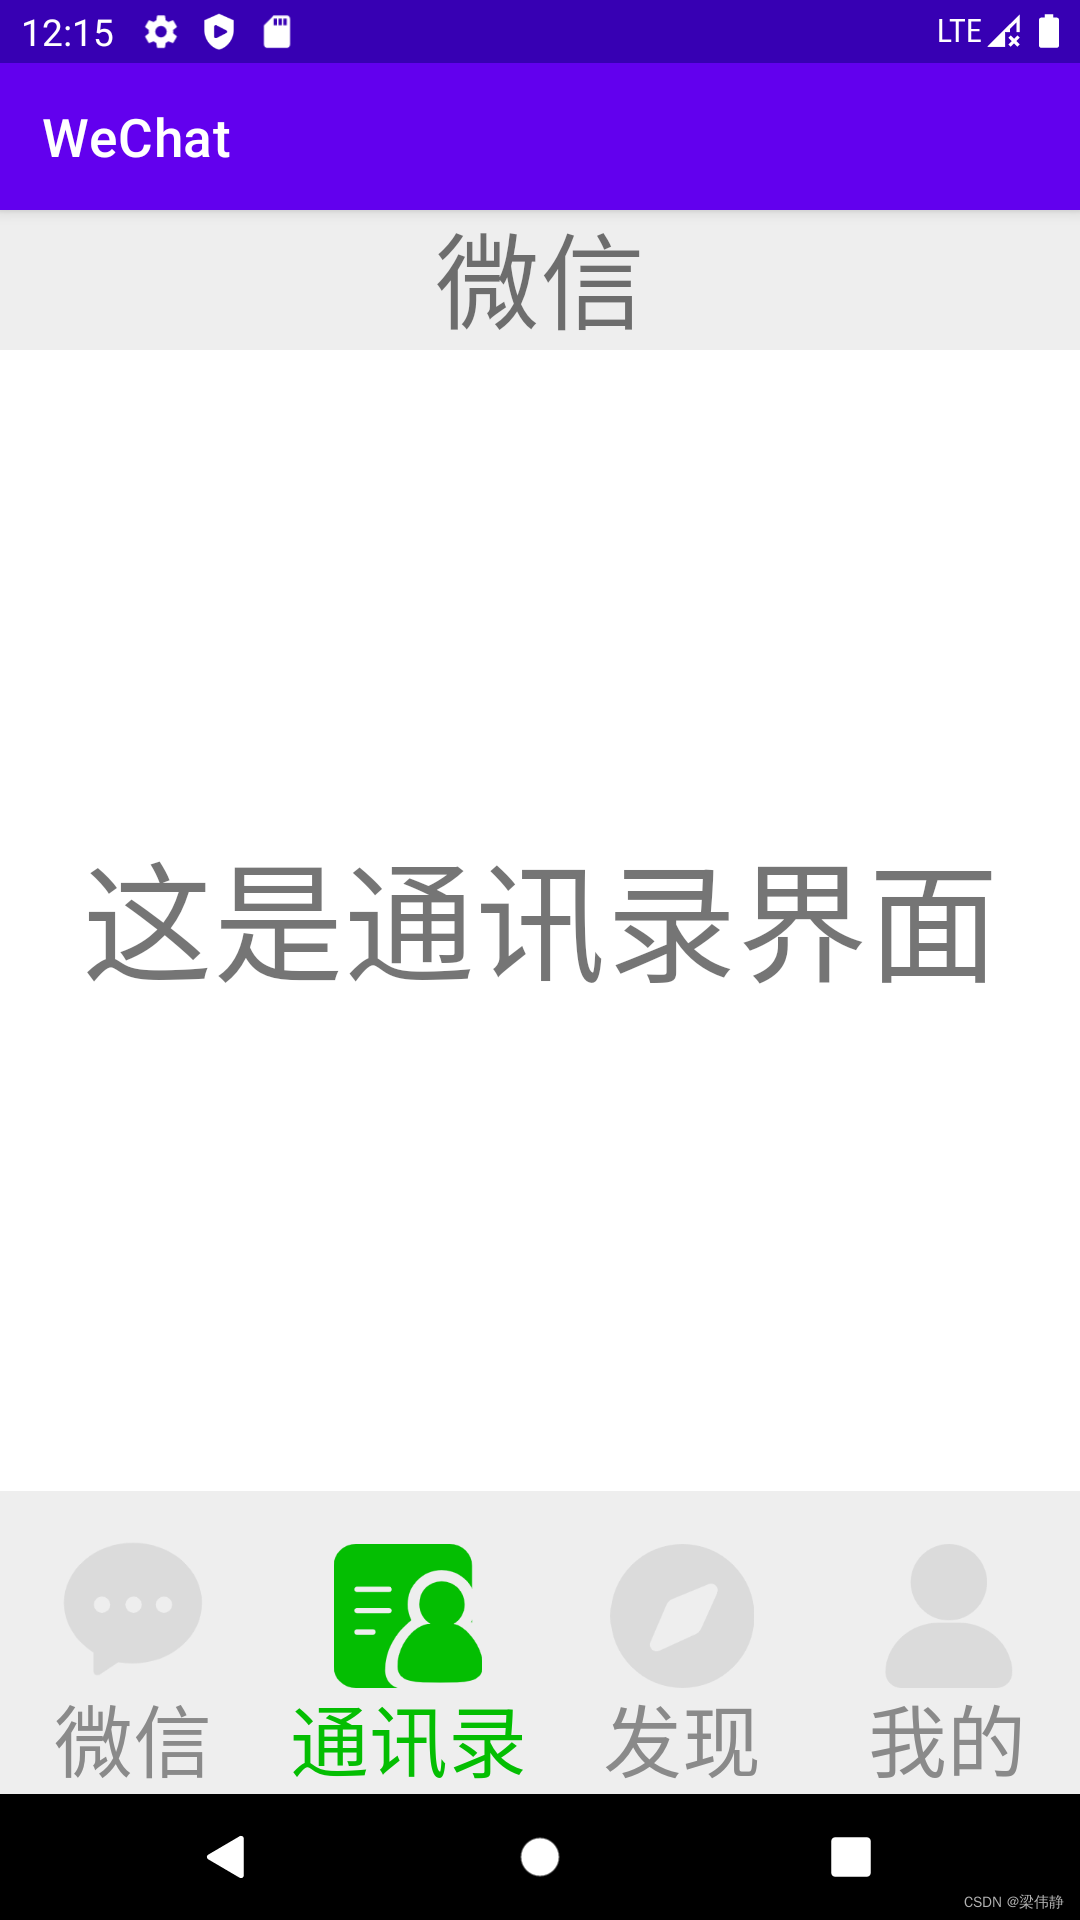
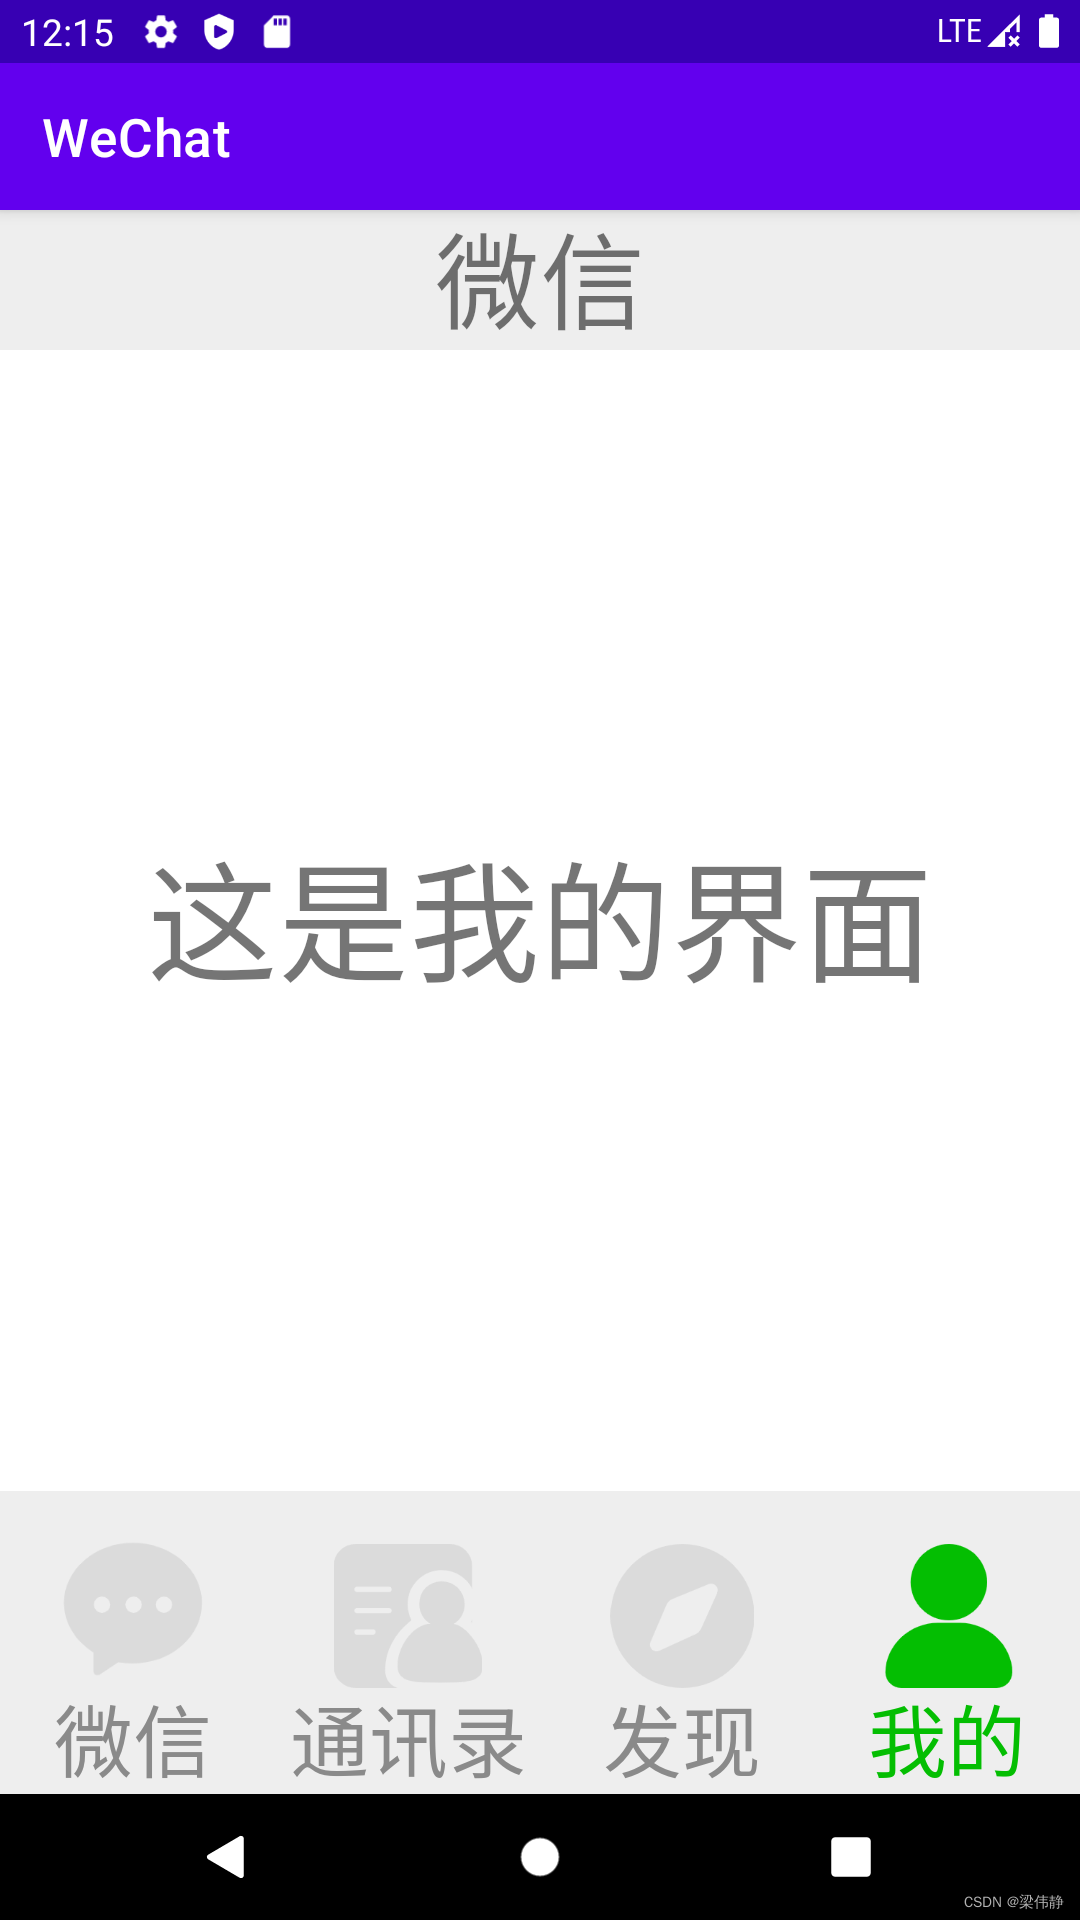
本次作业开发的是类似微信的主页面框架,UI布局为上中下结构,用户可通过点击底部导航栏切换板块内容,其中共包含四个板块,分别是“微信”、“通讯录”、“发现”和“我的”。
二、设计流程
2.1 页面设计
微信的界面布局分为上中下三个部分。
(1)第一部分,主要是显示界面的标题。
(2)第二部分,主要是“微信”、“通讯录”、“发现”和“我的”四个板块的具体内容。
(3)第三部分,主要是“微信”、“通讯录”、“发现”和“我的”四个板块的切换控件。
2.2 功能设计
实现点击底部控件切换到对应的板块界面。
(1)创建Fragment类及其对应的layout文件
(2)创建FragmentManager管理Fragment,以及FragmentTransaction
(3)设置监听
(4)设置控件被点击后的响应事件
三、核心代码详解
3.1 界面布局代码
3.1.1 总体布局 activity_main.xml
   ·<!--界面顶部-->
    <include layout="@layout/top"></include>

    <!--界面中部-->
    <FrameLayout
        android:id="@+id/content"
        android:layout_width="match_parent"
        android:layout_height="match_parent"
        android:layout_weight="1"></FrameLayout>

    <!--界面底部-->
    <include layout="@layout/bottom"></include>
<include>标签可以实现在一个layout文件中引用另一个layout文件的布局
此处则是在activity_main.xml文件中引入了top.xml文件和bottom.xml文件的布局
在FrameLayout中设置属性layout_weight=1可将FrameLayout填满界面中除了top和bottom的中间部分。
3.1.2 界面顶部 top.xml
<TextView
        android:id="@+id/top_title"
        android:layout_width="match_parent"
        android:layout_height="wrap_content"
        android:layout_weight="1"
        android:gravity="center"
        android:text="微信"
        android:textSize="40sp" />
3.1.3 界面中部
<?xml version="1.0" encoding="utf-8"?>
<FrameLayout xmlns:android="http://schemas.android.com/apk/res/android"
    xmlns:tools="http://schemas.android.com/tools"
    android:layout_width="match_parent"
    android:layout_height="match_parent"
    tools:context=".Fragmentxx">

    <TextView
        android:id="@+id/content1"
        android:layout_width="match_parent"
        android:layout_height="match_parent"
        android:layout_weight="1"
        android:gravity="center"
        android:text="这是消息界面"
        android:textSize="50sp" />

</FrameLayout>
该部分的布局文件共有四个,分别是fra_xx.xml、fra_lx.xml、fra_fx.xml、fra_wd.xml
代码大致相同,只需修改对应的Fragment类和组件id即可
3.1.4 界面底部 bottom.xml
<LinearLayout
        android:id="@+id/l_xiaoxi"
        android:layout_width="wrap_content"
        android:layout_height="wrap_content"
        android:layout_weight="1"
        android:orientation="vertical"
        android:layout_marginTop="15dp">

        <ImageView
            android:id="@+id/image_xiaoxi"
            android:layout_width="wrap_content"
            android:layout_height="60dp"
            app:srcCompat="@drawable/xiaoxi" />

        <TextView
            android:id="@+id/text_xiaoxi"
            android:layout_width="match_parent"
            android:layout_height="wrap_content"
            android:gravity="center"
            android:text="微信"
            android:textSize="30sp" />
    </LinearLayout>
界面底部的布局稍微复杂一点,布局解释如下:
(1)最外层是一个水平的LinearLayout,使得放在里面的组件可水平放置
(2)第二层是四个垂直的LinearLayout,使得放在里面的组件可垂直放置,并且通过layout_weight将此四个LinearLayout组件均分其父布局,即每个组件占父布局的1/4。
(3)对于(2)中的每个LinearLayout都有一个ImageView和TextView,详细代码如上。
另外,ImageView组件所使用的图片需存放在/res/drawable文件夹中。
3.2 点击按钮跳转板块功能代码
Fragmentxx、Fragmentlx、Fragmentfx和Fragmentwd类的主要代码:
public class Fragmentxx extends Fragment {

    @Override
    public View onCreateView(LayoutInflater inflater, ViewGroup container,
                             Bundle savedInstanceState) {
        // Inflate the layout for this fragment
        return inflater.inflate(R.layout.fra_xx, container, false);
    }
}
Fragmentlx、Fragmentfx和Fragmentwd与上述部分的代码基本一致,主要区别在于R.layout._____ 部分需对应其对应的layout文件
MainActivity类的主要代码:
FragmentManager
FragmentManager manager;
manager=getSupportFragmentManager();
Fragment对象
Fragment fragment1,fragment2,fragment3,fragment4;
fragment1=new Fragmentxx();
fragment2=new Fragmentlx();
fragment3=new Fragmentfx();
fragment4=new Fragmentwd();
LinearLayout对象,对应的id是bottom.xml文件中的第二层LinearLayout的id
LinearLayout linearLayout1,linearLayout2,linearLayout3,linearLayout4;
linearLayout1=findViewById(R.id.l_xiaoxi);
linearLayout2=findViewById(R.id.l_lianxi);
linearLayout3=findViewById(R.id.l_faxian);
linearLayout4=findViewById(R.id.l_wode);
Transaction对象
    FragmentTransaction transaction;
    //初始化,将所有fragment都添加到界面中部板块
    //对应的id是activity_main.xml中的Fragment的id
    public void inital(){
        transaction=manager.beginTransaction()
                .add(R.id.content,fragment1)
                .add(R.id.content,fragment2)
                .add(R.id.content,fragment3)
                .add(R.id.content,fragment4);
        transaction.commit();
    }
    //将所有的fragment隐藏起来
    public void fragmentHide(){
        transaction=manager.beginTransaction()
                .hide(fragment1)
                .hide(fragment2)
                .hide(fragment3)
                .hide(fragment4);
        transaction.commit();
    }
    //将指定的fragment进行展示
    public void fragmentShow(Fragment fragment){
        transaction=manager.beginTransaction().show(fragment);
        transaction.commit();
    }
从上述代码中可以看到最终四个板块的布局文件时如何添加到主布局中间的空板块的:
(1)首先通过Fragmentxx类绑定板块对应的布局文件fra_xx.xml;
(2)然后在MainActivity类中创建Fragmentxx对象;
(3)最后通过Transaction将Fragmentxx对象添加到主布局中间的空板块。
图片和文字颜色的改变
//定义组件对应的变量
TextView t1,t2,t3,t4;
ImageView im1,im2,im3,im4;
t1=findViewById(R.id.text_xiaoxi);
t2=findViewById(R.id.text_lianxi);
t3=findViewById(R.id.text_faxian);
t4=findViewById(R.id.text_wode);
im1=findViewById(R.id.image_xiaoxi);
im2=findViewById(R.id.image_lianxi);
im3=findViewById(R.id.image_faxian);
im4=findViewById(R.id.image_wode);
//将指定图片和文字设置为灰色
public void defaultImagendText(){
im1.setImageResource(R.drawable.xiaoxi);
im2.setImageResource(R.drawable.lianxi);
im3.setImageResource(R.drawable.faxian);
im4.setImageResource(R.drawable.wode);
t1.setTextColor(Color.parseColor("#8a8a8a"));
t2.setTextColor(Color.parseColor("#8a8a8a"));
t3.setTextColor(Color.parseColor("#8a8a8a"));
t4.setTextColor(Color.parseColor("#8a8a8a"));
}监听设置如下:
public class MainActivity extends AppCompatActivity implements View.OnClickListenerlinearLayout1.setOnClickListener(this);
linearLayout2.setOnClickListener(this);
linearLayout3.setOnClickListener(this);
linearLayout4.setOnClickListener(this);点击按钮后的响应事件,响应逻辑如下:
(1)点击后,先将所有图片和文字变成灰色,中间板块的内容也进行隐藏
(2)通过监听获取组件id
(3)根据获取得到的id,展示对应的板块,并且被点击的图片和文字颜色变绿
    public void onClick(View v) {
        fragmentHide();
        defaultImagendText();
        switch (v.getId())
        {
            case R.id.l_xiaoxi:
                fragmentShow(fragment1);
                im1.setImageResource(R.drawable.xiaoxi_click);
                t1.setTextColor(Color.parseColor("#04BE02"));
                break;
            case R.id.l_lianxi:
                fragmentShow(fragment2);
                im2.setImageResource(R.drawable.lianxi_click);
                t2.setTextColor(Color.parseColor("#04BE02"));
                break;
            case R.id.l_faxian:
                fragmentShow(fragment3);
                im3.setImageResource(R.drawable.faxian_click);
                t3.setTextColor(Color.parseColor("#04BE02"));
                break;
            case R.id.l_wode:
                fragmentShow(fragment4);
                im4.setImageResource(R.drawable.wode_click);
                t4.setTextColor(Color.parseColor("#04BE02"));
                break;
        };
    }
四、总结
4.1 运行结果展示

4.2 小结
通过本次作业练习掌握了一些安卓UI界面开发的基础知识,一开始由于组件有点多加上自己还不是很熟悉安卓UI界面的一些布局属性所以还有点云里雾里,在博客中对这些代码又重新梳理了一遍,感觉才好了些,总之收获还是很大的!