版权声明:本博客属个人原创,转载请注明。 https://blog.csdn.net/qq_33198758/article/details/82587330
一、设计要求
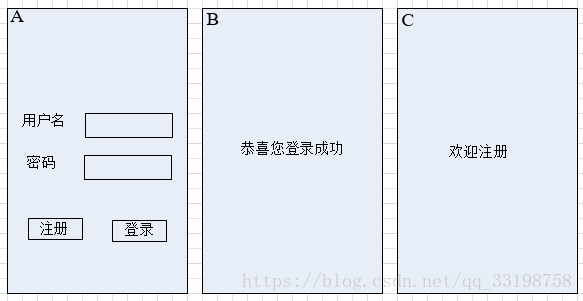
A为登录界面,点击登录按钮,登录成功,跳转到B界面。点击注册,跳转到C注册界面。
二、开发步骤
1、新建一个Mylogin工程。
2、设计登录界面
将界面按照高度均分为3部分,采用3个LinearLayout,然后将每个LinearLayout的weight设置为1。代码为:
 <LinearLayout
        android:orientation="horizontal"
        android:layout_width="match_parent"
        android:layout_height="match_parent"
        android:layout_weight="1"></LinearLayout>

    <LinearLayout
        android:orientation="horizontal"
        android:layout_width="match_parent"
        android:layout_height="match_parent"
        android:layout_weight="1"></LinearLayout>

    <LinearLayout
        android:orientation="horizontal"
        android:layout_width="match_parent"
        android:layout_height="match_parent"
        android:layout_weight="1"></LinearLayout>
然后在中间的LinearLayout里面添加用户名输入、密码输入、注册、登录按钮。代码如下:
<LinearLayout
android:orientation="horizontal"
android:layout_width="match_parent"
android:layout_height="match_parent"
android:layout_weight="1">
<TextView
android:layout_width="wrap_content"
android:layout_height="wrap_content"
android:text="用户名"
android:id="@+id/textView_userName"
android:textSize="16dp"
android:layout_weight="1"
android:layout_marginLeft="50dp" />
<EditText
android:layout_width="wrap_content"
android:layout_height="wrap_content"
android:inputType="textPersonName"
android:text="请输入用户名"
android:ems="10"
android:id="@+id/editText"
android:layout_weight="1" />
</LinearLayout>
<LinearLayout
android:orientation="horizontal"
android:layout_width="match_parent"
android:layout_height="match_parent"
android:layout_weight="1">
<TextView
android:layout_width="wrap_content"
android:layout_height="wrap_content"
android:text=" 密 码"
android:id="@+id/textView"
android:layout_weight="1"
android:layout_marginLeft="50dp"
android:textSize="16dp" />
<EditText
android:layout_width="wrap_content"
android:layout_height="wrap_content"
android:inputType="textPersonName"
android:text="请输入密码"
android:ems="10"
android:id="@+id/editText2"
android:layout_weight="1" />
</LinearLayout>
<LinearLayout
android:orientation="horizontal"
android:layout_width="match_parent"
android:layout_height="match_parent"
android:layout_weight="1">
<Button
android:layout_width="wrap_content"
android:layout_height="wrap_content"
android:text="注册"
android:id="@+id/button"
android:textSize="16dp"
android:layout_weight="1"
android:layout_marginLeft="50dp" />
<Button
android:layout_width="wrap_content"
android:layout_height="wrap_content"
android:text="登录"
android:id="@+id/button2"
android:textSize="16dp"
android:layout_weight="1"
android:layout_marginLeft="20dp"
android:layout_marginRight="50dp" />
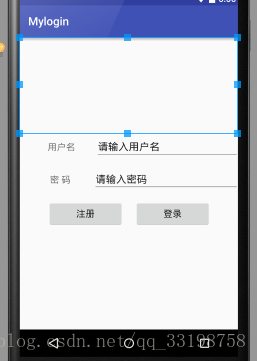
</LinearLayout>效果图:
3、设计登录成功界面
第一步
设计Layout布局,代码为:
<?xml version="1.0" encoding="utf-8"?>
<LinearLayout xmlns:android="http://schemas.android.com/apk/res/android"
    android:layout_width="match_parent"
    android:layout_height="match_parent">

    <TextView
        android:layout_width="wrap_content"
        android:layout_height="wrap_content"
        android:text="恭喜您,登录成功!"
        android:id="@+id/textView2"
        android:textSize="18dp"
        android:layout_margin="100dp" />
</LinearLayout>
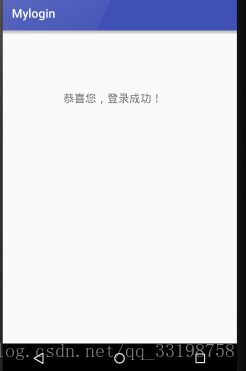
效果图:
第二步
添加LoginSuccessfullyActivity.java,用来绘制登录成功的UI。代码为:
package com.example.dx.mylogin;

import android.app.Activity;
import android.os.Bundle;

/**
 * Created by dx on 2018/9/10.
 */
public class LoginSuccessfullyActivity extends Activity {
    @Override
    protected void onCreate(Bundle savedInstanceState) {
        super.onCreate(savedInstanceState);
        setContentView(R.layout.activity_loginsuccessfully );
    }
}
4、设计注册界面
第一步
设计Layout,代码为:
<?xml version="1.0" encoding="utf-8"?>
<LinearLayout xmlns:android="http://schemas.android.com/apk/res/android"
    android:layout_width="match_parent"
    android:layout_height="match_parent">

    <TextView
        android:layout_width="wrap_content"
        android:layout_height="wrap_content"
        android:text="欢迎注册!"
        android:id="@+id/textView3"
        android:layout_margin="100dp"
        android:textSize="18dp" />
</LinearLayout>
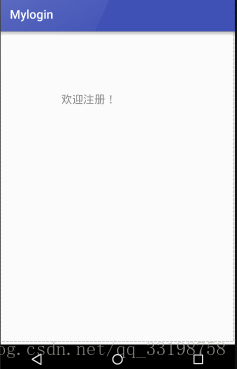
效果图:
第二步
添加RegisterActivity.java,用来绘制登录成功的UI。代码为:
package com.example.dx.mylogin;

import android.app.Activity;
import android.os.Bundle;

/**
 * Created by dx on 2018/9/10.
 */
public class RegisterActivity extends Activity {
    @Override
    protected void onCreate(Bundle savedInstanceState) {
        super.onCreate(savedInstanceState);
        setContentView(R.layout.activity_register );
    }
}
5、添加按钮点击事件,跳转界面
在MainActivity中添加按钮点击事件,用以跳转界面,代码为:
package com.example.dx.mylogin;

import android.app.Activity;

import android.content.Intent;
import android.os.Bundle;
import android.view.View;
import android.widget.Button;

public class MainActivity extends Activity implements View.OnClickListener {
    private Button  btn_register;
    private Button btn_login;
    @Override
    protected void onCreate(Bundle savedInstanceState) {
        super.onCreate(savedInstanceState);
        setContentView(R.layout.activity_main);
        btn_register =(Button)findViewById(R.id.button_register ) ;
        btn_login =(Button)findViewById(R.id.button_login ) ;
        btn_register .setOnClickListener(this) ;
        btn_login .setOnClickListener(this) ;
    }

    @Override
    public void onClick(View v) {
       if(v==btn_login )
       {
           Intent intent = new Intent();
           intent.setClass(MainActivity .this,LoginSuccessfullyActivity.class);
          MainActivity.this.startActivity(intent);
       }
        if(v==btn_register )
        {
            Intent intent = new Intent();
            intent.setClass(MainActivity.this,RegisterActivity.class);
            MainActivity.this.startActivity(intent);
        }
    }
}
6、注册Activity权限
在AndroidManifest里面注册Activity的权限,代码为:
<?xml version="1.0" encoding="utf-8"?>
<manifest xmlns:android="http://schemas.android.com/apk/res/android"
    package="com.example.dx.mylogin">

    <application
        android:allowBackup="true"
        android:icon="@mipmap/ic_launcher"
        android:label="@string/app_name"
        android:supportsRtl="true"
        android:theme="@style/AppTheme">
        <activity android:name=".MainActivity">
            <intent-filter>
                <action android:name="android.intent.action.MAIN" />

                <category android:name="android.intent.category.LAUNCHER" />
            </intent-filter>
        </activity>
        <activity android:name=".LoginSuccessfullyActivity"
            android:label="登陆成功界面" />
        <activity android:name=".RegisterActivity"
            android:label="注册界面" />
    </application>

</manifest>
三、实现效果
这里开发及环境为Android Studio。源码链接,源码。 提取密码:2evn