一、前言
承接上文已经完成对数据集的训练和对框架的修改实现实时输出mask的预测结果,但是仅仅做到这些是无法实现无人驾驶的。
PPLiteSeg训练自己的数据集实现自动驾驶并爆改制作成API可供其他Python程序调用实时语义分割(超低延时)_Leonard2021的博客-CSDN博客
百度飞浆EISeg高效交互式标注分割软件的使用教程_Leonard2021的博客-CSDN博客
整体思路:实时语义分割的输出预测mask,将整体预测分割中的车道线分割结果mask独立读取出来,再通过opencv进行图像二值化Canny边缘检测后得到车道线的边缘后,再通过HoughLinesP霍尔线变化取得车道线上的大量零散坐标,在这些零散坐标中求得起点和终点的车道线中点后,设置逻辑判断车道线是通向前方、左方、还是右方,求得输出车道区域的中点和起点车道区域的中点之间的角度,设置逻辑将改输出角度同步到无人车的前方转向轮的方向角度控制,就可使小车沿车道无人车自动驾驶。
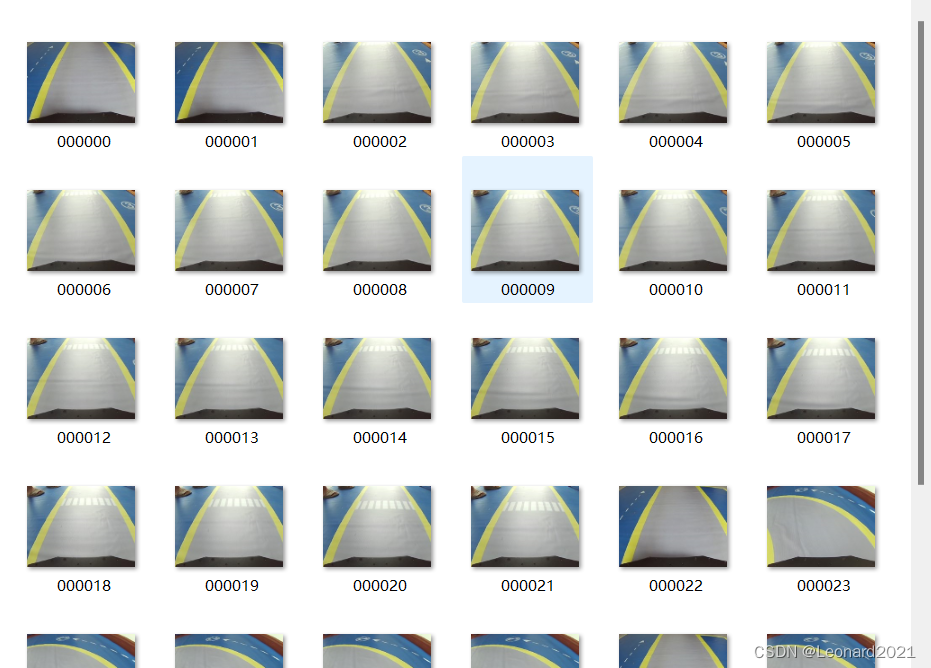
数据集大概长这样:

二、实战
训练函数部分,我在上一篇文章里已经提及,这里不再重复,直接开始修改和使用调用的部分。
新建 visualize_myself.py :
# Copyright (c) 2020 PaddlePaddle Authors. All Rights Reserved.
#
# Licensed under the Apache License, Version 2.0 (the "License");
# you may not use this file except in compliance with the License.
# You may obtain a copy of the License at
#
#    http://www.apache.org/licenses/LICENSE-2.0
#
# Unless required by applicable law or agreed to in writing, software
# distributed under the License is distributed on an "AS IS" BASIS,
# WITHOUT WARRANTIES OR CONDITIONS OF ANY KIND, either express or implied.
# See the License for the specific language governing permissions and
# limitations under the License.

import os

import cv2
import numpy as np
from PIL import Image as PILImage


def visualize(image, result, color_map, save_dir=None, weight=0.6):
    """
    Convert predict result to color image, and save added image.

    Args:
        image (str): The path of origin image.
        result (np.ndarray): The predict result of image.
        color_map (list): The color used to save the prediction results.
        save_dir (str): The directory for saving visual image. Default: None.
        weight (float): The image weight of visual image, and the result weight is (1 - weight). Default: 0.6

    Returns:
        vis_result (np.ndarray): If `save_dir` is None, return the visualized result.
    """

    color_map = [color_map[i:i + 3] for i in range(0, len(color_map), 3)]
    color_map = np.array(color_map).astype("uint8")
    # Use OpenCV LUT for color mapping
    c1 = cv2.LUT(result, color_map[:, 0])
    c2 = cv2.LUT(result, color_map[:, 1])
    c3 = cv2.LUT(result, color_map[:, 2])
    pseudo_img = np.dstack((c3, c2, c1))

    #im = cv2.imread(image)
    im = image.copy()
    vis_result = cv2.addWeighted(im, weight, pseudo_img, 1 - weight, 0)

    if save_dir is not None:
        if not os.path.exists(save_dir):
            os.makedirs(save_dir)
        image_name = os.path.split(image)[-1]
        out_path = os.path.join(save_dir, image_name)
        cv2.imwrite(out_path, vis_result)
    else:
        return vis_result


def get_pseudo_color_map(pred, color_map=None):
    """
    Get the pseudo color image.

    Args:
        pred (numpy.ndarray): the origin predicted image.
        color_map (list, optional): the palette color map. Default: None,
            use paddleseg's default color map.

    Returns:
        (numpy.ndarray): the pseduo image.
    """
    pred_mask = PILImage.fromarray(pred.astype(np.uint8), mode='P')
    if color_map is None:
        color_map = get_color_map_list(256)
    pred_mask.putpalette(color_map)
    #print(len(pred_mask.split()), type(pred_mask))
    #image = pred_mask.convert("RGB")#单通道转化为3通道
    #img = cv2.cvtColor(np.asarray(image), cv2.COLOR_BGR2GRAY)#转化为cv的格式返回
    return pred_mask


def get_color_map_list(num_classes, custom_color=None):
    """
    Returns the color map for visualizing the segmentation mask,
    which can support arbitrary number of classes.

    Args:
        num_classes (int): Number of classes.
        custom_color (list, optional): Save images with a custom color map. Default: None, use paddleseg's default color map.

    Returns:
        (list). The color map.
    """

    num_classes += 1
    color_map = num_classes * [0, 0, 0]
    for i in range(0, num_classes):
        j = 0
        lab = i
        while lab:
            color_map[i * 3] |= (((lab >> 0) & 1) << (7 - j))
            color_map[i * 3 + 1] |= (((lab >> 1) & 1) << (7 - j))
            color_map[i * 3 + 2] |= (((lab >> 2) & 1) << (7 - j))
            j += 1
            lab >>= 3
    color_map = color_map[3:]

    if custom_color:
        color_map[:len(custom_color)] = custom_color
    return color_map


def paste_images(image_list):
    """
    Paste all image to a image.
    Args:
        image_list (List or Tuple): The images to be pasted and their size are the same.
    Returns:
        result_img (PIL.Image): The pasted image.
    """
    assert isinstance(image_list,
                      (list, tuple)), "image_list should be a list or tuple"
    assert len(
        image_list) > 1, "The length of image_list should be greater than 1"

    pil_img_list = []
    for img in image_list:
        if isinstance(img, str):
            assert os.path.exists(img), "The image is not existed: {}".format(
                img)
            img = PILImage.open(img)
            img = np.array(img)
        elif isinstance(img, np.ndarray):
            img = PILImage.fromarray(img)
        pil_img_list.append(img)

    sample_img = pil_img_list[0]
    size = sample_img.size
    for img in pil_img_list:
        assert size == img.size, "The image size in image_list should be the same"

    width, height = sample_img.size
    result_img = PILImage.new(sample_img.mode,
                              (width * len(pil_img_list), height))
    for i, img in enumerate(pil_img_list):
        result_img.paste(img, box=(width * i, 0))

    return result_img
新建 predict_with_api.py : 修改过的predict,制作成了可实时运行的API接口
import cv2
import numpy as np
import paddle
from paddleseg.core import infer
from paddleseg.utils import visualize
import visualize_myself
from PIL import Image as PILImage


def preprocess(im_path, transforms):
    data = {}
    data['img'] = im_path
    data = transforms(data)
    data['img'] = data['img'][np.newaxis, ...]
    data['img'] = paddle.to_tensor(data['img'])
    return data

def predict(model,
            model_path,
            transforms,
            image_list,
            aug_pred=False,
            scales=1.0,
            flip_horizontal=True,
            flip_vertical=False,
            is_slide=False,
            stride=None,
            crop_size=None,
            custom_color=None
            ):
    # 加载模型权重
    para_state_dict = paddle.load(model_path)
    model.set_dict(para_state_dict)
    # 设置模型为评估模式
    model.eval()
    # 读取图像
    im = image_list.copy()
    color_map = visualize.get_color_map_list(256, custom_color=custom_color)
    with paddle.no_grad():
        data = preprocess(im, transforms)
        # 是否开启多尺度翻转预测
        if aug_pred:
            pred, _ = infer.aug_inference(
                model,
                data['img'],
                trans_info=data['trans_info'],
                scales=scales,
                flip_horizontal=flip_horizontal,
                flip_vertical=flip_vertical,
                is_slide=is_slide,
                stride=stride,
                crop_size=crop_size)
        else:
            pred, _ = infer.inference(
                model,
                data['img'],
                trans_info=data['trans_info'],
                is_slide=is_slide,
                stride=stride,
                crop_size=crop_size)
        # 将返回数据去除多余的通道,并转为uint8类型,方便保存为图片

        pred = paddle.squeeze(pred)
        pred = pred.numpy().astype('uint8')

        # 展示结果
        added_image = visualize_myself.visualize(image= im,result= pred,color_map=color_map, weight=0.6)
        #cv2.imshow('image_predict', added_image)

        # save pseudo color prediction
        pred_mask = visualize_myself.get_pseudo_color_map(pred, color_map)
        #cv2.waitKey(0)
        #cv2.destroyAllWindows()
        return added_image,pred_mask
新建 seg_read.py : 主要功能为将整体预测的输出改为指定输出某个种类的分割结果,这里我主要只输出车道线分割的预测部分
from PIL import Image
import numpy as np
import cv2

#生成染色版
def get_voc_palette(num_classes):
    n = num_classes
    palette = [0]*(n*3)
    for j in range(0,n):
            lab = j
            palette[j*3+0] = 0
            palette[j*3+1] = 0
            palette[j*3+2] = 0
            i = 0
            while (lab > 0):
                    palette[j*3+0] |= (((lab >> 0) & 1) << (7-i))
                    palette[j*3+1] |= (((lab >> 1) & 1) << (7-i))
                    palette[j*3+2] |= (((lab >> 2) & 1) << (7-i))
                    i = i + 1
                    lab >>= 3
    return palette

#染色代码
def colorize_mask(mask, palette):
    zero_pad = 256 * 3 - len(palette)
    for i in range(zero_pad):
                    palette.append(0)
    new_mask = Image.fromarray(mask.astype(np.uint8)).convert('P')
    new_mask.putpalette(palette)
    return new_mask

#生成指定类别的语义分割预测结果
def generate_img_with_choice_class(img,classes:list,num_classes:int):
    #传入 图像路径 和 需要预测的类别  总共的类别
    #img = Image.open(img)#

    img = np.asarray(img)
    f_img = img.copy()
    for idx,c in enumerate(classes):
        f_img[np.where(img==c)] = 0 #将对应位置置零
    f_img = colorize_mask(f_img,get_voc_palette(num_classes)) # 进行染色处理
    image = f_img.convert("RGB")
    #image.save('output/process_img.png')
    img = cv2.cvtColor(np.asarray(image), cv2.COLOR_BGR2GRAY)
    return img

if __name__ == '__main__':
    ''''''
    img_path = r'data/annotations/000026.png'
    choice_list = [0,2]
    img = generate_img_with_choice_class(img_path,choice_list,3)
    cv2.imshow('image',img)
    #cv2.imwrite('output/3.jpg', img)
    #cv2.waitKey(0)
新建 opencv手动阈值分割.py :通过滑块手动调整canny边缘检测的阈值
import cv2
#载入图片
img_original=cv2.imread('output/1.jpg')
#设置窗口
cv2.namedWindow('Canny')
#定义回调函数
def nothing(x):
    pass
#创建两个滑动条,分别控制threshold1,threshold2
cv2.createTrackbar('threshold1','Canny',50,400,nothing)
cv2.createTrackbar('threshold2','Canny',100,400,nothing)
while(1):
    #返回滑动条所在位置的值
    threshold1=cv2.getTrackbarPos('threshold1','Canny')
    threshold2=cv2.getTrackbarPos('threshold2','Canny')
    #Canny边缘检测
    img_edges=cv2.Canny(img_original,threshold1,threshold2)
    #显示图片
    cv2.imshow('original',img_original)
    cv2.imshow('Canny',img_edges)
    if cv2.waitKey(1)==ord('q'):
        break
cv2.destroyAllWindows()
新建 HoughLines_return.py :主要功能通过canny特征检测提取车道线上的大量零散坐标,再抽取边缘(包括:最上方、最左方、最下方、最右方)的各4个最接近边缘的输出坐标,求平均得到4个的方向的中点坐标,若最左方的车道线边缘中点靠近左侧上方且不上方接触则输出角度为左侧边缘的中点与下方边缘中点之间的角度,右侧和上方的同理。输出后便可通过串口通讯实时同步无人车的前方转向轮的方向角度。
import cv2
import matplotlib.pyplot as plt
import numpy as np
from collections import Counter
import math

def sort_max(list):
    list1 = list.copy()#复制一份,不破坏原来的列表
    list1.sort()#从小到大排序
    max1 = list1[-1]#最大
    max2 = list1[-2]#第二大
    max3 = list1[-3]#第3大
    max4 = list1[-4]#第4大
    return max1,max2,max3,max4

def sort_min(list):
    list1 = list.copy()  # 复制一份,不破坏原来的列表
    list1.sort()  # 从小到大排序
    min1 = list1[0]  # 最大
    min2 = list1[1]  # 第二大
    min3 = list1[2]  # 第3大
    min4 = list1[3]  # 第4大
    return min1, min2, min3, min4

def azimuthangle(x1, y1, x2, y2):
    """ 已知两点坐标计算角度 -
    :param x1: 原点横坐标值
    :param y1: 原点纵坐标值
    :param x2: 目标点横坐标值
    :param y2: 目标纵坐标值
    """
    angle = 0.0
    dx = x2 - x1
    dy = y2 - y1
    if x2 == x1:
        angle = math.pi / 2.0
        if y2 == y1:
            angle = 0.0
        elif y2 < y1:
            angle = 3.0 * math.pi / 2.0
    elif x2 > x1 and y2 > y1:
        angle = math.atan(dx / dy)
    elif x2 > x1 and y2 < y1:
        angle = math.pi / 2 + math.atan(-dy / dx)
    elif x2 < x1 and y2 < y1:
        angle = math.pi + math.atan(dx / dy)
    elif x2 < x1 and y2 > y1:
        angle = 3.0 * math.pi / 2.0 + math.atan(dy / -dx)
    return angle * 180 / math.pi


def get_index(l, x, n):
    # 函数作用: 获取某个元素第n次出现在列表的下标
    # 参数列表: 第一个参数为可迭代对象, 第二个参数为要查找的数, 第三个参数为要查找第几个出现的x
    l_count = l.count(x)
    result = None
    if n <= l_count:
        num = 0
        for item in enumerate(l):
            if item[1] == x:
                num += 1
            if num == n:
                result = item[0]
                break
    else:
        print("列表里总共有{}个{}".format(l_count, x))
    return result

def get_top_mid(x_list,y_list,judge):#真为上方,假为下方
    if judge ==True:
        min1_y, min2_y, min3_y, min4_y = sort_min(y_list)
    else:
        min1_y, min2_y, min3_y, min4_y = sort_max(y_list)
    #print("min1:", min1_y, "min2:", min2_y, "min3:", min3_y, "min4:", min4_y)
    min_list_y = [min1_y, min2_y, min3_y, min4_y]
    b = dict(Counter(min_list_y))
    same = [key for key, value in b.items() if value > 1]  # 只展示重复元素
    min_list_x = []
    i_1 = 1
    i_2 = 1
    for max in min_list_y:
        if len(same)==0:
            y_index = get_index(y_list, max, 1)
        elif len(same)==1:
            if max == same[0]:
                y_index = get_index(y_list, max, i_1)
                i_1 =i_1+1
            else:
                y_index = get_index(y_list, max, 1)
        elif len(same)==2:
            if max == same[0]:
                y_index = get_index(y_list, max, i_1)
                i_1 =i_1+1
            elif max == same[1]:
                y_index = get_index(y_list, max, i_2)
                i_2 =i_2+1
            else:
                y_index = get_index(y_list, max, 1)
        min_list_x.append(x_list[y_index])
    #print("min_list_x", min_list_x)
    top_mid = [sum(min_list_x) / len(min_list_x), sum(min_list_y) / len(min_list_y)]
    #print("top_mid:", top_mid)
    return top_mid

def get_side_mid(x_list,y_list,judge):#真为左,假为右
    if judge ==True:
        m1_x, m2_x, m3_x, m4_x = sort_min(x_list)
    else:
        m1_x, m2_x, m3_x, m4_x = sort_max(x_list)
    #print("min1:", m1_x, "min2:", m2_x, "min3:", m3_x, "min4:", m4_x)
    min_list_x = [m1_x, m2_x, m3_x, m4_x]
    b = dict(Counter(min_list_x))
    same = [key for key, value in b.items() if value > 1]  # 只展示重复元素
    #print("same:", same, len(same))
    min_list_y = []
    i_1 = 1
    i_2 = 1
    for max in min_list_x:
        if len(same)==0:
            x_index = get_index(x_list, max, 1)
        elif len(same) == 1:
            if max == same:
                x_index = get_index(x_list, max, i_1)
                i_1 = i_1 + 1
            else:
                x_index = get_index(x_list, max, 1)
            #print("x_index_1:", type(x_index), x_index)
        elif len(same)==2:
            if max == same[0]:
                x_index = get_index(x_list, max, i_1)
                i_1 = i_1 + 1
            elif max == same[1]:
                x_index = get_index(x_list, max, i_2)
                i_2 = i_2 + 1
            else:
                x_index = get_index(x_list, max, 1)
            #print("x_index_1:", type(x_index), x_index)
        min_list_y.append(y_list[x_index])
    #print("min_list_x", min_list_y)
    side_mid = [sum(min_list_x) / len(min_list_x), sum(min_list_y) / len(min_list_y)]
    #print("side_mid:", side_mid)
    return side_mid

def HL_return(src):
    img = src.copy()
    # 二值化图像(Canny边缘检测)
    # gray_img = cv2.cvtColor(img, cv2.COLOR_BGR2GRAY)
    dst_img = cv2.Canny(img, 11, 16)

    cv2.imshow('Canny', dst_img)
    #cv2.waitKey(0)

    lines = cv2.HoughLinesP(dst_img, 1, np.pi / 180, 20)

    x_list = []
    y_list = []

    for line in lines:
        for x1, y1, x2, y2 in line:
            x_list.append(x1)
            x_list.append(x2)
            y_list.append(y1)
            y_list.append(y2)
            cv2.line(img, (x1, y1), (x2, y2), (0, 255, 0), 3)
        cv2.imshow("HoughLinesP", img)
        #cv2.waitKey(0)

    top_mid = get_top_mid(x_list,y_list,True)#得到上面的中点
    down_mid = get_side_mid(x_list,y_list,False)#得到下面的中点
    left_side_mid = get_side_mid(x_list,y_list,True)#得到左边的中点
    right_side_mid = get_side_mid(x_list,y_list,False)#得到右边的中点
    print("top_mid:",top_mid,"dowm_mid:",down_mid,"left_mid:",left_side_mid,"right_mid:",right_side_mid)

    sp = src.shape
    sz1 = sp[0]  # height(rows) of image
    sz2 = sp[1]  # width(colums) of image
    sz3 = sp[2]  # the pixels value is made up of three primary colors
    if left_side_mid[1]<(sp[0]*0.5):
        angle =azimuthangle (left_side_mid[0],left_side_mid[1],down_mid[0],down_mid[1])
    elif right_side_mid[1]<(sp[0]*0.5):
        angle = azimuthangle(right_side_mid[0], right_side_mid[1], down_mid[0], down_mid[1])
    else:
        angle = azimuthangle(top_mid[0], top_mid[1], down_mid[0], down_mid[1])
    #print("angle:", type(angle), angle)
    #cv2.waitKey(0)
    return angle

if __name__ == '__main__':
    src = cv2.imread(r"D:\pyCharmdata\PPLiteSeg_demo\output\2.jpg")
    angle =HL_return(src)
    if (angle - 90) > 0:
        print("请右转:", math.fabs(angle - 90), "度")
    elif (angle - 90) < 0:
        print("请左转:", math.fabs(angle - 90), "度")
    elif angle == 90:
        print("正在保持90度直行")
新建 demo_run_API.py :调用实时分割API并实时输出转向角度
import cv2
from predict_with_api import predict
from paddleseg.models import PPLiteSeg
from paddleseg.models.backbones import STDC1
import paddleseg.transforms as T
from seg_read import generate_img_with_choice_class
from HoughLines_return import HL_return
import math

backbone = STDC1()

model = PPLiteSeg(num_classes=13,
                 backbone= backbone,
                 arm_out_chs = [32, 64, 128],
                 seg_head_inter_chs = [32, 64, 64],
                 pretrained=None)

transforms = T.Compose([
    T.Resize(target_size=(512, 512)),
    T.RandomHorizontalFlip(),
    T.Normalize()
])
model_path = 'output/best_model/model.pdparams'
cap=cv2.VideoCapture(0)# 0

if __name__ == '__main__':
    while True:
        rec,img = cap.read()
        added_image,pred_mask = predict(model=model,model_path=model_path, transforms=transforms,image_list=img)
        cv2.imshow('image_predict', added_image)#显示原图像与分割预测的合并图
        #
        choice_list = [0, 2]#只展示第2个类型的分割结果
        img = generate_img_with_choice_class(pred_mask, choice_list, 3)# PIL图像输入、展示第几个类型的分割、总的分割种类
        cv2.imshow('image', img)#将返回的指定分割类型的灰度图显示出来
        angle = HL_return(img)
        if (angle - 90) > 0:
            print("请右转:", math.fabs(angle - 90), "度")
        elif (angle - 90) < 0:
            print("请左转:", math.fabs(angle - 90), "度")
        elif angle == 90:
            print("正在保持90度直行")

        if cv2.waitKey(1)==ord('q'):
            break
三、总结
总的来说,虽然是完成的整体开发工作,但是由于使用的是数据集,且使用的数据集数量较少,训练程度较低。尚未落地进行实验,可能存在许多调试和逻辑上的问题有待发现和解决,且判断车道线的流向方向的阈值是手动自己估计的,实际的阈值的差值有待商榷。逻辑控制方面上相对大厂的算法显得不太成熟和简单。将输出角度与转向轮方向角度同步的部分,使用pyserial与下位机进行串口通讯,下位机再控制电机的转向轮到指定角度。
再加上目标检测部分,就形成了一个简易的无人驾驶的视觉部分。
爆改YOLOV7的detect.py制作成API接口供其他python程序调用(超低延时)_Leonard2021的博客-CSDN博客
本人完全独立自制的小玩意,简易版本的无人驾驶的视觉部分,精度肯定不如大厂的成品算法,如果有时间的精力的话,会继续改进的更新的。
本项目的架构,有需要可以自取:
PPLiteSeg_AutoDrive_demo.zip-深度学习文档类资源-CSDN下载