在学习webpack之前,也从网上搜过一些用webpack搭建vue项目的博客,但是在自己使用的时候会报各种的问题,报错的根本原因其实就是版本的问题,以下代码是经过解决了许多报错问题研究出来最简单最方便搭建vue2项目的方法
首先创建一个空的文件夹
2.初始化配置
npm init -y(不需要交互,下载更快)3.安装webpack
npm i [email protected] [email protected] -D4.创建配置文件
手动的在根目录下创建一个 webpack.config.js文件
配置以下基础内容
const { resolve } = require( 'path'); // node 内置核心模块,用来处理路径问题。
module.exports = {
entry: './src/js/ index .js', // 入口文件
output: { // 输出配置
filename: './built.js', // 输出文件名
path: resolve(__dirname, 'build/js') // 输出文件路径配置
},
mode: 'development' //开发环境
};
5.下载常用的loader安装包
npm i [email protected] [email protected] [email protected] [email protected] -D  //打包样式资源
npm install --save-dev [email protected] //打包html资源
npm install --save-dev [email protected] [email protected] [email protected] //打包图片资源
npm i [email protected] -D  //服务器端运行
npm install --save-dev [email protected]  //提取css成单独文件
npm install --save-dev [email protected] [email protected]  //css兼容性处理
npm install --save-dev [email protected] //压缩css
npm install --save-dev clean-webpack-plugin  //清除打包文件
npm i [email protected] [email protected] -D  //安装vue2
npm i [email protected] [email protected] [email protected] 以上是比较常用的插件,具体插件的用途以及注意事项在(5条消息) webpack(4版本)使用_是张鱼小丸子鸭的博客-CSDN博客中已经详细的说明了,有需要的可以查看一下
还有一种方式,比较便捷,就是复制我们package.json中的devDependencies中的内容,然后使用yarn或者npm i
 "devDependencies": {
    "clean-webpack-plugin": "^4.0.0",
    "css-loader": "^3.4.2",
    "file-loader": "^5.0.2",
    "html-loader": "^0.5.5",
    "html-webpack-plugin": "^3.2.0",
    "less": "^3.11.1",
    "less-loader": "^5.0.0",
    "mini-css-extract-plugin": "^0.9.0",
    "optimize-css-assets-webpack-plugin": "^5.0.3",
    "postcss-loader": "^3.0.0",
    "postcss-preset-env": "^6.7.0",
    "style-loader": "^1.1.3",
    "url-loader": "^3.0.0",
    "webpack-dev-server": "^3.10.3",
   "vue-loader": "^15.7.1",
"vue-template-compiler": "^2.6.10"
  },
 "dependencies": {
    "vue": "^2.6.10",
    "vue-router": "^3.1.3",
    "vue-style-loader": "^4.1.2"
    },
  "browserslist": {
    "development": [
      "last 1 chrome version",
      "last 1 firefox version",
      "last 1 safari version"
    ],
    "production": [
      ">0.2%",
      "not dead",
      "not op_mini all"
    ]
  }
执行完上面的代码跟我们一点一点下载loader包效果一样,可以选择使用
6.配置文件(webpack.config.js)
const { resolve } = require("path"); // node 内置核心模块,用来处理路径问题。

const HtmlWebpackPlugins=require('html-webpack-plugin')
// css分成单独文件
const MiniCssExtractPlugin = require('mini-css-extract-plugin')
const {CleanWebpackPlugin}=require('clean-webpack-plugin')
const OptimizeCssAssetsWebpackPlugin = require('optimize-css-assets-webpack-plugin')
const VueLoaderPlugin = require("vue-loader/lib/plugin-webpack4");
process.env.NODE_ENV = 'development'
module.exports = {
    mode: 'development',   // mode=production
  entry: "./src/index.js", // 入口文件
  resolve: {
    extensions: [".js", ".vue", ".json"],
    alias: {
    // 'vue$': 'vue/dist/vue.js',
    "@": resolve(__dirname, "./src"),
    },
    },
  output: {
    // 输出配置
    filename: "./built.js", // 输出文件名
    path: resolve(__dirname, "build"), // 输出文件路径配置
  },
  plugins:[
    new VueLoaderPlugin(),
    new CleanWebpackPlugin(),
    new HtmlWebpackPlugins({
        template: './src/index.html'
    }),
    new MiniCssExtractPlugin({
        filename: './src/css/main.css',
        }),
    new OptimizeCssAssetsWebpackPlugin(),
  ],

  module:{
    rules:[
      {
        test: /\.vue$/,
        loader: "vue-loader",
        },
        {
            test: /\.(c|le)ss$/,
            use: [MiniCssExtractPlugin.loader,
                'css-loader',
                 {
                loader: 'postcss-loader',//预处理,这里指的是在解析css之前,做一下兼容性处理
                options: {
                ident: 'postcss',
                plugins: () => [require('postcss-preset-env')()],
                },
                },
               ],
            },
        {
            test:/\.(jpg|png|jpeg|gif)$/,
            loader: "url-loader",
            options: {
                limit: 6 * 1024,// 最大限制图片
                name: "[name].[hash:10].[ext]", //图片命名+哈希值保留位数+后缀
                outputPath: "images", //导出路径
                esModule: false,  //是否是模块
                },
        },
        {
            //用来解析在html文件中的图片
            test: /\.html$/,
            loader: "html-loader",
            },

    ]
  },
  devServer: {
    // 项目构建后路径
    contentBase: resolve(__dirname, 'build'),
    // 启动 gzip 压缩
    compress: true,
    // 端口号
    port: 3000,
    // 自动打开浏览器
    open: true
    }

};
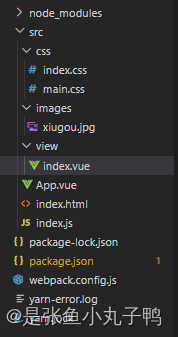
这是我的项目目录,路由还没有配置,只是搭建了一个基础的vue项目
这样我的vue2项目的就搭建完成了,但是如果我们想要vue项目能在我们项目中显示,我们还需要配一些其他的操作
index.js
import Vue from 'vue'
import App from './App.vue'

new Vue({

  render: h => h(App)
}).$mount('#app')
注意上面的引入,以及引入文件的路径
index.html
扫描二维码关注公众号,回复:
14747637 查看本文章

<!DOCTYPE html>
<html lang="en">
<head>
    <meta charset="UTF-8">
    <meta http-equiv="X-UA-Compatible" content="IE=edge">
    <meta name="viewport" content="width=device-width, initial-scale=1.0">
    <title>Document</title>
</head>
<body>
    <div id="app">

    </div>
</body>
</html>
注意:一定要加上id='app'
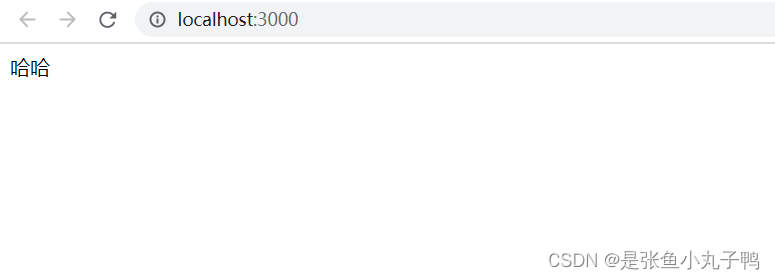
index.vue
<template>
    <div>
      哈哈
    </div>
  </template>

  <style>

  </style>
浏览器中运行效果
8.运行命令
package.json中配置运行命令
 "scripts": {
    "test": "echo \"Error: no test specified\" && exit 1",
    "build": "webpack",
    "dev": "webpack-dev-server"
  },
服务器端运行:npm run dev
打包命令:npm run build