前言
最近需要一个超分的模型,经过调研准备用 Real-ESRGAN。特此记录论文阅读和实战过程。
论文阅读
论文地址:Real-ESRGAN: Training Real-World Blind Super-Resolution with Pure Synthetic Data
Github:https://github.com/xinntao/Real-ESRGAN
参考视频:https://www.bilibili.com/video/BV14541117y6
主要贡献:
- 提出一种高阶退化过程(high-order degradation process)来模拟实际退化,并利用 sinc 滤波器给训练图片添加 Ringing artifacts(振铃伪影,周围震荡波的感觉)和 Overshoot artifacts(过冲伪影,如白边)构造训练集
- 用 U-net 而不是 VGG 作为 GAN 的 Discriminator,提高鉴别器能力并稳定训练动态
- Real-ESRGAN 性能更优,效果更好
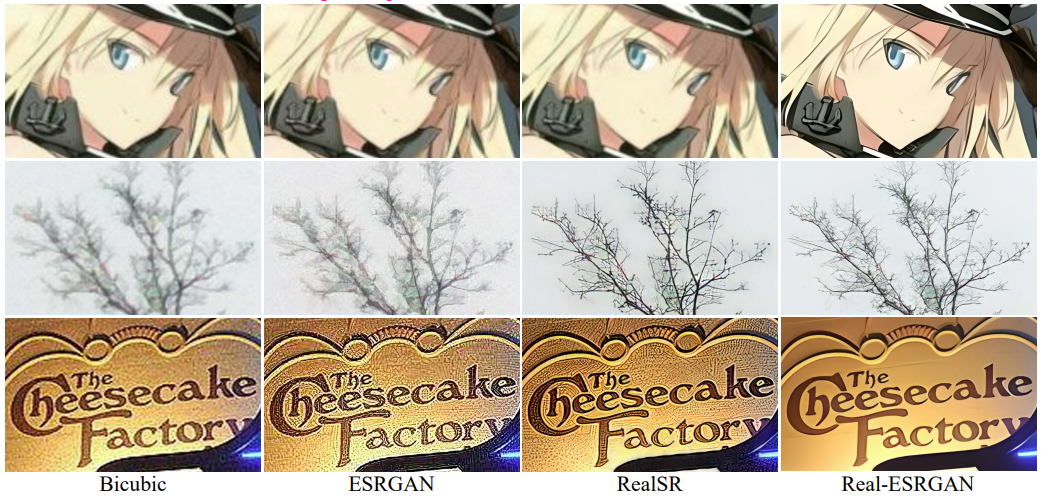
效果对比:
数据集构建:
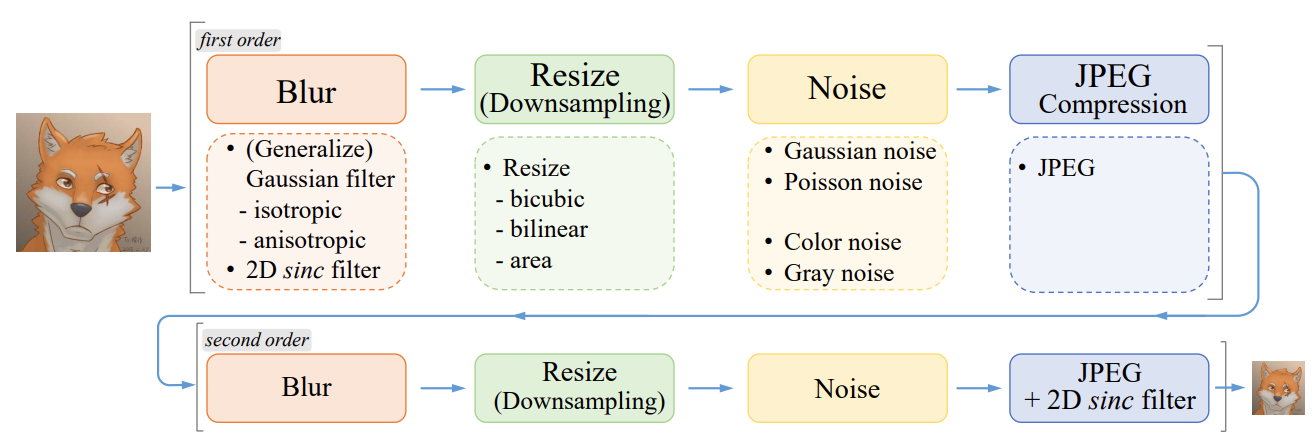
二阶退化。两阶段分别经过虚化、下采样、加噪声、JPEG压缩。其中 sinc filter 用来添加伪影。
| 伪影类型 | 实例 |
|---|---|
| 振铃伪影 | 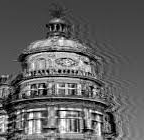 |
| 过冲伪影 | 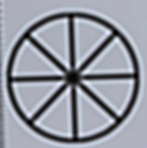 |
Real-ESRGAN 模型结构:
- Generator:结构和 ESRGAN 一样,不过他做了个 Pixel Unshuffle,减少图像长宽,增加 channel size。送到一个 RRDB 的残差网络最后上采样得到输出。
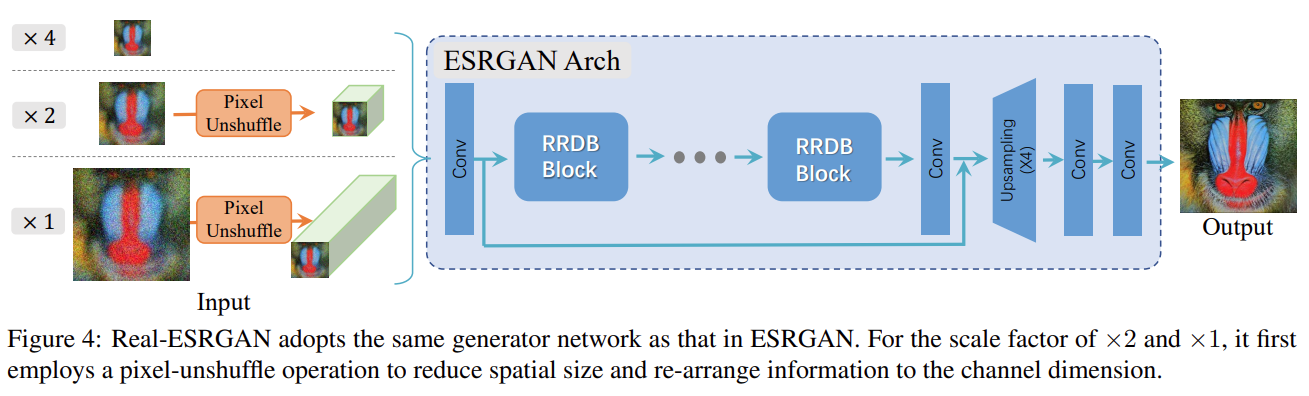
- Discriminator:用的 U-Net(下采样和上采样的feature之间有连接,能学习局部纹理信息),不像最初的 GAN 判别器输出 0/1(即全局是否合格),他这个输出是和原图size一致,其中每个像素点的值衡量真实性的 feedback(即各局部是否合格)。此外,用了 spectral norm(谱归一化),能提升训练稳定性,减少伪影。

两阶段模型训练:
首先,用 L1 loss 训练一个小网络(PSNR-oriented model)Real-ESRNet;然后,用其初始化 Generator 的权重,并用 L1 loss、perceptual loss、GAN loss 的结合训练最终的模型。
此外,还对 ground-truth 加了锐化再训了个 Real-ESRGAN+,能提升图像生成的锐度,但不会增加伪影。
实战记录
git clone https://github.com/xinntao/Real-ESRGAN.git
cd Real-ESRGAN
# Install basicsr - https://github.com/xinntao/BasicSR
# We use BasicSR for both training and inference
pip install basicsr
# facexlib and gfpgan are for face enhancement
pip install facexlib
pip install gfpgan
pip install -r requirements.txt
python setup.py develop
需要用到 realesrgan 模块的 RealESRGANer 类。以4倍超分为例:
import os
import cv2
import torch
import numpy as np
from PIL import Image
from basicsr.archs.rrdbnet_arch import RRDBNet
from realesrgan import RealESRGANer

ckpt_path = "./checkpoints/real-esrgan"
model_path = os.path.join(ckpt_path, "RealESRGAN_x4plus.pth")
model = RRDBNet(num_in_ch=3, num_out_ch=3, num_feat=64, num_block=23, num_grow_ch=32, scale=4)
netscale = 4

upsampler = RealESRGANer(
	scale=netscale,
	model_path=self.model_path,
	dni_weight=self.dni_weight,
	model=self.model,
	tile=0,                     # Tile size, 0 for no tile during testing
	tile_pad=10,                # Tile padding
	pre_pad=0,                  # Pre padding size at each border
	half=not fp16,
	device=device)

def enhance(image, width, height):
    """
        image: PIL Image Obj
        输出: PIL Image Obj
    """
    try:
        image_cv2 = cv2.cvtColor(np.asarray(image), cv2.COLOR_RGB2BGR)
        output, _ = upsampler.enhance(image_cv2, outscale=self.outscale)  # _ is RGB/RGBA
        image_pil = Image.fromarray(cv2.cvtColor(output, cv2.COLOR_BGR2RGB)).resize((width, height)).convert('RGB')
        # print(output, _, image_pil)
        return image_pil
    except Exception as e:
        print("enhance Exception: ", e)
    finally:
        torch.cuda.empty_cache()
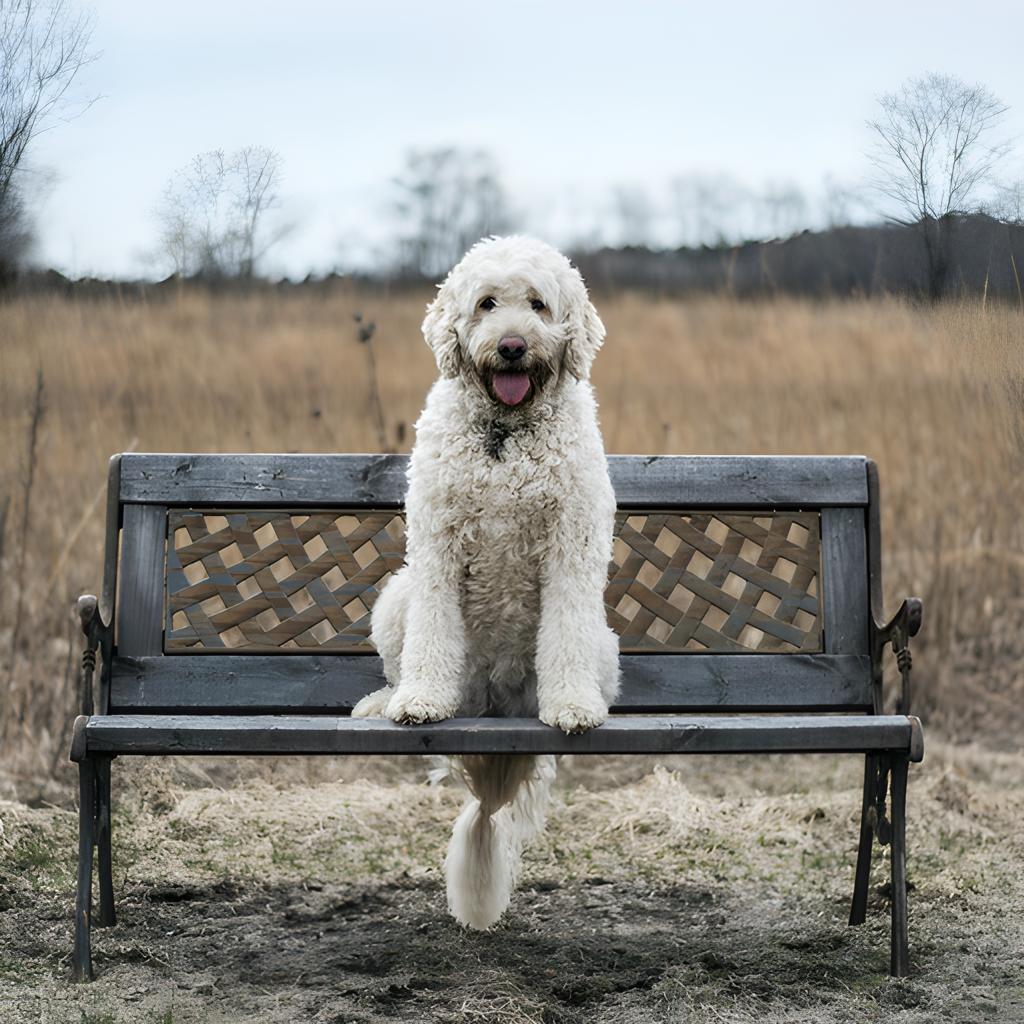
测试(超分前):
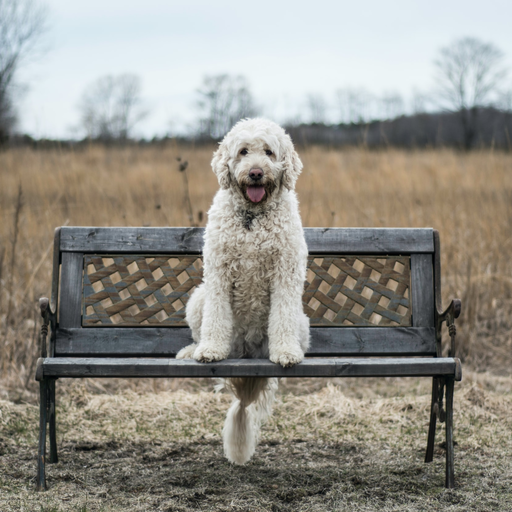
超分后: