一、论文简读
1、概述
目标不是恢复实际的地面真实颜色,而是产生可能欺骗人类观察者的合理着色,对灰度图像的语义和纹理及其颜色版本之间的统计依赖关系进行足够多的建模,以产生视觉上引人注目的结果。
给定亮度通道 L,在CIE Lab颜色空间中预测图像对应的 a 和 b 颜色通道。用作训练示例,将图像的 L 通道作为输入,将其 ab 通道作为监督信号。预测每个像素的可能颜色分布。此外在训练时重新加权损失以强调稀有颜色。这鼓励我们的模型充分利用大规模数据的多样性。 最后通过退火-分布的均值。 最终结果是色彩更加鲜艳并且比以前的方法在感知上更真实。
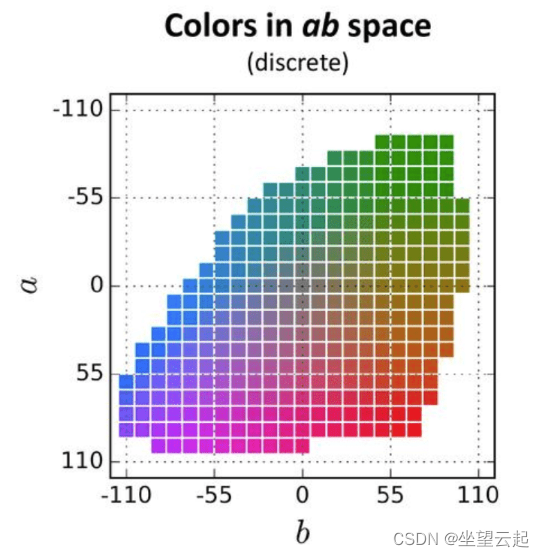
为了简化计算,Lab 颜色空间的ab空间被量化为 313 个 bin。不是为每个像素找到 a 和 b 值,因为这种量化,我们只需要找到一个介于 0 之间的 bin 编号和 312。另一种思考问题的方式是,我们已经有了取值从 0 到 255 的 L 通道,我们需要找到取值在 0 到 312 之间的ab通道。所以颜色预测任务现在是变成了一个多项分类问题,其中每个灰色像素有 313 个类别可供选择。
2、模型架构
论文中的网络架构。 每个 conv 层是指由 2 或 3 个重复的 conv 和 ReLU 层组成的块,然后是 BatchNorm [30] 层。 网络没有池化层。分辨率的所有变化都是通过卷积块之间的空间下采样或上采样来实现的。

3、论文地址
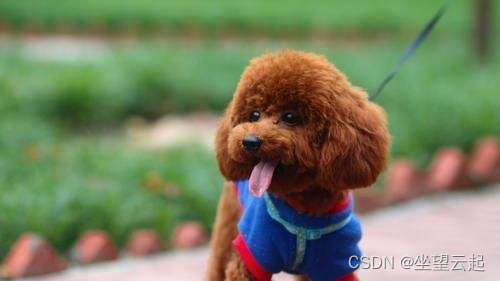
http://arxiv.org/pdf/1603.08511.pdf4、测试图片
5、参考代码及模型
链接:https://pan.baidu.com/s/1mvoSKE6qzmjRK3gheq4yfA
提取码:k853
二、Caffe版本
caffe版本参考代码
import cv2
import numpy as np

# Specify the paths for the model files
protoFile = "models/colorization_deploy_v2.prototxt"
weightsFile = "models/colorization_release_v2.caffemodel"
#weightsFile = "./models/colorization_release_v2_norebal.caffemodel";

# Read the input image
frame = cv2.imread("870.png")

W_in = 224
H_in = 224

# Read the network into Memory
net = cv2.dnn.readNetFromCaffe(protoFile, weightsFile)


# Load the bin centers
pts_in_hull = np.load('resources/pts_in_hull.npy')

# populate cluster centers as 1x1 convolution kernel
pts_in_hull = pts_in_hull.transpose().reshape(2, 313, 1, 1)
net.getLayer(net.getLayerId('class8_ab')).blobs = [pts_in_hull.astype(np.float32)]
net.getLayer(net.getLayerId('conv8_313_rh')).blobs = [np.full([1, 313], 2.606, np.float32)]

#Convert the rgb values of the input image to the range of 0 to 1
img_rgb = (frame[:,:,[2, 1, 0]] * 1.0 / 255).astype(np.float32)
img_lab = cv2.cvtColor(img_rgb, cv2.COLOR_RGB2Lab)
img_l = img_lab[:,:,0] # pull out L channel


# resize the lightness channel to network input size
img_l_rs = cv2.resize(img_l, (W_in, H_in)) # resize image to network input size
img_l_rs -= 50 # subtract 50 for mean-centering

net.setInput(cv2.dnn.blobFromImage(img_l_rs))
ab_dec = net.forward()[0,:,:,:].transpose((1,2,0)) # this is our result

(H_orig,W_orig) = img_rgb.shape[:2] # original image size
ab_dec_us = cv2.resize(ab_dec, (W_orig, H_orig))
img_lab_out = np.concatenate((img_l[:,:,np.newaxis],ab_dec_us),axis=2) # concatenate with original image L
img_bgr_out = np.clip(cv2.cvtColor(img_lab_out, cv2.COLOR_Lab2BGR), 0, 1)

cv2.imwrite('dog_colorized.png', img_bgr_out*255)
三、Pytorch版本
torch版本参考代码
from  colorizers import *
import matplotlib.pyplot as plt
import torch

colorizer_eccv16 = eccv16().eval()
colorizer_siggraph17 = siggraph17().eval()


# default size to process images is 256x256
# grab L channel in both original ("orig") and resized ("rs") resolutions
img = load_img('./870.png')
(tens_l_orig, tens_l_rs) = preprocess_img(img, HW=(256,256))
#if(opt.use_gpu):
#	tens_l_rs = tens_l_rs.cuda()

# colorizer outputs 256x256 ab map
# resize and concatenate to original L channel
img_bw = postprocess_tens(tens_l_orig, torch.cat((0*tens_l_orig,0*tens_l_orig),dim=1))
out_img_eccv16 = postprocess_tens(tens_l_orig, colorizer_eccv16(tens_l_rs).cpu())
out_img_siggraph17 = postprocess_tens(tens_l_orig, colorizer_siggraph17(tens_l_rs).cpu())

plt.imsave('%s_eccv16.png', out_img_eccv16)
plt.imsave('%s_siggraph17.png', out_img_siggraph17)

plt.figure(figsize=(12,8))
plt.subplot(2,2,1)
plt.imshow(img)
plt.title('Original')
plt.axis('off')

plt.subplot(2,2,2)
plt.imshow(img_bw)
plt.title('Input')
plt.axis('off')

plt.subplot(2,2,3)
plt.imshow(out_img_eccv16)
plt.title('Output (ECCV 16)')
plt.axis('off')

plt.subplot(2,2,4)
plt.imshow(out_img_siggraph17)
plt.title('Output (SIGGRAPH 17)')
plt.axis('off')
plt.show()