CSS 背景
CSS 背景属性用于定义 HTML 元素的背景。
CSS 属性定义背景效果:
background-color
background-image
background-repeat
background-attachment
background-position
背景颜色
background-color 属性定义了元素的背景颜色。
页面的背景颜色使用在 body 的选择器中:
body {

    background-color:#b0c4de;}
CSS 中,颜色值通常以以下方式定义:
十六进制 – 如:”#ff0000″
    RGB – 如:”rgb(255,0,0)”
颜色名称 – 如:”red”
背景图像
background-image 属性描述了元素的背景图像。
默认情况下,背景图像进行平铺重复显示,以覆盖整个元素实体。
页面背景图片设置实例:

<!DOCTYPE html>
<html>
<head>
<meta charset="utf-8">
<title>wgchen</title>
<style>
    body
    {


    	background-image:url('3.jpg');
    	background-color:#cccccc;
    }
</style>
</head>

<body>
    <h1>Hello World!</h1>
</body>

</html>
背景图像 – 水平或垂直平铺
默认情况下 background-image 属性会在页面的水平或者垂直方向平铺。
一些图像如果在水平方向与垂直方向平铺,这样看起来很不协调,如下所示:

如果图像只在水平方向平铺 (repeat-x), 页面背景会更好些:

背景图像- 设置定位与不平铺
让背景图像不影响文本的排版。
如果你不想让图像平铺,你可以使用 background-repeat 属性:

以上实例中,背景图像与文本显示在同一个位置,为了让页面排版更加合理,不影响文本的阅读,我们可以改变图像的位置。
可以利用 background-position 属性改变图像在背景中的位置:


提示:为 background-position 属性提供值有很多方法。
首先,可以使用一些关键字:top、bottom、left、right 和 center;其次,可以使用长度值,如 100px 或 5cm;最后也可以使用百分数值。
不同类型的值对于背景图像的放置稍有差异。


背景- 简写属性
在以上实例中我们可以看到页面的背景颜色通过了很多的属性来控制。
为了简化这些属性的代码,我们可以将这些属性合并在同一个属性中.
背景颜色的简写属性为 “background”:


当使用简写属性时,属性值的顺序为:
background-color
background-image
background-repeat
background-attachment
background-position
CSS background 属性
各值之间用空格分隔,不分先后顺序。可以只有其中的某些值,例如 background:#FF0000 URL(smiley.gif); 是允许的。
| 默认值: | 请参阅单独的属性 |
|---|---|
| 继承: | no |
| 版本: | CSS1+ CSS3中的新的属性 |
| JavaScript 语法: | object object.style.background=”red url(smiley.gif) top left no-repeat” |
js 语法
document.querySelector('body').style.background = 'red';
css 语法
background:bg-color bg-image position/bg-size bg-repeat bg-origin bg-clip bg-attachment initial|inherit;
| 值 | 说明 | CSS |
|---|---|---|
| background-color | 指定要使用的背景颜色 | 1 |
| background-position | 指定背景图像的位置 | 1 |
| background-size | 指定背景图片的大小 | 3 |
| background-repeat | 指定如何重复背景图像 | 1 |
| background-origin | 指定背景图像的定位区域 | 3 |
| background-clip | 指定背景图像的绘画区域 | 3 |
| background-attachment | 设置背景图像是否固定或者随着页面的其余部分滚动。 | 1 |
| background-image | 指定要使用的一个或多个背景图像 | 1 |
所有主流浏览器都支持 background 属性。
注意:IE8和更早版本不支持一个元素多个背景图像。
注意:IE7和更早的版本不支持”继承”的值。 IE8 需要定义 !DOCTYPE。 IE9支持”继承”。
在一个 div 元素中设置多个背景图像(并指定他们的位置):
<!DOCTYPE html>
<html>
<head>
<meta charset="utf-8">
<title>码云笔记(mybj123.com)</title>
<style>
body
{


    background: #00ff00 url('笑脸.gif') no-repeat fixed center;
}
</style>
</head>
<body>
<p>This is some text</p>
...
</body>
</html>

background-position 属性设置背景图像的起始位置
注意:对于这个工作在 Firefox 和 Opera,background-attachment必须设置为 “fixed(固定)”。
| 默认值: | 0% 0% |
|---|---|
| 继承: | no |
| 版本: | CSS1 |
| JavaScript 语法: | object object.style.backgroundPosition=”center” |
语法
background-position: horizontal vertical
horizontal:水平的 vertical:垂直的
水平是
percentage(百分比) | length | left | center | right
垂直是
percentage | length | top | center | bottom
属性值
| 值 | 描述 |
|---|---|
| left top left center left bottom right top right center right bottom center top center center center bottom |
如果仅指定一个关键字,其他值将会是”center” |
| x% y% | 第一个值是水平位置,第二个值是垂直。左上角是0%0%。右下角是100%100%。如果仅指定了一个值,其他值将是50%。 。默认值为:0%0% |
| xpos ypos | 第一个值是水平位置,第二个值是垂直。左上角是0。单位可以是像素(0px0px)或任何其他 CSS单位。如果仅指定了一个值,其他值将是50%。你可以混合使用%和positions |
| inherit | 指定background-position属性设置应该从父元素继承 |
定位 background-image:
<!DOCTYPE html>
<html>
<head>
<meta charset="utf-8">
<title>固定居住背景图片</title>
<style>
body
{


    background-image:url('3.jpg');
    background-repeat:no-repeat;
    background-attachment:fixed;
    background-position:center;
}
</style>
</head>
<body>

<p>
<b>注意:</b>
该属性工作在 Firefox 和 Opera, background-attachment 属性会被设置为 "fixed".
</p>

</body>
</html>

background-size 属性指定背景图片大小
| 默认值: | auto |
|---|---|
| 继承: | no |
| 版本: | CSS3 |
| JavaScript 语法: | object object.style.backgroundSize=”60px 80px” |
语法
background-size: length|percentage|cover|contain;
| 值 | 描述 |
|---|---|
| length | 设置背景图片高度和宽度。第一个值设置宽度,第二个值设置的高度。如果只给出一个值,第二个是设置为”auto(自动)” |
| percentage | 将计算相对于背景定位区域的百分比。第一个值设置宽度,第二个值设置的高度。如果只给出一个值,第二个是设置为”auto(自动)” |
| cover | 此时会保持图像的纵横比并将图像缩放成将完全覆盖背景定位区域的最小大小。 |
| contain | 此时会保持图像的纵横比并将图像缩放成将适合背景定位区域的最大大小。 |
指定背景图像的大小:
<!DOCTYPE html>
<html>
<head>
<meta charset="utf-8">
<title>指定背景图像的大小</title>
<style>
body
{


    background:url('3.jpg');
    background-size:80px 60px;
    background-repeat:no-repeat;
    padding-top:40px;
}
</style>
</head>
<body>

<p>
Lorem ipsum,中文又称“乱数假文”, 是指一篇常用于排版设计领域的拉丁文文章 ,主要的目的为测试文章或文字在不同字型、版型下看起来的效果。
</p>

<p>原始图片: <img src="3.jpg"  alt="Flowers" width="224" height="162"></p>

</body>
</html>

background-Origin 属性指定 background-position 属性相对位置
注意如果背景图像 background-attachment 是 ”fixed 固定”,这个属性没有任何效果。
| 默认值: | padding-box |
|---|---|
| 继承: | no |
| 版本: | CSS3 |
| JavaScript 语法: | object object.style.backgroundOrigin=”content-box” |
语法
background-origin: padding-box|border-box|content-box;
| 值 | 描述 |
|---|---|
| padding-box | 背景图像填充框的相对位置 |
| border-box | 背景图像边界框的相对位置 |
| content-box | 背景图像的相对位置的内容框 |
内容框相对定位的背景图片:

<!DOCTYPE html>
<html>
<head>
    <meta charset="utf-8">
    <title>background-Origin 属性指定 background-position属性相对位置</title>
    <style>
        div {


            border: 1px solid black;
            padding: 35px;
            background-image: url('3.jpg');
            background-size:25px 25px;
            background-repeat: no-repeat;
            background-position: left;
        }

        #div1 {


            background-origin: border-box;
        }

        #div2 {


            background-origin: content-box;
        }
    </style>
</head>
<body>

<p>背景图像边界框的相对位置:</p>
<div id="div1">
    Lorem ipsum dolor sit amet, consectetuer adipiscing elit, sed diam nonummy nibh euismod tincidunt ut laoreet
    dolore magna aliquam erat volutpat. Ut wisi enim ad minim veniam, quis nostrud exerci tation ullamcorper
    suscipit lobortis nisl ut aliquip ex ea commodo consequat.
</div>

<p>背景图像的相对位置的内容框:</p>
<div id="div2">
    Lorem ipsum dolor sit amet, consectetuer adipiscing elit, sed diam nonummy nibh euismod tincidunt ut laoreet
    dolore magna aliquam erat volutpat. Ut wisi enim ad minim veniam, quis nostrud exerci tation ullamcorper
    suscipit lobortis nisl ut aliquip ex ea commodo consequat.
</div>

</body>
</html>
background-clip 属性指定背景绘制区域
语法
background-clip: border-box|padding-box|content-box;
| 值 | 说明 |
|---|---|
| border-box | 默认值。背景绘制在边框方框内(剪切成边框方框)。 |
| padding-box | 背景绘制在衬距方框内(剪切成衬距方框)。 |
| content-box | 背景绘制在内容方框内(剪切成内容方框)。 |
指定绘图区的背景:
<!DOCTYPE html>
<html>
<head>
<meta charset="utf-8">
<title></title>
<style>
    #example1 {


        border: 10px dotted black;
        padding: 35px;
        background: yellow;
    }

    #example2 {


        border: 10px dotted black;
        padding: 35px;
        background: yellow;
        background-clip: padding-box;
    }

    #example3 {


        border: 10px dotted black;
        padding: 35px;
        background: yellow;
        background-clip: content-box;
    }
</style>
</head>
<body>

<p>没有背景剪裁 (border-box没有定义):</p>
<div id="example1">
    <h2>Lorem Ipsum Dolor</h2>
    <p>Lorem ipsum dolor sit amet, consectetuer adipiscing elit, sed diam nonummy nibh euismod tincidunt ut laoreet
        dolore magna aliquam erat volutpat.</p>
</div>

<p>background-clip: padding-box:</p>
<div id="example2">
    <h2>Lorem Ipsum Dolor</h2>
    <p>Lorem ipsum dolor sit amet, consectetuer adipiscing elit, sed diam nonummy nibh euismod tincidunt ut laoreet
        dolore magna aliquam erat volutpat.</p>
</div>

<p>background-clip: content-box:</p>
<div id="example3">
    <h2>Lorem Ipsum Dolor</h2>
    <p>Lorem ipsum dolor sit amet, consectetuer adipiscing elit, sed diam nonummy nibh euismod tincidunt ut laoreet
        dolore magna aliquam erat volutpat.</p>
</div>

</body>
</html>

background-attachment 设置背景图像是否固定或者随着页面的其余部分滚动
属性值
| 值 | 描述 |
|---|---|
| scroll | 背景图片随着页面的滚动而滚动,这是默认的。 |
| fixed | 背景图片不会随着页面的滚动而滚动。 |
| local | 背景图片会随着元素内容的滚动而滚动。 |
| initial | 设置该属性的默认值。 |
| inherit | 指定 background-attachment 的设置应该从父元素继承。 |
注意: Internet Explorer 8 及其更早版本的浏览器不支持多个背景图像在一个元素。
如何指定一个固定的背景图像:

<!DOCTYPE html>
<html>
<head>
<meta charset="utf-8">
<title>菜</title>
<style>
body
{


    background-image:url('3.jpg');
    background-repeat:no-repeat;
    background-attachment:fixed;
}
</style>
</head>
<body>

<p>背景图片是固定的。尝试向下滚动页面。</p>
...

</body>
</html>
CSS Text 文本格式
通过 CSS 的 Text 属性,你可以改变页面中文本的颜色、字符间距、对齐文本、装饰文本、对文本进行缩进等等,你可以观察下述的一段简单的应用了 CSS 文本格式的段落。
<!DOCTYPE html>
<html>
<head>
<meta charset="utf-8">
<title>文本格式</title>
<style>
    h1 {


        text-align: center;
        text-transform: uppercase;
        color: #A7C942;
    }

    p {


        text-indent: 50px;
        text-align: justify;
        letter-spacing: 3px;
    }

    a {


        text-decoration: none;
    }
</style>
</head>
<body>
    <h1>文本格式</h1>
    <p> 此文本使用一些文本格式属性设置样式。标题使用文本对齐、文本转换和颜色属性。段落缩进、对齐,并指定字符之间的间距。下划线将从“尝试一下”链接中删除。</p>
</body>
</html>
效果如下:

Text Color
颜色属性被用来设置文字的颜色。
颜色是通过CSS最经常的指定:
 十六进制值 – 如”#FF0000″
 一个RGB值 – “RGB(255,0,0)”
 颜色的名称 – 如”红”
一个网页的背景颜色是指在主体内的选择:
<!DOCTYPE html>
<html>
<head>
<meta charset="utf-8">
<title>码云笔记(mybj123.com)</title>
<style>
    body {


        color: red;
    }

    h1 {


        color: #00ff00;
    }

    p.ex {


        color: rgb(0, 0, 255);
    }
</style>
</head>
<body>
    <h1>这是标题 1</h1>
    <p>这是一个普通的段落。请注意,本文是红色的。页面中定义默认的文本颜色选择器。</p>
    <p class="ex">这是一个类为"ex"的段落。这个文本是蓝色的。</p>
</body>
</html>

注:对于W3C标准的CSS:如果你定义了颜色属性,你还必须定义背景色属性。
text-align 文本的对齐方式
text-align 文本排列属性是用来设置文本的水平对齐方式。
文本可居中或对齐到左或右,两端对齐.
当 text-align 设置为 ”justify“,每一行被展开为宽度相等,左,右外边距是对齐(如杂志和报纸)。

<!DOCTYPE html>
<html>
<head>
<meta charset="utf-8">
<title></title>
<style>
    h1 {


        text-align: center;
    }

    p.date {


        text-align: right;
    }

    p.main {


        text-align: justify;
    }
</style>
</head>
<body>
    <h1>CSS text-align 实例</h1>
    <p class="date">2021 年 6 月 1 号</p>
    <p class="main">
        “当我年轻的时候,我梦想改变这个世界;当我成熟以后,我发现我不能够改变这个世界,我将目光缩短了些,决定只改变我的国家;当我进入暮年以后,我发现我不能够改变我们的国家,我的最后愿望仅仅是改变一下我的家庭,但是,这也不可能。当我现在躺在床上,行将就木时,我突然意识到:如果一开始我仅仅去改变我自己,然后,我可能改变我的家庭;在家人的帮助和鼓励下,我可能为国家做一些事情;然后,谁知道呢?我甚至可能改变这个世界。”
    </p>
    <p><b>注意:</b> 重置浏览器窗口大小查看 "justify" 是如何工作的。</p>
</body>
</html>
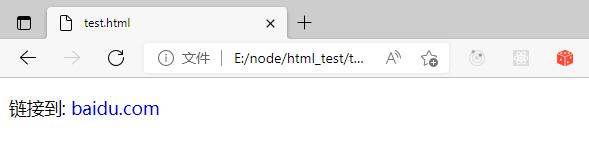
text-decoration 文本修饰
text-decoration 属性用来设置或删除文本的装饰。
从设计的角度看 text-decoration 属性主要是用来删除链接的下划线:
<!DOCTYPE html>
<html>
<head>
<meta charset="utf-8">
<title></title>
<style>
a {

      text-decoration:none;}
</style>
</head>
<body>

<p>链接到: <a href="www.baidu.com">baidu.com</a></p>

</body>
</html>

<!DOCTYPE html>
<html>
<head>
<meta charset="utf-8">
<title></title>
<style>
    h1 {

      text-decoration:overline;}
    h2 {

      text-decoration:line-through;}
    h3 {

      text-decoration:underline;}
</style>
</head>
<body>

<h1>这是标题 1</h1>
<h2>这是标题 2</h2>
<h3>这是标题 3</h3>

</body>
</html>
注: 我们不建议强调指出不是链接的文本,因为这常常混淆用户。
text-transform 文本转换
text-transform 文本转换属性是用来指定在一个文本中的大写和小写字母。
可用于所有字句变成大写或小写字母,或每个单词的首字母大写。

<!DOCTYPE html>
<html>
<head>
<meta charset="utf-8">
<title></title>
<style>
    p.uppercase {

      text-transform:uppercase;}
    p.lowercase {

      text-transform:lowercase;}
    p.capitalize {

      text-transform:capitalize;}
</style>
</head>
<body>

<p class="uppercase">This is some text.</p>
<p class="lowercase">This is some text.</p>
<p class="capitalize">This is some text.</p>

</body>
</html>
text-indent 文本缩进
文本缩进属性是用来指定文本的第一行的缩进。
CSS 提供了 text-indent 属性,该属性可以方便地实现文本缩进。
通过使用 text-indent 属性,所有元素的第一行都可以缩进一个给定的长度。

<!DOCTYPE html>
<html>
<head>
<meta charset="utf-8">
<title></title>
<style>
    p {

      text-indent:50px;}
</style>
</head>
<body>

<p>在我更年轻、更脆弱的年代,
父亲给了我一些建议,从那时起我就一直在想这些建议他对我说,
每当你想批评任何人时,只要记住,这个世界上所有的人都没有你所拥有的优势。</p>

</body>
</html>
所有CSS文本属性
| 属性 | 描述 |
|---|---|
| color | 设置文本颜色 |
| direction | 设置文本方向。 |
| letter-spacing | 设置字符间距 |
| line-height | 设置行高 |
| text-align | 对齐元素中的文本 |
| text-decoration | 向文本添加修饰 |
| text-indent | 缩进元素中文本的首行 |
| text-shadow | 设置文本阴影 |
| text-transform | 控制元素中的字母 |
| unicode-bidi | 设置或返回文本是否被重写 |
| vertical-align | 设置元素的垂直对齐 |
| white-space | 设置元素中空白的处理方式 |
| word-spacing | 设置字间距 |
letter-spacing 属性增加或减少字符间的空白(字符间距)
| 默认值: | normal |
|---|---|
| 继承: | yes |
| 版本: | CSS1 |
| JavaScript 语法: | object.style.letterSpacing=”3px” |
| 值 | 描述 |
|---|---|
| normal | 默认。规定字符间没有额外的空间。 |
| length | 定义字符间的固定空间(允许使用负值)。 |
| inherit | 规定应该从父元素继承 letter-spacing 属性的值。 |

<!DOCTYPE html>
<html>
<head>
<meta charset="utf-8">
<title></title>
<style>
    h1 {

      letter-spacing:2px;}
    h2 {

      letter-spacing:-3px;}
</style>
</head>
<body>
    <h1>This is heading 1</h1>
    <h2>This is heading 2</h2>
</body>
</html>
line-height 设置以百分比计的行高
注意: 负值是不允许的
| 默认值: | normal |
|---|---|
| 继承: | yes |
| 版本: | CSS1 |
| JavaScript 语法: | object.style.lineHeight=”2″ |
属性值
| 值 | 描述 |
|---|---|
| normal | 默认。设置合理的行间距。 |
| number | 设置数字,此数字会与当前的字体尺寸相乘来设置行间距。 |
| length | 设置固定的行间距。 |
| % | 基于当前字体尺寸的百分比行间距。 |
| inherit | 规定应该从父元素继承 line-height 属性的值。 |
使用百分比设置行高

<!DOCTYPE html>
<html>
<head>
<meta charset="utf-8">
<title></title>
<style>
    p.small {

      line-height:70%;}
    p.big {

      line-height:200%;}
</style>
</head>
<body>

<p>
这是一个标准行高的段落。<br>
这是一个标准行高的段落。<br>
大多数浏览器的默认行高约为110%至120%。<br>
</p>

<p class="small">
这是一个更小行高的段落。<br>
这是一个更小行高的段落。<br>
这是一个更小行高的段落。<br>
这是一个更小行高的段落。<br>
</p>

<p class="big">
这是一个更大行高的段落。<br>
这是一个更大行高的段落。<br>
这是一个更大行高的段落。<br>
这是一个更大行高的段落。<br>
</p>

</body>
</html>
使用像素值设置行间距
本例演示如何使用像素值来设置段落中的行间距。

<!DOCTYPE html>
<html>
<head>
<meta charset="utf-8">
<title></title>
<style>
    p.small
    {


        line-height: 10px
    }
    p.big
    {


        line-height: 30px
    }
</style>
</head>
<body>

    <p>
    这是一个标准行高的段落。
    在大多数浏览器默认行高约20 px。
    这是一个标准行高的段落。
    这是一个标准行高的段落。
    </p>

    <p class="small">
    这是一个更小行高的段落。
    这是一个更小行高的段落。
    这是一个更小行高的段落。
    这是一个更小行高的段落。
    </p>

    <p class="big">
    这是一个更大行高的段落。
    这是一个更大行高的段落。
    这是一个更大行高的段落。
    这是一个更大行高的段落。
    </p>

</body>
</html>
使用数值来设置行间距
本例演示如何使用一个数值来设置段落中的行间距。

<!DOCTYPE html>
<html>
<head>
    <meta charset="utf-8">
    <title></title>
    <style>
        p.small {


            line-height: 0.5
        }

        p.big {


            line-height: 2
        }
    </style>
</head>
<body>

    <p>
    这是一个标准行高的段落。
    浏览器的默认行高为“1”。
    这是一个标准行高的段落。
    这是一个标准行高的段落。
    </p>

    <p class="small">
    这是一个更小行高的段落。
    这是一个更小行高的段落。
    这是一个更小行高的段落。
    这是一个更小行高的段落。
    </p>

    <p class="big">
    这是一个更大行高的段落。
    这是一个更大行高的段落。
    这是一个更大行高的段落。
    这是一个更大行高的段落。
    </p>

</body>
</html>
CSS Font 字体
CSS字体属性定义字体,加粗,大小,文字样式。
serif 和 sans-serif 字体之间的区别:
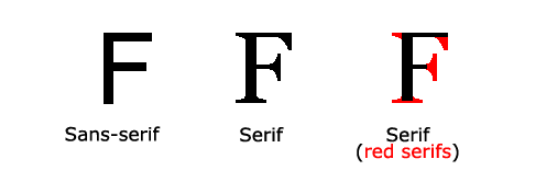
注:在计算机屏幕上,sans-serif 字体被认为是比 serif 字体容易阅读。
CSS字型
在CSS中,有两种类型的字体系列名称:
通用字体系列 – 拥有相似外观的字体系统组合(如 “Serif” 或 “Monospace”)
特定字体系列 – 一个特定的字体系列(如 “Times” 或 “Courier”)
| Generic family | 字体系列 | 说明 |
|---|---|---|
| Serif | Times New Roman Georgia |
Serif字体中字符在行的末端拥有额外的装饰 |
| Sans-serif | Arial Verdana |
“Sans”是指无 – 这些字体在末端没有额外的装饰 |
| Monospace | Courier New Lucida Console |
所有的等宽字符具有相同的宽度 |
字体系列
font-family 属性设置文本的字体系列。

font-family 属性应该设置几个字体名称作为一种”后备”机制,
            如果浏览器不支持第一种字体,他将尝试下一种字体。
注意::如果字体系列的名称超过一个字,它必须用引号,如 Font Family:”宋体”。
多个字体系列是用一个逗号分隔指明:

<!DOCTYPE html>
<html>
<head>
    <meta charset="utf-8">
    <title></title>
    <style>
        p.serif {


            font-family: "Times New Roman", Times, serif;
        }

        p.sansserif {


            font-family: Arial, Helvetica, sans-serif;
        }
    </style>
</head>
<body>

<h1>CSS font-family</h1>
<p class="serif">这一段的字体是 Times New Roman </p>
<p class="sansserif">这一段的字体是 Arial.</p>

</body>
</html>
字体样式
font-style 主要是用于指定斜体文字的字体样式属性。
font-style 属性有三个值:

     正常 – 正常显示文本
     斜体 – 以斜体字显示的文字
倾斜的文字 – 文字向一边倾斜(和斜体非常类似,但不太支持)

<!DOCTYPE html>
<html>
<head>
    <meta charset="utf-8">
    <title></title>
    <style>
        p.normal {


            font-style: normal;
        }

        p.italic {


            font-style: italic;
        }

        p.oblique {


            font-style: oblique;
        }
    </style>
</head>
<body>
    <p class="normal">这是一个段落,正常。</p>
    <p class="italic">这是一个段落,斜体。</p>
    <p class="oblique">这是一个段落,斜体。</p>
</body>
</html>
font-size 属性设置文本的大小
能否管理文字的大小,在网页设计中是非常重要的。但是,你不能通过调整字体大小使段落看上去像标题,或者使标题看上去像段落。
请务必使用正确的HTML标签,就 <h1> – <h6> 表示标题和 <p >表示段落:
字体大小的值可以是绝对或相对的大小。
绝对大小:
设置一个指定大小的文本
不允许用户在所有浏览器中改变文本大小
确定了输出的物理尺寸时绝对大小很有用
相对大小:
相对于周围的元素来设置大小
允许用户在浏览器中改变文字大小
如果你不指定一个字体的大小,默认大小和普通文本段落一样,是16像素(16px=1em)。
设置字体大小像素
设置文字的大小与像素,让您完全控制文字大小:

<!DOCTYPE html>
<html>
<head>
    <meta charset="utf-8">
    <title></title>
    <style>
        h1 {


            font-size: 40px;
        }

        h2 {


            font-size: 30px;
        }

        p {


            font-size: 14px;
        }
    </style>
</head>
<body>
    <h1>This is heading 1</h1>
    <h2>This is heading 2</h2>
    <p>This is a paragraph.</p>
</body>
</html>
上面的例子可以在 Internet Explorer 9, Firefox, Chrome, Opera, 和 Safari 中通过缩放浏览器调整文本大小。
虽然可以通过浏览器的缩放工具调整文本大小,但是,这种调整是整个页面,而不仅仅是文本。
用 em 来设置字体大小
为了避免 Internet Explorer 中无法调整文本的问题,许多开发者使用 em 单位代替像素。
em 的尺寸单位由W3C建议。
1em 和当前字体大小相等。在浏览器中默认的文字大小是16px。
因此,1em 的默认大小是16px。可以通过下面这个公式将像素转换为 em:px/16=em
h1 {font-size:2.5em;} /* 40px/16=2.5em */
h2 {font-size:1.875em;} /* 30px/16=1.875em */
p {font-size:0.875em;} /* 14px/16=0.875em */
在上面的例子,em 的文字大小是与前面的例子中像素一样。不过,如果使用 em 单位,则可以在所有浏览器中调整文本大小。
不幸的是,仍然是IE浏览器的问题。调整文本的大小时,会比正常的尺寸更大或更小。
使用百分比和 em 组合
在所有浏览器的解决方案中,设置 元素的默认字体大小的是百分比:
body {font-size:100%;}
  h1 {font-size:2.5em;}
  h2 {font-size:1.875em;}
   p {font-size:0.875em;}
我们的代码非常有效。在所有浏览器中,可以显示相同的文本大小,并允许所有浏览器缩放文本的大小。
所有CSS字体属性
| Property | 描述 |
|---|---|
| font | 在一个声明中设置所有的字体属性 |
| font-family | 指定文本的字体系列 |
| font-size | 指定文本的字体大小 |
| font-style | 指定文本的字体样式 |
| font-variant | 以小型大写字体或者正常字体显示文本。 |
| font-weight | 指定字体的粗细。 |
font-weight 属性设置文本的粗细
属性值
| 值 | 描述 |
|---|---|
| normal | 默认值。定义标准的字符。 |
| bold | 定义粗体字符。 |
| bolder | 定义更粗的字符。 |
| lighter | 定义更细的字符。 |
|
定义由细到粗的字符。400 等同于 normal,而 700 等同于 bold。 |
| inherit | 规定应该从父元素继承字体的粗细。 |
CSS 链接
不同的链接可以有不同的样式。
链接样式
链接的样式,可以用任何CSS属性(如颜色,字体,背景等)。
特别的链接,可以有不同的样式,这取决于他们是什么状态。
这四个链接状态是:
   a:link – 正常,未访问过的链接
a:visited – 用户已访问过的链接
  a:hover – 当用户鼠标放在链接上时
 a:active – 链接被点击的那一刻
<!DOCTYPE html>
<html>
<head>
    <meta charset="utf-8">
    <title></title>
    <style>
        a:link {


            color: #000000;
        }

        /* 未访问链接*/
        a:visited {


            color: #00FF00;
        }

        /* 已访问链接 */
        a:hover {


            color: #FF00FF;
        }

        /* 鼠标移动到链接上 */
        a:active {


            color: #0000FF;
        }

        /* 鼠标点击时 */
    </style>
</head>
<body>

<p><a href="baidu.com" target="_blank">这是一个链接</a></p>

</body>
</html>
当设置为若干链路状态的样式,也有一些顺序规则:
 a:hover 必须跟在 a:link 和 a:visited 后面
a:active 必须跟在 a:hover后面
文本修饰
text-decoration 属性主要用于删除链接中的下划线:
<!DOCTYPE html>
<html>
<head>
<meta charset="utf-8">
<title></title>
<style>
a:link {

      text-decoration:none;}    /* unvisited link */
a:visited {

      text-decoration:none;} /* visited link */
a:hover {

      text-decoration:underline;}   /* mouse over link */
a:active {

      text-decoration:underline;}  /* selected link */
</style>
</head>
<body>

    <p><a href="/css/" target="_blank">这是一个链接</a></p>

</body>
</html>
背景颜色
背景颜色属性指定链接背景色:
a:link {background-color:#B2FF99;}
a:visited {background-color:#FFFF85;}
a:hover {background-color:#FF704D;}
a:active {background-color:#FF704D;}
CSS 列表
CSS 列表属性作用如下:
设置不同的列表项标记为有序列表
设置不同的列表项标记为无序列表
设置列表项标记为图像
在 HTML中,有两种类型的列表:
无序列表 ul – 列表项标记用特殊图形(如小黑点、小方框等)
有序列表 ol – 列表项的标记有数字或字母
使用 CSS,可以列出进一步的样式,并可用图像作列表项标记。
无序列表如下所示:
有序列表如下所示:
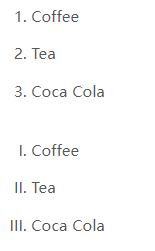
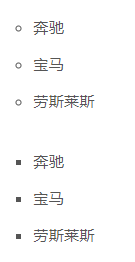
不同的列表项标记
list-style-type 属性指定列表项标记的类型是:

<!DOCTYPE html>
<html>
<head>
<meta charset="utf-8">
<title></title>
<style>
    ul.a {

      list-style-type:circle;}
    ul.b {

      list-style-type:square;}
    ol.c {

      list-style-type:upper-roman;}
    ol.d {

      list-style-type:lower-alpha;}
</style>
</head>
<body>

    <p>无序列表实例:</p>

    <ul class="a">
      <li>咖啡</li>
      <li>茶</li>
      <li>可口可乐</li>
    </ul>

    <ul class="b">
      <li>咖啡</li>
      <li>茶</li>
      <li>可口可乐</li>
    </ul>

    <p>有序列表实例:</p>

    <ol class="c">
      <li>咖啡</li>
      <li>茶</li>
      <li>可口可乐</li>
    </ol>

    <ol class="d">
      <li>咖啡</li>
      <li>茶</li>
      <li>可口可乐</li>
    </ol>

</body>
</html>
一些值是无序列表,以及有些是有序列表。
下列是对 list-style-type 属性的常见属性值的描述:
       none:不使用项目符号
       disc:实心圆
     circle:空心圆
     square:实心方块
    decimal:阿拉伯数字
lower-alpha:小写英文字母
upper-alpha:大写英文字母
lower-roman:小写罗马数字
upper-roman:大写罗马数字
作为列表项标记的图像
要指定列表项标记的图像,使用列表样式图像属性:
<!DOCTYPE html>
<html>

<head>
    <meta charset="utf-8">
    <title></title>
    <style>
        ul {


            list-style-image: url('3.jpg');
        }
    </style>
</head>
<body>

    <ul>
        <li>咖啡</li>
        <li>茶</li>
        <li>可口可乐</li>
    </ul>

</body>
</html>
图片

上面的例子在各大主流浏览器中的显示有所差异,IE 和 Opera 显示图像标记比火狐( Firefox ),Chrome 和 Safari 更高一点点。
提示:
利用 list-style-position 可以确定标志出现在列表项内容之外还是内容内部。
如果你想在所有的浏览器放置同样的形象标志,就应使用浏览器兼容性解决方案,方法如下。
浏览器兼容性解决方案
同样在所有的浏览器,下面的例子会显示的图像标记:
<!DOCTYPE html>
<html>
<head>
    <meta charset="utf-8">
    <title></title>
    <style>
        ul
        {


            list-style-type:none;
            padding:0px;
            margin:0px;
        }
        ul li
        {


            background-image:url("3.gif");
            background-repeat:no-repeat;
            background-position:0px 5px;
            padding-left:14px;
        }
    </style>
</head>
<body>
    <ul>
        <li>咖啡</li>
        <li>茶</li>
        <li>可口可乐</li>
    </ul>
</body>
</html>
例子解释:
ul:
设置列表类型为没有列表项标记
设置填充和边距 0px(浏览器兼容性)
ul 中所有 li:
设置图像的 URL,并设置它只显示一次(无重复)
您需要的定位图像位置(左 0px 和上下 5px)
用 padding-left 属性把文本置于列表中
列表 – 简写属性
在单个属性中可以指定所有的列表属性。这就是所谓的简写属性。
为列表使用简写属性,列表样式属性设置如下:
ul {


    list-style:square url("sqpurple.gif");
}
可以按顺序设置如下属性:
list-style-type
list-style-position (有关说明,请参见下面的CSS属性表)
list-style-image
如果上述值丢失一个,其余仍在指定的顺序,就没关系。
移除默认设置
list-style-type:none :属性可以用于移除小标记。
默认情况下列表 <ul> 或 <ol> 还设置了内边距和外边距,可使用 margin:0 和 padding:0 来移除:
<!DOCTYPE html>
<html>
<head>
    <meta charset="utf-8">
    <title></title>
    <style>
        ul.demo {


            list-style-type: none;
            margin: 0;
            padding: 0;
        }
    </style>
</head>
<body>

    <p>默认设置:</p>
    <ul>
        <li>Google</li>
        <li>mybj</li>
        <li>Taobao</li>
    </ul>

    <p>移除默认设置:</p>
    <ul class="demo">
        <li>Coffee</li>
        <li>Tea</li>
        <li>Coca Cola</li>
    </ul>

</body>
</html>

所有的CSS列表属性
| 属性 | 描述 |
|---|---|
| list-style | 简写属性。用于把所有用于列表的属性设置于一个声明中 |
| list-style-image | 将图像设置为列表项标志。 |
| list-style-position | 设置列表中列表项标志的位置。 |
| list-style-type | 设置列表项标志的类型。 |
list-style-position 属性指示如何相对于对象的内容绘制列表项标记
Outside:
<ul style="list-style-position: outside; width: 25%;">
    <li style="border: 1px solid #000000;">Coffee</li>
    <li style="border: 1px solid #000000; border-top: 0;">Tea</li>
    <li style="border: 1px solid #000000; border-top: 0;">Coca-cola</li>
</ul>

Inside:
<ul style="list-style-position: inside; width: 25%;">
    <li style="border: 1px solid #000000;">Coffee</li>
    <li style="border: 1px solid #000000; border-top: 0;">Tea</li>
    <li style="border: 1px solid #000000; border-top: 0;">Coca-cola</li>
</ul>

CSS Table (表格)
表格边框
指定 CSS 表格边框,使用 border 属性。
下面的例子指定了一个表格的 th 和 td 元素的黑色边框:

请注意,在上面的例子中的表格有双边框。这是因为表和 th / td 元素有独立的边界。
为了显示一个表的单个边框,使用 border-collapse 属性。
<!DOCTYPE html>
<html>
<head>
    <meta charset="utf-8">
    <title></title>
    <style>
        table,
        th,
        td {


            border: 1px solid black;
        }
    </style>
</head>

<body>

    <table>
        <tr>
            <th>姓</th>
            <th>名字</th>
        </tr>
        <tr>
            <td>博客</td>
            <td>笔记</td>
        </tr>
        <tr>
            <td>前端</td>
            <td>博客</td>
        </tr>
    </table>

</body>
</html>
折叠边框
border-collapse: 属性设置表格的边框是否被折叠成一个单一的边框或隔开:

<!DOCTYPE html>
<html>
<head>
    <meta charset="utf-8">
    <title></title>
    <style>
    table {


        border-collapse: collapse;
    }

    table, td, th {


        border: 1px solid black;
    }
    </style>
</head>

<body>

    <table>
        <tr>
            <th>姓</th>
            <th>名字</th>
        </tr>
        <tr>
            <td>博客</td>
            <td>笔记</td>
        </tr>
        <tr>
            <td>前端</td>
            <td>博客</td>
        </tr>
    </table>

</body>
</html>
注意:如果没有指定 !DOCTYPE border-collapse 属性在 IE8 及更早 IE 版本中是不起作用的。
表格宽度和高度
width 和 height 属性定义表格的宽度和高度。
下面的例子是设置 100% 的宽度,50 像素的 th 元素的高度的表格:

<!DOCTYPE html>
<html>
<head>
    <meta charset="utf-8">
    <title></title>
    <style>
        table,
        td,
        th {


            border: 1px solid black;
        }

        table {


            width: 100%;
        }

        th {


            height: 50px;
        }
    </style>
</head>
<body>

    <table>
        <tr>
            <th>姓</th>
            <th>名字</th>
            <th>存款</th>
        </tr>
        <tr>
            <td>码云</td>
            <td>笔记</td>
            <td>$100</td>
        </tr>
        <tr>
            <td>前端</td>
            <td>博客</td>
            <td>$150</td>
        </tr>
    </table>

</body>
</html>
表格文字对齐
表格中的文本对齐和垂直对齐属性。
text-align 属性设置水平对齐方式,像左,右,或中心:

<!DOCTYPE html>
<html>
<head>
    <meta charset="utf-8">
    <title></title>
    <style>
        table,
        td,
        th {


            border: 1px solid black;
        }

        td {


            text-align: right;
        }
    </style>
</head>
<body>

    <table>
        <tr>
            <th>第一个姓</th>
            <th>第二个名字</th>
            <th>存款</th>
        </tr>
        <tr>
            <td>码云</td>
            <td>笔记</td>
            <td>$100</td>
        </tr>
        <tr>
            <td>前端</td>
            <td>博客</td>
            <td>$150</td>
        </tr>
    </table>

</body>
</html>
垂直对齐属性设置垂直对齐,比如顶部,底部或中间:

<!DOCTYPE html>
<html>
<head>
    <meta charset="utf-8">
    <title></title>
    <style>
        table,td,th {


            border:1px solid black;
        }
        td {


            height:50px;
            vertical-align:bottom;
        }
    </style>
</head>
<body>

    <table>
        <tr>
            <th>第一个姓</th>
            <th>第二个名字</th>
            <th>存款</th>
        </tr>
        <tr>
            <td>码云</td>
            <td>笔记</td>
            <td>$100</td>
        </tr>
        <tr>
            <td>前端</td>
            <td>博客</td>
            <td>$150</td>
        </tr>
    </table>

</body>
</html>
表格填充
如需控制边框和表格内容之间的间距,应使用 td 和 th 元素的填充属性:

<!DOCTYPE html>
<html>
<head>
    <meta charset="utf-8">
    <title></title>
    <style>
        table,td,th {


            border:1px solid black;
        }
        td {


            padding:15px;
        }
    </style>
</head>
<body>

    <table>
        <tr>
            <th>第一个姓</th>
            <th>第二个名字</th>
            <th>存款</th>
        </tr>
        <tr>
            <td>码云</td>
            <td>笔记</td>
            <td>$100</td>
        </tr>
        <tr>
            <td>前端</td>
            <td>博客</td>
            <td>$150</td>
        </tr>
    </table>

</body>
</html>
表格颜色
下面的例子指定边框的颜色,和 th 元素的文本和背景颜色:

<!DOCTYPE html>
<html>
<head>
    <meta charset="utf-8">
    <title></title>
    <style>
        table,td,th {


            border:1px solid green;
        }
        th {


            background-color:green;
        color:white;
        }
    </style>
</head>
<body>

    <table>
        <tr>
            <th>第一个姓</th>
            <th>第二个名字</th>
            <th>存款</th>
        </tr>
        <tr>
            <td>码云</td>
            <td>笔记</td>
            <td>$100</td>
        </tr>
        <tr>
            <td>前端</td>
            <td>博客</td>
            <td>$150</td>
        </tr>
    </table>

</body>
</html>