仅供参考
一、效果


二、过程
1.准备工作 - 截图 - 提取主色
先手动截一张图片,然后通过在线网站https://palettegenerator.com/提取主色,如红色为#FD1111

2.图片二值化
有了主色后,通过autojs的 images.interval(img, “#C71718”, 70) 函数,将图片二值化
将图片二值化,在color-interval ~ color+interval范围以外的颜色都变成0,在范围以内的颜色都变成255。这里对color的加减是对每个通道而言的。
例如images.interval(img, “#888888”, 16),每个通道的颜色值均为0x88,加减16后的范围是[0x78, 0x98],因此这个代码将把#787878~#989898的颜色变成#FFFFFF,而把这个范围以外的变成#000000。
var img = images.read("/sdcard/Pictures/QQ/c.jpg");

img=images.interval(img, "#FD1111", 120)// 60-90	//后边这个值自己可以改一下看看
images.save(img, "./邻域yyds.jpg", "jpg", 100);

img.recycle();
3.文字识别
文字识别,我之前写过 python的百度智能云-文字识别
这里我们通过调用 百度OCR文字识别 接口 来进行文字识别。
官方文档:https://cloud.baidu.com/doc/OCR/s/Ek3h7xypm
1.注册账号-之前的文章里有
2.获得API Key、Secret Key-之前的文章里有
3.调用接口
https://cloud.baidu.com/doc/OCR/s/Ck3h7y2ia
请求格式 - POST方式调用
返回格式 - JSON格式
请求限制 - 请求图片需经过base64编码及urlencode后传入
请求格式支持:PNG、JPG、JPEG、BMP、TIFF、PNM、WebP
图片编码后大小限额:base64编码urlencode后大小不超过4M,最短边至少15px,最长边最大4096px
var img64 = images.toBase64(img, "png", 100); //图片经base64编码
调用方式一:请求URL数据格式
向API服务地址使用POST发送请求,必须在URL中带上参数:access_token
注意:access_token的有效期为30天,需要每30天进行定期更换;
参考“Access Token获取”
向授权服务地址https://aip.baidubce.com/oauth/2.0/token发送请求(推荐使用POST),并在URL中带上以下参数:
grant_type: 必须参数,固定为client_credentials;
client_id: 必须参数,应用的API Key;
client_secret: 必须参数,应用的Secret Key;
    var API_Key="输入自己的API_Key";
    var Secret_Key="输入自己的Secret_Key";
    //向授权服务地址发送请求
    var getTokenUrl="https://aip.baidubce.com/oauth/2.0/token";
    var token_Res = http.post(getTokenUrl, {


        grant_type: "client_credentials",
        client_id: API_Key,
        client_secret: Secret_Key,
    });
    var access_token=token_Res.body.json().access_token;
服务器返回的JSON文本参数如下:
access_token: 要获取的Access Token;
expires_in: Access Token的有效期(秒为单位,有效期30天);
其他参数忽略,暂时不用;
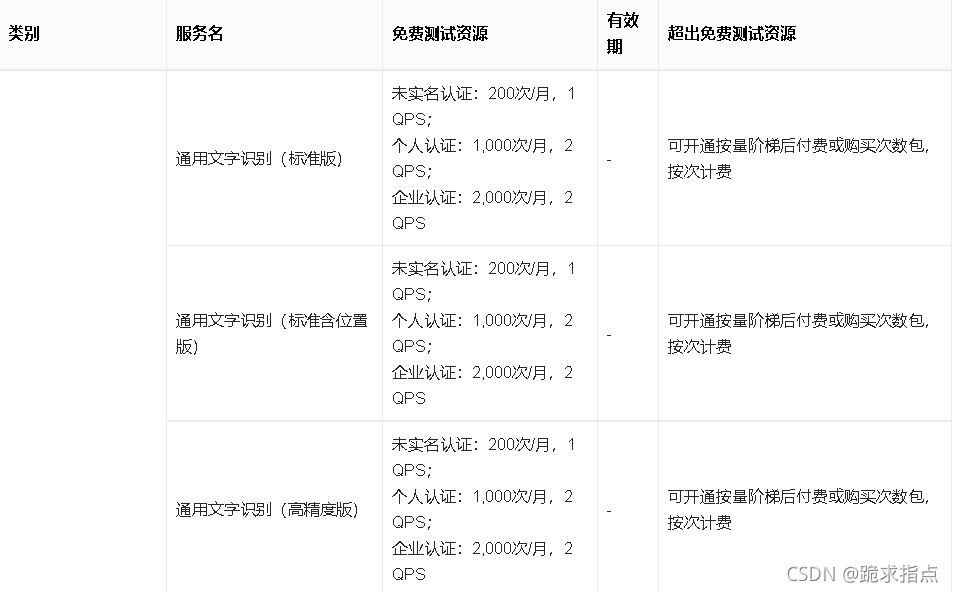
以 通用文字识别(高精度版) 为例
https://cloud.baidu.com/doc/OCR/s/1k3h7y3db
    var ocrUrl = "https://aip.baidubce.com/rest/2.0/ocr/v1/accurate_basic";
    var ocr_Res = http.post(ocrUrl, {


        headers: {


            "Content-Type": "application/x-www-form-urlencoded"
        },
        access_token: access_token,	//之前获得的access_token
        image: img64,		//和 url/pdf_file 三选一,img64是传入的图片
    });
    var json = ocr_Res.body.json();
必要参数headers、access_token、image,其他参数查看文档
4.完整代码
//百度智能云 文字识别OCR 接口调用
function Baidu_ocr(img){


    log("调用百度ocr:");
    /**** 将图片编码 ******/
    var img64 = images.toBase64(img, "png", 100);

    /**** 获取access_token ******/
    var API_Key="输入自己的API_Key";
    var Secret_Key="输入自己的Secret_Key";
    //向授权服务地址发送请求
    var getTokenUrl="https://aip.baidubce.com/oauth/2.0/token";
    var token_Res = http.post(getTokenUrl, {


        grant_type: "client_credentials",
        client_id: API_Key,
        client_secret: Secret_Key,
    });
    var access_token=token_Res.body.json().access_token;

    /**** 调用ocr ******/
    //高精度文字识别
    var ocrUrl = "https://aip.baidubce.com/rest/2.0/ocr/v1/accurate_basic";
    var ocr_Res = http.post(ocrUrl, {


        headers: {


            "Content-Type": "application/x-www-form-urlencoded"
        },
        access_token: access_token,	//之前获得的access_token
        image: img64,		//和 url/pdf_file 三选一,img64是传入的图片
    });
    var json = ocr_Res.body.json();

    /**** 返回结果 ******/
    return json;
}
三、我的摸索过程
1.二值化
var img = images.read("/sdcard/Pictures/QQ/c.jpg");	//读取一张图片

var c=[]	//将图片里的颜色值放入数组
var cc = 0	//记录颜色值数量
//获取在点(x, y)的颜色值
for(x=0;x<250;x++){


    for(y=0;y<20;y++){


		var color = images.pixel(img, x, y);
		//显示该颜色
		if(colors.toString(color) != "#ffffffff"){

    	//不是白色才保存
			log(x,y,colors.toString(color));

			c[cc] = colors.toString(color)
			cc=cc+1
		}
	}
}

//灰度化
img1=images.grayscale(img)
images.save(img1, "./灰度化.jpg", "jpg", 100);
//将图片中大于20的值全部变成255,其余变成0
img2=images.threshold(img, 19, 255, "BINARY")//20!  25黑字会显 15红字不清晰
images.save(img2, "./阈值.jpg", "jpg", 100);
//把范围里的变白
img3=images.inRange(img, "#FD1111", "#FCBDBB")//fffffafa//ffffdddc
images.save(img3, "./范围.jpg", "jpg", 100);


//若红字本身不清楚,后面的数 要调大,若背景没消干净,要调小

/*img4=images.interval(img, "#FD1111", 95)// 黑字显
images.save(img4, "./4.jpg", "jpg", 100); */

img4=images.interval(img, "#FD1111", 120)//
images.save(img4, "./邻域yyds.jpg", "jpg", 100);

/* img4=images.interval(img, "#FD1111", 135)//红字不清晰
images.save(img4, "./6.jpg", "jpg", 100); */

img.recycle();//回收图片,截屏的不需要
我对这个颜色的RGB,十六进制,灰度值其实也不是很了解,以上结果都是我一点点摸索出来的,不大具有普适性,借鉴一下就行
2.文字识别
根据文档一步步来
1.将图片编码
2.获取access_token
3.获取识别结果
虽然代码很多,但其实很容易看懂,要传的参数,返回的参数,文档中写的都很清晰
四、完整代码
var img = images.read("/sdcard/Pictures/QQ/c.jpg");	//自己改成截图
log("读取图片")

img=images.interval(img, "#FD1111", 120)//C11719.70!! 60-90
images.save(img, "./邻域yyds.jpg", "jpg", 100);
log("图片二值化")

img.recycle();//回收图片,截屏不需要

var res=Baidu_ocr(img4)//调用百度识图

/*将识别结果拼接*/
words = ''
for(i=0;i<res.words_result_num;i++){


    words = words + res.words_result[i].words
}
log("识别结果:" + words)


//百度智能云 文字识别OCR 接口调用
function Baidu_ocr(img){


    log("调用百度ocr:");
    /**** 将图片编码 ******/
    var img64 = images.toBase64(img, "jpg", 100);//转换截屏图片

    /**** 获取access_token ******/
    var API_Key="Oa3pVyYxbrPpUxAUwKFmnkQ0";
    var Secret_Key="h6nvjCpGDD3fUy3u6Qa3tS0yL6vSe7vq";
    //向授权服务地址发送请求
    var getTokenUrl="https://aip.baidubce.com/oauth/2.0/token";
    var token_Res = http.post(getTokenUrl, {


        grant_type: "client_credentials",
        client_id: API_Key,
        client_secret: Secret_Key,
    });
    var access_token=token_Res.body.json().access_token;

    /**** 调用ocr ******/
    //高精度文字识别
    var ocrUrl = "https://aip.baidubce.com/rest/2.0/ocr/v1/accurate_basic";
    var ocr_Res = http.post(ocrUrl, {


        headers: {


            "Content-Type": "application/x-www-form-urlencoded"
        },
        access_token: access_token,	//之前获得的access_token
        image: img64,		//和 url/pdf_file 三选一,img64是传入的图片
    });
    var json = ocr_Res.body.json();

    /**** 返回结果 ******/
    return json;
}
总结
图片二值化使用的很不方便,最近准备csp有点忙,等考完试,再写一个根据边界截图的方法试试