黑神话悟空里面的雪地感觉就是个活的,交互效果非常好,如下:

这雪地,动一下凹一点,配合角色的动作,显得就很灵动。
当然这种“凹陷”的效果实现原理不难,高度贴图+曲面细分就能做出来,我之前做的角色面部造型(捏脸)就类似这种效果,下面先简单的实现一下。
Shader "SnowField/SnowFieldHeightShader"
{


    Properties
    {


        _MainTex ("Texture", 2D) = "white" {

    }
        _TesselFactor("Tessellation Factor",Range(1,20)) = 5
        [Toggle]_HeightOnOff("Height On Off",int) = 1
        _HeightTex("Height Texture",2D) = "white" {

    }
        _HeightPower("Height Power",Range(1,5)) = 1
        _HeightBase("Height Base",Range(0,1)) = 0.5
        [Toggle]_HeightInverse("Height Inverse",int) = 1
    }
    SubShader
    {


        Tags {

     "RenderType"="Opaque" }
        LOD 100

        Pass
        {


            CGPROGRAM
            #pragma vertex tessvert
            #pragma fragment frag
            #pragma hull hs
            #pragma domain ds
            #pragma target 4.6

            #include "UnityCG.cginc"
            #include "Lighting.cginc"

            struct appdata
            {


                float4 vertex : POSITION;
                float2 uv : TEXCOORD0;
                float4 tangent : TANGENT;
                float3 normal : NORMAL;
            };

            struct v2f
            {


                float2 uv : TEXCOORD0;
                float4 vertex : SV_POSITION;
                float4 tangent : TANGENT;
                float3 normal : NORMAL;
            };

            struct tessellation_appdata
            {


                float4 vertex : INTERNALTESSPOS;
                float4 tangent : TANGENT;
                float3 normal : NORMAL;
                float2 uv : TEXCOORD;
            };

            sampler2D _MainTex;
            float4 _MainTex_ST;
            int _TesselFactor;          //细分参数
            int _HeightOnOff;           //高度开启
            sampler2D _HeightTex;       //高度图
            float _HeightPower;         //高度强度
            float _HeightBase;          //高度基准
            int _HeightInverse;         //高度反转

            tessellation_appdata tessvert(appdata v)
            {


                tessellation_appdata o;
                o.vertex = v.vertex;
                o.tangent = v.tangent;
                o.normal = v.normal;
                o.uv = v.uv;
                return o;
            }

            v2f vert (appdata v)
            {


                v2f o;
                o.uv = TRANSFORM_TEX(v.uv, _MainTex);
                if(_HeightOnOff)
                {


                    //通过高度图的r通道,对vertex进行normal朝向的偏移
                    float r = tex2Dlod(_HeightTex,float4(o.uv,0,0)).r-_HeightBase;
                    v.vertex += _HeightInverse?-float4(v.normal*r*_HeightPower,0):float4(v.normal*r*_HeightPower,0);
                }
                o.vertex = UnityObjectToClipPos(v.vertex);
                return o;
            }

            UnityTessellationFactors hsconst(InputPatch<tessellation_appdata,3> v)
            {


                UnityTessellationFactors o;
                float4 tf = float4(_TesselFactor,_TesselFactor,_TesselFactor,_TesselFactor);
                o.edge[0] = tf.x;
                o.edge[1] = tf.y;
                o.edge[2] = tf.z;
                o.inside = tf.w;
                return o;
            }

            [UNITY_domain("tri")]
            [UNITY_partitioning("fractional_odd")]
            [UNITY_outputtopology("triangle_cw")]
            [UNITY_patchconstantfunc("hsconst")]
            [UNITY_outputcontrolpoints(3)]
            tessellation_appdata hs(InputPatch<tessellation_appdata,3> v,uint id:SV_OutputControlPointID)
            {


                return v[id];
            }

            [UNITY_domain("tri")]
            v2f ds(UnityTessellationFactors tessfactors,const OutputPatch<tessellation_appdata,3> vi,float3 bary:SV_DOMAINLOCATION)
            {


                appdata v;

			    v.vertex = vi[0].vertex*bary.x + vi[1].vertex*bary.y + vi[2].vertex*bary.z;
			    v.tangent = vi[0].tangent*bary.x + vi[1].tangent*bary.y + vi[2].tangent*bary.z;
			    v.normal = vi[0].normal*bary.x + vi[1].normal*bary.y + vi[2].normal*bary.z;
			    v.uv = vi[0].uv*bary.x + vi[1].uv*bary.y + vi[2].uv*bary.z;

			    v2f o = vert(v);
			    return o;
            }

            fixed4 frag (v2f i) : SV_Target
            {


                fixed4 col = tex2D(_MainTex, i.uv);
                return col;
            }
            ENDCG
        }
    }
}
然后再用photoshop制作一张黑底白顶的高度图(黑色r通道=0,白色r通道=1,进行顶点的坐标加权),再调整色彩制作一张主贴图,如下:
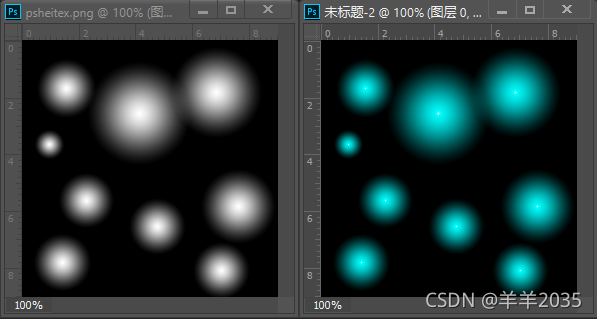
效果如下:
技术核心如下:
1.曲面细分,前面有写过,可以看得出来细分参数TessellationFactor越大,细分次数越多,网格越平滑。
2.高度图采样,黑色r=0过渡白色r=1代表高度加权的系数,然后配合强度等参数进行normal法向量上的vertex顶点偏移,再通过MVP矩阵变换到裁剪空间。
好,下一步我们就该思考怎么制作类似角色踩到雪地上下陷的功能,我们假设有两层panel,底下一层是刚体地面,上面一层是雪面,角色走在刚体地面上,则上层雪面高于角色脚底的部分需要“下陷”到贴合下层地面。
那么我们怎么得到这个“下陷”数据呢?或者说怎么得到雪面的高度图?
我们可以将雪面想象成一张uv纹理,角色脚部网格顶点坐标(世界坐标系)的y轴得到与雪面y轴的”高度差“,x轴和z轴得到顶点在雪面纹理上的uv坐标,就可以绘制出高度图。
当然unity直接的摄像机提供深度图采样功能,我们可以拿到深度图当高度图用,挺方便的,如下:
using System.Collections;
using System.Collections.Generic;
using UnityEngine;

public class TestSampleDepthTexture : MonoBehaviour
{


    public Material depthMat;

    private Camera depthCamera;

    void Start()
    {


        depthCamera = GetComponent<Camera>();
        depthCamera.depthTextureMode = DepthTextureMode.Depth;
    }

    private void OnRenderImage(RenderTexture source, RenderTexture destination)
    {


        Graphics.Blit(source, destination, depthMat);
    }
}
c#中采样原始深度图,shader中进行0-1的线性R通道转换
Shader "SnowField/TestDepthSampleShader"
{


    SubShader
    {


        Tags {

     "RenderType"="Opaque" }
        LOD 100

        Pass
        {


            CGPROGRAM
            #pragma vertex vert
            #pragma fragment frag

            #include "UnityCG.cginc"

            struct appdata
            {


                float4 vertex : POSITION;
                float4 uv : TEXCOORD0;
            };

            struct v2f
            {


                float4 uv : TEXCOORD0;
                float4 vertex : SV_POSITION;
            };

            sampler2D _CameraDepthTexture;          //unity提供我们camera采样的深度图

            v2f vert (appdata v)
            {


                v2f o;
                o.vertex = UnityObjectToClipPos(v.vertex);
                o.uv = ComputeScreenPos(o.vertex);
                return o;
            }

            fixed4 frag (v2f i) : SV_Target
            {


                //对深度图进行0-1线性转换
                fixed depth = Linear01Depth(tex2D(_CameraDepthTexture,i.uv.xy/i.uv.w).r);
                fixed4 col = fixed4(depth,depth,depth,1);
                return col;
            }
            ENDCG
        }
    }
}
效果如下:

可以看的出来调整depthcamera的far clipping panel(远裁剪面)就能调整深度图的R值,离depthcamera越近depth趋近0(R通道=0),越远depth趋近1(R通道=1),深度图我们以前聊过,不清楚的同学可以找找。
那么接下来,我们利用摄像机深度采样的功能,对上层雪面进行一次采样,得到雪面的深度图,然后对角色(圆柱体)进行实时深度图采样,因为角色(圆柱体)是走在刚体地面上的,所以雪面深度值和角色(圆柱体)的深度值之差就能得到雪面需要“下陷”的程度。
ps:因为我们需要采样雪面深度信息和角色(圆柱体)底部的深度信息,所以深度摄像机的视口是从下往上照射的,那么因为雪面“更高”(相比角色底部),意味着离摄像机更远,则深度越大,则depth更大(更趋近1)
接下来我们处理代码,这里需要三个着色器和两个摄像机控制类
着色器:
1.深度采样的着色器,用于采样深度图(DepthSamplingShader)
Shader "SnowField/DepthSamplingShader"
{


    SubShader
    {


        Tags {

     "RenderType"="Opaque" }
        LOD 100

        Pass
        {


            CGPROGRAM
            #pragma vertex vert
            #pragma fragment frag

            #include "UnityCG.cginc"

            struct appdata
            {


                float4 vertex : POSITION;
                float4 uv : TEXCOORD0;
            };

            struct v2f
            {


                float4 uv : TEXCOORD0;
                float4 vertex : SV_POSITION;
            };

            sampler2D _CameraDepthTexture;          //unity提供我们camera采样的深度图

            v2f vert (appdata v)
            {


                v2f o;
                o.vertex = UnityObjectToClipPos(v.vertex);
                o.uv = ComputeScreenPos(o.vertex);
                return o;
            }

            fixed4 frag (v2f i) : SV_Target
            {


                //对深度图进行0-1线性转换
                fixed depth = Linear01Depth(tex2D(_CameraDepthTexture,i.uv.xy/i.uv.w).r);
                fixed4 col = fixed4(depth,depth,depth,1);
                return col;
            }
            ENDCG
        }
    }
}
2.雪面和角色底部高度图计算的着色器(HeightSamplingShader)
Shader "SnowField/HeightSamplingShader"
{


    Properties
    {


        _SnowFieldDepthTex("SnowField Depth Texture",2D) = "white" {

    }
    }

    SubShader
    {


        Tags {

     "RenderType"="Opaque" }
        LOD 100

        Pass
        {


            CGPROGRAM
            #pragma vertex vert
            #pragma fragment frag

            #include "UnityCG.cginc"

            struct appdata
            {


                float4 vertex : POSITION;
                float4 uv : TEXCOORD0;
            };

            struct v2f
            {


                float4 uv : TEXCOORD0;
                float4 vertex : SV_POSITION;
            };

            sampler2D _CameraDepthTexture;

            sampler2D _SnowFieldDepthTex;

            v2f vert (appdata v)
            {


                v2f o;
                o.vertex = UnityObjectToClipPos(v.vertex);
                o.uv = ComputeScreenPos(o.vertex);
                return o;
            }

            fixed4 frag (v2f i) : SV_Target
            {


                float2 uv = i.uv.xy/i.uv.w;
                //因为深度摄像机相反后,需要处理uv.x的反向
                float2 iuv = float2(1-uv.x,uv.y);
                fixed depth = Linear01Depth(tex2D(_CameraDepthTexture,iuv).r);
                //还原snowfield的深度值
                fixed sfdepth = 1-tex2D(_SnowFieldDepthTex,uv).r;
                //计算snowfield与player的深度差
                fixed difdepth = saturate(sfdepth-depth);
                fixed4 col = fixed4(difdepth,difdepth,difdepth,1);
                return col;
            }
            ENDCG
        }
    }
}
3.雪面的渲染着色器,处理雪面细分和高度置换(SnowFieldEffectShader)
Shader "SnowField/SnowFieldEffectShader"
{


    Properties
    {


        _MainTex ("Texture", 2D) = "white" {

    }
        _TesselFactor("Tessellation Factor",Range(1,100)) = 5
        [Toggle]_HeightOnOff("Height On Off",int) = 1
        _HeightTex("Height Texture",2D) = "white" {

    }
        _HeightPower("Height Power",Range(1,100)) = 1
        _HeightBase("Height Base",Range(0,1)) = 0.5
        [Toggle]_HeightInverse("Height Inverse",int) = 1
    }
    SubShader
    {


        Cull Off    //对背面的深度写入无效
        Tags {

     "RenderType"="Opaque" }
        LOD 100

        Pass
        {


            CGPROGRAM
            #pragma vertex tessvert
            #pragma fragment frag
            #pragma hull hs
            #pragma domain ds
            #pragma target 4.6

            #include "UnityCG.cginc"
            #include "Lighting.cginc"

            struct appdata
            {


                float4 vertex : POSITION;
                float2 uv : TEXCOORD0;
                float4 tangent : TANGENT;
                float3 normal : NORMAL;
            };

            struct v2f
            {


                float2 uv : TEXCOORD0;
                float4 vertex : SV_POSITION;
                float4 tangent : TANGENT;
                float3 normal : NORMAL;
            };

            struct tessellation_appdata
            {


                float4 vertex : INTERNALTESSPOS;
                float4 tangent : TANGENT;
                float3 normal : NORMAL;
                float2 uv : TEXCOORD;
            };

            sampler2D _MainTex;
            float4 _MainTex_ST;
            int _TesselFactor;          //细分参数
            int _HeightOnOff;           //高度开启
            sampler2D _HeightTex;       //高度图
            float _HeightPower;         //高度强度
            float _HeightBase;          //高度基准
            int _HeightInverse;         //高度反转

            tessellation_appdata tessvert(appdata v)
            {


                tessellation_appdata o;
                o.vertex = v.vertex;
                o.tangent = v.tangent;
                o.normal = v.normal;
                o.uv = v.uv;
                return o;
            }

            v2f vert (appdata v)
            {


                v2f o;
                o.uv = TRANSFORM_TEX(v.uv, _MainTex);
                if(_HeightOnOff)
                {


                    //通过高度图的r通道,对vertex进行normal朝向的偏移
                    float r = tex2Dlod(_HeightTex,float4(o.uv,0,0)).r-_HeightBase;
                    v.vertex += _HeightInverse?-float4(v.normal*r*_HeightPower,0):float4(v.normal*r*_HeightPower,0);
                }
                o.vertex = UnityObjectToClipPos(v.vertex);
                return o;
            }

            UnityTessellationFactors hsconst(InputPatch<tessellation_appdata,3> v)
            {


                UnityTessellationFactors o;
                float4 tf = float4(_TesselFactor,_TesselFactor,_TesselFactor,_TesselFactor);
                o.edge[0] = tf.x;
                o.edge[1] = tf.y;
                o.edge[2] = tf.z;
                o.inside = tf.w;
                return o;
            }

            [UNITY_domain("tri")]
            [UNITY_partitioning("fractional_odd")]
            [UNITY_outputtopology("triangle_cw")]
            [UNITY_patchconstantfunc("hsconst")]
            [UNITY_outputcontrolpoints(3)]
            tessellation_appdata hs(InputPatch<tessellation_appdata,3> v,uint id:SV_OutputControlPointID)
            {


                return v[id];
            }

            [UNITY_domain("tri")]
            v2f ds(UnityTessellationFactors tessfactors,const OutputPatch<tessellation_appdata,3> vi,float3 bary:SV_DOMAINLOCATION)
            {


                appdata v;

			    v.vertex = vi[0].vertex*bary.x + vi[1].vertex*bary.y + vi[2].vertex*bary.z;
			    v.tangent = vi[0].tangent*bary.x + vi[1].tangent*bary.y + vi[2].tangent*bary.z;
			    v.normal = vi[0].normal*bary.x + vi[1].normal*bary.y + vi[2].normal*bary.z;
			    v.uv = vi[0].uv*bary.x + vi[1].uv*bary.y + vi[2].uv*bary.z;

			    v2f o = vert(v);
			    return o;
            }

            fixed4 frag (v2f i) : SV_Target
            {


                fixed4 col = tex2D(_MainTex, i.uv);
                return col;
            }
            ENDCG
        }
    }
    FallBack "Diffuse"
}
控制类:
1.控制雪面深度摄像机采样(SnowFieldDepthCamera)
/// <summary>
/// 深度摄像机控制基类
/// </summary>
using System.Collections.Generic;
using UnityEngine;

public abstract class ADepthCameraBase : MonoBehaviour
{


    [Header("渲染层级")]
    public LayerMask renderLayer;
    [Header("视口宽高比")]
    [Range(0, 5f)]
    public float cameraAspect = 1f;
    [Header("摄像机深度")]
    public int cameraDepth = -2;

    protected Camera depthCamera;

    private LayerMask lastLayer;
    private float lastAspect;
    private int lastDepth;

    protected virtual void Awake()
    {


        depthCamera = GetComponent<Camera>();
        if (depthCamera == null)
        {


#if UNITY_EDITOR
            Debug.LogErrorFormat("depthCamera is null");
#endif
            return;
        }
        depthCamera.clearFlags = CameraClearFlags.Depth;
        UpdateCullMask(renderLayer);
        UpdateAspect(cameraAspect);
        UpdateDepth(cameraDepth);
        depthCamera.useOcclusionCulling = false;
        depthCamera.allowHDR = false;
        depthCamera.allowMSAA = false;
        depthCamera.allowDynamicResolution = false;
        depthCamera.depthTextureMode = DepthTextureMode.Depth;
    }

    protected virtual void Start()
    {


        int layer = LayerMask.NameToLayer("Player");
    }

    void Update()
    {


        UpdateCullMask(renderLayer);
        UpdateAspect(cameraAspect);
        UpdateDepth(cameraDepth);
    }

    protected virtual void UpdateCullMask(LayerMask layermask)
    {


        if (lastLayer != layermask)
        {


            List<int> layers = GetLayerValuesFromLayerMask(layermask);
            for (int i = 0; i < layers.Count; i++)
            {


                depthCamera.cullingMask |= (1 << layers[i]);
            }
            lastLayer = layermask;
        }
    }

    protected virtual List<int> GetLayerValuesFromLayerMask(LayerMask layermask)
    {


        List<int> vallist = new List<int>();
        for (int i = 0; i < 32; i++)
        {


            if (((layermask.value >> i) & 1) == 1)
            {


                vallist.Add(i);
            }
        }
        return vallist;
    }

    protected virtual void UpdateAspect(float aspect)
    {


        if (lastAspect != aspect)
        {


            depthCamera.aspect = aspect;
            lastAspect = aspect;
        }
    }

    protected virtual void UpdateDepth(int depth)
    {


        if (lastDepth != depth)
        {


            depthCamera.depth = depth;
            lastDepth = depth;
        }
    }

    protected virtual void OnDestroy()
    {


    }
}
2.角色高度图计算、并传递SnowFieldEffectMaterial,生成最终效果的控制类(PlayerDepthCamera)
using System.Collections;
using System.Collections.Generic;
using UnityEngine;
using UnityEngine.UI;

/// <summary>
/// 高度图生成控制类
/// 雪面depth-角色depth
/// </summary>
public class PlayerDepthCamera : ADepthCameraBase
{


    public Material heightMat;              //处理高度图
    public Material snowFieldMat;           //处理雪地

    public RawImage rawImgHeightTex;

    private RenderTexture heiRt;

    protected override void Start()
    {


        base.Start();
        heiRt = RenderTexture.GetTemporary(512, 512);
    }

    private void OnRenderImage(RenderTexture source, RenderTexture destination)
    {


        Graphics.Blit(source, heiRt, heightMat);
        rawImgHeightTex.texture = heiRt;
        snowFieldMat.SetTexture("_HeightTex", heiRt);
    }

    protected override void OnDestroy()
    {


        base.OnDestroy();
        RenderTexture.ReleaseTemporary(heiRt);
    }
}
如果细心的小伙伴会发现一个问题,那就是我在角色采样后进行了uv.x反向,雪面深度采样的之后进行1-depth的操作,这是为什么呢?
其实是我碰到了一个尴尬的问题,就是深度摄像机无法采样网格背面(Back Face)的深度信息,哪怕Cull Off都无效
那么我在雪面采样的时候就只能将深度摄像机视口调整为从上到下,如下:

然后运行看效果:

可以看得出来雪面的网格跟随角色移动进行了“下陷”,当然我们修改一下高度图的合成效果。
就用ComputeShader。
#pragma kernel CSMain

RWTexture2D<float4> HeightTex;
RWTexture2D<float4> ResultTex;

[numthreads(8,8,1)]
void CSMain (uint3 id : SV_DispatchThreadID)
{


    //行走的轨迹按“最深”来采样
    //也就是heiRt.R<=compRt.R?heiRt.R:compRt.R
    float4 heicol = HeightTex[id.xy];
    //有“新足迹”
    if(heicol.x > 0)
    {


        float4 retcol = ResultTex[id.xy];
        //有“老足迹”
        if(retcol.x > 0)
        {


            //判断“最深足迹”
            if(heicol.x < retcol.x)
            {


                ResultTex[id.xy] = heicol;
            }
            else
            {


                ResultTex[id.xy] = retcol;
            }
        }
        else    //无“老足迹”
        {


            ResultTex[id.xy] += heicol;
        }
    }
    else //无“新足迹”,直接合成
    {


        ResultTex[id.xy] += heicol;
    }
}
再修改一下PlayerDepthCamera中合成逐帧高度图功能。
using UnityEngine;
using UnityEngine.UI;

/// <summary>
/// 高度图生成控制类
/// 雪面depth-角色depth
/// </summary>
public class PlayerDepthCamera : ADepthCameraBase
{


    public Material heightMat;              //处理高度图
    public Material snowFieldMat;           //处理雪地
    public ComputeShader compCS;            //合成高度图

    public RawImage rawImgHeightTex;

    private RenderTexture heiRt;

    private RenderTexture compositeRT;

    protected override void Start()
    {


        base.Start();
        compositeRT = RenderTexture.GetTemporary(512, 512);
        compositeRT.enableRandomWrite = true;
        compositeRT.Create();
        heiRt = RenderTexture.GetTemporary(512, 512);
        heiRt.enableRandomWrite = true;
        heiRt.Create();
    }

    private void OnRenderImage(RenderTexture source, RenderTexture destination)
    {


        Graphics.Blit(source, heiRt, heightMat);
        int kernel = compCS.FindKernel("CSMain");
        compCS.SetTexture(kernel, "HeightTex", heiRt);
        compCS.SetTexture(kernel, "ResultTex", compositeRT);
        compCS.Dispatch(kernel, 512 / 8, 512 / 8, 1);
        rawImgHeightTex.texture = compositeRT;
        snowFieldMat.SetTexture("_HeightTex", compositeRT);
    }


    protected override void OnDestroy()
    {


        base.OnDestroy();
        RenderTexture.ReleaseTemporary(heiRt);
        RenderTexture.ReleaseTemporary(compositeRT);
    }
}
再运行一下看下效果,如图:
这里我们通过新旧“足迹”的颜色值判断合成完整高度图,就能完成角色(圆柱体)移动后产生的雪面“塌陷”变化。
当然这里我们只是完成了功能部分,后面有时间我们继续完成着色部分。