1 使用原因
暑期大作业中,老师希望我们使用swagger来为API写文档。
为什么要为API做文档呢?
The aggregate experience of the developer when discovering, learning to use, and finally integrating with an API is termed as Developer Experience. The API documentation is the key to excellent developer experience.
2 Swagger配置
参照了这个链接的内容进行使用:swagger与SpringBoot项目的整合
首先引入 maven dependency
<dependency>
   <groupId>io.springfox</groupId>
   <artifactId>springfox-swagger2</artifactId>
   <version>2.9.2</version>
</dependency>
接着在SpringBoot的启动class中enable Swagger
@EnableSwagger2
@SpringBootApplication
public class WeiboserviceApplication {


    public static void main(String[] args) {


        SpringApplication.run(WeiboserviceApplication.class, args);
    }

}
更好的方法是 build a seperate config class
在这里,我们指定了API暴露(exposed)的地址,设置了包名称
import org.springframework.context.annotation.Bean;
import org.springframework.context.annotation.Configuration;

import springfox.documentation.builders.ApiInfoBuilder;
import springfox.documentation.builders.PathSelectors;
import springfox.documentation.builders.RequestHandlerSelectors;
import springfox.documentation.service.ApiInfo;
import springfox.documentation.service.Contact;
import springfox.documentation.spi.DocumentationType;
import springfox.documentation.spring.web.plugins.Docket;
import springfox.documentation.swagger2.annotations.EnableSwagger2;

@Configuration
@EnableSwagger2
public class SwaggerConfig {


    @Bean
    public Docket createRestApi() {


        return new Docket(DocumentationType.SWAGGER_2)
                //apiInfo指定测试文档基本信息,这部分将在页面展示
                .apiInfo(apiInfo())
                .select()
                //apis() 控制哪些接口暴露给swagger,
                // RequestHandlerSelectors.any() 所有都暴露,会多出一个默认的error-service-controller
                // RequestHandlerSelectors.basePackage("com.info.*")  指定包位置
                .apis(RequestHandlerSelectors.any())
                .paths(PathSelectors.any())
                .build();
    }

    //文档的总体信息
    private ApiInfo apiInfo() {


        return new ApiInfoBuilder()
                .title("测试项目标题")
                .description("接口描述")
                //联系人实体类
                .contact(
                        new Contact("名字", "网址", "邮箱")
                )
                //版本号
                .version("1.0.0-SNAPSHOT")
                .build();
    }
}
按照第二种方法引入了Swagger后,已经算配置大功告成了,可以用Postman发送一个请求到 http://localhost:8080/v2/api-docs 测试一下
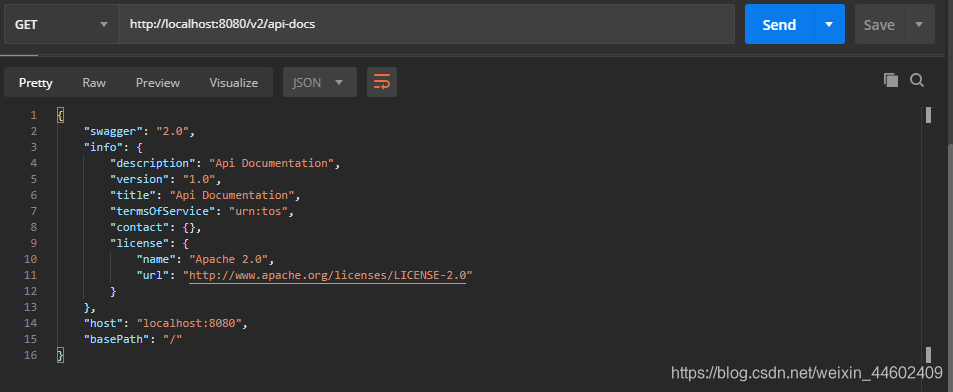
很明显,返回的结果不是我们想要的文档,这时候就到Swagger-ui发挥用场的时候了
3 Swagger UI使用
Swagger UI is a dependency-free collection of HTML, JavaScript, and CSS assets that dynamically generate beautiful documentation and sandbox from a Swagger-compliant API. Because Swagger UI has no dependencies, you can host it in any server environment, or on your local machine.
本篇使用的是2.x版本而非最新的3.x版本,因为2.0的使用场景更为简洁,3.0用于规范的大型项目会比较好
接口描述在Swagger3.0中通过Swagger规范(一个JSON文件)来描述,Swagger2.0是通过在接口中提供一系列注解来描述的。
首先引入maven dependency
<dependency>
   <groupId>io.springfox</groupId>
   <artifactId>springfox-swagger-ui</artifactId>
   <version>2.9.2</version>
</dependency>
引入后,可以直接在浏览器中访问到以localhost:8080为Base url的swagger UI 页面 http://localhost:8080/swagger-ui.html#/.
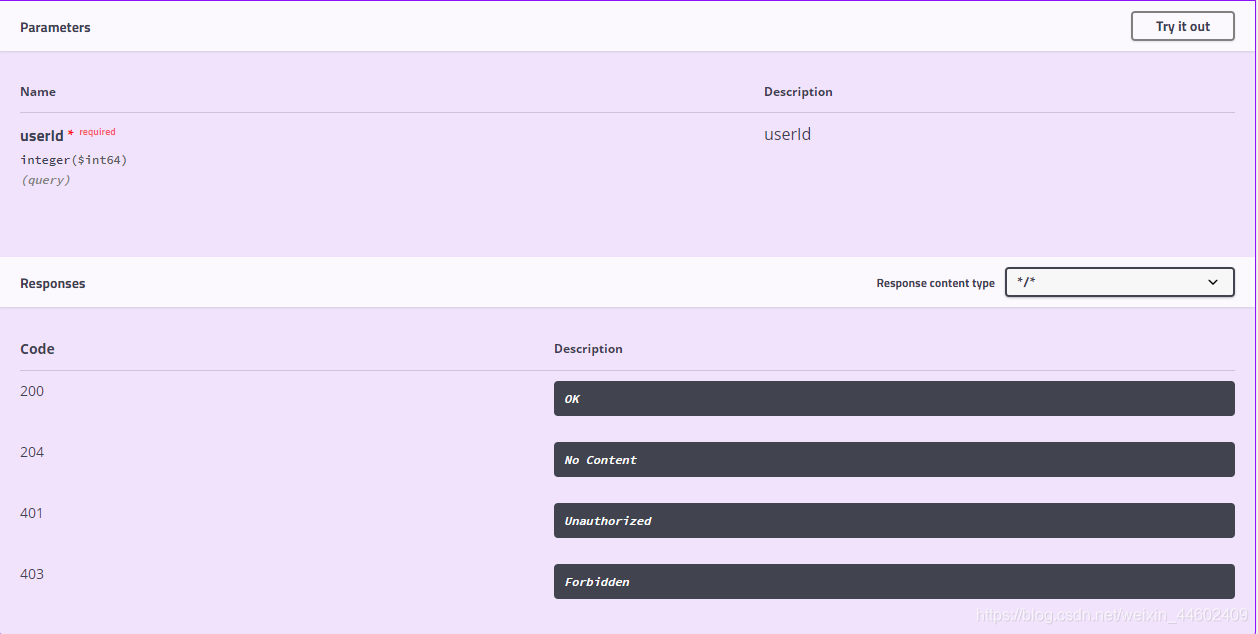
不给controller加任何注解时,默认的文档如下
为controller类加上注解,常用注解有:
@Api(value="",tag=""):用在类上,说明该类的作用。
@ApiOperation:注解来给API增加方法说明。
注意这里要指定一下httpMethod,不然每个method都会出现一个文档
@ApiImplicitParams : 用在方法上包含一组参数说明。
@ApiImplicitParam:用来注解来给方法入参增加说明。
@ApiResponses:用于表示一组响应
@ApiResponse:用在@ApiResponses中,一般用于表达一个错误的响应信息
code:数字,例如400
message:信息,例如"请求参数没填好"
response:抛出异常的类
   @ApiResponses({
        @ApiResponse(code = 1000, message = "非HTTP状态码,返回值JSON code字段值,描述:成功"),
        @ApiResponse(code = 401, message = "非HTTP状态码,返回值JSON code字段值,描述:无token")
})
@ApiModel:描述一个Model的信息(一般用在请求参数无法使用@ApiImplicitParam注解进行描述的时候)
@ApiModelProperty:描述一个model的属性
@CrossOrigin(origins = "*")
@RestController
@Api(value = "UserServiceControl23ler")
public class UserServiceController {


    @Autowired
    private UserService userService;

     @ApiOperation(notes = "get user info by userID", value = "get user info",httpMethod = "GET")
    @RequestMapping(path="/user/getUser")
    public User getUser(@ApiParam(name = "userId", value = "The user ID of a WeiBo user,should be a Long Integer") @RequestParam("userId") Long uid){


        System.out.println("*****getWeibo*****");
        return userService.findAllById(uid);
    }
}
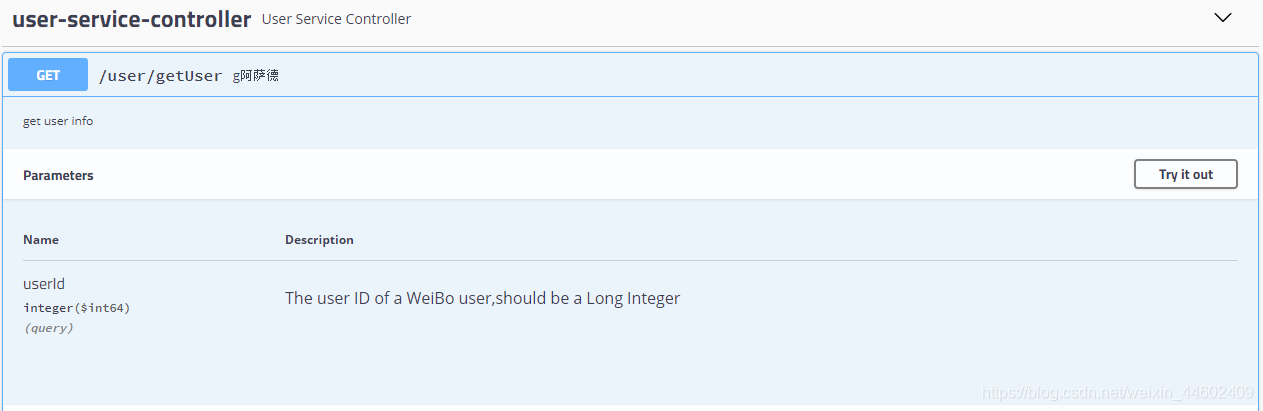
加上注解后的文档效果。对于小型项目来说,这些注解足够了
4 注意事项
swagger应该是根据注解向接口发送请求,来获得要展示的文档信息。此时传入的参数都为空,如果后端没有做异常处理的话会报error,如
java.lang.NumberFormatException: For input string: ""
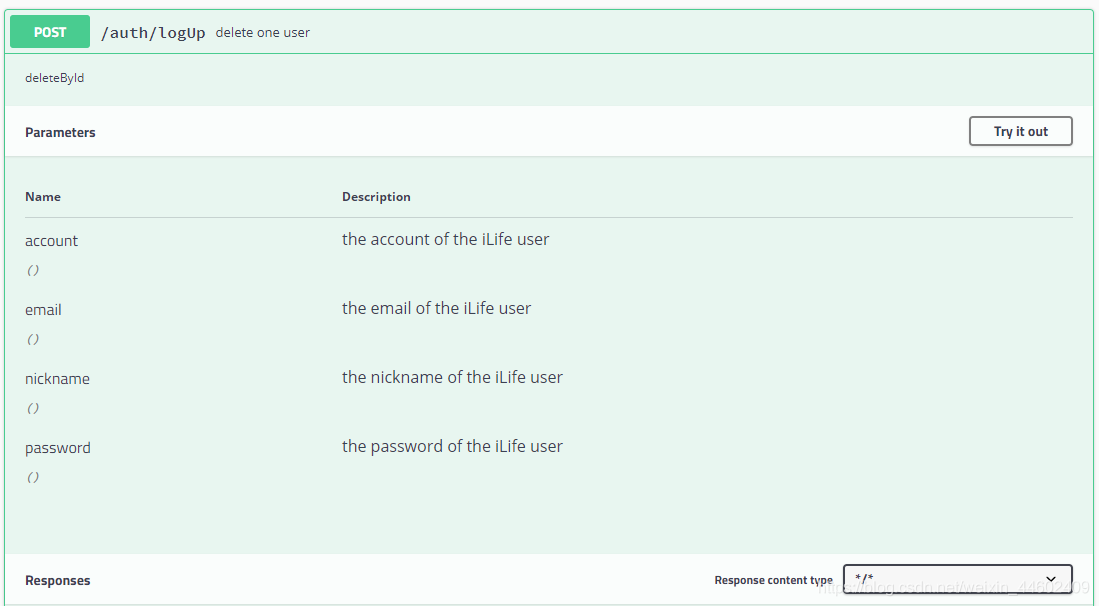
对于描述post方法,暂时没有简便的解决方案,不过有很多博客写了自己的方法,可以去搜一搜。我的方案如下:
    @ApiOperation(notes = "deleteById", value = "delete one user", httpMethod = "POST")
    @ApiImplicitParams({


            @ApiImplicitParam(name = "nickname", value = "the nickname of the iLife user"),
            @ApiImplicitParam(name = "account", value = "the account of the iLife user"),
            @ApiImplicitParam(name = "password", value = "the password of the iLife user"),
            @ApiImplicitParam(name = "email", value = "the email of the iLife user")
    }
    )
    @RequestMapping(path = "/auth/logUp")
    public ResponseEntity<?> logUp(@ApiIgnore @RequestBody Map<String, String> params) {


        String nickname = params.get("nickname");
        String account = params.get("account");
        String password = params.get("password");
        String email = params.get("email");
        System.out.println("********** deleteById **********");
        return userService.save(nickname, account, password, email);
    }
用param来代表headers里的data要传的参数,再把requestBody这个参数ignore掉(否则会多出来一个黑框),运行效果如下