文章目录
1、使用Swagger自动生成文档
在前后端分离的项目中,我们的前端和后端都是同时进行的

加入 swagger 依赖
首先在 https://mvnrepository.com 的网站上搜索 springfox
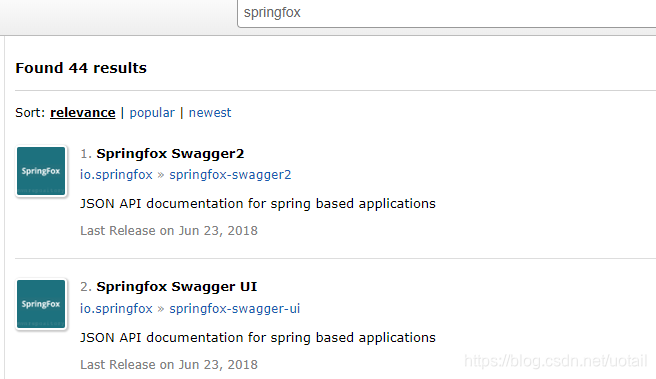
第一个是核心包,他是扫面我们的类来生成文档数据的
<!-- https://mvnrepository.com/artifact/io.springfox/springfox-swagger2 -->
<dependency>
    <groupId>io.springfox</groupId>
    <artifactId>springfox-swagger2</artifactId>
    <version>2.9.2</version>
</dependency>
第二个是ui包,生成我们最终看的页面
<!-- https://mvnrepository.com/artifact/io.springfox/springfox-swagger-ui -->
<dependency>
    <groupId>io.springfox</groupId>
    <artifactId>springfox-swagger-ui</artifactId>
    <version>2.9.2</version>
</dependency>
分别把他们加入我的项目demo的pom中
加注解 启动
然后再再demo中的DemoApplication启动类上面加上注解@EnableSwagger2
这样就ok了
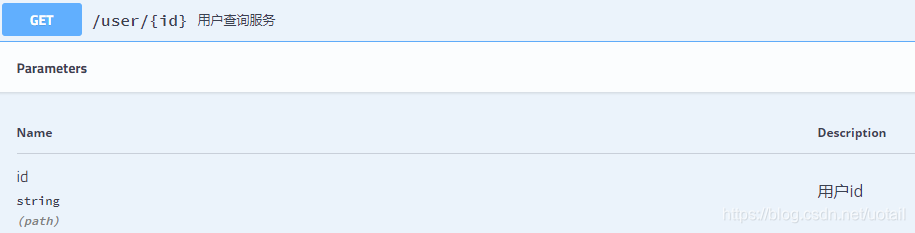
然后运行项目 访问 http://localhost:8080/swagger-ui.html 页面
这里面列出了我们项目中所有的 controller 和 endpoint
swagger注解的使用
@ApiOperation 和 @ApiParam
方法的描述用 @ApiOperation
基本参数的描述使用 @ApiParam

@ApiModelProperty的使用
如果方法的参数为对象,如何给参数加注解呢
为此我们需要给这个对象里面的属性加上 @ApiModelProperty 注解

给参数对象的属性加上下面的注解


2、WireMock
当我的后台服务还没有写完的时候,我们就需要伪造服务向前端提供接口
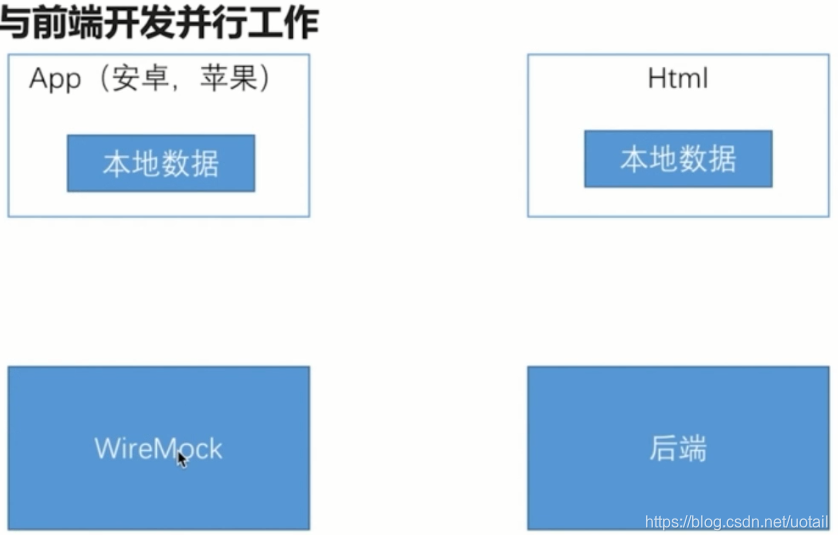
使用WireMock伪造服务,当我们的后台服务开发好后,前端只需要更改一些配置就可以无缝切换
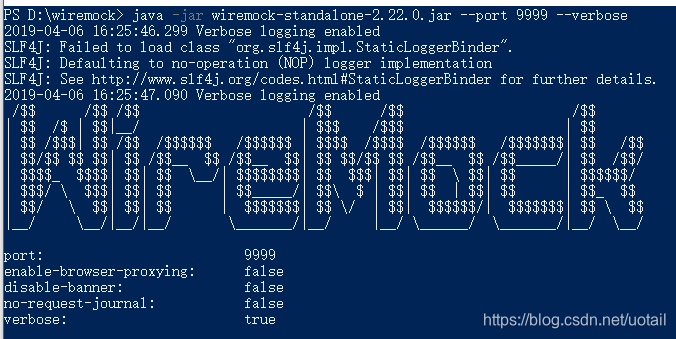
下载并启动wiremock服务器
访问 http://wiremock.org/docs/running-standalone/ 下载jar

按照官方文档 启动它 (指定端口并启动日志)
PS D:\wiremock> java -jar wiremock-standalone-2.22.0.jar --port 9999 -verboss
加入wiremock依赖
http://wiremock.org/docs/download-and-installation/
在demo项目的pom文件中加入依赖、
        <dependency>
            <groupId>com.github.tomakehurst</groupId>
            <artifactId>wiremock-jre8-standalone</artifactId>
            <version>2.22.0</version>
            <scope>test</scope>
        </dependency>
官方给的pom没有下载成功,我只好重新引入下面的pom文件
<!-- https://mvnrepository.com/artifact/com.github.tomakehurst/wiremock -->
<dependency>
    <groupId>com.github.tomakehurst</groupId>
    <artifactId>wiremock</artifactId>
    <version>2.22.0</version>
    <type>pom</type>
    <scope>test</scope>
</dependency>
这下依赖加入成功
在后面我写java时需要配置wiremock,却无法引用它的class,最后才发现 这个依赖的 <scope>test</scope>
需要把它的依赖范围改为<scope>compile</scope>
程序中配置wiremock
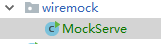
新建一个类
/**
 * 它用来连接命令行中启动的服务,告诉服务器怎么处理外界的http请求
 */
public class MockServe {

    public static void main(String[] args) {

        //WireMock.configureFor(); 这个方法有很多重载 可以知道ip和端口 因为是本地开发我们不指定ip
        WireMock.configureFor(9999);//指定连接端口
        WireMock.removeAllMappings();    //将之前做过的所有请求配置清掉

        //接下来告诉服务器怎么处理请求
        //伪造测试桩
        WireMock.stubFor(
                WireMock.get(WireMock.urlEqualTo("/order/1"))
                        .willReturn(WireMock.aResponse().withBody("{\"id\":1}").withStatus(200))
        );
    }
}
右键运行这个main方法
再看wiremock控制台打印的日志

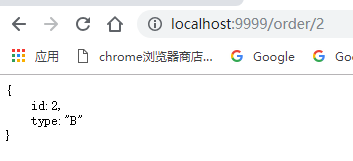
然后浏览器访问 http://localhost:9999/order/1

重构代码
/**
* 它用来连接命令行中启动的服务,告诉服务器怎么处理外界的http请求
*/
public class MockServe {
public static void main(String[] args) throws IOException {
//WireMock.configureFor(); 这个方法有很多重载 可以知道ip和端口 因为是本地开发我们不指定ip
WireMock.configureFor(9999);//指定连接端口
WireMock.removeAllMappings(); //将之前做过的所有请求配置清掉
/**
ClassPathResource resource = new ClassPathResource("mock/respose/01.txt");
String content = FileUtils.readFileToString(resource.getFile());//将文件里的内容读成string 不推荐了
content = FileUtils.readFileToString(resource.getFile(), "utf-8"); //也不推荐
List<String> readLines = FileUtils.readLines(resource.getFile(), "utf-8");
content = StringUtils.join(readLines,"/r");
mock(url,fiel);
//接下来告诉服务器怎么处理请求
//伪造测试桩
WireMock.stubFor(
WireMock.get(WireMock.urlEqualTo("/order/1"))
.willReturn(WireMock.aResponse().withBody("{\"id\":1}").withStatus(200))
);
// 抽取上面代码为一个方法
**/
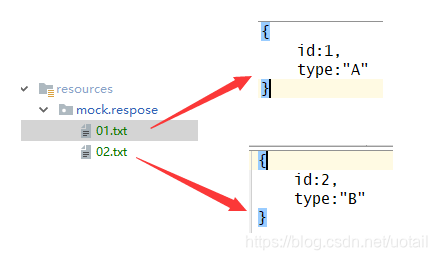
mock("/order/1","01");
mock("/order/2","02");
}
public static void mock(String url,String file) throws IOException {
ClassPathResource resource = new ClassPathResource("mock/respose/"+file+".txt");
List<String> readLines = FileUtils.readLines(resource.getFile(), "utf-8");
//String content = StringUtils.join(readLines.toArray());
String content = StringUtils.join(readLines.toArray(),"\n");
WireMock.stubFor(
WireMock.get(WireMock.urlEqualTo(url))
.willReturn(WireMock.aResponse().withBody(content).withStatus(200))
);
}
}
浏览器访问测试