直接应用原模型预测
导入模型
导入函数:

导入代码
import keras

# 读入完整的VGG16模型设定
model = keras.applications.vgg16.VGG16(include_top = True,
                                       weights = 'imagenet',
                                       input_tensor = None,
                                       input_shape = None,
                                       pooling = None,
                                       classes = 1000) # 所有参数均为默认值
model.summary()
model.layers[1].get_weights()
整理数据
将数据整理为模型所需格式
from keras.preprocessing import image
from keras.applications.imagenet_utils import preprocess_input
# 按照模型指定大小载入图片
img = image.load_img('test.jpg', target_size = (224, 224))
img
import numpy as np

x = image.img_to_array(img) # 转化为三维数组(224,224,3)
print(x[:5, :5, 1])
x = np.array([x]) # 转换为四维格式(1,224,224,3),也可使用np.expand_dims()
x = preprocess_input(x) # 预处理(减去均值)
print(x[0, :5, :5, 1])

进行预测
y_pred = model.predict(x)# 预测概率

print(len(y_pred[0]))
y_pred[0][:10]]:

from keras.applications.vgg16 import decode_predictions

# 输出五个最高概率(类名, 语义概念, 预测概率)
for item in decode_predictions(y_pred, top = 5)[0]:
    print("%s, %s, %2.2f%%" % (item[0], item[1], item[2] * 100))
利用原模型做数据处理
用原模型转换图像数据
import keras
# 读取不包括顶层的VGG16模型及权重,这里可以用input_shape参数指定输入矩阵尺寸
model = keras.applications.vgg16.VGG16(include_top = False)
model.summary()
from keras.preprocessing import image
#载入图片,此处图片如太小则需要指定大小
img = image.load_img('test.jpg')
img
import numpy as np
from keras.applications.imagenet_utils import preprocess_input

x = image.img_to_array(img) # 转化为三维数组(*,*,3)
x = np.array([x]) # 转换为四维格式(1,*,*,3),也可使用np.expand_dims()
x = preprocess_input(x) # 预处理(减去均值)
x_trans = model.predict(x)# 利用模型预测的方式得到转换后的x矩阵
x_trans.shape
x_trans[0,:,:,0]
将VGG16用于cifar10案例
整理数据格式
将原始数据转换为符合VGG16要求的格式
cifar10的源图片为32 32,使用VGG16处理完毕后会成为1 1大小,因此根据后续建模处理的需求,可能需要对输入图片的大小做事先转换。
from keras.datasets import cifar10
(X_train, y_train), (X_test, y_test) = cifar10.load_data()
X_train1 = X_train[:1000]; y_train1 = y_train[:1000]
X_test1 = X_test[:1000]; y_test1 = y_test[:1000]
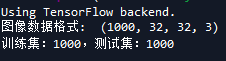
print('图像数据格式: ', X_train1.shape)
print("训练集:%2.0f,测试集:%2.0f" %(X_train1.shape[0], X_test1.shape[0]))
NewSize = 64
from PIL import Image #PIL pakage name is Pillow
from keras.preprocessing import image

def M_imgpreproc(inmtx):
    return image.img_to_array(Image.fromarray(inmtx).resize((NewSize,
                                                             NewSize)))

X_train1.shape#(1000, 32, 32, 3)选择1000条数据
import numpy as np
X_train2 = np.zeros((X_train1.shape[0], NewSize, NewSize, 3))
for i in range(X_train1.shape[0]):
    X_train2[i] = M_imgpreproc(X_train1[i])

X_train2.shape#(1000, 64, 64, 3)
X_test2 = np.zeros((X_test1.shape[0], NewSize, NewSize, 3))
for i in range(X_test1.shape[0]):
    X_test2[i] = M_imgpreproc(X_test1[i])
利用VGG16模型进行数据处理
import keras
# 读取不包括顶层的VGG16模型及权重,这里可以用input_shape参数指定输入矩阵尺寸
model = keras.applications.vgg16.VGG16(include_top = False)

import numpy as np
from keras.applications.imagenet_utils import preprocess_input

X = preprocess_input(X_train2) # 预处理(减去均值)

%time X_trans = model.predict(X)# 利用模型预测的方式得到转换后的x矩阵
X_trans.shape
# 显示部分转换后数据
X_trans[0, :, :,6]
# 将原始数据转换为[0, 1]区间
X_trans1 = X_trans.astype('float32') / 255
X_test1 = X_test1.astype('float32') / 255

# 类别向量转为多分类矩阵
y_train1 = keras.utils.to_categorical(y_train1, 10)
y_test1 = keras.utils.to_categorical(y_test1, 10)

from keras.models import Sequential
from keras.layers import Dense, Dropout, Activation, Flatten
from keras.layers import Conv2D, MaxPooling2D

# 建立基于keras的cnn模型
model2 = Sequential()

# 卷积==>最大池化
model2.add(Conv2D(32, X_trans1.shape[1:3], padding = 'same',
                 input_shape = X_trans1.shape[1:])) # 第一层需要指定数据格式
model2.add(Activation('relu'))
model2.add(MaxPooling2D(pool_size = (2, 2)))
model2.add(Dropout(0.25))

# 将数据展平
model2.add(Flatten())
model2.add(Dense(512))
model2.add(Activation('relu'))
model2.add(Dropout(0.5))
model2.add(Dense(10))
model2.add(Activation('softmax'))
model2.compile(loss = 'categorical_crossentropy',
              optimizer = 'adam', metrics = ['accuracy'])
model2.fit(X_trans1, y_train1, epochs = 100)
X_testtrans = model.predict(preprocess_input(X_test2))

model2.evaluate(X_testtrans.astype('float32') / 255, y_test1)
在原模型的基础上继续训练
Keras的函数式API
网络层以张量为参数,并且返回一个张量。
Layer = Dense(64, activation=‘relu’)(input)
基于网络层返回张量这一事实,网络层实例可被直接调用。
type(model.layers[0].output)
网络层可以被依次用来定义一个模型(Model),且此模型同Sequential模型一样,都可以被训练。
未完待续~