文章目录
集群准备
-
准备3台客户机(关闭防火墙、静态ip,主机映射、主机名称),主机名称分别hadoop1,hadoop2,hadoop3
-
安装jdk,配置环境变量(可以直接复制hadoop1虚拟机,省略配置)
-
配置ssh,免密登陆
-
配置时间同步
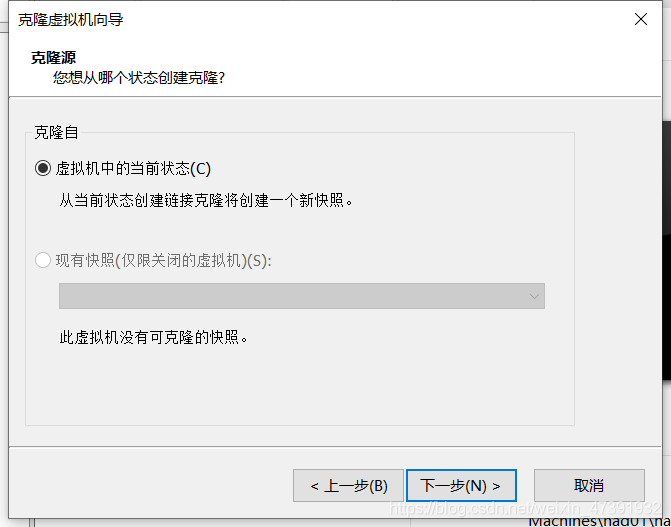
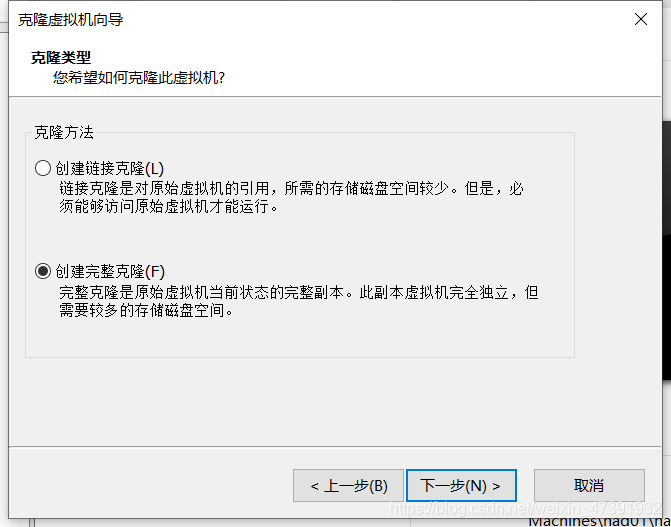
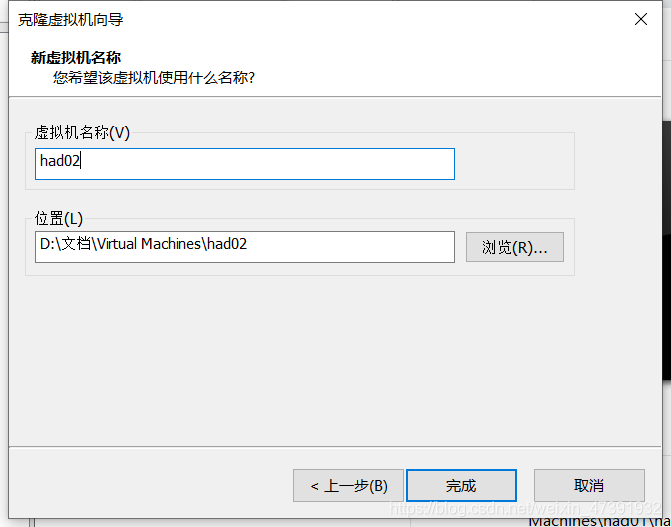
复制虚拟机
1.复制


更改虚拟机名和位置
打开复制后的虚拟机的编辑虚拟机设置

点击网络适配器,进入高级,将MAC地址重新生成(两个网络适配器都要进行)点击确认出来
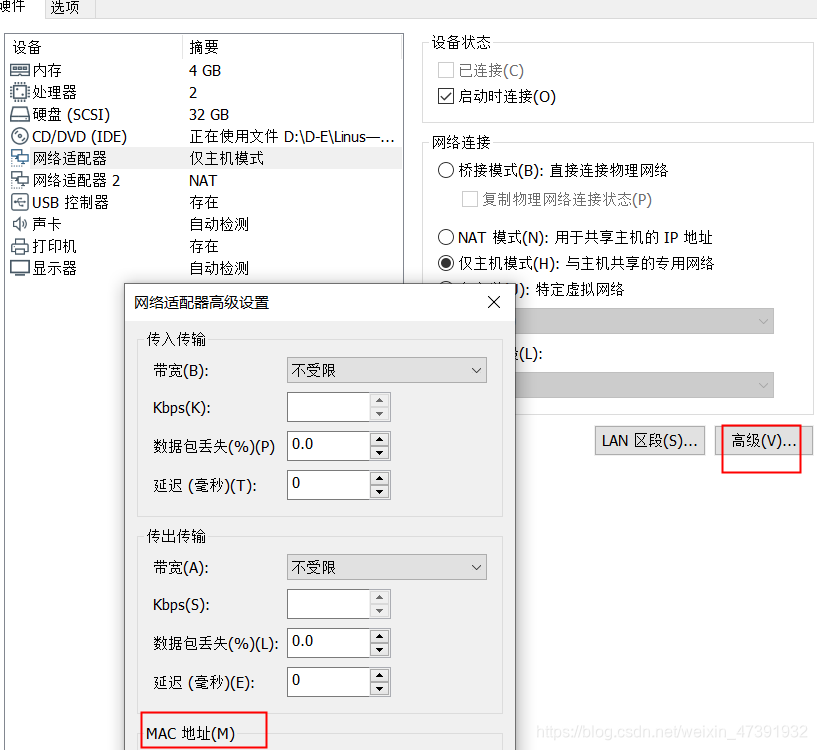
hadoop3一样
2.关闭防火墙、静态ip,主机映射、主机名称
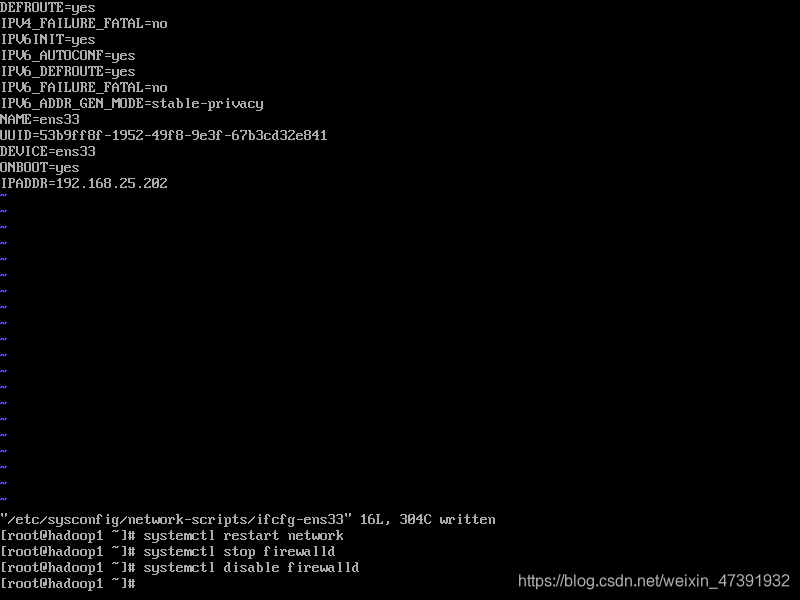
vi /etc/sysconfig/network-scripts/ifcfg-ens33

systemctl restart network
systemctl stop firewalld
systemctl disable firewalld
 用MobaXterm连接

1.输入:vi /etc/hostname 修改主机名
2.输入:vi /etc/hosts 修改主机列表
3. 输入:hostnamectl set-hostname 主机名
修改配置文件
1. ssh-keygen -t rsa -P “” 生成私钥
2.cat .ssh/id_rsa.pub >> .ssh/authorized_keys root目录下,复制私钥到公钥
3.
不用复制本机,要复制其他机器, 远程复制到另一台机器
ssh-copy-id -i .ssh/id_rsa.pub -p22 root@hadoop1
ssh-copy-id -i .ssh/id_rsa.pub -p22 root@hadoop2
ssh-copy-id -i .ssh/id_rsa.pub -p22 root@hadoop3
hadoop-env.sh
export JAVA_HOME=/opt/install/自己的路径
core-site.xml
	<!-- 指定HDFS中NameNode的地址 -->
	<property>
		<name>fs.defaultFS</name>
        <value>hdfs://hadoop1:9000</value>
	</property>

	<!-- 指定hadoop运行时产生文件的存储目录 -->
	<property>
		<name>hadoop.tmp.dir</name>
		<value>/opt/install/hadoop/data/tmp</value>
	</property>
hdfs-site.xml
	<property>
		<name>dfs.replication</name>
		<value>3</value>
	</property>

	<property>
        <name>dfs.namenode.secondary.http-address</name>
        <value>hadoop3:50090</value>
    </property>
yarn-env.sh
export JAVA_HOME=/opt/install/jdk
yarn-site.xml
	<!-- reducer获取数据的方式 -->
	<property>
		 <name>yarn.nodemanager.aux-services</name>
		 <value>mapreduce_shuffle</value>
	</property>

	<!-- 指定YARN的ResourceManager的地址 -->
	<property>
		<name>yarn.resourcemanager.hostname</name>
		<value>hadoop1</value>
	</property>
mapred-site.xml
	<!-- 指定mr运行在yarn上 -->
	<property>
		<name>mapreduce.framework.name</name>
		<value>yarn</value>
	</property>
slaves
hadoop1
hadoop2
hadoop3
拷贝到其他客机上
[root@hadoop1 hadoop]# scp core-site.xml @hadoop2:/opt/install/hadoop/etc/hadoop/          core-site.xml
core-site.xml                                  100% 1135   935.2KB/s   00:00
[root@hadoop1 hadoop]# scp core-site.xml @hadoop3:/opt/install/hadoop/etc/hadoop/          core-site.xml
core-site.xml                                  100% 1135   753.5KB/s   00:00
[root@hadoop1 hadoop]# scp hdfs-site.xml @hadoop3:/opt/install/hadoop/etc/hadoop/          hdfs-site.xml
hdfs-site.xml                                  100% 1029   107.1KB/s   00:00
[root@hadoop1 hadoop]# scp hdfs-site.xml @hadoop2:/opt/install/hadoop/etc/hadoop/          hdfs-site.xml
hdfs-site.xml                                  100% 1029    98.3KB/s   00:00
[root@hadoop1 hadoop]# scp yarn-env.sh @hadoop2:/opt/install/hadoop/etc/hadoop/ya          rn-env.sh
yarn-env.sh                                    100% 4611     2.7MB/s   00:00
[root@hadoop1 hadoop]# scp yarn-env.sh @hadoop3:/opt/install/hadoop/etc/hadoop/ya          rn-env.sh
yarn-env.sh                                    100% 4611   485.5KB/s   00:00
[root@hadoop1 hadoop]# scp yarn-site.xml @hadoop3:/opt/install/hadoop/etc/hadoop/          yarn-site.xml
yarn-site.xml                                  100% 1379   437.6KB/s   00:00
[root@hadoop1 hadoop]# scp yarn-site.xml @hadoop2:/opt/install/hadoop/etc/hadoop/          yarn-site.xml
yarn-site.xml                                  100% 1379     1.0MB/s   00:00
[root@hadoop1 hadoop]# scp slaves @hadoop2:/opt/install/hadoop/etc/hadoop/slaves
slaves                                         100%   24     2.3KB/s   00:00
[root@hadoop1 hadoop]# scp slaves @hadoop3:/opt/install/hadoop/etc/hadoop/slaves
slaves                                         100%   24     2.4KB/s   00:00
时间同步
安装ntp
rpm -qa|grep ntp
yum -y install ntp

vi /etc/ntp.conf
-----------------------
# 修改1(设置本地网络上的主机不受限制。)
#restrict 192.168.1.0 mask 255.255.255.0 nomodify notrap为
restrict 192.168.1.0 mask 255.255.255.0 nomodify notrap
# 修改2(设置为不采用公共的服务器)
server 0.centos.pool.ntp.org iburst
server 1.centos.pool.ntp.org iburst
server 2.centos.pool.ntp.org iburst
server 3.centos.pool.ntp.org iburst为
#server 0.centos.pool.ntp.org iburst
#server 1.centos.pool.ntp.org iburst
#server 2.centos.pool.ntp.org iburst
#server 3.centos.pool.ntp.org iburst
# 添加3(添加默认的一个内部时钟数据,使用它为局域网用户提供服务。)
server 127.127.1.0
fudge 127.127.1.0 stratum 10
修改/etc/sysconfig/ntpd
vim /etc/sysconfig/ntpd
-----------------------
# 增加内容如下(让硬件时间与系统时间一起同步)
SYNC_HWCLOCK=yes
重新启动ntpd
service ntpd status
service ntpd start
chkconfig ntpd on
配置其他机器
[root@hadoop1 system]# scp /etc/ntp.conf @hadoop2:/etc/ntp.conf
ntp.conf                                                 100% 2108     1.8MB/s   00:00
[root@hadoop1 system]# scp /etc/ntp.conf @hadoop3:/etc/ntp.conf
ntp.conf                                                 100% 2108     2.2MB/s   00:00
[root@hadoop1 system]# scp /etc/sysconfig/ntpd @hadoop2:/etc/sysconfig/ntpd
ntpd                                                     100%   62    68.1KB/s   00:00
[root@hadoop1 system]# scp /etc/sysconfig/ntpd @hadoop3:/etc/sysconfig/ntpd
ntpd                                                     100%   62    72.4KB/s   00:00