If there is a dedicated soft routing hardware device, OpenWrt can be directly installed in the device, so that the performance of the device will be fully utilized. For the convenience of learning, this experiment will demonstrate the installation of a VMware virtual machine on a Windows system computer and run the OpenWrt system in the virtual machine.
Table of contents
1. VMware virtual machine installation
Three, VMware virtual machine creation
4. Virtual machine configuration
3. Specify the bridge network card
5. Turn on the virtual machine
1. Change interface and device configuration
2. Physical machine configuration
7. Culture in OpenWrt Web Management Panel
1. Luci Chinese package installation
1. VMware virtual machine installation
Please find the information by yourself and install the VMware virtual machine on the computer.
2. OpenWrt image preparation
1. Download the OpenWrt image
Mirror acquisition: https://downloads.OpenWrt.org/releases/
Select a version, such as 21.02.1, the download address for the x86 platform is: https://downloads.OpenWrt.org/releases/21.02.1/targets/x86/64/
Select the image file generic-ext4-combined.img.gz to download.
2. Image format conversion
The VMware virtual machine cannot recognize the .img image file, so it needs to be converted to *.vmdk format.
Search and download the qemu-img tool for conversion. This tool can be found on various operating system platforms.
[How to use] In the Windows operating system, after switching to the directory where the qemu-img.exe file of the qemu-img tool is located in the command line, use the following command to convert:
qemu-img convert “D:\source.img” -O vmdk “D:\dest.vmdk”Among them, D:\source.img is the downloaded *.img image file name (including the full path), and D:\dest.vmdk is the file name of the converted file (including the full path).
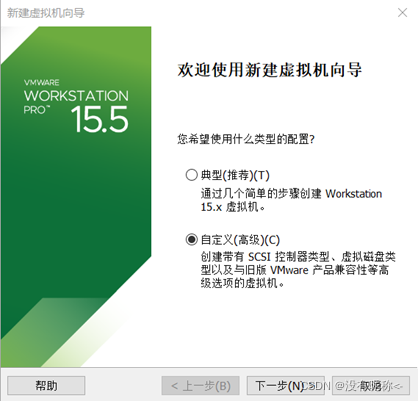
Three, VMware virtual machine creation
In VMware, create a new virtual machine.
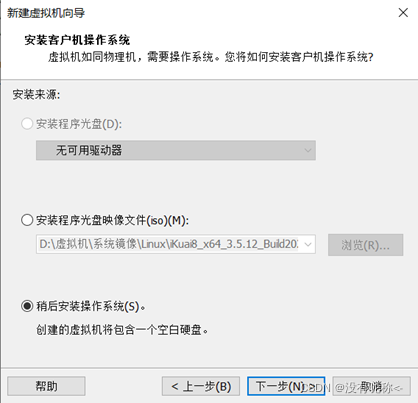
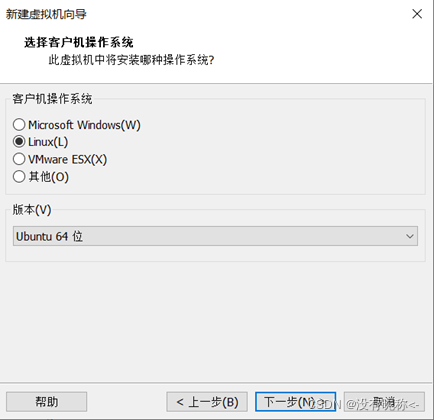
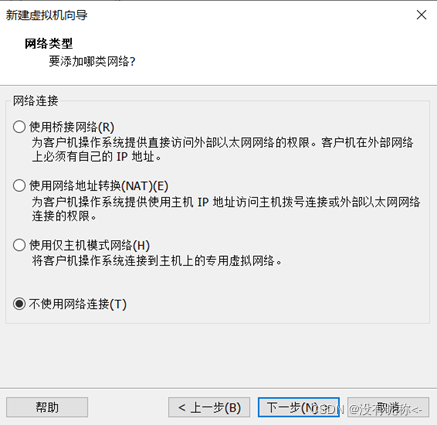
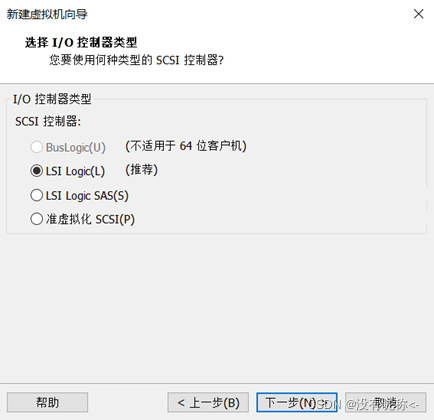
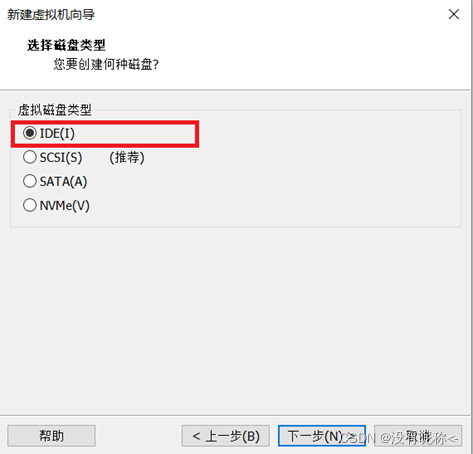
Steps not listed in the following pictures (Figure 1-Figure 8) can be kept as default or selected as required.
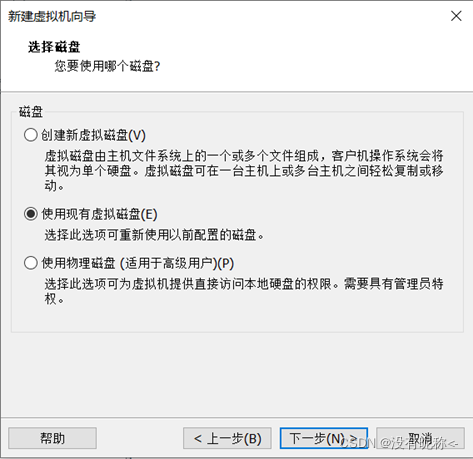
In Figure 8, select the *.vmdk file prepared in step 2.2 .

After everything is done, click the "Finish" button to complete the creation of the virtual machine.
4. Virtual machine configuration
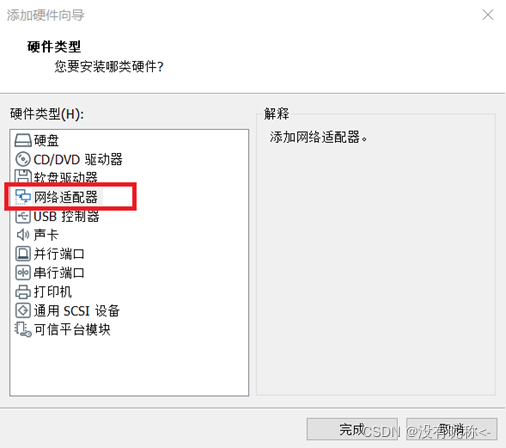
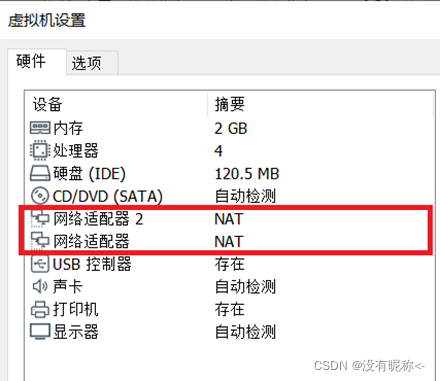
1. Add a network adapter
At the name of the created virtual machine, execute "Right-click -> Virtual Machine Settings" to enter the virtual machine settings page. Click "Add" at the bottom of the "Hardware" tab page to add "Network Adapter", as shown in Figure 9. Repeat the operation again to add another network adapter. At this point the virtual machine will have two network adapters, Figure 10.
【illustrate】
Each virtual machine network adapter can be compared to a network card of a physical physical machine, and the number and type of network adapters can be added according to the needs. The number of network adapters in 4.1 is determined according to the requirements of subsequent experiments.
2. Set up the network adapter
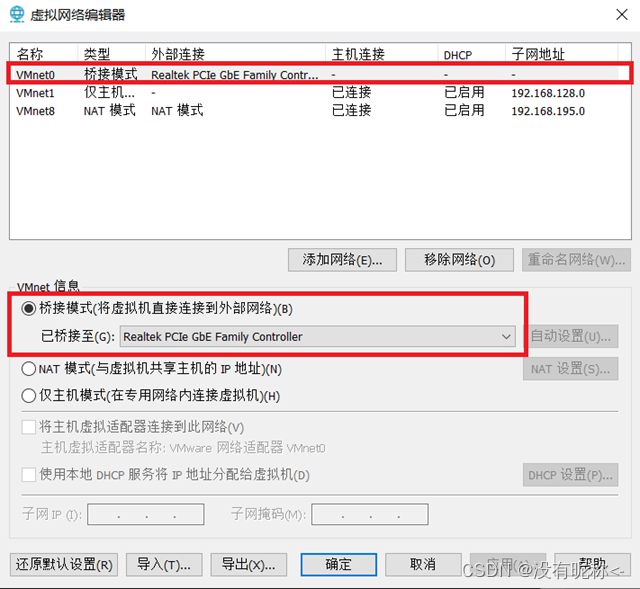
Select "Network Adapter", and in the "Network Connections" pane on the right, select "Bridged Mode", as shown in Figure 11.

Select "Network Adapter 2", in the "Network Connection" pane on the right, select "Custom", and find the VMnet with "Host-Only Mode", such as "VMnet1 (Host-Only Mode)" in Figure 12. If not, it can be created in the upper menu "Edit->Virtual Network Editor" of VMware.

When finished, click the "OK" button below to complete the virtual machine setup.
【illustrate】
If the physical machine has two Ethernet ports , one of them can be used as the WAN port of the router, and the other can be used as the LAN port. If the physical machine has a wireless network card , one of the network adapters can be bridged to the wired Ethernet card as a WAN port, and the other network adapter can be bridged to the wireless network card as a LAN port, and the wireless network card can be configured as an AP to send Wi-Fi signals. Therefore, the number and type of network adapters can be determined according to requirements. The type of network adapter in 4.2 is determined according to the subsequent experimental requirements.
The follow-up of this experiment will demonstrate the implementation method of single-arm routing. One-arm routing means that the router hardware device only has one Ethernet port, which needs to be used to transmit data of the wide area network (WAN) and local area network (LAN) at the same time. Therefore, the prerequisite is that the physical machine has only one network port. At this point, we need to bridge the "network adapter" in Figure 10 to the physical network card as the data entry and exit of the router. Use "network adapter 2" as a virtual network card, only establish communication with the physical machine, and use it as a channel for the physical machine to manage OpenWrt through the Web page.
3. Specify the bridge network card
In the upper menu of VMware, select "Edit->Virtual Network Editor", and in the "Virtual Network Editor" window, click the "Change Settings" button. Check the option where the type is "Bridge Mode" and select the bridge network card as a wired Ethernet card, not a Wi-Fi network card. Figure 13.
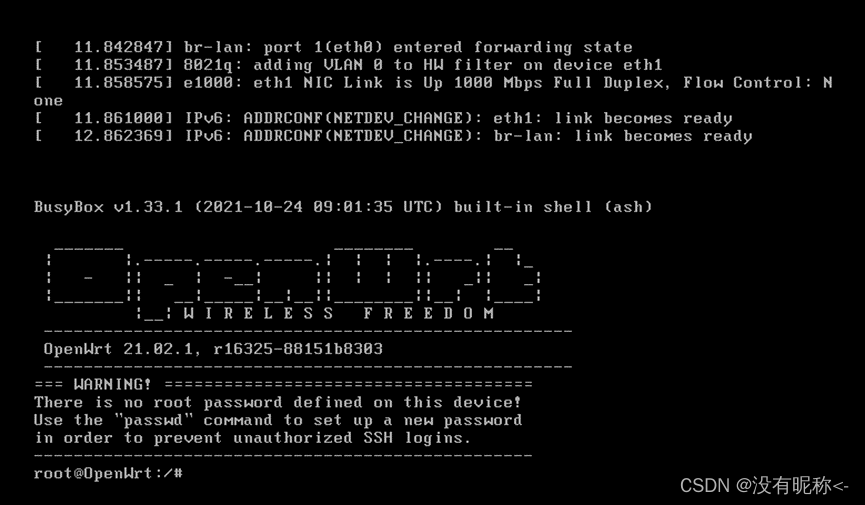
5. Turn on the virtual machine
After waiting for it to be turned on, press the Enter button to enter the command input state. As shown in Figure 14.
6. OpenWrt configuration
By default, OpenWrt uses eth0 (the network adapter in Figure 11) as the LAN port, and eth1 (the network adapter 2 in Figure 12) as the WAN port. According to the experimental plan in 4.2, we use eth0 as the multiplexing interface of WAN and LAN to bridge with the physical Ethernet card, and use eth1 as the channel for the physical machine to enter the web management page.
Therefore, in order to enter the OpenWrt web management interface from a physical machine, the following two steps are required: (1) We need to exchange the two, and we need to set the IP address and subnet mask of the network adapter 2 for web management. (2) It is necessary to set the IP address and subnet mask of the virtual network adapter created by network adapter 2 in the physical machine so that it is in the same LAN segment as OpenWrt's eth1 (network adapter 2).
1. Change interface and device configuration
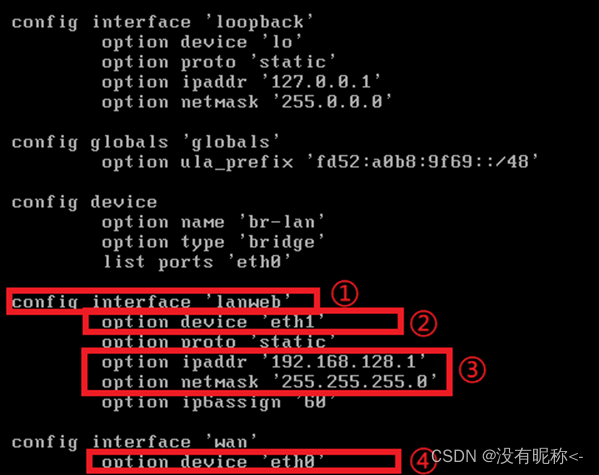
1) Enter the following command in OpenWrt to open the network file. Then press the "i" key on the keyboard to enter the editing state.
vim /etc/config/networkChange the code in the file, Figure 15.
【Description of change】
① Rename the lan interface to lanweb, as the management port lan port of the physical machine web management OpenWrt, and reserve a name for the subsequent real lan port.
② Change the LAN management interface to eth1 (corresponding to network adapter 2). It is located in the option device under config interface 'lanweb' (the red rectangle marked with ②).
③ Change the OpenWrt management address corresponding to "Network Adapter 2" to a non-conflicting network segment in the LAN, and select "192.168.128.0" for the network number here. Therefore, the configuration management ip address is 192.168.128.1, which is located in option ipaddr and option netmask under config interface 'lanweb' (at the red rectangle marked with ③).
④ Change the WAN interface to eth0 (network adapter). It is located under the option device whose interface name is config interface 'wan' (at the red rectangle marked with ④).
2) After editing, press the ESC key, then enter the following content, press Enter, save and exit editing.
:wq3) Enter the following command to restart the network service to make the configuration take effect.
/etc/init.d/network restart2. Physical machine configuration
Back to the physical machine, configure the IP address and subnet mask of the virtual network card created by the virtual machine so that it is in the same network segment as the virtual machine.
1) Right-click on the "Network" icon on the desktop, select "Properties", and enter "Network and Sharing Center". Or enter through "Control Panel->Network and Internet->Network and Sharing Center".
2) Click "Change Adapter Settings" on the left side of the page, and the "Network Connections" window will open.
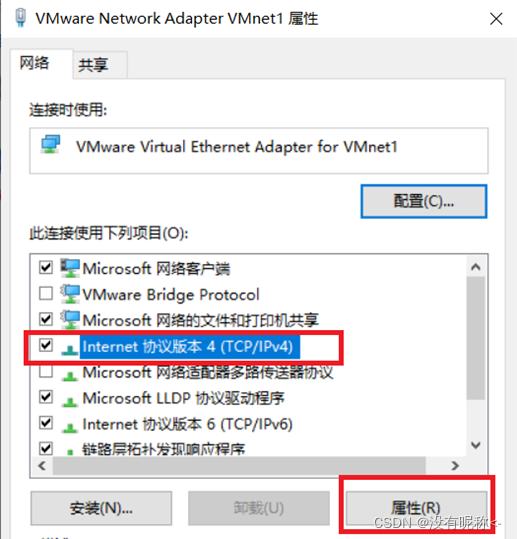
3) In the "Network Connections" window, find the virtual network card corresponding to the "Network Adapter 2" of the virtual machine. For example, in the VMware virtual machine settings, select "VMnet1 (host only mode)" for "Network Adapter 2" (Figure 12), then find the virtual network card named "VMware Network Adapter VMnet1" here (Figure 13).

4) Right-click on the icon, select "Properties", and configure its "Internet Protocol Version 4 (TCP/IPv4)" properties.
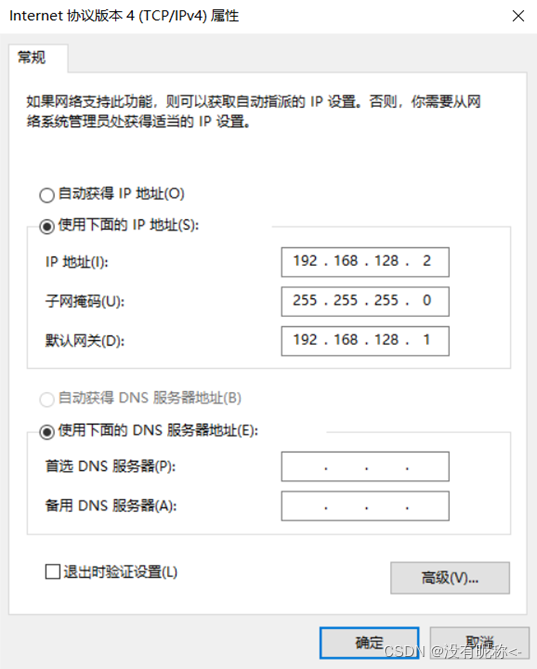
5) In the property panel, enter another address in the same network segment as the OpenWrt management address for "IP address", the subnet mask is consistent with the subnet mask of the OpenWrt management address, and enter the OpenWrt management address for the default gateway. Click the "OK" button to complete the configuration.
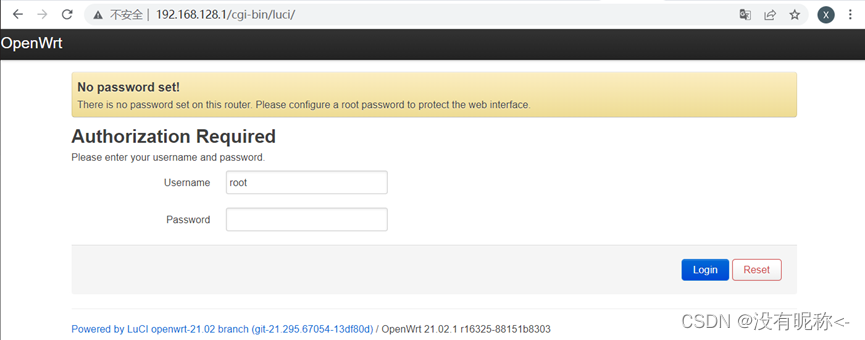
So far, all the basic configurations of OpenWrt are completed, and the web management panel can be accessed through the IP address of OpenWrt eth1 set in 6.1, as shown in Figure 16. The default account for the initial test is root, and the password is blank.
7. Culture in OpenWrt Web Management Panel
1. Luci Chinese package installation
[Tip] Before performing the following operations, you need to ensure that the network card connected to the virtual machine eth0 can access the Internet normally . There are the following two methods: (1) Connect the Ethernet port of the physical machine to a place that can access the Internet with a network cable. Cannot carry VLAN tags (such as the Tag or Trunk port of a switch). (2) Repeat the operation of 4.3, select "Virtual Network Editor" in the edit menu above VMware, temporarily change the bridge network card to a Wi-Fi network card, and connect to the Wi-Fi that can access the Internet. Remember to change the bridge back to the wired ethernet card when you're done.
Back in the virtual machine OpenWrt, enter the following command to complete the installation.
1) Update the opkg source
opkg update2) Install luci Chinese package
opkg install luci-i18n-base-zh-cnAt this point, the Chinese language package installation is complete. Refresh the web management interface to check whether the Chinese panel is displayed. If the panel is still in English, continue to perform the following steps.
2. Change language settings
1) Log in to the OpenWrt web management background.
2) Click "System" -> "Language and Style" in the top menu, and change "Language" to "Simplified Chinese".
Eight, OpenWrt shutdown
OpenWrt does not have shutdown commands such as shutdown and init 0 in CentOS. As a routing system, you can directly power off or force shutdown, or use the following commands to shutdown.
poweroff