参考链接:
ubuntu下配置Caffe:https://blog.csdn.net/a_z666666/article/details/72853346
https://www.cnblogs.com/go-better/p/7161006.html
注意防坑点:Python和OpenCV版本都是采用的2.版本。(一开始在github上下载的,Python是3.6.4(由于安装了anaconda)和OpenCV和4.0版本,Caffe还不支持4.0的OpenCV;后来OpenCV降到3.1.0版本,安装还是各种坑。索性把Python和OpenCV都降到2.版本(先卸载了anaconda),我采用的Python是Ubuntu16.04自带的2.7.12,OpenCV是2.4.11版本,一次即配置成功。)
下面开始介绍Caffe实现物体分类的具体流程:
前期准备参考上一篇博客链接:http://www.cnblogs.com/wmr95/p/9022415.html ,这里train和test的lmdb准备还是一样(这里test.txt没有标签,可以先默认所有标签都是1,然后生成lmdb,最后在acc层可以来预测test的lmdb来得到每个的预测结果,可以把预测结果写入到一个txt中)。
(这里采用的是SENet,顺便介绍下配置SENet的过程。)github链接:https://github.com/hujie-frank/SENet (Momenta大佬写的)
(采用其他网络如resnet也是一样的步骤,而且不需要添加新的层。直接配置prototxt即可。)
1. 首先配置好senet的prototxt(SENet-50_train.prototxt,SENet-50_deploy.prototxt,SENet-50_solver.prototxt)
大部分的配置都在example下:

a. SENet-50_solver.prototxt的配置:
net: "examples/signboard/senet/SENet-50_train.prototxt"
base_lr: 0.0001
lr_policy: "step"
gamma: 0.1
stepsize: 500
display: 20
max_iter: 2000
momentum: 0.9
weight_decay: 0.0005
snapshot: 100
snapshot_prefix: "examples/signboard/model/senet"
solver_mode: CPU
net:表示训练网络的路径,solver_mode:表示CPU模式。
b. SENet-50_train.prototxt的配置改了下输入和输出:
输入部分:
name: "SE-ResNet-50"
layer {
  name: "data"
  type: "Data"
  top: "data"
  top: "label"
  include {
        phase: TRAIN
  }
  data_param {
      source: "examples/signboard/train_lmdb"
      batch_size: 16
      backend: LMDB
  }
}
输出部分:
layer {
  name: "pool5/7x7_s1"
  type: "Pooling"
  bottom: "conv5_3"
  top: "pool5/7x7_s1"
  pooling_param {
    pool: AVE
    kernel_size: 3          #注意这里kersize改为3,这个可能是根据你输入图像的大小,我这里resize成224
    stride: 1
  }
}
layer {
  name: "fc"         #这里原来name为classifier,报错。问题链接:https://blog.csdn.net/raby_gyl/article/details/72357269
  type: "InnerProduct"
  bottom: "pool5/7x7_s1"
  top: "fc"          #这里同样将classifier改成fc,下面bottom也要记得修改
  inner_product_param {
    num_output: 100    #这里改成你自己的分类数目
  }
}
layer {
  name: "accuracy"
  type: "Accuracy"
  bottom: "fc"
  bottom: "label"
  top: "accuracy"
  include {
    phase: TEST
  }
}
layer {
  name: "loss"
  type: "SoftmaxWithLoss"
  bottom: "fc"
  bottom: "label"
  top: "loss"
}#
c. SENet-50_deploy.prototxt配置:
输入部分:
name: "SE-ResNet-50"
layer {
  name: "data"
  type: "Data"
  top: "data"
  top: "label"
  include {
        phase: TEST
  }
  data_param {
      source: "examples/signboard/senet/test_lmdb"
      batch_size: 20
      backend: LMDB
  }
}
输出部分:(这里解释同train.prototxt)
layer {
  name: "pool5/7x7_s1"
  type: "Pooling"
  bottom: "conv5_3"
  top: "pool5/7x7_s1"
  pooling_param {
    pool: AVE
    kernel_size: 3
    stride: 1
  }
}
layer {
  name: "fc"
  type: "InnerProduct"
  bottom: "pool5/7x7_s1"
  top: "fc"
  inner_product_param {
    num_output: 100
  }
}
layer {
  name: "prob"
  type: "Softmax"
  bottom: "fc"
  top: "prob"
}
layer {
  name: "accuracy"
  type: "Accuracy"
  bottom: "fc"
  bottom: "label"
  top: "accuracy"
  include {
    phase: TEST
  }
}
2. 接下来在Caffe中添加并编译Axpy层,在Caffe中主要添加三个文件:caffe/include/caffe/layers文件夹下:axpy_layer.hpp;caffe/src/caffe/layers文件夹下:axpy_layer.cpp和axpy_layer.cu文件。这三个文件在git上都有:https://github.com/hujie-frank/SENet
添加完之后,在caffe/src/caffe/proto中的caffe.proto中message LayerParameter中为新层添加参数:

这里注意AxpyParameter的ID不能和现有的重复,我这里取148。另外添加一个新的message,如果有参数就写进去,没有就空着。
3. 接下来在Caffe的路径下进行make all就行了。执行命令:make all -j20
4. 接下来,编写执行脚本进行训练:
在caffe的路径下新建一个train_senet.sh,输入以下内容:
#!usr/bin/env sh

./build/tools/caffe train --solver=./examples/signboard/senet/SENet-50_solver.prototxt \
--weights=./examples/signboard/senet/SE-ResNet-50.caffemodel
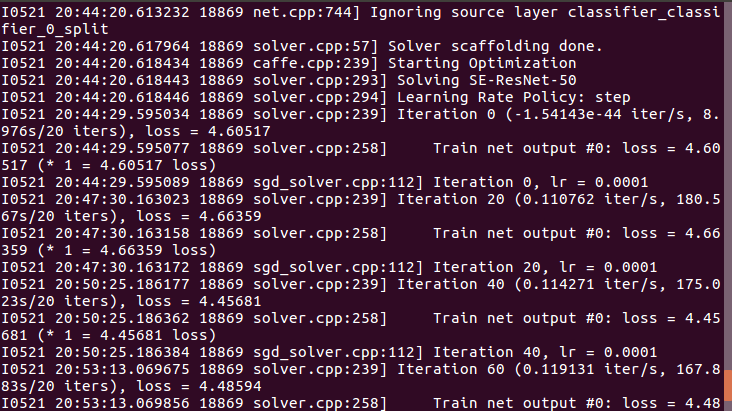
执行train_senet.sh文件,便OK啦。
最后训练模型完成之后,要进行test数据的预测,我这里想把每个图片预测的分类写到一个txt中。
1. 这里只修改caffe/src/caffe/layers/的accuracy_layer.cpp中的Forward_cpu部分:(因为我们在deploy.prototxt中写了acc层,预测结果可以从这里获取)
template <typename Dtype>
void AccuracyLayer<Dtype>::Forward_cpu(const vector<Blob<Dtype>*>& bottom,
    const vector<Blob<Dtype>*>& top) {
  ofstream fout;
  fout.open("/home/wanglaotou/Caffe/caffe-master/out.txt", std::ios::out | std::ios::app);
  Dtype accuracy = 0;//准确率
  const Dtype* bottom_data = bottom[0]->cpu_data();//100*10
  const Dtype* bottom_label = bottom[1]->cpu_data();//100*1,100个图像对应的类
  const int dim = bottom[0]->count() / outer_num_;//dim=10
  const int num_labels = bottom[0]->shape(label_axis_);
  //全连接后的blob数据都是2维的,label_axis_=1,所以shape就应该是N*D中的D(这块可以看我上一篇文章)
  //所以bottom[0]->shape(1)=10,也就是类别数
  vector<Dtype> maxval(top_k_+1);
  vector<int> max_id(top_k_+1);
  if (top.size() > 1) {
    caffe_set(nums_buffer_.count(), Dtype(0), nums_buffer_.mutable_cpu_data());
    caffe_set(top[1]->count(), Dtype(0), top[1]->mutable_cpu_data());
  }
  int count = 0;
  //LOG(INFO) << "outer_num_: "<<outer_num_<<"\n";
  //LOG(INFO) << "inner_num_: "<<inner_num_<<"\n";
  for (int i = 0; i < outer_num_; ++i) {//outer_num_=100
    for (int j = 0; j < inner_num_; ++j) {//inner_num_为每个图像所对应的类别数,所以=1
      const int label_value =
          static_cast<int>(bottom_label[i * inner_num_ + j]);
          //将bottom_label的值赋给label_value,[i * inner_num_ + j]其实就是一个图像一个类嘛
      if (has_ignore_label_ && label_value == ignore_label_) {
        continue;
      }
      if (top.size() > 1) ++nums_buffer_.mutable_cpu_data()[label_value];
      DCHECK_GE(label_value, 0);
      DCHECK_LT(label_value, num_labels);//label_value(0~9)肯定小于 num_labels(10)
      // Top-k accuracy  // top_k为取前k个最高评分(的预测标签)
      std::vector<std::pair<Dtype, int> > bottom_data_vector;
      //这个主要就是用于对接下来两步把测试评分与类别ID挂勾,并对评分排序(这里我其实是比较迷糊的,测试评分指的是bottom_data,难道说经过全连接后,得到的向量就是测试评分? 迷糊中~~~)
      for (int k = 0; k < num_labels; ++k) {
        bottom_data_vector.push_back(std::make_pair(
            bottom_data[i * dim + k * inner_num_ + j], k));
            //把测试评分与类别ID挂勾,
      }
      std::partial_sort(
          bottom_data_vector.begin(), bottom_data_vector.begin() + top_k_,
          bottom_data_vector.end(), std::greater<std::pair<Dtype, int> >());//排序
      // check if true label is in top k predictions
      //LOG(INFO) << "top_k_: "<<top_k_<<"\n";
      for (int k = 0; k < top_k_; k++) {

        //if (bottom_data_vector[k].second == label_value) {
        //  ++accuracy;
          // .second指的是类别,如果跟label_value相等,那就说明准确
        //  if (top.size() > 1) ++top[1]->mutable_cpu_data()[label_value];
        //  break;
        //}
    LOG(INFO) << "label_value: "<<bottom_data_vector[k].second + 1<<"\n";
    fout <<"label_value: "<<bottom_data_vector[k].second + 1<<"\n";
          fout.flush();
      }

      ++count;
    }

  }

  LOG(INFO) << "Accuracy: " << accuracy;
  top[0]->mutable_cpu_data()[0] = accuracy / count;
  if (top.size() > 1) {
    for (int i = 0; i < top[1]->count(); ++i) {
      top[1]->mutable_cpu_data()[i] =
          nums_buffer_.cpu_data()[i] == 0 ? 0
          : top[1]->cpu_data()[i] / nums_buffer_.cpu_data()[i];
    }
  }
  fout.close();
  // Accuracy layer should not be used as a loss function.
}
2. 编写test.sh脚本文件进行测试:
#!usr/bin/env sh

./build/tools/caffe test --iterations=50 --model=./examples/signboard/senet/SENet-50_deploy.prototxt \
--weights=./examples/signboard/model/senet_iter_2000.caffemodel
3. 执行脚本完后会得到一个out.txt文件,内容如下:

到此,大功告成~