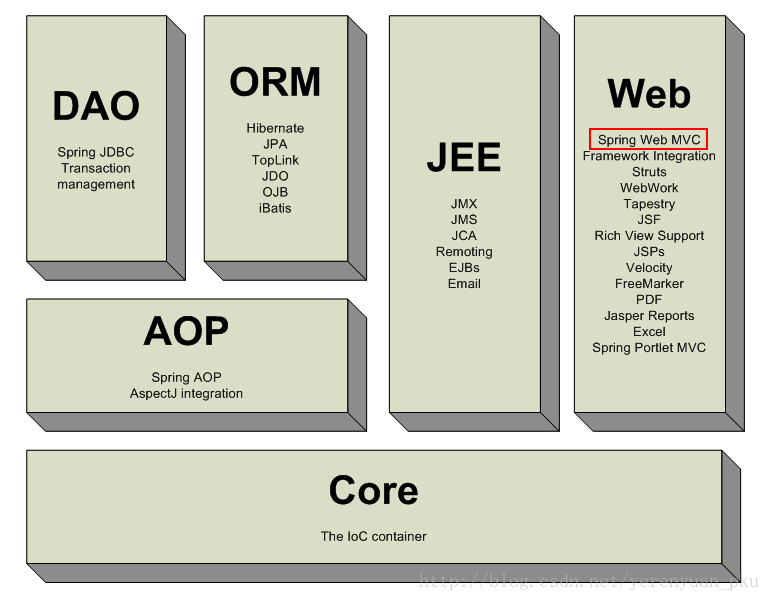
1.springmvc介绍
SpringMVC和Struts2都属于表现层的框架,它是Spring框架的一部分
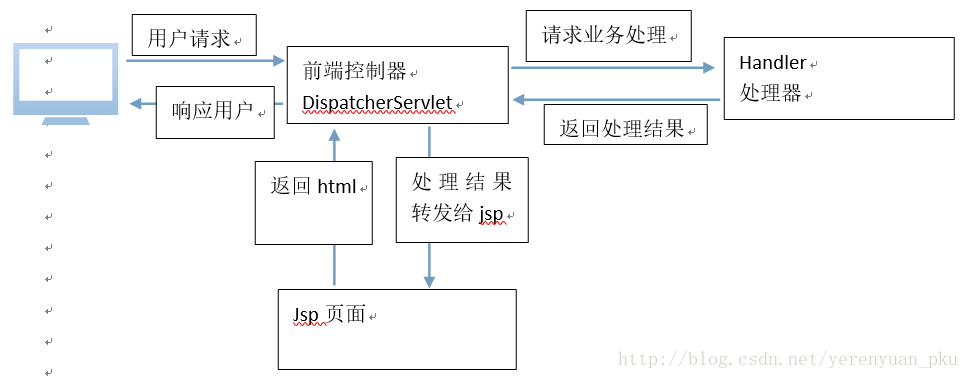
2.SpringMVC处理流程
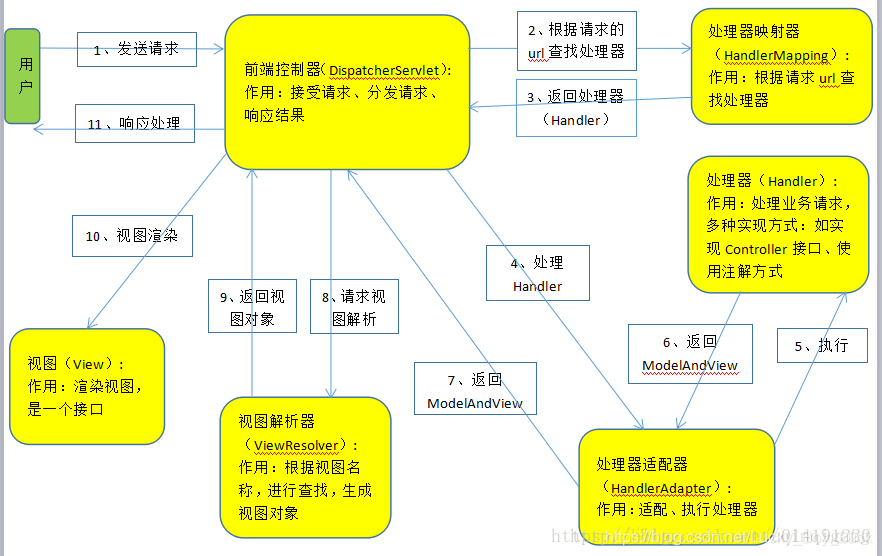
1.用户发起请求到前端控制器(DispatcherServlet),该控制器会过滤出哪些请求可以访问Servlet、哪些不能访问。就是url-pattern的作用,并且会加载springmvc.xml配置文件。
2.前端控制器会找到处理器映射器(HandlerMapping),通过HandlerMapping完成url到controller映射的组件,简单来说,就是将在springmvc.xml中配置的或者注解的url与对应的处理类找到并进行存储,用map<url,handler>这样的方式来存储。
3.HandlerMapping有了映射关系,并且找到url对应的处理器,HandlerMapping就会将其处理器(Handler)返回,在返回前,会加上很多拦截器。
4.DispatcherServlet拿到Handler后,找到HandlerAdapter(处理器适配器),通过它来访问处理器,并执行处理器。
5.执行处理器
6.处理器会返回一个ModelAndView对象给HandlerAdapter
7.通过HandlerAdapter将ModelAndView对象返回给前端控制器(DispatcherServlet)
8.前端控制器请求视图解析器(ViewResolver)去进行视图解析,根据逻辑视图名解析成真正的视图(jsp),其实就是将ModelAndView对象中存放视图的名称进行查找,找到对应的页面形成视图对象
9.返回视图对象到前端控制器。
10.视图渲染,就是将ModelAndView对象中的数据放到request域中,用来让页面加载数据的。
11.通过第8步,通过名称找到了对应的页面,通过第10步,request域中有了所需要的数据,那么就能够进行视图渲染了。最后将其返回即可。
3.springmvc入门程序
此教程使用的是SpringMVC4.0.0这个版本
如何在spring官网下载jar包
开发步骤:
- 加入jar包
- 在web.xml中配置DispatcherServlet
- 加入springmvc的配置文件
- 编写处理请求的处理器,并标识为处理器
- 编写视图
项目结构图:

【第一步】、创建一个javaweb工程,如springmvc-01-helloworld
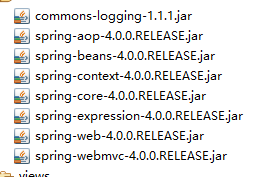
【第二步】、导入springmvc能够独立运行的jar包。如下:
【第三步】、配置前端控制器。在web.xml中添加DispatcherServlet的配置
<?xml version="1.0" encoding="UTF-8"?>
<web-app xmlns:xsi="http://www.w3.org/2001/XMLSchema-instance"
	xmlns="http://xmlns.jcp.org/xml/ns/javaee"
	xsi:schemaLocation="http://xmlns.jcp.org/xml/ns/javaee
					http://xmlns.jcp.org/xml/ns/javaee/web-app_4_0.xsd"
	id="WebApp_ID" version="4.0">
	<display-name>springmvc-01-helloworld</display-name>

	<!-- 配置前端控制器 -->
	<servlet>
		<servlet-name>springDispatcherServlet</servlet-name>
		<servlet-class>org.springframework.web.servlet.DispatcherServlet</servlet-class>
		<!-- 配置springmvc.xml配置文件的位置和名称。如果不指定,默认为:/WEB-INF/${servlet-name}-servlet.xml -->
		<init-param>
			<param-name>contextConfigLocation</param-name>
			<param-value>classpath:springmvc.xml</param-value>
		</init-param>
		<!-- springDispatcherServlet在当前应用被加载时创建,而不是在第一次请求时创建 -->
		<load-on-startup>1</load-on-startup>
	</servlet>

	<servlet-mapping>
		<servlet-name>springDispatcherServlet</servlet-name>
		<!-- 拦截所有请求 -->
		<url-pattern>/</url-pattern>
	</servlet-mapping>
</web-app>
上面springmvc.xml文件还未创建,接下来再来创建它
【第四步】、创建并配置springmvc.xml
<?xml version="1.0" encoding="UTF-8"?>
<beans xmlns="http://www.springframework.org/schema/beans"
    xmlns:xsi="http://www.w3.org/2001/XMLSchema-instance"
    xmlns:context="http://www.springframework.org/schema/context"
    xmlns:mvc="http://www.springframework.org/schema/mvc"
    xsi:schemaLocation="
        http://www.springframework.org/schema/beans
        http://www.springframework.org/schema/beans/spring-beans-4.0.xsd
        http://www.springframework.org/schema/context
        http://www.springframework.org/schema/context/spring-context-4.0.xsd
        http://www.springframework.org/schema/mvc
        http://www.springframework.org/schema/mvc/spring-mvc-4.0.xsd">

</beans>
【第五步】、编写处理请求的处理器
在src目录下创建一个com.zzc.controller.HelloWorldController.java类
public class HelloWorldController {

	public String hello() {
		System.out.println("hello world");
		return "hello";
	}
}
【第六步】、标识为控制器
- springmvc.xml配置文件中添加配置:
<?xml version="1.0" encoding="UTF-8"?>
<beans xmlns="http://www.springframework.org/schema/beans"
    xmlns:xsi="http://www.w3.org/2001/XMLSchema-instance"
    xmlns:context="http://www.springframework.org/schema/context"
    xmlns:mvc="http://www.springframework.org/schema/mvc"
    xsi:schemaLocation="
        http://www.springframework.org/schema/beans
        http://www.springframework.org/schema/beans/spring-beans-4.0.xsd
        http://www.springframework.org/schema/context
        http://www.springframework.org/schema/context/spring-context-4.0.xsd
        http://www.springframework.org/schema/mvc
        http://www.springframework.org/schema/mvc/spring-mvc-4.0.xsd">

	<!-- 配置自动扫描包 -->
	<context:component-scan base-package="com.zzc.controller"></context:component-scan>

</beans>
- 在HelloWorldController类上添加@Controller注解
@Controller
public class HelloWorldController {

	public String hello() {
		System.out.println("hello world");
		return "hello";
	}
}
【第七步】、编写视图
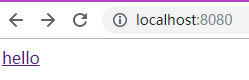
在WebContent目录下面创建一个index.jsp,其内容为:
<%@ page language="java" contentType="text/html; charset=UTF-8"
    pageEncoding="UTF-8"%>
<!DOCTYPE html>
<html>
<head>
<meta charset="UTF-8">
<title>springmvc入门</title>
</head>
<body>
	<a href="hello">hello</a>
</body>
</html>
此请求 hello 会被web.xml配置的springDispatcherServlet(拦截所有请求)进行处理。然后 会交给哪个处理器的哪个方法呢?通过@RequestMapping注解来映射请求
【第八步】:映射请求
在HelloWorldController类中的hello方法上添加注解@RequestMapping,应修改HelloWorldController类,其内容为:
@Controller
public class HelloWorldController {

	@RequestMapping("/hello")
	public String hello() {
		System.out.println("hello world");
		return "success";
	}
}
@RequestMapping注解指定请求的url
方法的返回值(return “success”)会通过视图解析器解析为实际的物理视图
【第九步】、配置视图解析器
在springmvc.xml配置视图解析器:
<?xml version="1.0" encoding="UTF-8"?>
<beans xmlns="http://www.springframework.org/schema/beans"
    xmlns:xsi="http://www.w3.org/2001/XMLSchema-instance"
    xmlns:context="http://www.springframework.org/schema/context"
    xmlns:mvc="http://www.springframework.org/schema/mvc"
    xsi:schemaLocation="
        http://www.springframework.org/schema/beans
        http://www.springframework.org/schema/beans/spring-beans-4.0.xsd
        http://www.springframework.org/schema/context
        http://www.springframework.org/schema/context/spring-context-4.0.xsd
        http://www.springframework.org/schema/mvc
        http://www.springframework.org/schema/mvc/spring-mvc-4.0.xsd">

	<!-- 配置自动扫描包 -->
	<context:component-scan base-package="com.zzc.controller"></context:component-scan>

	<!-- 配置视图解析器:如何把 handler 方法返回值解析为实际的物理视图 -->
	<bean class="org.springframework.web.servlet.view.InternalResourceViewResolver">
		<property name="prefix" value="/WEB-INF/views/" ></property>
		<property name="suffix" value=".jsp"></property>
	</bean>

</beans>
对于InternalResourceViewResolver视图解析器而言,会做出如下解析:
通过 prefix + returnVal + suffix 这样的方式得到实际的物理视图,然后做转发操作。
则上述的实际的物理视图为:/WEB-INF/views/success.jsp
【第十步】、创建实际的物理视图
在WebContent/WEB-INF目录下新建一个views文件夹,再新建一个success.jsp文件
success.jsp内容为:
<%@ page language="java" contentType="text/html; charset=UTF-8"
pageEncoding="UTF-8"%>
<!DOCTYPE html>
<html>
<head>
<meta charset="UTF-8">
<title>Insert title here</title>
</head>
<body>
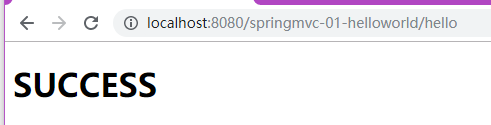
<h1>SUCCESS</h1>
</body>
</html>
【第十一步】、测试
浏览器访问:http://localhost:8080/springmvc-01-helloworld/
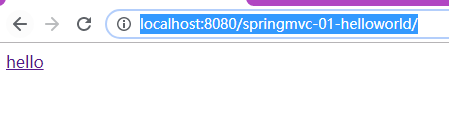
点击 hello 链接: