1.导入jar包
spring-aop
spring-beans
spring-context
spring-core
spring-expression
spring-web
spring-webmvc
除此之外,还需要
commons-logging
以上是被要求最少jar包
2.配置web.xml
配置servlet,SpringMVC是通过servlet作为入口与struts2以filter作为入口不同!
    <servlet>
        <servlet-name>springmvc</servlet-name>
        <servlet-class>org.springframework.web.servlet.DispatcherServlet</servlet-class>
        <init-param>
            <param-name>contextConfigLocation</param-name>
            <param-value>classpath:springmvc.xml</param-value>
        </init-param>
        <load-on-startup>1</load-on-startup>
    </servlet>
    <servlet-mapping>
        <servlet-name>springmvc</servlet-name>
        <url-pattern>/</url-pattern>
    </servlet-mapping>
contextConfigLocation指定了SpringMVC的配置文件路径以及名称。
特别注意:<url-pattern>/</url-pattern>这个过滤的URL是【/】而不是【/*】。填错了会报错,可以尝试!
3.创建一个Helloworld类
package com.zhangpn.hello;

import org.springframework.stereotype.Controller;
import org.springframework.web.bind.annotation.RequestMapping;

@Controller
public class Helloworld {

    @RequestMapping("/hello")
    public String Helloworld() {
        System.out.println("开始处理页面请求...");
        return "success";
    }
}
4.创建springmvc.xml配置文件并且配置注解扫描与视图解析需要配置视图解析器
<?xml version="1.0" encoding="UTF-8"?>
<beans xmlns="http://www.springframework.org/schema/beans"
    xmlns:xsi="http://www.w3.org/2001/XMLSchema-instance"
    xmlns:aop="http://www.springframework.org/schema/aop"
    xmlns:context="http://www.springframework.org/schema/context"
    xmlns:tx="http://www.springframework.org/schema/tx"
    xsi:schemaLocation="http://www.springframework.org/schema/beans http://www.springframework.org/schema/beans/spring-beans-4.3.xsd
        http://www.springframework.org/schema/aop http://www.springframework.org/schema/aop/spring-aop-4.3.xsd
        http://www.springframework.org/schema/context http://www.springframework.org/schema/context/spring-context-4.3.xsd
        http://www.springframework.org/schema/tx http://www.springframework.org/schema/tx/spring-tx-4.3.xsd">


        <context:component-scan base-package="com.zhangpn.hello"></context:component-scan>

        <bean class="org.springframework.web.servlet.view.InternalResourceViewResolver">
            <property name="prefix" value="/WEB-INF/jsp/"></property>
            <property name="suffix" value=".jsp"></property>
        </bean>
</beans>
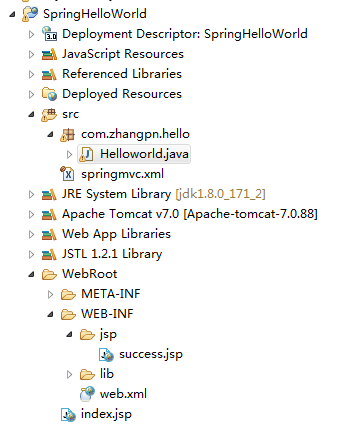
5.最后再配置success.jsp视图文件,最终目录结构如下
扫描二维码关注公众号,回复:
1664947 查看本文章

最后运行部署在Tomcat下
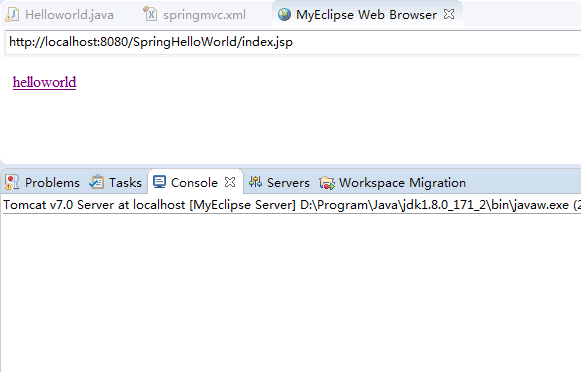
点击超级链接后【<a href="hello">helloworld</a><br>】
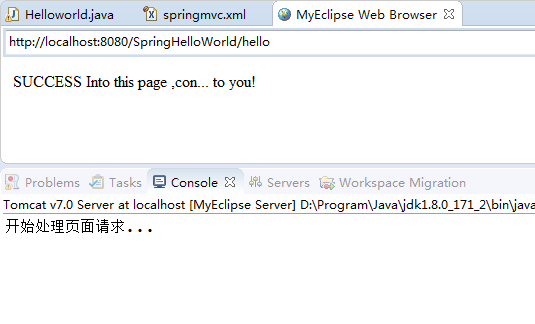
请求被响应,至此,springMVC已经搭建完成。
需要补充的是:
配置文件在web.xml中可以不直接指定,使用默认文件名和路径:
默认文件名:【servlet-name】-servlet.xml
默认路径:/WEB-INF/<servlet-name>-servlet.xml
以上就是springMVC搭建的入门全部内容!