Day 4
影评情感分类任务
数据清洗
- 导入所需的包
import os
import re
import numpy as np
import pandas as pd
from bs4 import BeautifulSoup
from sklearn.feature_extraction.text import CountVectorizer
from sklearn.ensemble import RandomForestClassifier
from sklearn.metrics import confusion_matrix
from sklearn.linear_model import LogisticRegression
import nltk
from nltk.corpus import stopwords
- pandas读取训练数据
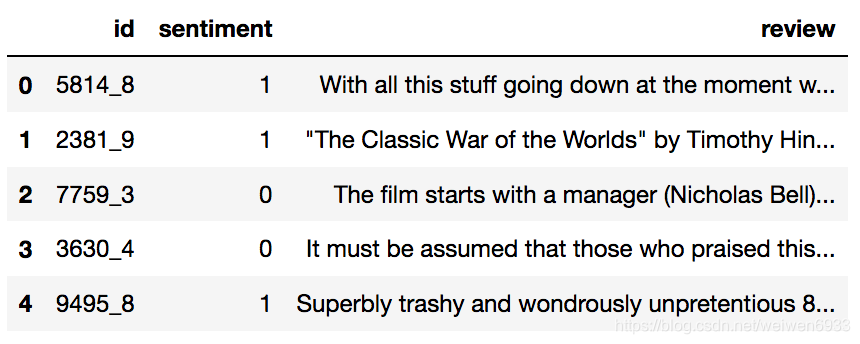
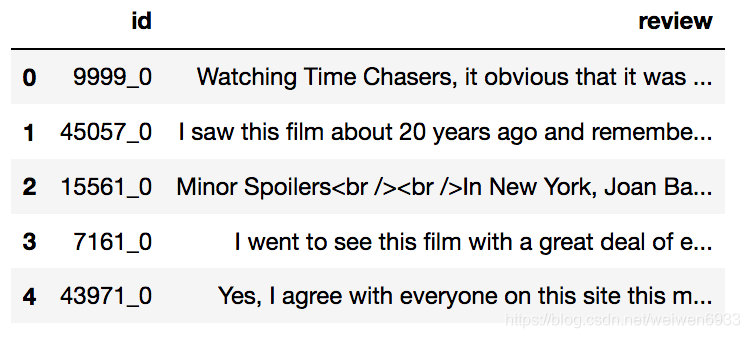
df = pd.read_csv('data/labeledTrainData.tsv',sep='\t', escapechar='\\')
print('Number of reviews:{}'.format(len(df)))
df.head()
# Number of reviews:25000
1代表喜欢的倾向,0代表不喜欢的倾向
-
数据预处理
1、删除文本中的html标签
df['review'][11]

example = BeautifulSoup(df['review'][11],'html.parser').get_text()
example

2、删除标点符号
example_letter = re.sub(r'[^a-zA-Z]',' ', example)
example_letter
#正则表达式,非字母替换为空格

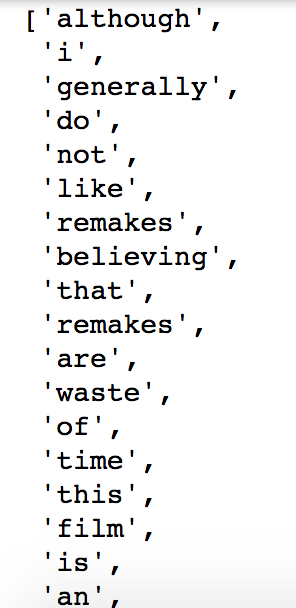
3、切分成词
#全部统一为小写,要不会认为同一字母的大写小写不是一个东西
words = example_letter.lower().split()
words
'''
strip() 方法用于移除字符串头尾指定的字符(默认为空格或换行符)或字符序列。
rstrip() 删除 string 字符串末尾的指定字符(默认为空格).
'''
'''
fromkeys(iterable, value=None, /)
method of builtins.type instance
Returns a new dict with keys from iterable and values equal to value.
'''
4、去掉停用词
stop_words ={}.fromkeys([line.rstrip() for line in open('stopwords.txt')])
words_nostop = [w for w in words if w not in stop_words]
words_nostop
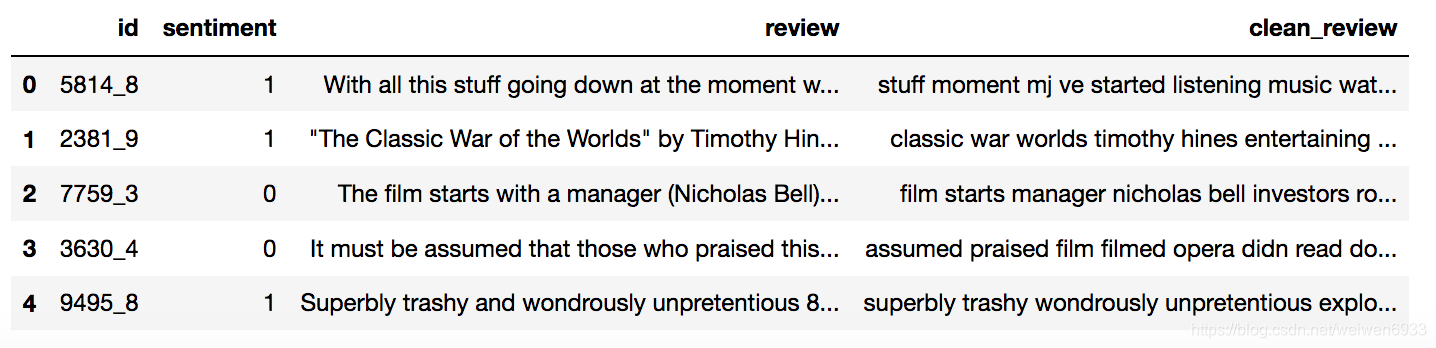
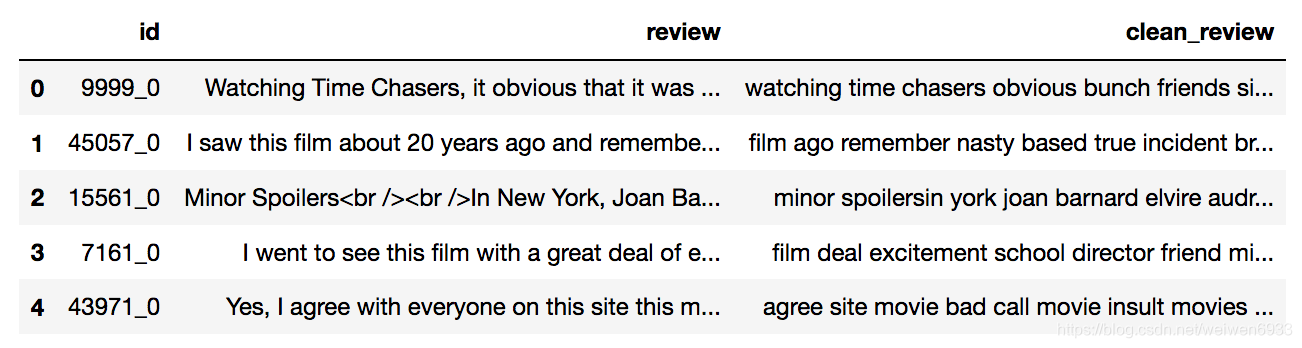
5、建立清洗函数,重组为句子
en_stop = set(stop_words)
def clean_text(text):
    text = BeautifulSoup(text,'html.parser').get_text()
    text = re.sub(r'[^a-zA-Z]',' ', text)
    words = text.lower().split()
    words = [w for w in words if w not in en_stop]
    return ' '.join(words)
df['clean_review'] = df.review.apply(clean_text)
df.head()
抽取bag of words(词袋)特征,建立分类模型
- 词袋模型:只考虑词频,计算评论中各个词出现的词频。
- 用sklearn的CountVectorizer:文本计数器
vectorizer  = CountVectorizer(max_features=5000) #只取前5000出现次数最多的词
train_data_features = vectorizer.fit_transform(df.clean_review).toarray()
train_data_features.shape
# (25000, 5000)
from sklearn.model_selection import train_test_split
X_train,X_test,Y_train,Y_test = train_test_split(train_data_features,df.sentiment,test_size=0.2,random_state=0)
- 混淆矩阵画图函数模板
import matplotlib.pyplot as plt
import itertools
def plot_confusion_matrix(cm,classes,title = 'Confusion matrix',cmap=plt.cm.Blues):
    plt.imshow(cm,interpolation='nearest',cmap=cmap)
    plt.title(title)
    plt.colorbar()
    tick_marks = np.arange(len(classes))
    plt.xticks(tick_marks,classes,rotation=0)
    plt.yticks(tick_marks,classes)

    thresh = cm.max()/2
    for i,j in itertools.product(range(cm.shape[0]),range(cm.shape[1])):
        plt.text(j,i,cm[i,j],horizontalalignment = 'center',color = 'white' if cm[i,j]>thresh else 'black')
    plt.tight_layout()
    plt.ylabel('True Label')
    plt.xlabel('Predicted Label')
- 训练分类器
LR_model = LogisticRegression()
LR_model = LR_model.fit(X_train,Y_train)
y_pred = LR_model.predict(X_test)
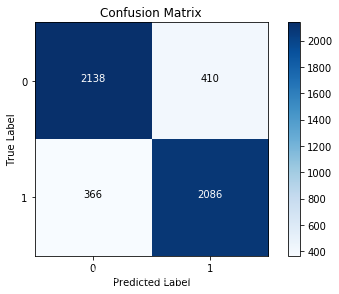
cnf_matrix = confusion_matrix(Y_test,y_pred)
#打印召回率和准确率
print('Recall metric in the testing dataset:',cnf_matrix[1,1]/(cnf_matrix[1,0]+cnf_matrix[1,1]))
print('Accuraucy metric in the testing dataset:', (cnf_matrix[1,1]+cnf_matrix[0,0]) /(cnf_matrix[0,0] + cnf_matrix[1,1]
+cnf_matrix[1,0]+cnf_matrix[0,1]))
class_names = [0,1]
plt.figure()
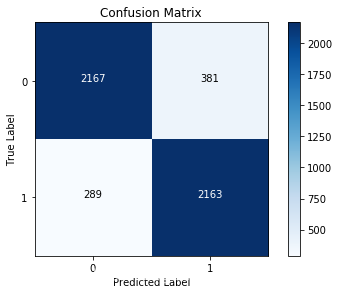
plot_confusion_matrix(cnf_matrix,classes=class_names,title='Confusion Matrix')
plt.show()
Recall metric in the testing dataset: 0.8507340946166395
Accuraucy metric in the testing dataset: 0.8448
接下来我们不使用词频的思路,而是利用word2vec对每个词进行向量的转换,训练新的模型,看看效果如何~
用word2vec模型处理未标注数据
df = pd.read_csv('data/unlabeledTrainData.tsv',sep='\t', escapechar='\\')
print('Number of reviews:{}'.format(len(df)))
df.head()
# Number of reviews:50000
- 数据清洗
df['clean_review'] = df.review.apply(clean_text)
df.head()
review_part = df['clean_review']
review_part.shape
#(50000,)
- 英文分词器
import warnings
warnings.filterwarnings('ignore')
tokenizer = nltk.data.load('tokenizers/punkt/english.pickle')
- 对句子进行分词处理
def split_sentences(review):
    raw_sentences = tokenizer.tokenize(review.strip())
    sentences = [clean_text(s) for s in raw_sentences if s]
    return sentences
sentences = sum(review_part.apply(split_sentences),[])
print('{} reviews --> {} sentences'.format(len(review_part),len(sentences)))
# 50000 reviews --> 50000 sentences
sentences[0]
'''
'watching time chasers obvious bunch friends sitting day film school hey pool money bad movie bad movie dull story bad script lame acting poor cinematography bottom barrel stock music corners cut prevented film release life'
''''
- 分割成一个个单词的list格式
# word2vec的输入是单词而不是句子,所以还要分割
sentence_list = []
for line in sentences:
    sentence_list.append(nltk.word_tokenize(line))
sentence_list[0]

- 设定词向量训练的参数
#设定词向量训练的参数
num_features = 300
min_word_count = 40
num_workers = 4
context = 10
model_name = '{}features_{}minwords_{}context.model'.format(num_features,min_word_count,context)
参数介绍:
sentences:可以是一个list
sg:设置训练算法,默认0,代表CBOW算法,1代表skip-gram算法
size:特征向量的维度,默认100,size越大需要的训练数据越多,一般在几十到几百之间
window:表示当前词与预测词在一个句子中的最大距离是多少
alpha:学习速率
seed:用于随机数发生器,与初始化词向量有关
min_count:词频小于min_count次数的单词被丢弃,默认5
max_vocab_size:设置词向量构建期间的RAM限制。如果所有独立单词个数超过这个,则就消除掉其中最不频繁的一个。每一千万个单词需要大约1GB的RAM。设置成None则没有限制。
workers:参数控制训练的并行数
hs:如果为1则会采用多层softmax,哈弗曼树。如果设置为0(default),则negative sampling负采样会被使用。
negative:如果大于零,则会采用负采样,用于设置多少个noise words
iter:迭代次数,默认5
from gensim.models.word2vec import Word2Vec
model = Word2Vec(sentence_list,workers=num_workers,size=num_features,min_count=min_word_count,window=context)
model.init_sims(replace=True)#省内存,效率高,官方推荐
model.save(model_name)#将模型保存
- 简单测试
print(model.doesnt_match(['man','woman','child','kitchen']))
#kitchen
model.most_similar('gay') #context = 10
'''
[('lesbians', 0.7876343727111816),
 ('homosexual', 0.7546083331108093),
 ('gays', 0.7183076739311218),
 ('lesbian', 0.7162018418312073),
 ('queer', 0.7038205862045288),
 ('heterosexual', 0.6712609529495239),
 ('openly', 0.6598548889160156),
 ('homosexuality', 0.637216329574585),
 ('bisexual', 0.635231077671051),
 ('males', 0.618820309638977)]
 '''
- 模型建立
df = pd.read_csv('data/labeledTrainData.tsv',sep='\t',escapechar='\\')
#停用词调用
from nltk.corpus import stopwords
eng_stopwords = set(stopwords.words('english'))
#数据清洗
def clean_text(text,remove_stopwords=False):
    text = BeautifulSoup(text, 'html.parser').get_text()
    text = re.sub(r'[^a-zA-Z]', ' ', text)
    words = text.lower().split()
    if remove_stopwords:
        words = [w for w in words if w not in eng_stopwords]
    return words
#将清洗后的review转化为向量
def to_review_vector(review):
    global word_vec
    review = clean_text(review,remove_stopwords=True)
    #初始化词向量,300维
    word_vec = np.zeros((1,300))
    for word in review:
        if word in model:
        	#将词的向量累加
            word_vec+=np.array([model[word]])
    #求均值
    return pd.Series(word_vec.mean(axis=0))
train_data_features = df.review.apply(to_review_vector)
train_data_features.head()

- 用此模型计算召回率和准确率
from sklearn.model_selection import train_test_split
X_train,X_test,Y_train,Y_test = train_test_split(train_data_features,df.sentiment,test_size=0.2,random_state=0)

LR_model = LogisticRegression()
LR_model = LR_model.fit(X_train,Y_train)
y_pred = LR_model.predict(X_test)
cnf_matrix = confusion_matrix(Y_test,y_pred)

print('Recall metric in the testing dataset:',cnf_matrix[1,1]/(cnf_matrix[1,0]+cnf_matrix[1,1]))
print('Accuraucy metric in the testing dataset:', (cnf_matrix[1,1]+cnf_matrix[0,0]) /(cnf_matrix[0,0] + cnf_matrix[1,1]
                                                                                    +cnf_matrix[1,0]+cnf_matrix[0,1]))

class_names = [0,1]
plt.figure()
plot_confusion_matrix(cnf_matrix,classes=class_names,title='Confusion Matrix')
plt.show()
Recall metric in the testing dataset: 0.882137030995106
Accuraucy metric in the testing dataset: 0.866
- 本文用了Logistic分类,当然也可以用随机森林等其他机器学习算法进行预测。
