1 安装
老版vue-cli(不建议使用,可以跳到新版安装部分)
安装vue-cli
npm install -g vue-cli初始化一个Vue.js项目
vue init webpack vue-demovue-demo是项目(及项目文件夹)的名字,可以不写,之后vue-cli会询问。
之后需要设置一系列安装选项
? Project name vue-demo // 项目名称
? Project description A Vue.js project // 项目描述
? Author Ammo // 作者
? Vue build standalone
? Install vue-router? Yes // 使用路由
? Use ESLint to lint your code? No // 使用代码规范检查
? Set up unit tests No // 添加单元测试
? Setup e2e tests with Nightwatch? No // 添加端到端的黑盒测试
? Should we run `npm install` for you after the project has been created? (recommended) npm // 使用何种模块管理工具
大家可以自行配置。
新版@vue/cli
前面安装vue-cli的时候会出现这样一句话:
npm WARN deprecated [email protected]: This package has been deprecated in favour of @vue/cli意思就是不建议使用vue-cli(1.x, 2.x),建议使用新版的@vue/cli。如果之前全局安装了旧版vue-cli但是现在想使用新版,需要全局卸载模块:
// 通过npm卸载
npm uninstall -g vue-cli
// 通过yarn卸载
yarn global remove vue-cli
全局安装@vue-cli
// npm安装
npm install -g @vue/cli
// yarn安装
yarn global add @vue/cli
输入
vue --version可以确认是否已安装。
2 创建Vue.js项目
新建一个文件夹,打开cmd,在cmd中打新建的文件夹,输入
vue create vue-demo之后是一系列参数选项:
Vue CLI v4.1.2
? Please pick a preset: (Use arrow keys)
> default (babel, eslint) // 使用默认的配置
  Manually select features  // 自定义配置
Vue CLI v4.1.2
? Please pick a preset: Manually select features
? Check the features needed for your project: (Press <space> to select, <a> to toggle all, <i> to invert selection) // 选择你想要的插件,空格选择,a全选,i反选,回车确认
>(*) Babel
( ) TypeScript
( ) Progressive Web App (PWA) Support
( ) Router
( ) Vuex
( ) CSS Pre-processors
(*) Linter / Formatter
( ) Unit Testing
( ) E2E Testing Vue CLI v4.1.2
? Please pick a preset: Manually select features
? Check the features needed for your project: Babel, TS, Router, Vuex, CSS Pre-processors, Linter
? Use class-style component syntax? Yes // 启用css预编译器的实时编译功能
? Use Babel alongside TypeScript (required for modern mode, auto-detected polyfills, transpiling JSX)? Yes // 同时使用Babel和TypeScript
? Use history mode for router? (Requires proper server setup for index fallback in production) Yes // 前端路由启用history模式
? Pick a CSS pre-processor (PostCSS, Autoprefixer and CSS Modules are supported by default): Sass/SCSS (with node-sass) // 选择css预编译器
? Pick a linter / formatter config: Basic // 语法检测器预设规则
? Pick additional lint features: (Press <space> to select, <a> to toggle all, <i> to invert selection)Lint on save // 语法检测的额外设置
? Where do you prefer placing config for Babel, ESLint, etc.? In package.json // Babel和ESLint的设置保存位置
? Save this as a preset for future projects? (y/N) n // 是否保存设置用于今后的安装 或者:本地安装的@vue-cli?
本人一如既往的有洁癖,脚手架不愿全局安装,因此执行了'npm install -s @vue-cli'
这样要安装的话,就要执行
node node_modules/@vue/cli/bin/vue create vue-demo效果与'vue create vue-demo'是一样的。
3 安装Vuex
实际上@vue-cli已经帮我们安装配置好了Vuex,我们可以学习一下官方的引入方式。
Vuex的引入方式就是在全局Vue对象中注册一个Vuex.store对象实例。
Vuex.store注册在/src/store/index.ts中
import Vue from 'vue'
import Vuex from 'vuex'

Vue.use(Vuex)

export default new Vuex.Store({
  state: {
    // 保存的数据
  },
  mutations: {
    // 同步修改数据的方法
  },
  actions: {
    // 异步操作
  },
  modules: {
    // store对象的子store对象
  }
})
此外Vuex.store也可以有getters属性,读者可以自行添加。
然后在/src/main.ts中引入
import Vue from 'vue'
import App from './App.vue'
import router from './router'
import store from './store'

Vue.config.productionTip = false

new Vue({
  router,
  store, // 引入store
  render: h => h(App)
}).$mount('#app')
在全局组件中引入Vuex.store之后,所有的子组件的this中都会多一个$store对象,里面存储的就是全局Vuex.store的内容。
在子组件中,我们可以通过this.$store.state.variableName来获取对应的数据
通过this.$store.getters.getterName来获取经过处理的数据
通过this.$store.commit('mutationName', ...params)来调用mutation中的方法,进而修改数据
通过this.$store.dispatch('actionName', ...params)来调用actions中的方法,其实际效果类似于mutation,但是actions中的方法本质上是提交了一个mutation方法,且可以包含异步操作。且actions回调函数中的第一个参数为context,该实例与store拥有相同的属性和方法。
4 安装webpack
在安装选项中我们可以看见,Vuex已经可以安装到Vue.js项目中了。那么webpack是否也已经安装呢?
查看package.json,可以看到,vuex、babel、eslint、router、typescript都已经安装,但是却没有webpack,那么这个项目又如何打包呢?
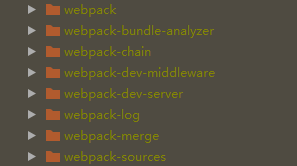
再看node_modules文件夹

实际上webpack已经作为vue模块的一部分安装了。因为打包是由@vue-cli-service控制的,所以由@vue-cli-service引入了webpack模块。具体的打包流程详见https://blog.csdn.net/Z_ammo/article/details/103930091
通过npm run build 就可以进行打包。
