•上一节我们讲解了spring IOC工厂模式创建对象以及自动装载机制。这一节我们讲解实际开发中我们用到的,spring IOC基于注解的开发。
•前边三节我们讲解的是spring IOC基本实现原理以及基本使用,但在项目运用中,我们大多时候用的是更为简便的基于注解开发,这样使得我们觉得前边讲的内容在项目中用到的比较少,其实不然,只是它们没有注解那么容易让我们察觉到而已。在我们开发中,spring IOC有两种来发模式,一种是基于xml配置方式,一种是基于注解的方式。
•我们先来讲第一种,基于xml配置方式:
(1)创建StudentController类
//StudentController
public class StudentController {
    private StudentService studentService;

    public Student getStudentById(int id){
        return studentService.getStudentById(id);
    }

    public void setStudentService(StudentService studentService) {
        this.studentService = studentService;
    }
}
(2)创建StudentService接口以及实现类StudentImpl
//StudentService接口
public interface StudentService {
    public Student getStudentById(int id);
}
//StudentServiceImpl
public class StudentServiceImpl implements StudentService {

    private  StudentDao studentDao;

    public Student getStudentById(int id){
        return studentDao.getStudentById(id);
    }

    public void setStudentDao(StudentDao studentDao) {
        this.studentDao = studentDao;
    }
}
创建StudentDao接口以及实现类StudentDaoImpl
//StudentDao接口
public interface StudentDao {
    public Student getStudentById(int id);
}
//StudentDaoImpl
public class StudentDaoImpl implements StudentDao {

    private static Map<Integer,Student> students;

    static{
        students=new HashMap<Integer, Student>();
        students.put(1,new Student(1,"jacob",18));//这里注意在Student实体类中添加有参构造函数。
        students.put(2,new Student(2,"jacobFly",19));
        students.put(3,new Student(3,"FlyJacob",20));


    }
   public Student getStudentById(int id){
        return students.get(id);
    }
}
(4)创建Student实体类
//Student.class
public class Student {
    private int id;
    private String name;
    private int age;

    public Student(int id,String name,int age){
        super();
        this.id=id;
        this.name=name;
        this.age=age;
    }
(5)在spring.xml配置studentController,studentService,studentDao,并完成依赖注入。
    <!--spring.xml-->>
    <bean id="studentController" class="controller.StudentController">
        <property name="studentService" ref="studentService"></property>
    </bean>
    <bean id="studentService" class="service.serviceImpl.StudentServiceImpl">
        <property name="studentDao" ref="studentDao"></property>
    </bean>
    <bean id="studentDao" class="dao.daoImpl.StudentDaoImpl">

    </bean>
(6)在测试类中获取studentController对象,调用方法获取student对象。
public class ApplicationContext {
    public static void main(String[] args){
        AbstractApplicationContext applicationContext=new ClassPathXmlApplicationContext("spring.xml");
        StudentController studentController=(StudentController)applicationContext.getBean("studentController");
        Student student=studentController.getStudentById(1);
        System.out.println(student);
    }
}
运行结果:
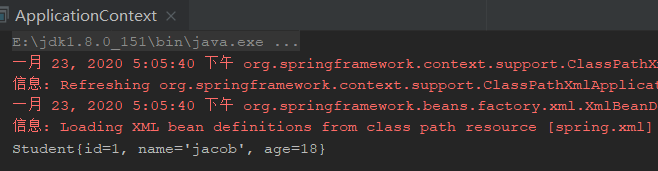
•我们可以看到,运行结果正是我们在student的Map集合中存储的id为1的属性。
基于注解配置方式:
•我们参照上边的代码来进行修改,一起感受一下注解开发的精妙之处!
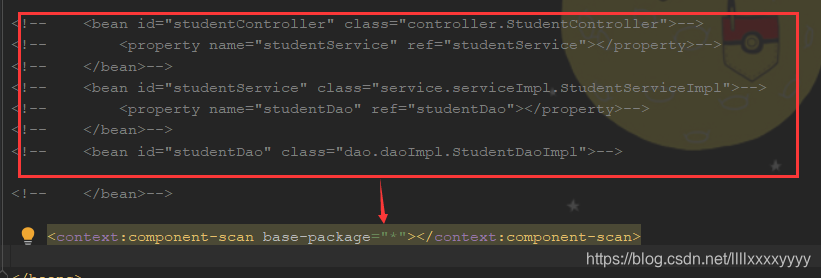
•首先,删除了spring.xml中各种对象bean,修改为注解模式,其中base-package="xxx.*"表示将xxx包下所有类都扫描到IOC容器中,一步可将所有参与项目的类完成扫描注入。
•接下来,我们分别看一下StudentController、StudentServiceImpl、StudentDaoImpl的代码片段。
//StudentController
@Controller
public class StudentController {
    @Autowired
    private StudentService studentService;

    public Student getStudentById(int id){
        return studentService.getStudentById(id);
    }
}
//StudentServiceImpl
@Service
public class StudentServiceImpl implements StudentService {

    @Autowired
    private  StudentDao studentDao;

    public Student getStudentById(int id){
        return studentDao.getStudentById(id);
    }

    public void setStudentDao(StudentDao studentDao) {
        this.studentDao = studentDao;
    }
}
//StudentDaoImpl
@Repository
public class StudentDaoImpl implements StudentDao {

    private static Map<Integer,Student> students;

    static{
        students=new HashMap<Integer, Student>();
        students.put(1,new Student(1,"jacob",18));//这里注意在Student实体类中添加有参构造函数。
        students.put(2,new Student(2,"jacobFly",19));
        students.put(3,new Student(3,"FlyJacob",20));


    }
   public Student getStudentById(int id){
        return students.get(id);
    }
}
•我们发现,它们都多了一个@XXX。
•StudentController多了一个@Controller注解,表示该类作为一个控制器;StudentService属性处添加@Autowired注解,表示IOC容器自动完成装载,默认是byType的方式。
•StudentServiceImpl多了一个@Service注解,表示该类是业务层;StudentDao属性处添加@Autowired注解,表示IOC容器自动完成装载,默认是byType的方式。
•StudentDaoImpl多了一个@Repository注解,表示该类是数据接口层。
•通过结果我们可以得出结论,使用注解的方式可以大大简化代码的编写,因此在实际开发中,推荐使用基于注解的方式来架构。我们分别给Controller、Service、Dao添加了@Controller、@Service、@Repository注解。
•补充:IOC中可以给类添加的注解有4种:
•@Controller
•@Service
•@Repository
•@Component
•@Component注解无特殊用处,一般用于需要将某个类放入IOC容器,又不属于controller,service,repository任意一个。
•刚刚我们说到,类中属性的自动装载默认是通过byType的方式实现的。自动装载除了byType的方式,还可以使用byName;使用byName的方式,需要结合@Qualifier注解一起使用。
//StudentController
@Controller
public class StudentController {
    @Autowired
    @Qualifier("testStudentService")
    private StudentService studentService;

    public Student getStudentById(int id){
        return studentService.getStudentById(id);
    }

//    public void setStudentService(StudentService studentService) {
//        this.studentService = studentService;
//    }
}
//StudentServiceImpl
@Service("testStudentService")
public class StudentServiceImpl implements StudentService {

    @Autowired
    private  StudentDao studentDao;

    public Student getStudentById(int id){
        return studentDao.getStudentById(id);
    }

    public void setStudentDao(StudentDao studentDao) {
        this.studentDao = studentDao;
    }
}
•通过上边两个片段,我们看到Controller中添加了@Qualifier注解,注解的括号中是我们为这个类设置的别名,相当于bean中的id,StudentServiceImpl中的@Service注解我们也添加了一个别名,这个名字是对应于@Qualifier注解别名的。这两个值必须一致,才能完成自动装载。
总结:
•这一节我们总结了spring IOC基于注解开发,它们常常应用于我们的项目开发之中,通常在项目开发中,我们有两种方式来配置IOC容器,一种是基于xml配置的方式,一种是基于注解的方式。基于注解的方式比较方便快捷,减少了很多的代码量,因此在开发中,我们通常选择基于注解开发。基于注解的开发也有两种方式,一种是默认方式–byType,它不需要我们做任何处理,只需要添加相应的注解即可;另一种是byName,它需要指定注解后边的别名,可以理解它就是bean的ref,还需要添加@Qualifier注解,这个注解的别名可以理解为它就是bean的id。这两个值必须一致,才能完成自动装载。
•以上便是我对这一部分的理解,如果有错误或者你有其他疑惑都可以留言给出,我都会一一进行回复,希望对你有所帮助,如果写的不好也请您多多包涵。欢迎在下方补充留言哟。
•对SSM框架感兴趣的童鞋,可以移步这里,在这里你可以快速的搭建好一个SSM框架。
•如果你在写项目的时候,遇到一些不寻常的问题,也可以关注我的博客园,上边会发布一些我在写项目中遇到的各种问题以及解决方式。
