前言
在微服务中众多服务的配置必然会出现相同的配置,如果配置发生变化需要修改,一个个去修改然后重启项目的方案是绝对不可取的。而 SpringCloud Config 就是一个可以帮助你实现统一配置选择之一。
如果你不懂 SpringCloud Config 环境搭建,那么该篇博客将会帮助到你,文中通过具体操作带你了解 SpringCloud Config 环境搭建的入门操作。
阅读本文需要你熟悉 SpringBoot 项目的基本使用即可,还有一点需要注意的是在操作过程中尽量和我本地环境一致,因为环境不一致可能会带来一些问题。我本地环境如下:
- SpringBoot Version: 2.1.0.RELEASE
- SpringCloud Version: Greenwich.RELEASE
- Apache Maven Version: 3.6.0
- Java Version: 1.8.0_144
- IDEA:Spring Tools Suite (STS)
接下来就开始 SpringCloud Config 环境搭建操作介绍!
搭建 SpringCloud Config 环境
SpringCloud Config 环境搭建最小环境需要 3个 SpringCloud 项目:一台 Eureka Server 端、一台 Config Server 端(也是Eureka Client 端)、一台普通服务端(即是 Config Client 也是 Eureka Client)。
关于Eureka环境的搭建请参考我的另一篇博客 带你入门SpringCloud服务发现 | Eurka搭建和使用
Config Server 端搭建
在 SpringBoot 项目中引入 spring-cloud-config-server 和 spring-cloud-starter-netflix-eureka-client 依赖,具体代码如下:
		<dependency>
			<groupId>org.springframework.cloud</groupId>
			<artifactId>spring-cloud-config-server</artifactId>
		</dependency>
		<dependency>
			<groupId>org.springframework.boot</groupId>
			<artifactId>spring-boot-starter-web</artifactId>
		</dependency>
		<dependency>
			<groupId>org.springframework.cloud</groupId>
			<artifactId>spring-cloud-starter-netflix-eureka-client</artifactId>
		</dependency>
在 SpringBoot Application 上声明 @EnableDiscoveryClient 和 @EnableConfigServer,具体代码如下:
@SpringBootApplication
@EnableDiscoveryClient
@EnableConfigServer
public class SpringCloudConfigServerApplication {

	public static void main(String[] args) {
		SpringApplication.run(SpringCloudConfigServerApplication.class, args);
	}

}
在 GitHub上创建私有仓库


然后添加配置信息到 GitHub 上。


product.properties 配置可以添加一些公共的配置他会覆盖到 product-dev.properties上
在 application.properties 添加配置信息
spring.application.name=CONFIGSERVER
eureka.client.service-url.defaultZone=http://localhost:8761/eureka/

spring.cloud.config.server.git.uri=https://github.com/zhuoqianmingyue/config-repo
spring.cloud.config.server.git.username=github帐号
spring.cloud.config.server.git.password=github帐号密码
spring.cloud.config.server.git.basedir=config-repo/config-repo
- spring.application.name:服务的名称
- eureka.client.service-url.defaultZone:Eureka Server 地址
- spring.cloud.config.server.git.uri:配置GitHub 私有仓库 HTTP 克隆地址
- spring.cloud.config.server.git.username:配置你的 github帐号
- spring.cloud.config.server.git.password:配置你的github帐号密码
- spring.cloud.config.server.git.basedir:克隆配置文件存储地址
Config Server 端高可用只需要配置多台Config Server注册到Eureka 服务端即可。
测试
第一步启动 Eurka Server 端(具体代码请从我的GitHub项目获取,GitHub地址下面有介绍)
将 spring-cloud-config-eureka-service 进行打包,通过 mvn clean package -Dmaven.test.skip=true。

进入 target 目录 通过 java -jar 方式启动。

第二步启动 Config Server 端

第三步最后访问 Eurka Server 端,如下图所示:
CONFIGSERVER 已经注册到 Eurka Server 服务端。

访问 Config Server 端获取配置信息,具体访问地址:http://localhost:8080/product-dev.properties。访问结果如下图所示:

到这里 Config Server 端搭建介绍完毕!接下来开始 Config Client 端搭建介绍。
Config Client 端搭建(商品服务)
在商品服务 SpringBoot 项目中引入 spring-cloud-config-client 和 spring-cloud-starter-netflix-eureka-client 依赖。具体代码如下:
<dependency>
	<groupId>org.springframework.boot</groupId>
	<artifactId>spring-boot-starter-web</artifactId>
</dependency>
<dependency>
	<groupId>org.springframework.cloud</groupId>
	<artifactId>spring-cloud-starter-netflix-eureka-client</artifactId>
</dependency>
<dependency>
	<groupId>org.springframework.cloud</groupId>
	<artifactId>spring-cloud-config-client</artifactId>
</dependency>
在 SpringBoot Application上声明 @EnableDiscoveryClient
@SpringBootApplication
@EnableDiscoveryClient
public class SpringCloudConfigProductServiceApplication {

	public static void main(String[] args) {
		SpringApplication.run(SpringCloudConfigProductServiceApplication.class, args);
	}

}
在 src\main\resources 目录下创建 bootstrap.properties, 具体代码如下:
spring.cloud.config.discovery.service-id=CONFIGSERVER
spring.cloud.config.discovery.enabled=true
spring.cloud.config.profile=dev
spring.application.name=product

eureka.client.service-url.defaultZone=http://localhost:8761/eureka/
- spring.cloud.config.discovery.service-id:Config Server 服务名
- spring.cloud.config.discovery.enabled:是否开启配置发现
- spring.cloud.config.profile:启用那个后缀的配置文件
- eureka.client.service-url.defaultZone:Eureka Server 地址
- spring.application.name:服务的名称
连接接Config Server配置 spring.cloud.config.xx 和 eureka Server 端配置eureka.client.service-url.defaultZone=http://localhost:8761/eureka/ 一定要配置到bootstrap.properties中,否则根不获取不到 Config Server 的配置信息。
测试
第一步启动 Eurka Server端 和 Config Server 端。
第二步启动 Config Client (商品服务) 端
第三步访问 Eurka Server 端,如下图所示:
PRODUCT 已经注册到 Eurka Server 服务端。

第四步:编写获取 Config Server 上配置信息的 Controller,具体代码如下:
获取的就是红色框的 env 配置项的值。

@RestController
public class EvnController {
	@Value("${env}")
    private String env;

	@RequestMapping("/env")
    public String evn() {
        return this.env;
    }
}
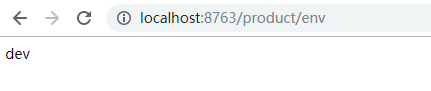
游览器访问 localhost:8763/product/env 进行测试,具体结果如下:
小结
SpringCloud Config 执行流程是通用的配置添加配置仓库中(默认使用Git),在由 Config Server 读取配置仓库配置并对外提供接口。其他服务(Config Client)可以通过调用Config Server 提供接口来获取配置信息。
搭建过程也并不复杂还是SpringCloud 添加starter 依赖、添加EnableXX 注解、最后在添加相关配置即可。没有操作的最好操作一篇哈!
代码示例
如果你按照上述方式搭建并未成功,可以参考我在GitHub 项目 spring-cloud-get-started 仓库中模块名为:
- spring-cloud-config-eureka-service
- spring-cloud-config-server
- spring-cloud-config-product-service
进行对比查看是否配置有误。
spring-cloud-get-started 项目地址:https://github.com/zhuoqianmingyue/spring-cloud-get-started
