1.首先我们在app.json配置菜单项(评教和个人信息):
"tabBar": {
    "list": [
      {
        "selectedIconPath": "images/ping.png",
        "iconPath": "images/ping.png",
        "pagePath": "pages/teachers/teachers",
        "text": "评教"
      },
      {
        "selectedIconPath": "images/user.png",
        "iconPath": "images/user.png",
        "pagePath": "pages/my/my",
        "text": "个人信息"
      }
    ]
  }
2.创建个人信息的页面:
<view class="container">
  <view class="info_list">
  <view style="text-align:center;">个人信息</view>
    <block>

        <view class="weui_cell">
            <view class="weui_cell_hd"><image src="../../images/uu.png"></image></view>
            <view class="weui_cell_bd">
                <view class="weui_cell_bd_p"> 姓名:{{name}} </view>
            </view>

        </view>
         <view class="weui_cell">
            <view class="weui_cell_hd"><image src="../../images/wen.png"></image></view>
            <view class="weui_cell_bd">
                <view class="weui_cell_bd_p"> 学号:{{no}} </view>
            </view>
        </view>
           <view class="weui_cell">
            <view class="weui_cell_hd"><image src="../../images/xian.png"></image></view>
            <view class="weui_cell_bd">
                <view class="weui_cell_bd_p"> 性别:男 </view>
            </view>
        </view>
         <view class="weui_cell">
            <view class="weui_cell_hd"><image src="../../images/lun.png"></image></view>
            <view class="weui_cell_bd">
                <view class="weui_cell_bd_p"> 班级:{{ban}} </view>
            </view>
        </view>
         <view class="weui_cell">
            <view class="weui_cell_hd"><image src="../../images/message.png"></image></view>
            <view class="weui_cell_bd">
                <view class="weui_cell_bd_p"> 系别:{{xi}}</view>
            </view>
        </view>
         <view class="weui_cell">
            <view class="weui_cell_hd"><image src="../../images/edit.png"></image></view>
            <view class="weui_cell_bd">
                <view class="weui_cell_bd_p"> 班号:{{cc}}</view>
            </view>
        </view>
           <view class="weui_cell">
            <view class="weui_cell_hd"><image src="../../images/edit.png"></image></view>
            <view class="weui_cell_bd">
                <navigator class="weui_cell_bd_p" url="../pwd/pwd" >修改密码</navigator>
            </view>
        </view>
          <view class="weui_cell">
            <view class="weui_cell_hd"><image src="../../images/edit.png"></image></view>
            <view class="weui_cell_bd">
                <navigator bindtap="tui" class="weui_cell_bd_p" url="../login/login" >退出</navigator>
            </view>
        </view>
    </block>
  </view>
</view>
3.在login.js修改跳转页面的方法:
原来是这样:
 wx.redirectTo({
       url: '../teachers/teachers',
  })
这样跳转是不起作用的,所以我们需要使用另一个方法:
wx.switchTab({
     url: '../teachers/teachers',
      })
这样我们就能得到任课老师的列表那个页面。
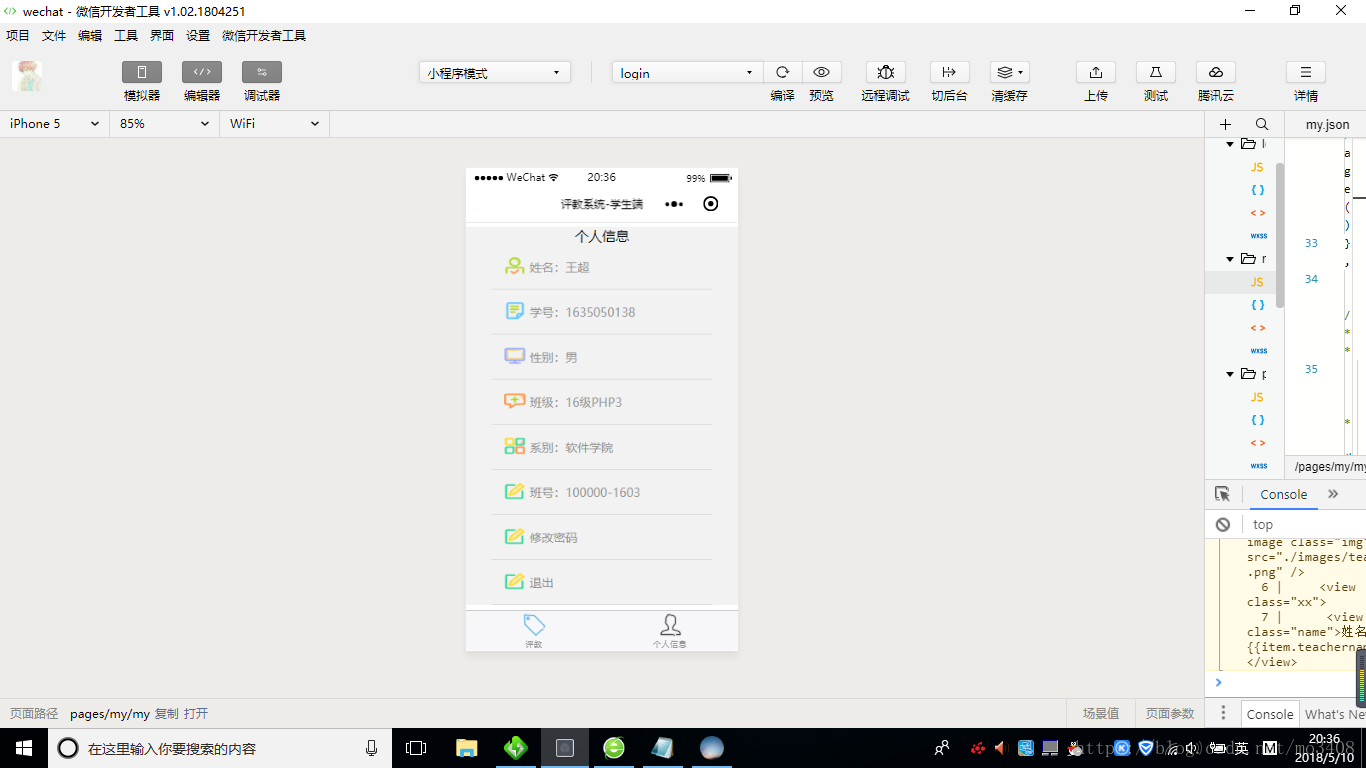
4.在my.js里,我们需要获取登陆的个人信息,所以需要使用以下代码:
onLoad: function (options) {
    var student = wx.getStorageSync('student');
    this.setData({no:student.student.no}),//获取学号
    this.setData({ name: student.student.name })//获取姓名
    this.setData({ cc: student.student.classid })//获取班号
    this.setData({ ban: student.student.classname })//获取班级
    this.setData({ xi: student.student.departmentname})//获取系别
  },
这样就可以获取到下面的信息:
然后当我们点击修改密码时,会出现以下页面:

代码如下:
 <form  bindsubmit="formSubmit">
     <view class="all">

        <view class="content">
        <view class="change">
            输入原密码:

             <input password type="text" name="oldpwd" />

        </view>
        <view class="change">
            输入新密码:
            <view>
             <input password type="text"name="newpwd" />
            </view>
        </view>
        <view class="change">
            请再次输入新密码:
            <view>
              <input password type="text" name="newpwd1"/>
            </view>
        </view>
        <view class="input">
            <button form-type='submit' type="primary" >提交</button>
        </view>
    </view>
    </view>
    </form>
样式:
/* pages/pwd/pwd.wxss */

     header {
                width: 100%;
                height: 70px;
                background: #F6BA40;
                color: white;
                line-height: 100px;
                text-align: center;
            }
            input{
              border:1px solid #CCC;
            }
        .all{
            position: relative;
            /*height: 370px;*/
            width: 100%;
            margin:0 auto;
            background:white;
        }
        .per{
            position: absolute;
            width: 80%;
            height: 50px;
            background: #337AB7;
            color:white;
            border-radius: 4px 4px 0 0;
        }
        .per span{
            position: absolute;
            left: 20px;
            top: 15px;
        }
        .content{
            position: absolute;
            top:30px;
            left:50px;
        }
        .change{
            font-weight: bold;
            margin-bottom: 20px;
            width:100%;
        }
        .change input{
            width:240px;
        }
        .input{
            position: absolute;
            top:200px;
            width:100%;
            text-align: center;

        }
        .input input{
            width:80%;
            height: 35px;
            line-height: 35px;
            font-weight: 100;
            background: #F6BA40;
            color: white;
            border-radius: 5px;
            outline: none;
            border:none;
        }
js代码如下:
当输入原密码和新密码,点击提交就会出现以下页面:
formSubmit:function(e){
    console.log(e)
   var oldpwd=e.detail.value.oldpwd;
   var newpwd =e.detail.value.newpwd;

   var newpwd1 =e.detail.value.newpwd1;
   if(oldpwd==''||newpwd==''|| newpwd1==''){
     wx.showToast({
       title: '密码不能为空',
       icon:'none',
       duration:1000
     })
   }else if(newpwd!=newpwd1){
     wx.showToast({
       title: '两次密码输入不一样',
       icon: 'none',
       duration: 1000
     })
   }else{
     var student = wx.getStorageSync('student');
     var no=student.student.no;

     var url ="接口url地址";
     wx.request({
       url: url,
       method:'POST',
       data:{
       no:no,
       oldpwd:oldpwd,
       newpwd:newpwd
       },
       header: {
         'content-type': 'application/x-www-form-urlencoded' // 默认值
       },
       success: function (res) {
        //  console.log(res.data)
         wx.showToast({
           title: res.data.msg,
           icon: 'none',
           duration: 2000,
         })
       }
     })
   }
  }

当我们点击退出时,清除缓存的数据,并且回到登陆页面,这样就使用
wx.clearStorage()清除缓存数据.