首先是搭建显示的基本页面
在teachers.wxml文件中
<view class="container">
    <view class='header'>
      <text>评教系统——我要评教</text>
    </view>
    <view class="section_gap" wx:for="{{teachers}}">
      <image style="width: 120px; height: 120px; background-color: #f0f;" mode="{{item.mode}}" src="{{src}}"></image>
      <view class='section'>
        <view class='section_one'>
          <text>{{item.teachername}}</text>
        </view>
        <view class='section_two'>
          <text>{{item.course}}</text>
        </view>
        <view class='bottom'>
          <navigator open-type="navigate" url="">留言</navigator>
          <navigator open-type="navigate" url="../testpaper/testpaper?teacherid={{item.teacherid}}">评教</navigator>
        </view>
      </view>
    </view>
</view>
在teachers.wxss文件中设置页面样式
.section_gap{
  display: flex;
  margin-top: 20px;
   /* background-color: #ccc;  */
   /* border: solid 1px yellow;  */
}
.header{
  margin-top: 20rpx;
}
.section{
  height:120px;
  line-height: 30px;
  display: flex;
  flex-direction: column;
   margin-left: 50rpx;
  /* border: solid 1px #0f0;   */
}
.section_two text{
  color: #ccc;
}
.bottom{
  margin-top: 15rpx;
  display: flex;
}
navigator{
  margin: 10rpx;
  padding: 7rpx 30rpx;
  border: 1px solid red;
}
接下来就是调用接口获取信息
Page({

  /**
   * 页面的初始数据
   */
  data: {
    teachers:null,
    src: '../images/64.jpg'
  },

  /**
   * 生命周期函数--监听页面加载
   */
  onLoad: function (options) {
    var url ="https://www.zhangsan.top/pingjiao/index.php/student/api/teachers";

    //读取缓存
    var student = wx.getStorageSync('student');
    // console.log(student);

    var classid=student.classid;
    // console.log(classid);
    wx.request({
      url: url, //仅为示例,并非真实的接口地址
      data: {
       classid:classid
      },
      header: {
        'content-type': 'application/json' // 默认值
      },
      success:(res)=> {
        console.log(res.data)
        this.setData({teachers:res.data});
      }
    })

  }
})
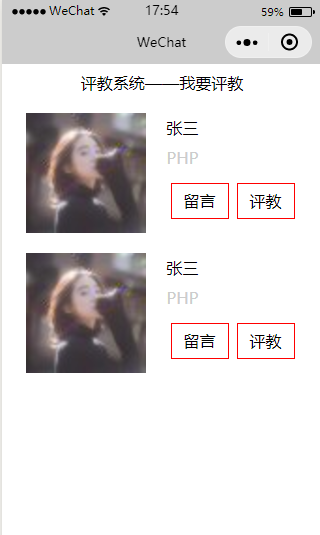
最后页面效果如下