版权声明:本文为博主原创文章,遵循 CC 4.0 BY-SA 版权协议,转载请附上原文出处链接和本声明。
推荐阅读:
今天给大家提供三种CocosCreator常用的三种适配方式,废话不多说,直接上代码
/**************************
 *
 * @author:shirln
 * @time:2019.7.15
 */

cls.Ground = cc.Class({
    extends: cc.Component,

    statics: {

        // 所有UserInfo节点列表
        pool: [],

        ///
        // update

    },

    properties: {
        mode: { default: 1 },
    },

    // LIFE-CYCLE CALLBACKS:

    // onLoad () {},

    start() {
        gm.Ground = this;

        // 视口大小
        var csz = cc.view.getCanvasSize();
        // 设计分辨率
        var des = new cc.Vec2(1080, 1920);
        // 进行分辨率适配
        cc.view.setDesignResolutionSize(des.x, des.y, cc.ResolutionPolicy.SHOW_ALL);

        // fitWidth
        var sx = csz.width / des.x;
        // fitHeight
        var sy = csz.height / des.y;
        // show_all
        var min = Math.min(sx, sy);
        // EXACT_FIT
        var max = Math.max(sx, sy);

        /// show_all下缩放背景
        if (this.mode == 1) {
            // 等比例黑边
            this.node.setScale(max / min, max / min);
        }
        else if (this.mode == 2) {
            // 拉伸填充
            this.node.setScale(sx == min ? 1 : max / min, sy == min ? 1 : max / min);
        }
        else if (this.mode == 3) {
            // 等比例裁剪
            this.node.setScale(max / max, max / max);
        }

    },

    // update (dt) {},

});
使用方法:在需要适配的面板上添加该脚本,并为其指定适配模式(1,2,3),三选一
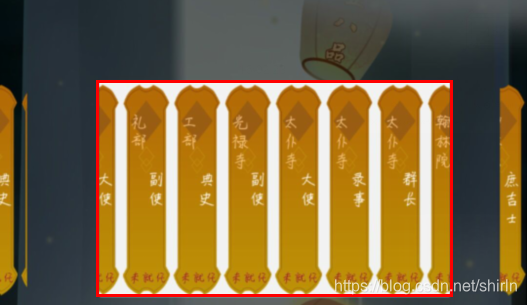
这里需要注意的是,当你使用ScrollView组件时,可能会出现bug:scrollView种超过区域的内容不会被裁剪,例如,红框范围为ScrollView:
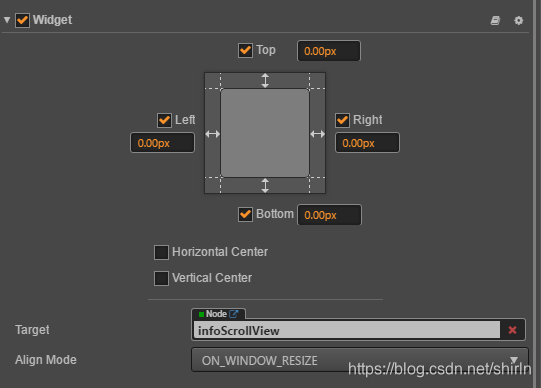
解决方法:为添加view添加widget组件,并为其指定对其目标为ScrollView,如下: