这一节讲springboot 如何集成apollo ,如果没有搭建好linux 版的apollo,可以看我上一节
https://blog.csdn.net/weixin_44714808/article/details/89736391
1.首先创建一个maven工程,导入springboot的jar包
2.引入apollo-client的jar包
<dependency>
			<groupId>org.springframework.boot</groupId>
			<artifactId>spring-boot-starter-web</artifactId>
			<!-- https://mvnrepository.com/artifact/com.ctrip.framework.apollo/apollo-client -->
</dependency>
<dependency>
			<groupId>com.ctrip.framework.apollo</groupId>
			<artifactId>apollo-client</artifactId>
			<version>1.3.0</version>
</dependency>
3.写配置文件application.properties
server.port=8080
//端口号
app.id=1499960848
//下面说
apollo.bootstrap.enabled = true
apollo.meta=http://192.168.245.133:8080
//开启apollo后你的Eureka注册中心的地址。一般都是8080。
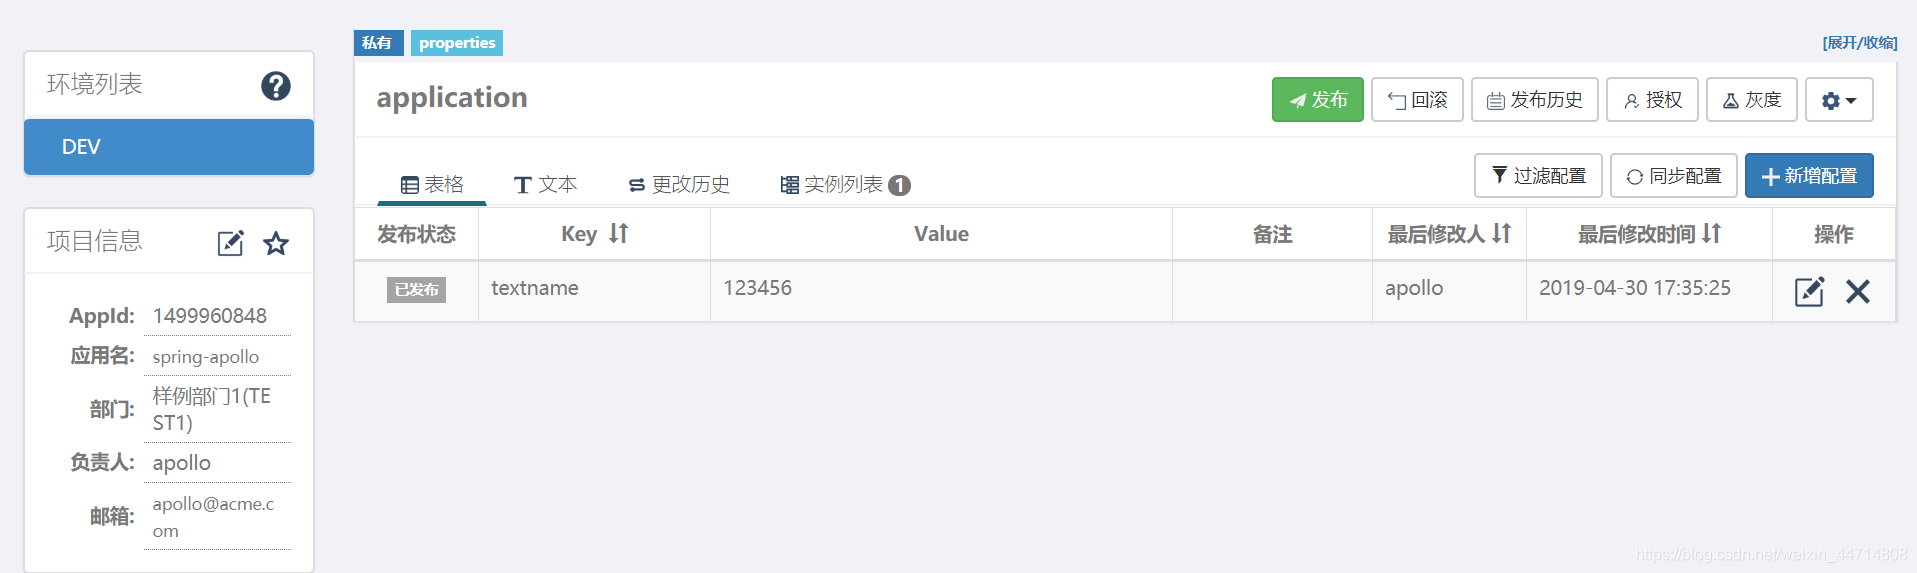
一.appid:

点击创建项目。里面会让你填写appid之类的信息。我这里创建了一个appid为1499960848的appid 并且发布了一个key为textname value 为123456的用来后期测试。
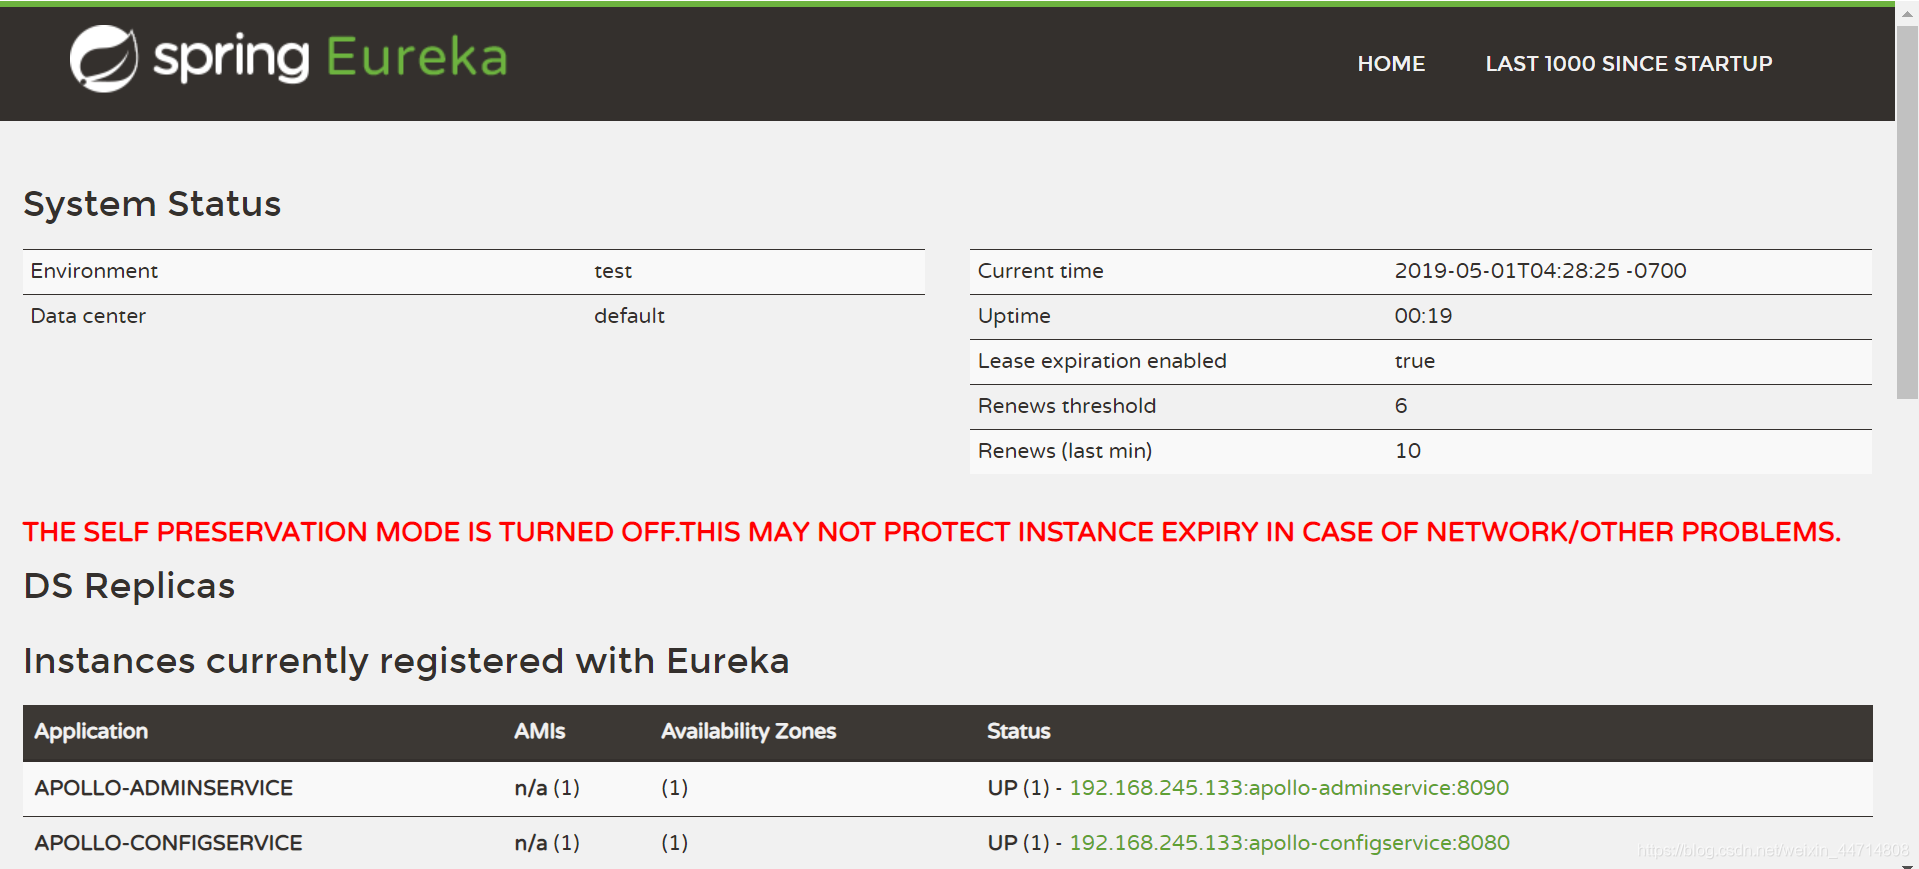
二.apollo.meta
如果输入地址+8080是这个界面,那么恭喜你,不用折腾了。如果不是,你需要去配置文件里找一下你对应得端口号
4.开始测试
package text;

import org.springframework.beans.factory.annotation.Value;
import org.springframework.web.bind.annotation.RequestMapping;
import org.springframework.web.bind.annotation.RestController;

import com.ctrip.framework.apollo.spring.annotation.EnableApolloConfig;

@EnableApolloConfig
@RestController
public class textapollo {
	@Value("${textname}")
	private String textname;
	@RequestMapping("textname")
	public String get() {
		return textname;
	}
}
这里定义了一个textname得值。(在我本地配置中心没有这个key,只要apollo里有),并且用get方法去获取。
记得开启@EnableApolloConfig
设置启动类
package text;

import org.springframework.boot.SpringApplication;
import org.springframework.boot.autoconfigure.SpringBootApplication;

@SpringBootApplication
public class main {
	public static void main(String[] args) {
		SpringApplication.run(main.class, args);
	}
}
启动项目

成功。